

Streaming Church Services Live and Cheap
Most churches start streaming church services live during Covid. You probably wish to continue that, but how do you do it without paying thousands of dollars?

Since Covid closed down America's in-person worship services in March 2020, most churches started streaming church services live on Facebook or other services. You can spend thousands of dollars on equipment and service fees, or you can spend far less. In fact, if you follow my recommendations, you can start streaming this week for far less than a thousand hundred dollars.

We'll look at the cameras you can use cheaply. You can buy inexpensive software and use what you already likely have in your church's sound booth to connect it all.
Streaming Church Services - The Camera
Most people start by thinking about a camera. The number one post on my site covers the 4 styles of the camera for streaming church services. Please read that post first for a comprehensive guide to choosing a camera. However, I recommend one kind for budget streaming.
Why not use your phone? Many smartphones come with a great camera. You can, but I don't think it gives you the best option. If you can't afford the cameras below, then use your phone. But you'll need to buy a mic anyway, so spend a little more and get a great dedicated camera that you don't have to worry about charging, getting intrusive notifications, and can't zoom or pan while recording as easily.

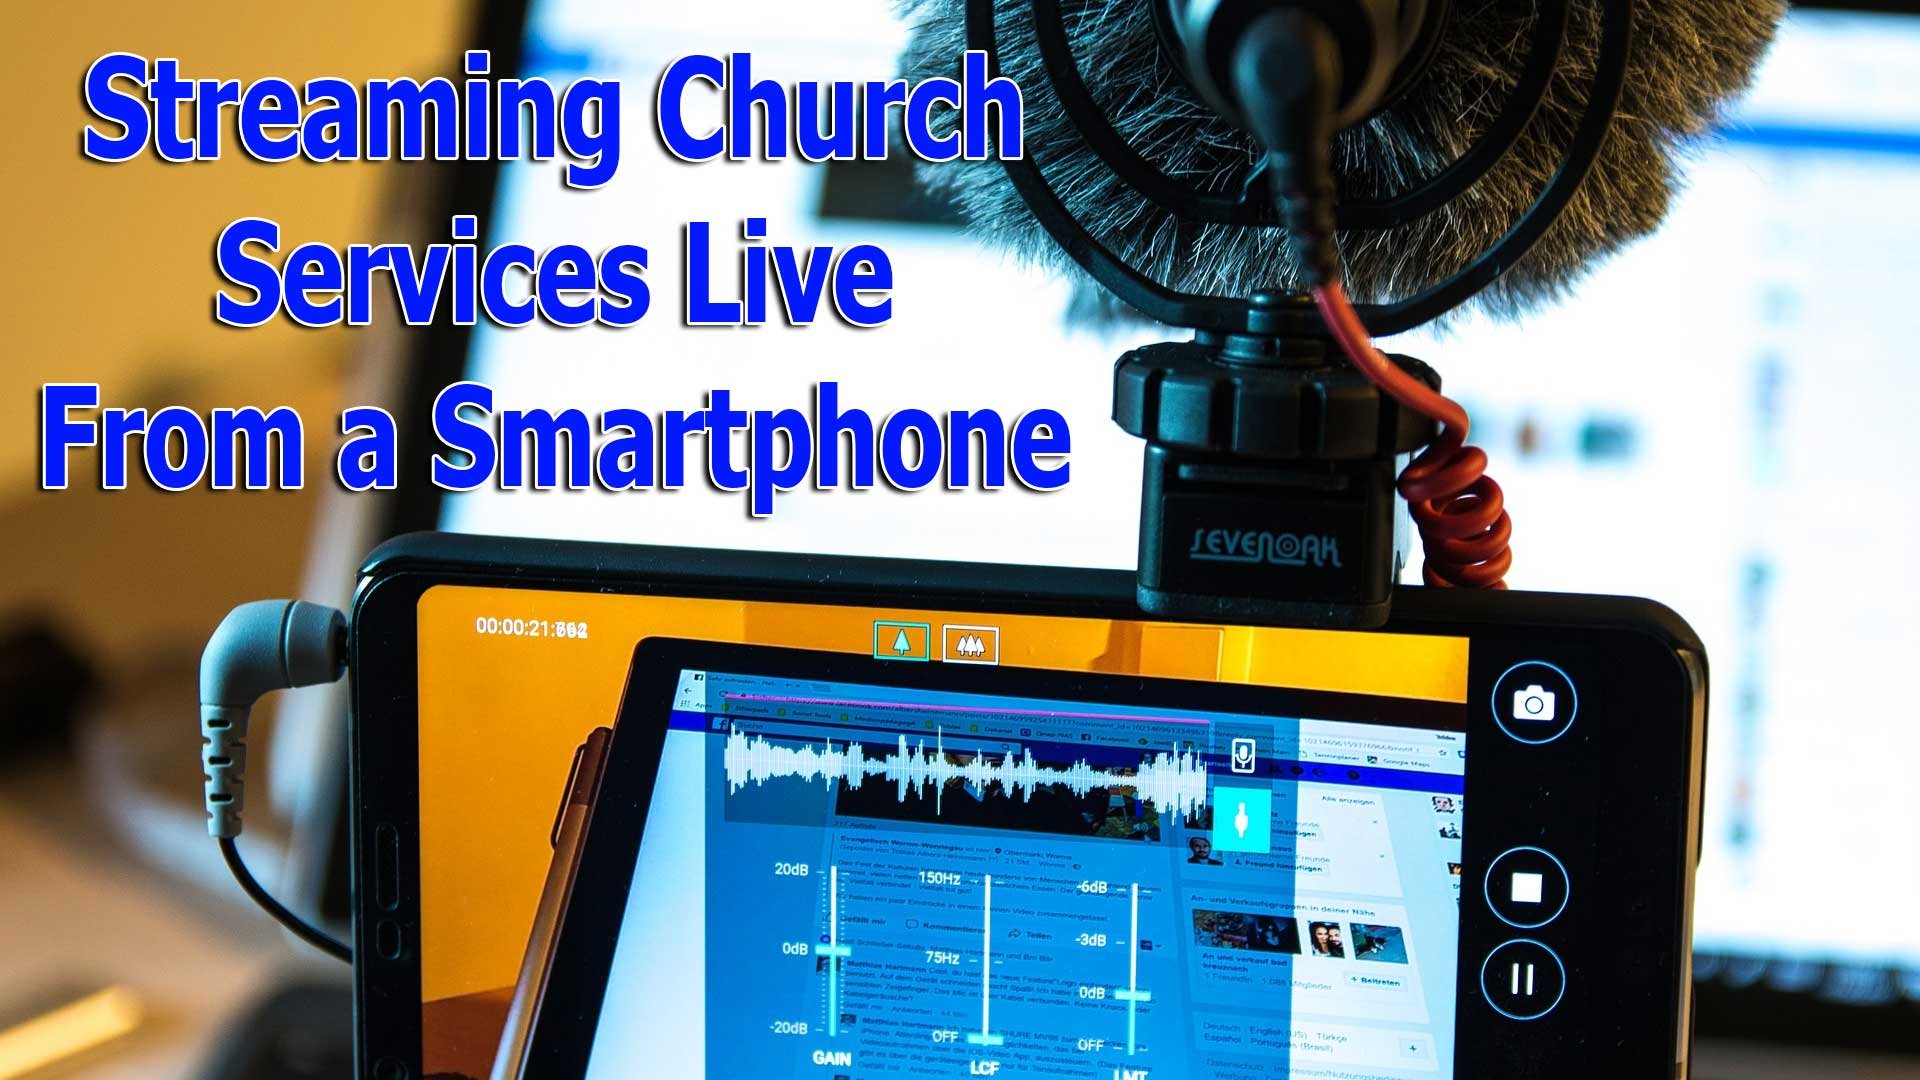
Get a decent 1080p camcorder with a clean HDMI out signal (see image and caption above) that will run for at least as long as your worship service, plus about 20 minutes. That could mean you leave it plugged in, or the battery lasts at least that long. What does all of that mean, and which one should you buy? Let's break it down...
- 1080p refers to the resolution. Some people recommend a 4K camera, but that's too much for most churches, and it will cost too much. However, if you already have one, then use it. Just set it for 1080p. 1080p means the resolution of the camera is 1920 pixels horizontally and 1080 pixels vertically. The P stands for pixels.
- Get a camcorder like everyone used to buy before cell phone cameras became so powerful. Make sure it has a 30x optical zoom. Ignore the digital zoom because it makes things look really blurry. Turn off the digital zoom. Only use optical zoom and make sure it does 30x, especially if the camera sits in the back of the auditorium. You want it in the back, so you don't distract attendees.
- Make sure the camera supports a clean HDMI signal (see above image and caption for description). If it doesn't support a clean single, then you'll see things like the battery indicator and the other onscreen display items you see on the small screen on the camcorder. How do you know if the camera supports a clean HDMI signal output? Look at the specs of the camera or ask the person selling it. You can also go to Amazon and ask about the camera.
- The camera needs to run on battery at least 20 minutes longer than your worship service. That way, you can turn it on and test everything before the service. The best camcorders run on AC power plugged into an electric outlet instead of running them off battery power.
We don't have room to go into more detail about camera specs. Adhering to the four things above will give you a great camera. Let me recommend a couple of cameras.
Canon VIXIA HF R800 Camcorder

The Canon VIXIA HF R800 will stream your church service, fulfilling the four requirements above. It supports 1080p and has a clean HDMI signal that would show the distracting icons on the built-in display to your viewers.
The camera supports 32x optical zoom for streaming church services live. Ignore the 57x digital zoom because when you zoom in that far, two things happen. Video quality degrades, and your camera operator will struggle to keep the image stable.
Finally, the camera operator can plug it in a while streaming church services live. The camera will run for about one hour and forty minutes on battery life.
There's one problem with the R800. It costs $300 at B&H Photo and that was cheapest price we could find.
Panasonic HC-V180K Camcorder

Take a look at the Panasonic HC-V180K for a slightly less expensive camera ($229.99 at B&H Photo). It supports a clean 1080p HDMI signal with a nice 50x optical zoom. Again, ignore the 90x "intelligent zoom," which is a misnomer because you'd be stupid to use it.
Consider looking for each of these cameras used. You can often find a camera that is in good condition for less than the retail value.
Streaming Church Services - Software
The cheapest place to stream also invites the largest audience. That's Facebook.
I've tried dedicated streaming services like Dacast and going live to YouTube before settling on Facebook. Google now requires 1,000 subscribers on a channel before they can stream live to their service using the YouTube user interface. Churches can also subscribe to expensive services that put your live stream on your website, or there's for anywhere from hundreds of dollars a year to thousands.
Facebook lets churches stream for free, and they don't need a minimum number of subscribers or followers. Whether you like Facebook or like the way they've limited or allowed certain kinds of accounts and content, it's the cheapest available. That's what my church uses.

How can you get the signal from the camera to Facebook? We'll talk about the connecting accessories below. First, what software should you use? Facebook has its own streaming user interface. Set up a Facebook page and then use their live streaming feature built into the website.
You can add some cool features like lower thirds, text written at the bottom of the video to show what's on your stream. Use it to put the names of people leading worship or the title of the pastor's sermon. To get that you'll need some software.
Take a look at three options below:
- OBS Studio - a free, powerful, open-source program that lets you stream live to Facebook and more. It's complex, but with some time and effort to learn the program, OBS Studio gives users the most powerful solution for no cost to their church.
- Ecamm Live - a great piece of software that makes streaming to Facebook easy, but it's at least a $16/month subscription.
- Restream - a program like Ecamm but offers a free version. I've not used it, but a lot of people prefer it.
- Dacast - a more costly program like Ecamm and Restream. It's more of a service, which offers streaming that you can embed on your church's website.
Of the two above options, I'd recommend OBS Studio if you don't want to use the Facebook page streaming interface. I only mentioned Ecamm Live because I use it at my church. We're grandfathered into the pre-subscription model. You can't get that now, but the software is easy to use. They charge either $16 or $32 per month to use it. They offer a 14-day trial.
Restream is another program that streams videos for you. It's slightly more expensive than Ecamm at the high end. It starts at $16 per month for the subscription version with some of the bells and whistles. The higher tier sells for $41 per month.
OBS Studio is more powerful but more complicated and also free. Ecamm is the easiest tool for churches without someone who can figure out OBS, but it's also expensive due to a monthly subscription. You could say the same for Restream and Dacast.
Other streaming software exists, but it's usually more expensive. If your church already subscribes to software for worship presentation, it might also include streaming features. Proclaim from Faithlife has an option for streaming and Podcasting.
Streaming Church Services - Computer
We put this hardware item last because it's honestly the least important. My church uses a 2014 Mac mini. I upgraded the internal hard drive with a 500GB SSD, and it runs fine. I paid $200 for the computer used and less than $75 for the SSD.

You can also get a recent model Windows computer. Desktops usually cost less than laptops. If you can run Windows 10, you can likely stream from it. Streaming doesn't require a high-end computer. Some people bring their own laptops to church and use them.
If you can afford a brand new system, I'd recommend the new M1-based Mac mini, which costs $800 for a basic version. It's not a "cheap" solution, but it will last a long time in most cases and can handle all that we've talked about for streaming. It's still not incredibly expensive, like a $2000 multimedia PC or MacBook Pro.
Connecting the Camera, Computer, Software, and Sound
Our church sanctuary has a balcony with our soundboard, computer, and camera in the center front of it. We can easily connect our camera, computer, and soundboard because they're within 6 feet of each other. If those three things sit further apart, it will potentially get harder to connect them. If you're set up like we are, then you can follow the first example below.

We put our camera on a sturdy tripod and plug it into a power outlet so that we don't have to worry about the battery running out. We use a mini-HDMI to full-sized HDMI cable coming out of the camera. It plugs into a box made by Blackmagicdesign ($160). It has an HDMI input on one side and a USB-C port on the other. Plug that into your computer.
The computer will "see" this input as a camera, and Facebook or other streaming software will let the operator choose it as the video source.
Connecting Soundboard to Computer
Don't use the sound from the camera for streaming church services live. You probably have a professional sound system with mics meant for soloists and speaking. Use it instead. Connect the soundboard to the computer's sound input using whatever kind of cable you have for sound output.
Our soundboard has a stereo output port with reliable white and red jacks, also called RCA jacks. On the other end of the cable, there's a 3.5mm stereo connector. That goes into the computer using the kind of cable you see below.

You will need this adapter if you have a Mac with a 3.5mm sound jack input. The Mac expects a cable with 3 signals coming in from something like the white Apple earbuds. Your white Apple earbuds or other earbuds or headphones with a mic have three signals going into the computer. One handles the voice coming from the mic in the earbuds or headphones. The other two are the right and left coming from the computer into the headphones. It would help if you had an adapter to change the stereo signal from the soundboard into something the computer jack can handle. For a complete explanation of TRS and TRRS connectors, watch the video below.
Windows PC users may also need the above kind of cable. They might not. There are too many different kinds of Windows PCs to explain how each of them works.

If your church soundboard doesn't have RCA outputs, you may need to use a quarter-inch to 3.5mm TRRS cable. The above video explained that thes "TS Cables" are quarter-inch connectors. But they work the same way. You can find them on Amazon for $10-$20 like this one. Some people will need an XLR cable that converts to 3.5mm TRRS. You can get either a male or female version.
A Better Sound Interface - USB
While the above cables will most likely work, a more expensive solution definitely will work. Get a good USB audio capture device. These devices connect to the computer using USB. Plug your audio cable from the soundboard into the device. It converts it to a digital version that the computer receives over USB.

An expensive high-end version comes from Zoom. The Podtrack P4 works great. I use it for my Wednesday night live streams at church. However, it costs $200 and has more than you need.

If you need a budget option that costs less that $50, take a look at a USB capture device like the Foxnova Game Capture Card. I have to admit, I've not used this one. However, it supports capturing both the HDMI and audio signal so you could potentially ditch the Blackmagjicdesign UltraStudio 3G we looked at above. Take a look at the video below to see an unboxing video.
To Sum It All Up
Let's sum it all up. To start, grab one of the cameras above or see if someone owns a camcorder in your church. They may donate it. Make sure it supports 1080P, clean HDMI output has at least 30x optical zoom. That should cost between $220-$350.
Grab the Blackmagicdesign UltraStudio 3G or the Foxnova Game Capture Card for $50-$160, depending on which one you choose. I'd start with the Foxnova card. It's cheaper. If it doesn't work, return it to Amazon and get the Blackmagicdesign.
Connect the camera to the box with the right mini HDMI cable. Connect the soundboard with the right kind of cable. These should cost less than $50 depending on what you buy.
If you don't already have a computer, try and find a used Mac mini ($200-$400) or get the latest M1 Mac mini ($700).
The software should be free unless you buy something like Ecamm Live.
All of the above hardware adds up to $550 to $1260. That's far less than most churches probably paid for their equipment, cables, and software.

The 4 Best Camera Styles for Streaming Church Services Live in 2021
What's the best camera for streaming your church services live on Facebook or YouTube. We'll give you some tips for choosing the right camera.
When churches shut down due to Covid-19 we looked at the 4 best camera styles for streaming church services. It's almost a year later and time to update that for 2021.
In a previous post about streaming church services live, we looked at the best way to stream with an iPhone or Android phone. To offer a professional live stream of your church's worship service, you'll want a dedicated camera instead of a phone. In this post, we'll look at picking the right camera for your needs. Again, a phone might fit your budget, but this time we're assuming you want something that creates better quality for streaming church services.

Here are the other posts in this series:
- Streaming Church Services Live from a Phone Made Simple
- Streaming Church Services Live Using Facebook or YouTube Apps or Pages
- 7 Best Tools for Streaming Church Services
- Streaming Church Services Life and Cheap
What Kind of Camera Should You Use for Streaming Church Services?
People can pick from a few different kinds of cameras aside from their phone camera. Most people think of a webcam when they think of live streaming. However, webcams only work if you're streaming yourself sitting at a desk or in a room close to the camera. The quality of the image that a webcam produces usually won't compare to a dedicated camera. The camera, if it zooms, usually uses digital zoom, which looks bad. You'll have to put the camera very close to the pulpit and it will distract the people from attending the stream. Don't use a webcam for streaming church services live.
The best options include the following styles of cameras:
- A video camera or camcorder with at least 720p resolution that also has an HDMI output that shows the live view of the camera video.
- A DSLR or mirrorless camera that also offers a live output of the video of the camera.
- A PTZ IP Streaming Camera that you can connect over an Ethernet cable and offers remote control of the panning and zooming of the camera lens.

Let's take a look at some options for each kind of camera.
Video Camera or Camcorder

Before cameras on smartphones got so good, most people owned a camcorder or video camera. Basic consumer-grade camcorders made in the last few years will offer a 1080p or even a 4K video option. You can spend as little as $250 for a very good Canon camcorder that offers HDMI output and a live view of the image. B&H Photo has a few ranging in price from $250 to $2000 depending on your church's budget. The cheapest option, the Canon VIXIA HF R800 Camcorder offers the following features needed for a good streaming camcorder.

- Optical Image Stabilization - less wiggle as the camera operator movies it from side to side.
- HD Video - 1080p is the sweet spot, but lower quality 720p usually looks good enough and high-quality 4K video may offer too much making it harder to stream on a slower network. This camera offers 1080p which gives your viewers good image quality.
- 32X Optical Zoom - avoid using digital zoom because it gets closer to the subject, but looks horrible. The optical zoom looks much better. If your camera has a digital zoom, turn it off in settings.
- Powered via Power Adapter - you want to plug it into the wall so you don't have to worry about your battery running out. If you do this remove the battery so you don't ruin it by keeping it plugged in. That way you can still use the camera for recording video outside of the sanctuary.
- Mic Input - the camera comes with a mic input if you need to use it in other situations outside of streaming your worship service. While streaming church services, you'll get sound from the soundboard going into the computer.
Consider a Higher-quality 4K Camcorder
The above Canon camera gives users an adequate option, but if you want 4K streaming you'll have to find another camera. The Canon VIXIA HF G50 4K Camcorder (seen below) gives a higher resolution but costs 4 times as much. But you'll get a much better image. It will also require higher bandwidth, so make sure your Internet connection is fast upstream as well as downstream and can handle streaming church services in 4K.

Despite the higher price, the HF G50 cuts the optical zoom by a third. That means you won't get as close to the people on stage while recording from the same spot. If you can place the camera person closer to the stage, then this will work fine.
You can go nuts with high-end professional cameras that cost thousands of dollars, but people who need those cameras probably already know more about cameras used for streaming church services live than I do.
Mevo Camera for Streaming Church Services Live
The Mevo Camera gives churches a specialized camera for streaming church services live, but you'll have to place it close to the platform like a camera phone.
The Mevo Start ($399) streams or record locally in 1080p. Use the Mevo App to control the camera on a smart phone or tablet. Set things up so it looks like you have multiple cameras all using the one camera and the app.
The Mevo Start is small and has a battery that should last long enough for most worship services, but you can also plug it in. The built-in mic will pick up audio or there's a built-in 3.5mm mic input to connect a higher quality external mic. Most churches will connect their soundboard to the smartphone or tablet instead. You'll need to connect some specialized cables to make that work. I'd suggest going to the Mevo Facebook group to get further support from other experienced users.

An Example of Using Mevo in Church
You can view an example of the Mevo in action at my church's Facebook page. Look for our Sunday School on Wednesday night videos. We use a regular camcorder for our Sunday morning, but we use the older Mevo Plus camera for Wednesday night streams. Here's the company's ad for the Mevo Start.
The camera will connect either to your phone or your tablet. I'd recommend using an iPad since that's larger and you can see more on the screen at one time.
The app runs on iOS and Android. Find out more about that from Mevo.
The Mevo camera works best in smaller sanctuaries or for churches who want to stream things like interviews or events in a small room. If your room requires you to be further than about 10-20 feet, this option won't work well for you and the image quality is lower than even a camera phone.
DSLR or Mirrorless Camera
Churches can use the above cameras for streaming church services live online, but they may want better quality images and a camera that they can take off the tripod and use for take photos of church events. A good DSLR or Mirrorless camera will fit that situation better.
What are DSLR or Mirrorless cameras? The video below explains it better than I can. If you don't care and just want recommendations, then skip to the next paragraph.
Mirrorless camera give the user a smaller camera while still offering beautiful photos and video. The DSLR is the style of camera that's been around forever, but now they're digital. Mirrorless is the future.
Canon M6 Mark ii
I used to recommend the Canon EOS M50, but a friend had a lot of trouble using one for his church. So I now recommend the Canon EOS M6 Mark ii. That's the camera I own and occasionally use for live streaming.

Canon released a brand new utility called the EOS Webcam Utility that lets users turn their DSLR or mirrorless camera into a webcam. You can hook your camera up to your computer with USB-C. The new utility will make it available in your software as a camera for streaming. It works fine for Facebook or YouTube live streams.
The camera might run out of battery power before your service ends, so get the power adapter that lets you plug the camera in AC power. It costs $24 as of this writing.
Get a zoom lens with at least 200 mm of zoom. You'll still have to place the camera little closer than you may like because 200 mm zoom is like 6.5X zoom on a camcorder.
Canon EOS Digital Rebel T7i

If you don't own a Windows computer, consider then take a look at the Canon EOS Rebel T7i DSLR camera which starts at $680 without a lens. Pay $1000 to get a long zoom lens.
I prefer Canon because they offer better color than Nikon or Sony camera. But you can find comparable cameras from those manufacturers that will work for you. Other companies like Panasonic, Fujifilm and Olympus make great camera. Here's a list of options at Amazon.
Look for...
- 4K resolution for shooting
- Live video output for streaming
- A lens from 200mm zoom or higher
- Stays on and offers live video for a long enough time to stream your entire service since some cameras shut off after 20 or 30 minutes.
- An adapter for powering the camera while using it because most batteries won't last for the full length of a worship service.
You may not be able to find the above things mentioned in the camera's description at your store of choice. Ask the seller or post a question in a place like Amazon.
The last item on the list is a must. Get the power adapter for your camera like this one for the T7i mentioned above. or the one we linked to above for the Mark 6 Mii.
PTZ Streaming Video Cameras
A friend of mine chose to buy another kind of camera that I've not used. It's called the Avipas AV-1081G 10x HDMI PTZ Camera ($620) with IP Live Streaming. PTZ stands for Pan Tilt Zoom, which describes the way it can move (panning left-right, tilting up-down and zooming in and out).
It only offers 1080p video, which is fine for now. It says it's a 10x zoom camera, but only the digital zoom is only 5x, which is not going to be good enough for medium to larger sanctuaries.
These IP cameras are usually smaller, so you can put them in your sanctuary and they'll seem less noticeable. You won't need a big tripod because you can install it permanently.
The camera connects via a network cable. You can control it from a computer or with a special remote control box. The box or the software will control the panning (left right) and the tilting (up and down) while zooming in to the subject.
Recommendation
For those who worship in a large sanctuary, get a camcorder with a 32X zoom or higher. They are usually the cheapest option and you can get a good 1080p or 4K camera for hundreds instead of thousands of dollars. Then invest in good software to make it work, although Facebook alone does the trick for most people. If you plan to stream to another service, ask them what they recommend. The best free software for streaming is OBS Studio. The open-source software comes with a large community of users who can help you get it set up.
Here's what you'll need to get it all working if you're streaming from your church sanctuary:
- Canon VIXIA HF R800 Camcorder - $250 at B&H Photo
- A mini-HDMI to HDMI out cable with an adapter for your computer like to convert the HDMI signal to format that streaming software can use - $100 for both.
- A good streaming computer like the new M1 Macs - $900+.
- A cable to connect your soundboard to your streaming computer. You'll have to determine what kind of sound output your board has - $10-$50.
- Open your web browser and use Facebook Live Streaming from your church's Facebook page or if you want more features get OBS Studio which lets you set up multiple camera inputs, an input for your worship presentation (lyrics and sermon slides), and other interesting graphics - Free.
For people who are streaming from a smaller room, consider going with the Mevo Camera and a good phone or tablet. Here's what I use to make it all work:
- Mevo Start Camera - $399 or $384 on Amazon.
- A mini table-top tripod like the Manfrotto PIXI Mini Tripod - $18 on Amazon.
- iPad to control the Mevo Camera app - $319 for a 32GB base iPad from Amazon or $329 from Apple.
- Zoom Podtrack P4 mobile mixer with 2 Zoom mics - $390 from Amazon
The last item on the list is a new addition to my setup. We had a lot of trouble getting audio right with the Mevo over my iPad. However, this mixer fixed it all. If you already have a headset, two XLR mics, and cables, then you can buy the Podtrack P4 for only $200. Check back here for a full review of the Zoom Podtrack P4 at a later date.
7 Best Tools for Streaming Church Services
Here's the list of the best software or services for streaming church services live on Facebook, YouTube or other services.

What software and services can churches use for streaming church services live on Facebook or YouTube or other platforms. This last part of our series on streaming church services rounds out the tools and gear needed to put together a professional solution for the future.
For most of the options below, you'll need to connect a camera up to you computer and you'll probably want to hook up your sound board to the computer as well. Then use the software solutions below to take that video and audio and send it out onto the Internet.
Here are the other posts in this series:
- Streaming Church Services Live from a Phone Made Simple
- The Four Best Camera Styles for Streaming Church Services Live
- Streaming Church Services Live Using Facebook or YouTube Apps or Pages
- Stream Church Services Live and Cheap
Ecamm Live on Mac for Streaming Church Services Live
My first choice runs only on Mac, making it a great tool if you own one, but not useful for Windows machines. Ecamm handles...
- Streaming church services on Facebook Live.
- Uploading to YouTube after your finished streaming.
- Saving the video file for editing or uploading to other services.
- Saving the audio file to create a podcasts or to upload to audio services.
You can download and test Ecamm Live for free. It comes with a watermark on the video, so I don't recommend using it for a long time. But test out the software.
The company offers guides on how to set up your whole system of audio and video equipment. You can use these same guides with the other software below, but it may take some tweaking if you're not using Ecamm.
If you users choose to go all-in with Ecamm, it will cost you $12/month billed annually. A pro version costs $20/month billed annually. With the paid versions you get...
- Watermark removed from video.
- Use other services like Restream (more on that below) to stream to multiple sites like YouTube and Facebook simultaneously.
- Use overlays to show branding of your church or graphics during the service to add a professional look.
- Green screen support.
- Support for talking to guests over Skype.
The pro version adds...
- 4K Streaming.
- Live video monitor to any display hooked up to the computer.
- Audio monitor much like many churches use in their nursery.
- Cross post to multiple pages on Facebook.
- Shows real-time bandwidth stats.
- Higher level tech support.
What if you don't have a Mac? Then consider one of the following services instead.
OBS Studio for Windows or Mac For Free
There's a free option out there called OBS Studio. It's a lot more complex than Ecamm Live. However, it's also free. If you have a tech savvy volunteer or staff member, then this might work better. It has a lot of the features you find with Ecamm, but you have to know what you're doing or spend some time learning how to use it.

OBS also offers some setup guides and shows users how to use it. Once you set things up, you can stream to Facebook, YouTube and even Twitter. If your service offers a way to setup third-party streaming services, you can configure that too. You'll need something called the RTMP information.
OBS will let you stream multiple cameras easily. Hook them up to the computer and the software makes switching between them easily. You could also easily share your screen to the video stream. You might want to show the slides on a song, Bible passage or the pastor's sermon images and notes.
OBS has more power and therefore more complexity than Ecamm.
XSplit Broadcaster - 3rd Best Option

XSplit Broadcaster ($25 to $200) - The third best option comes from XSplit Broadcaster. It's a marriage of Ecamm's simplicity with OBS Studio's power, but at a higher cost.
- 3-month subscription for $25
- 1-year subscription for $60
- 3-year subscription for $150
- Lifetime cost is $200
XSplit offers multiple camera inputs and sharing your images from the worship presentation. You can do Skype interviews and stream to more than one place at a time, like Facebook and YouTube or your own service.
Churches that want to stream to an overflow room or the nursery, can set up a monitor and stream to it locally over your own network.
Other Live Streaming Options
In addition to the above three best options, you can choose others. If you want a little more hand holding in the process consider some services for streaming church services. These will not help you stream to Facebook or YouTube, but that might work better for you. You have more control of your channel.
- Faithlife LiveStream ($90/month to $200/month) - If you're familiar with Logos Bible Software, then you may already know about Faithlife. They offer a live streaming solution. It's expensive but adds more than video streaming church services. You'll get online digital giving, Podcasting, and users can install an app to watch your service along with other church services.
- Restream.io ($16 or $41/month billed annually) - Churches can stream their services to as many as 30 different services at once with Restream.io. It has the benefit of working within a browser instead of installing software using Restream Studio. You can interact with viewers on all of the platforms from their Chat service. It also works with other software like Ecamm, OBS, Zoom and more. IT starts with a free level but subscribers can also stream to other services not officially supported. The Pro level takes away the Restream branding and lets you brand yourself. They'll soon add multi-camera setups.
- Dacast - ($X) - Dacast lets churches stream their services from their own website. I've used it and it's not bad, for people who want to set up their own site for streams. They host the video and you embed it on your sight.
- VMix - (Free to $1200) - I'm not as familiar with VMix but hear that it works very well. To get 1080p streams you will want to pay for Basic HD level at $60. It compares nicely to XSplit or Ecamm above. With that level of software you can stream to up to 3 services at cone and use overlay graphics. It also has the ability to stream to a monitor so you could send it to a hardwired overflow room or nursery.
Streaming Church Services Live Using Facebook or YouTube Apps or Pages
Streaming church services live on Facebook and YouTube extends your reach as a church. We'll show you how to use their apps and websites for streaming.

Choosing the right software for streaming church services live actually impacts the rest of the decisions you'll make - equipment, cameras and accessories. If you want to start streaming church services live, then you will need some kind of software. We'll look at using Facebook or YouTube . Churches can choose between using an iPhone or Android phone and the mobile apps for these services. However, you probably should pick a computer with a camera hooked up and streaming using the Facebook or YouTube websites instead of a mobile app.
Here are the other posts in this series:
- The Four Best Camera Styles for Streaming Church Services Live
- Streaming Church Services Live Using Facebook or YouTube Apps or Pages
- 7 Best Tools for Streaming Church Services
- Streaming Church Services Life and Cheap
A lot of streaming platforms exist to help churches. You can buy a subscription to a dedicated service, but they can cost hundreds to thousands of dollars a year. It's also harder to garner an audience if you're a small to mid-sized church using one of these dedicated subscription services like the ones mentioned at the end of our post on the 7 Best Tools for Streaming Church Services. You can find even more services listed at ChurchTechToday.com. They range in price from $25/month to almost $150.

Most people reading this will opt for streaming to Facebook or YouTube since they're free and easier to discover by potential viewers.
Streaming Church Services with Facebook or YouTube Apps from a Phone
The Facebook app on an iPhone or Android phone does a decent job of helping churches share their worship services. However, in our last post in this series we argued for using a dedicated camera for a lot of reasons. You get better images, more versatility and placement is better with a dedicated camera.
However, if you must use an iPhone or Android phone you can go live from their mobile apps. The video below shows you how to stream from your mobile app to Facebook.
People who have enough subscribers can use the YouTube app on their iPhone or Android phone to live stream. The video below shows you how to use the app and how to go live if you don't have enough subscribers. By the way, you'll need 1,000 subscribers on YouTube to go live from the mobile app. But this videos shows you alternatives.
Streaming to Facebook resulted in more engagement for our church than we saw on YouTube. We used to go live on YouTube and would get at most 10-20 people for regular worship services and no more than 100 for special services. We moved to Facebook and those jumpers soared sometimes reaching hundreds of views. We average 80=110 in worship.
Streaming from the Facebook or YouTube Websites
Since it's better to hook up a dedicated camera to a computer for higher quality and more versatility, using the Facebook or YouTube websites will result in better quality streams. Third-party software gives churches more versatility, than the Facebook or YouTube websites. We'll cover that in our next post in this series.

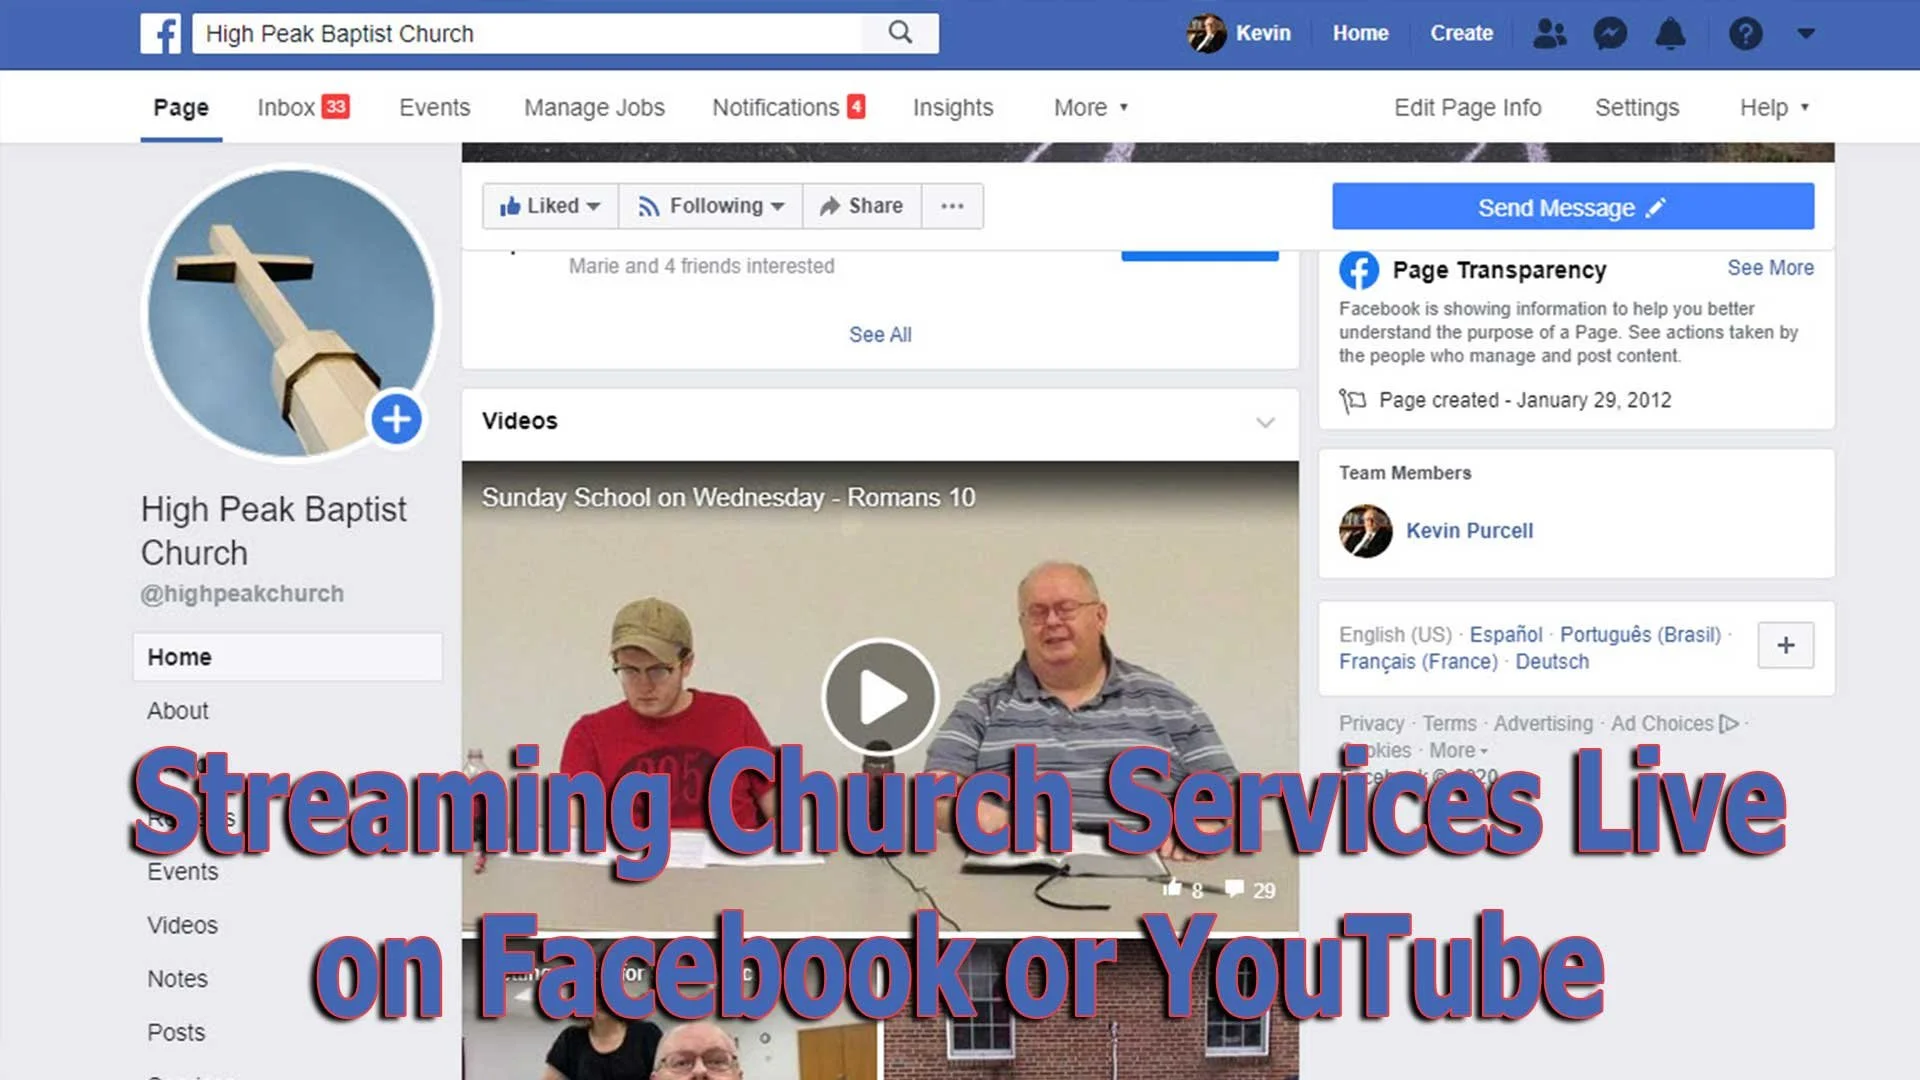
To get started on Facebook, you'll want to set up a Facebook Page for your church. Facebook offers a good help page for doing this. Once you're done following that guide, you can log into your account, go to your Facebook page and then start a live stream. Take a look at the slideshow below.


First, click on the Pages link along the left (first image above). Then click on your page name in the resulting page. On that page click on Live (second image above).

Follow the steps in red above. First click on Use Camera. Then choose your camera and your microphone. Next, along the right, click on drop down menus to choose where you want your video to go. It should read "Share to a Page You Manage" and then the name of the page for your church.
Give your video a title in step 6 above. Make sure the video looks right in the box in the lower right (#7 above). Then when you're ready, hit the Go Live button in the lower left.
The resulting page will show you the feed and you can interact with viewers. I recommend putting a comment in the video and make it stick to the top that reads:
We welcome you to our church's worship service here on Facebook. If this is your first time viewing our Facebook Live worship service, hit the heart and we will get back to you with a special gift.
Now you can send them something special, like a coupon to a local restaurant's take out business and some info about your church. At the very least, leave off the gift and then just follow up with a note.
Since things change quickly and often on Facebook, if the above instructions don't work, head over to Facebook's Live Broadcasting help page.
YouTube Live Streaming Church Services
I prefer streaming to Facebook since most churches will see more engagement, but some prefer YouTube. You might already have a presence on YouTube. If you have over 1,000 subscribers, then you can stream live to YouTube too.


Click on the little camera icon in the upper right corner and choose Go live from the drop down menu. This opens a screen (second image above) if it's the first time you've tried to stream. It asks you to give permission for using your microphone and camera. Hit allow (third image above) and you're reading to set things up.

Give your stream a Title in the top box. Make it public, if it's not alreayd. Then click whether it's made for kids or not. Most churches should click No, not because it's not appropriate for kids, but because you are not targeting kids. You might be in a special service for kids. That comes with a special set of requirements that are not useful for this purpose.

Click on the More Options button at the bottom and make sure you selected the right camera and microphone. Also add it to the right camera by clicking the drop down box above the camera option. Choose Nonprofits from the list. The content above the category comes from the default description from your channel.
The Advanced Settings button opens another screen. Click the Allow Chat on or off depending on whether you want comments. You should leave it on unless you have some special reason for stopping viewers from commenting. Videos with comments get more engagement on YouTube.
Since you're a church, you should not take ads, so turn off the option that reads "This contains paid promotions...". Not click the back arrow. Then click Next and it will take a photo as a thumbnail. You should later replace this with a branded image for your church.
Next, you'll see a Stream preview. You can edit the details and share the stream on social media. In the Live Chat you should add a post targeting guests. Ask them to respond so you can follow.
Hit Go Live and you're streaming. When it's over you can end the stream and save it. You will want to edit things now like the thumbnail.

Streaming Church Services Live from a Phone Made Simple
Churches that want to extend their reach should consider streaming church services to platforms like Facebook Live or YouTube. Church leaders might not know how to get started and what they need to stream church services live online. We'll help church leaders choose tools for streaming church services online live.

This first article in a series about streaming church services will focus on making the decision on how to stream and what tools you'll need to stream from a smartphone. Next, we look at the tools needed for streaming with higher quality cameras and equipment in article two. Then, we'll look at the software and streaming services in the third article. Finally, we'll put it all together in the final installment of this series on streaming church services live online.
Here are the other posts in this series:
- The Four Best Camera Styles for Streaming Church Services Live
- Streaming Church Services Live Using Facebook or YouTube Apps or Pages
- 7 Best Tools for Streaming Church Services
- Streaming Chruch Services Life and Cheap
Should You Use a Phone for Streaming Church Services?
First, let’s talk about how you plan to stream your worship services and more. Most people will stream their Sunday morning worship services. For a lot of us that takes place at 11:00 a.m. on Sunday.
Churches stream their worship service in a lot of different ways.
- Streaming Church Services on a Smartphone
- Stream from a dedicated camera through a computer or other device
- A professional setup with multiple cameras, a switcher and visual animations like a TV news broadcast
Of the three styles of streaming church services, the first costs the least. It's also more accessible for people with little to no tech skills. However, it also doesn't look as professional and will often sound subpar.
Sound is important and that's the biggest reason why I'd shy away from streaming from your iPhone or Android phone. You can still use it and if you connect an external microphone or find a way to connect the phone to your sound system, then it will sound better and seem more professional.
Some churches can't afford to pay for a camera, any accessories needed to connect to your sound system or make it sound better, or an installer to set things up. Just load up the Facebook app and stream using Facebook. You'll need someone to hold the camera from the front row. Tell them to hold it very still and don't make a sound.
For those who decide they still want to use their phone but want better sound and a stable video feed, consider buying the following tools:
- An external microphone
- A tripod
- A holder for your phone
Before you go all-in using your smartphone remember the following:
- Phone cameras can't get close enough to the speaker and singers on stage for a professional looking stream without distracting the service attendees.
- Pointing a phone up at a raised platform from the front row looks bad especially if you can't see the speaker or singer behind the podium.
- Holding a phone results in a wobbly video unless you put it on a tripod, which might not look very good to the worship service attendees.
- A phone mic sounds bad compared to your church sound system that you paid hundreds or more likely thousands of dollars to sound good.
- Unless you have someone operating the camera at all times, you're forced to frame the video so that the speaker or singer is always in view of the camera, which looks too far apart.
But how do you stream using your iPhone or Android phone and still make it look and sound decent enough for viewers to continue watching? Will they watch and consider joining you in person in the future?
Tripod for Streaming Church Services with a Phone
You've decided to stick with a smartphone like your Apple iPhone or a good Android phone with a decent camera. What do you need to make the stream look good enough to keep people watching?
First, use a tripod to keep the video stable. Any tripod will do if you get the right accessory to hold the phone. I like products from smartphone accessory maker Joby. They offer phone tripod mounts that work great and don't cost too much. Take a look at their guide on buying mounts for your phone. These will hold the phone in either portrait or landscape mode and attach the phone to any standard tripod. They even sell tripods.

The Joby GripTight Pro Phone mount costs $30 and secures the phone tightly. Screw it into a tripod mount with a typical 1/4"-20 tripod mount. That's the little screw that you screw into the bottom of a traditional camera on top of the tripod.
This mount will rotate from portrait to landscape mode. That means holding the phone so it looks tall (portrait) or wide (landscape). The best option for professional looking streams is landscape or wide mode. The person watching on a phone can rotate their phone but the person watching on a computer or a TV with the phone or computer connected to it can't rotate the computer or TV screen easily.
Always use widescreen mode unless you know that 100% of your viewers want to watch it on portrait or tall mode.
You can use almost any tripod to hold the phone. A full-size tripod will offer the most stable option, but it might look bad to people attending the service since it has to sit close to the front of the auditorium.
You could choose something like a mount that holds the camera from on the front pew or seat. Joby also offers great options like their GorillaPod Line of tripods. You can get the above GripTight mount and the GorillaPod Tripod for $59.95 together.
This has legs that bend so you can fasten it to the front pew or seat back. You can also fasten it to anything else to bring the camera on your phone closer to the stage.
Any mount and tripod combination will work so long as the mount holds your phone in widescreen/landscape mode. Make sure the mount will fit your phone. Most modern mounts will, but measure it before you buy.
Sound for Streaming Church Services from a Phone
While camera phones often come with excellent cameras, they seldom come with decent microphones. That's compounded by the fact that you're usually not holding the phone close enough to yourself while speaking or singing. If a singer uses a canned accompaniment track or other instruments, they are not close to the camera.
The single biggest consideration for streaming live video isn't the video quality. It's the sound quality. Viewers care more about sound and will forgive lower quality video if it sounds good. Services like Facebook and YouTube actually put more of their focus on streaming good audio if the Internet connection gets week.
You can fix the audio problem by connecting a good mic system or by hooking your phone up to the church sound system. Let me offer three options.
Best Option: Wired Connection to the Sound System
Run a wire from your sound system to the phone. Find an output on your sound system and connect a wire to that output connection. Then connect the other end to the phone. If only it was that simple!
Your phone camera might sit too far away from the sound system to make this convenient. Try to run a longer cable if possible. It's the best option.
What kind of cable should you use? That depends on the sound system and the phone input. Let's start with the phone.

All recent iPhones use a Lightning connection and don't include a sound port anymore. You'll need to connect a Lightning to 3.5 mm Headphone Jack Adapter. It's only $9 at Apple.com. Don't bother with anything else. This works and they're cheap.
To connect the cable to the board you'll need what's called a TRRS to TRS adapter. What's that? If you don't care and just want buy one, check out Amazon. That link takes you to a search result on Amazon. Find one that's highly rated and read the reviews. Ask the buyer if it will work on a church sound system and see what they say. Now skip to the next heading below. If you do care what TRRS and TRS stand for keep reading.

Here's the explanation if you want it. A TRRS to TRS adapter lets you plug a cable with three lines to one with two. The letters stand for Tip, Ring and Sleeve (see above image). The ring separates the two black lines, which connect the wires in the cable to the device you're plugging into. So the above image shows a stereo cable with left and right audio.
A typical sound cable used just for sound will have a quarter-inch or 3.5mm jack with TRS like the image above. That means it has two wires for left and right sound connections.

If the cable has three (Tip, Ring, Ring, Sleeve or TRRS), it's designed for a phone with left, right and mic. These are used for earbuds or headphones with a mic so you can listen and talk on your phone. A sound system can't handle the TRRS or three connectors. So you need an adapter to take it from three to two.
Some sound systems have two outputs, one for left channel and one for right. Typically they will look like a red and white connector. If that's the case you'll need one of those too. Some use a larger quarter-inch jack to connect to the sound system. So, you'll need an adapter to connect the quarter inch to the smaller 3.5mm jack.
Second Best Option: External Microphone
If you don't connect the phone to your sound system, then you should get an external microphone. The best option comes from a company called Rode.
The Rode Wireless Go comes in two pieces, a transmitter and receiver, which wirelessly connect to each other. The receiver connects to the phone with a 3.5mm cable. You can use the adapter from the above part about connecting to your sound system.
The transmitter of the Rode Wireless God works like a lapel mic. It has a built-in mic. Turn both parts on and they will connect to each other wirelessly. The transmitter with mic works like a regular mic.
The transmitter also has an input for a 3.5mm connection from an external mic. I have a mic with a 3.5mm jack and plug it into the Rode Wireless transmitter.
Hooking Up an Android Phone
The above discussion focused mainly on an iPhone. Android phones have one of two connections. Does your Android phone have a headphone jack or not? If it does, then just use the cables mentioned above without the Lightning to 3.5 mm adapter from Apple. You don't need it.
How do you tell if your Android phone has a headphone jack? Look for a little round hole like the one below.

If your phone doesn't come with a headphone jack, did the manufacturer supply an adapter for you to plug into the power port? You can use that adapter or buy a new one like it. Most of these use USB-C connectors or they might have a micro-USB adapter.

USB Type-C users can get the Apple USB-C to 3.5 mm adapter. It works with Android phones and only costs $9 at Amazon. For Micro-USB to headphone adapters, check out this highly rated adapter from Amazon for $10.
Now use the above instructions in the previous section for what you need to hook up your phone to your sound system.
Should You Use the Zoom Feature on Your Phone to Get Closer?
If you're happy with the way your phone looks and where you placed it in your auditorium, then you can skip this section and the next one. However, some people may still want to put their phone back further while getting a close-up shot of the speaker or singer. Should you use the phone's zoom feature, where you pinch out to make things look closer? Some cameras like the iPhone 11 have multiple optical lenses so you'll see a .5 (for wide angle), 1x or 2X button in the camera app. Those are fine. But should you go beyond the 2X setting and zoom closer?

Do not use the digital zoom, where you go closer than the 2X if you have 2 lenses. Use only the optical zoom. Digital zoom looks terrible. It blows up the photo beyond what the camera lens sees naturally and degrades the image quality.
If you don't believe me, take out your phone. Take a photo of the pulpit in your church. Us the regular zoom level, the 2x Zoom and then go in closer with digital zoom. Now compare the photos. The regular image and the 2X will look fine. The digital will look grainy and even blurry. DON'T USE IT even if you think it looks fine. Almost no one else, including potential visitors will agree!!
But what if you want to get closer than the 2X zoom lets you?
Adding a Physical Lens to Your Phone
You can add zoom lenses that add closer zoom capability to your camera phone without degrading the image quality. These do not come cheap if you want one that looks good. Search on Amazon or Google and you'll find a bunch of garbage options that cost $10 or $20. You get what you pay for.

I've found two companies that make decent zoom lenses for the iPhone or popular Android phones. The best option comes from a company called Moment Lens. I own a set of their lenses and they're fantastic. They make a number of lenses, but for our purpose take a look at their zoom lens. The 58mm lens doubles the zoom of the built-in lens using high-quality optical lenses. Connect the lens to a case on your phone to make it a 2X on the main lens or a 4X on the built-in 2X zoom on an iPhone 11. Other phones offer other zoom levels and the Moment 58mm lens will double those zooms.

The Moment lens costs $119.99. It ain't cheap. but it's still cheaper than a dedicated camera and makes an phones like the iPhone, Samsung Galaxy s10 and Google Pixel 4 usable.
To use the Moment Lens you'll need a case for your phone. They offer cases for iPhones, Galaxy phones and Pixel phones. Buyers can also get a mount that will fit on other phones. They're not as good as a case, but still work well with other phones besides the ones they make cases for. These cases and mounts start at $20 and cost as much as $50.
Olloclip makes cheaper lenses, but they're not as good. They use lower quality lenses and work with fewer phones. I don't recommend them.
Putting it All Together
Now that you have the gear and the understanding that using your phone works for people who need a low-budget option, let's put it all together.
Connect everything you bought...
- Put your case or mount on your phone.
- Hook the lens to the case or mount.
- Attach the cables and adapters to the sound system.
- Put your phone in the mount that you've attached to the tripod.
- Turn on your camera app and test the recording.
Remember that playing back your recorded video won't play on the phone until you unplug the cable connected to the sound board. Test it out and then plug it back in.
If it doesn't work, make sure everything is connected properly. Reverse the audio cables or adapters if need be. If it still doesn't work, it could mean a faulty cable or adapter. It also could mean you plugged the cable into the soundboard in the wrong place.
We don't have to the time to talk out how to use Facebook for streaming church services live. The step-by-step will show up in a later post in this series. For now, use the steps from the video above.