

Unlocking the Logos Draw On Screen Feature on iPad and iPhone

People often ask how to use their Apple Pencil on the Logos Mobile iPad app (Logos: Deep Bible Study on the App Store). The Logos Draw on Screen feature takes advantage of the Apple Pencil's drawing features while using an Apple Pencil on Logos Mobile and iPad. We'll look at how to use Draw On Screen with the Apple Pencil on Logos Mobile and offer use cases for using the feature on your iPad. We also look at using it on iPhone without Apple Pencil.
https://youtu.be/tdF0BNQFdLc
What Is Logos Draw On Screen Tool in Logos Mobile
The Logos Draw On Screen tool uses Apple's drawing feature and the Apple Pencil Tool Palette on the iPad and iPhone. On the negative side, it won't work on the Android version of the app. You must subscribe to one of the different levels that Logos released in 2024. Look at this.
When you use the feature, your iPad screen running the Logos Mobile iPad app becomes a digital drawing board. When you're finished with your drawing session, you can save or share the resulting drawing. In addition, you can also discard it by exiting the Draw On Screen tool.
Logos Draw On Screen works only on iPhone and iPad if you subscribe to a monthly plan.
How to Start the Logos Draw On Screen Tool
Open your iPad version of Logos Mobile and arrange the books and tools in the app as you want them to look during your drawing session. You might want to change the View Settings so your audience can see the text and your annotations more clearly. To do that, tap on the menu button in the upper right corner. It looks like three vertical dots. Tap on View Settings and adjust the look of the text as you want it for your teaching or viewing session.
Tap on the icon in the upper right corner to open the menu and show the View Settings dialog.
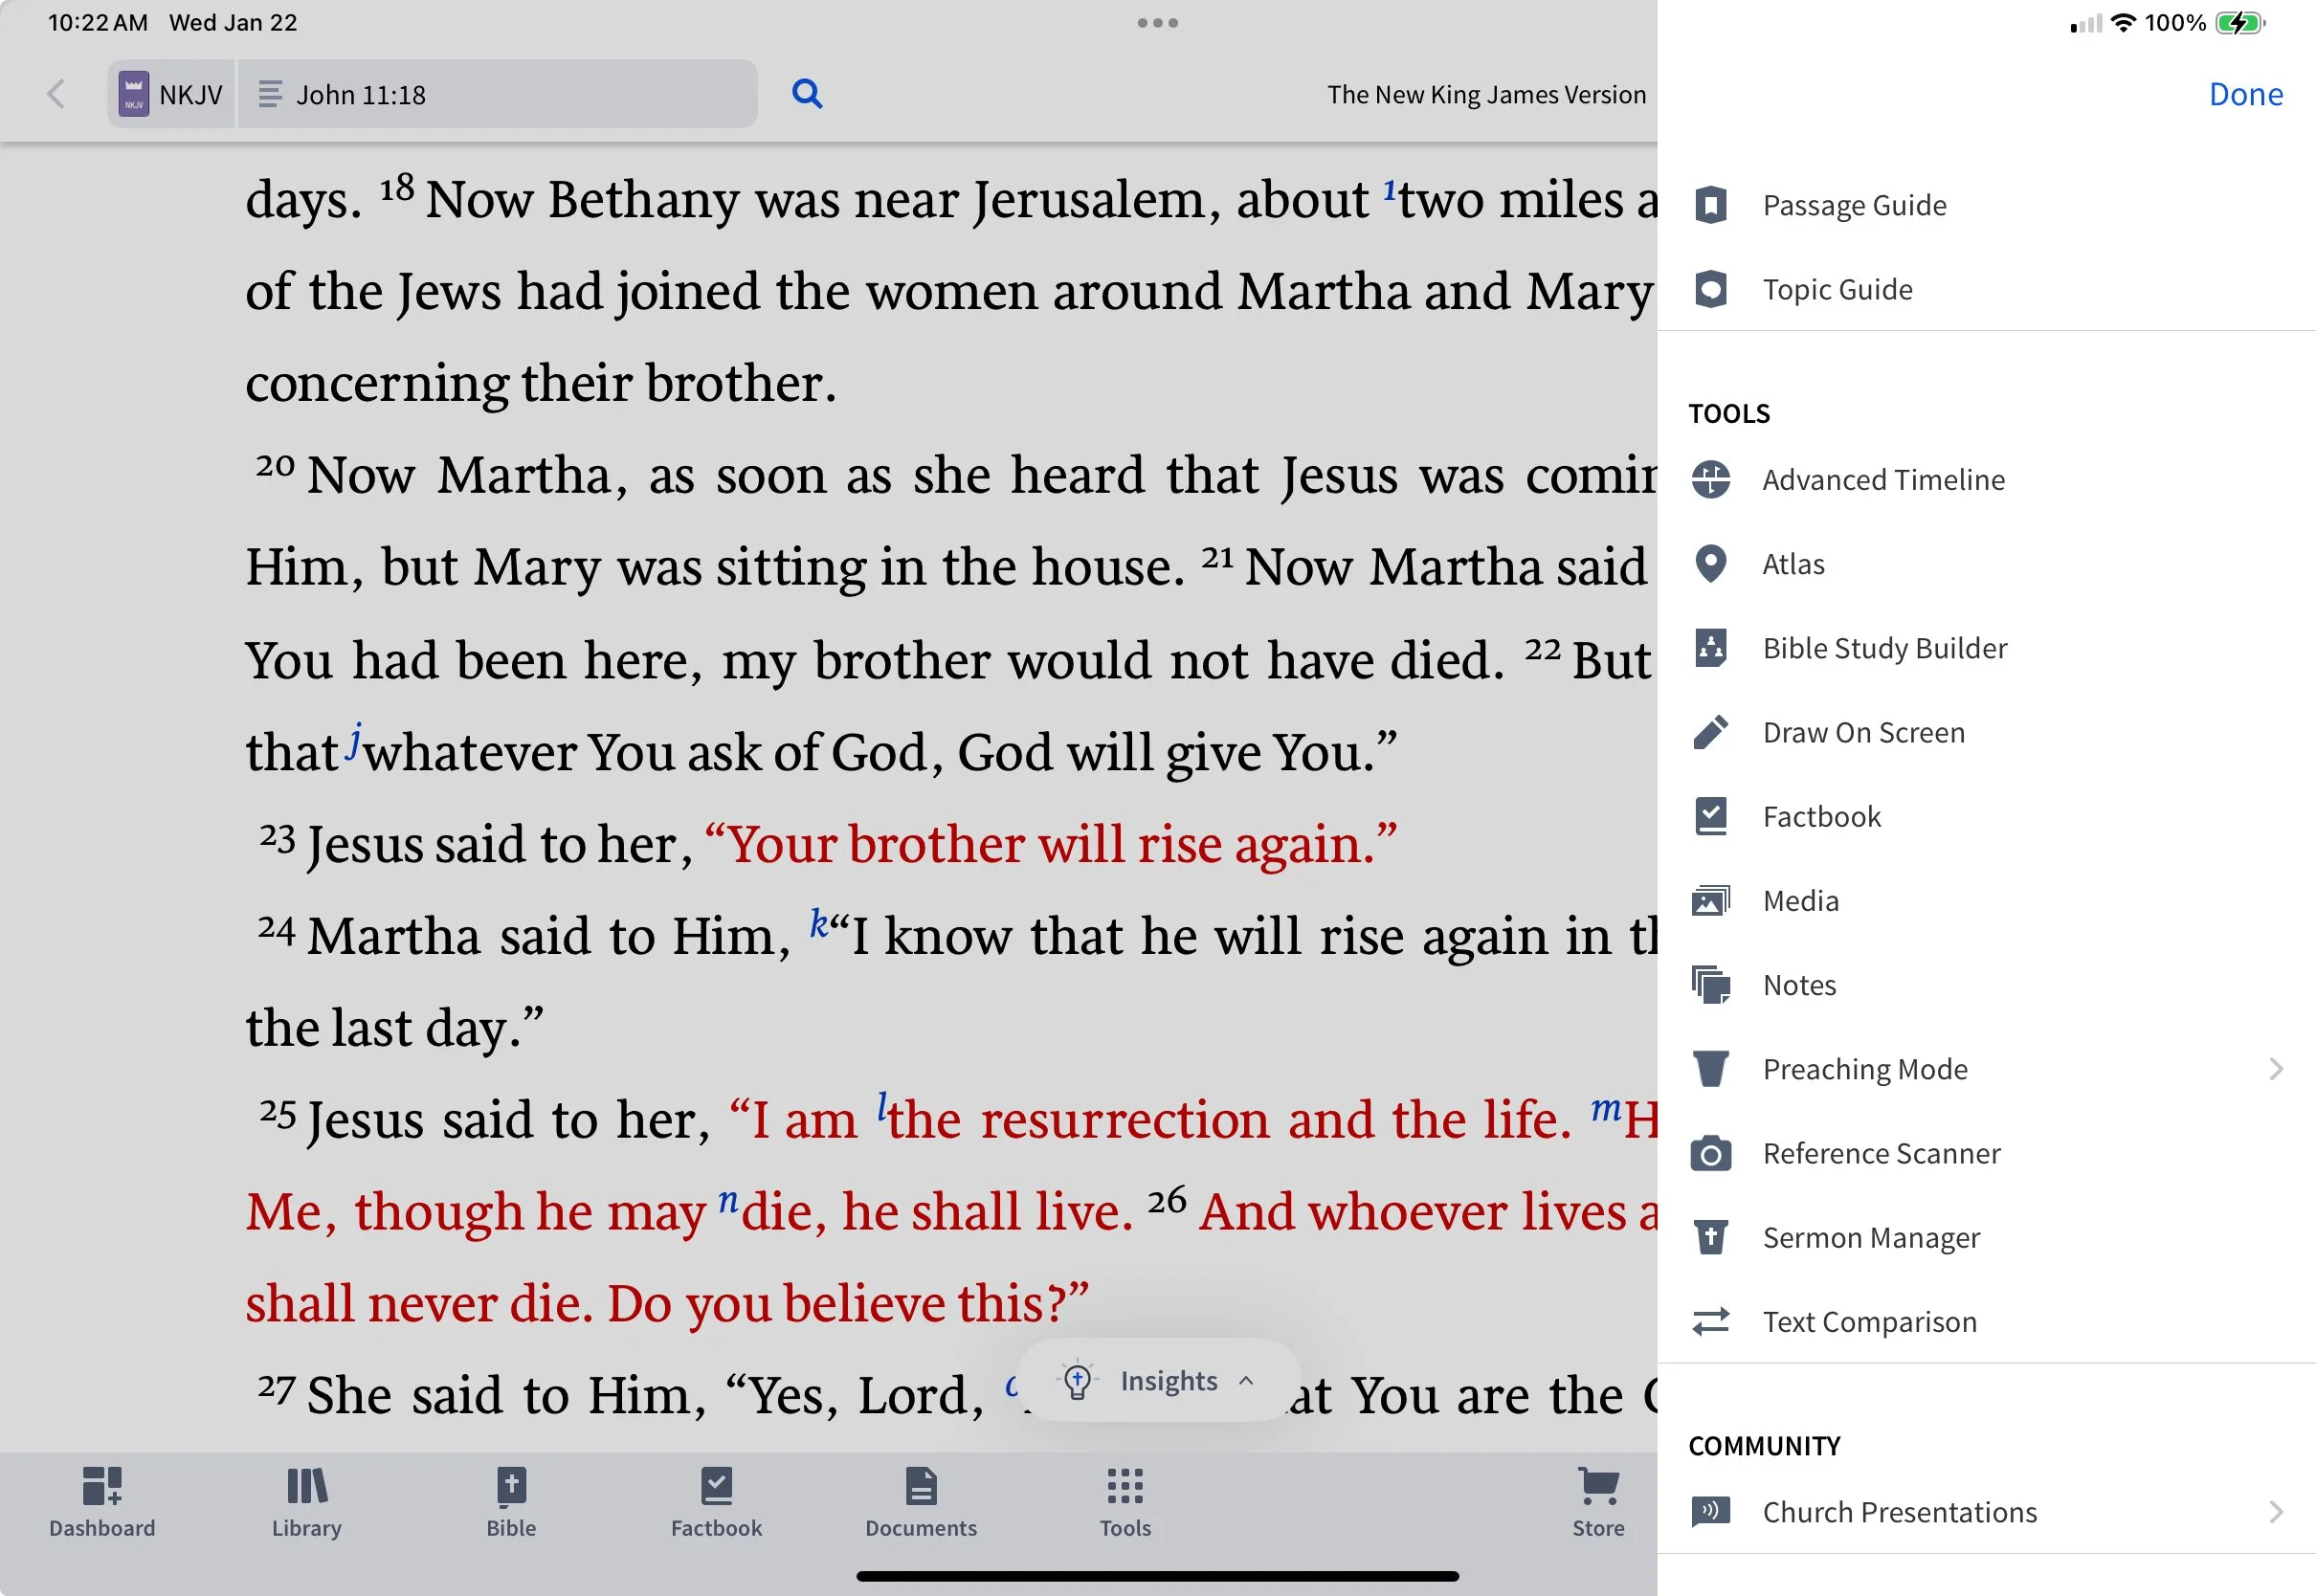
After adjusting the display, open the More section using the button in the lower right corner. Scroll down to the TOOLS section and tap on Draw On Screen. Afterward, the Apple Pencil Tool Palette will pop up from the bottom of the screen. A circle with three horizontal dots will appear in the upper right corner.
You can save your image or exit the tool from the menu. Here's what the options you see in the menu...
Copy Image - to the iOS clipboard.
Save to Photos - puts the image in your iOS Photos app.
Save as Note - saves it in the iOS Notes app.
Share - opens the iOS share sheet menu to save it to external apps.
Exit Drawing - leaves Draw On Screen and discards the drawing image.
Now, take a look at what you get.
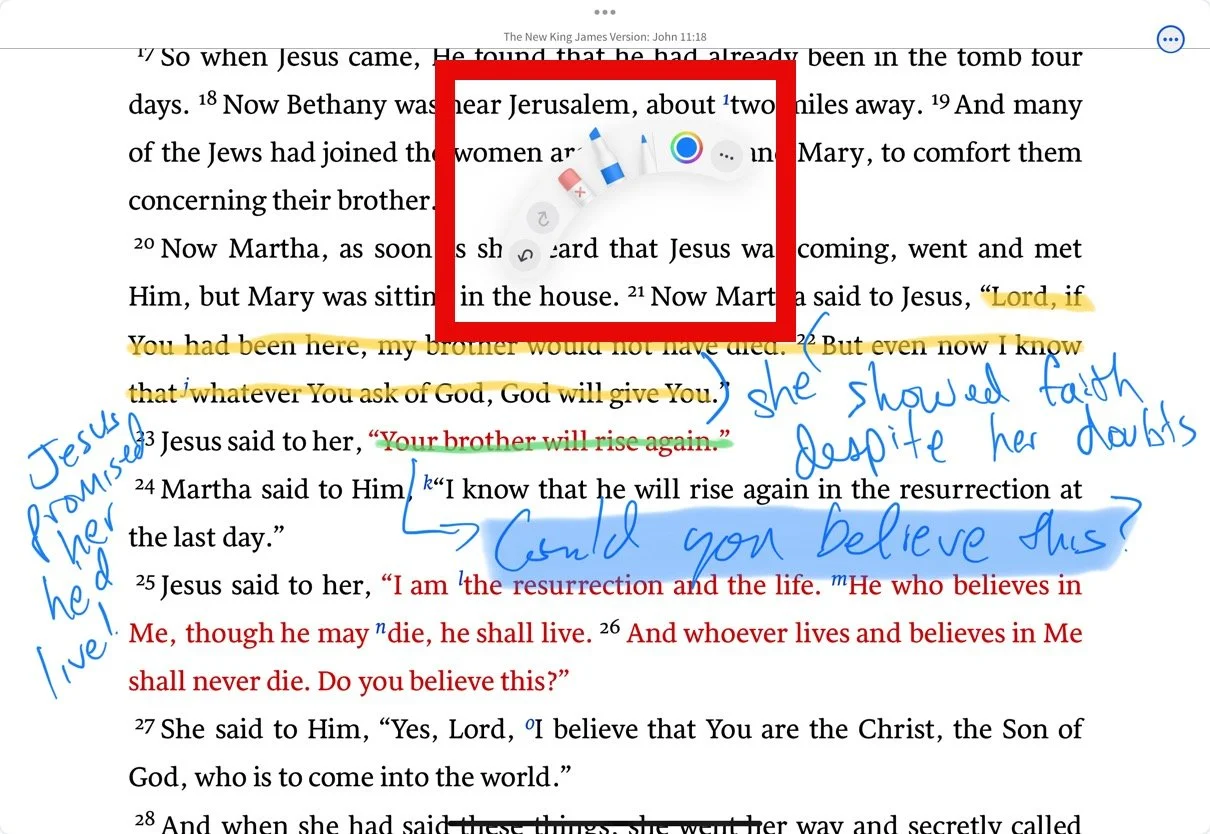
The iPad Apple Pencil Tool Palette

Once you open the Draw On Screen tool, you'll see the iOS Apple Pencil Tool Palette. The Tool Palette includes the following tools...
Undo and Redo buttons that do as you'd expect. Undo the last markup or redo one you've undone.
Marker - draws in a basic line.
Fine Tip Pen - draws with a more precise tip.
Highlighter - highlights with an adjustable capacity.
Eraser - erases pixels like a typical eraser or erases objects that you draw.
Selection Pen - selects drawings on the screen so you can move or delete them.
Ruler - use this to draw straight lines.
Felt Tip Pen - a secondary felt tip maker.
Crayon - draws like a crayon.
Calligraphy Pen - a wide-tipped calligraphy style pen.
Paint Brush - paints like a soft paintbrush.
Color Chooser Palette
Tool Palette Settings Menu - circle with three vertical dots at the right end.
If you use the latest generation Apple Pencil and iPad Pro, then you can use the Squeeze function to bring up the Tool Palette. Squeeze your latest generation Apple Pencil and you'll see the version of the tool palette shown below. It shows up at the point where your Apple Pencil hovers over the screen and has all the same functions as the Tool Palette that pops up on the bottom of the screen.
Why Use Logos Draw On Screen
Why would a person use the Draw On Screen feature in the Logos iPad App? Consider the following use cases...
Teaching on a Bible passage in church.
Presenting information to a Sunday school class or small group.
Use in higher education settings like Seminary or Bible College.
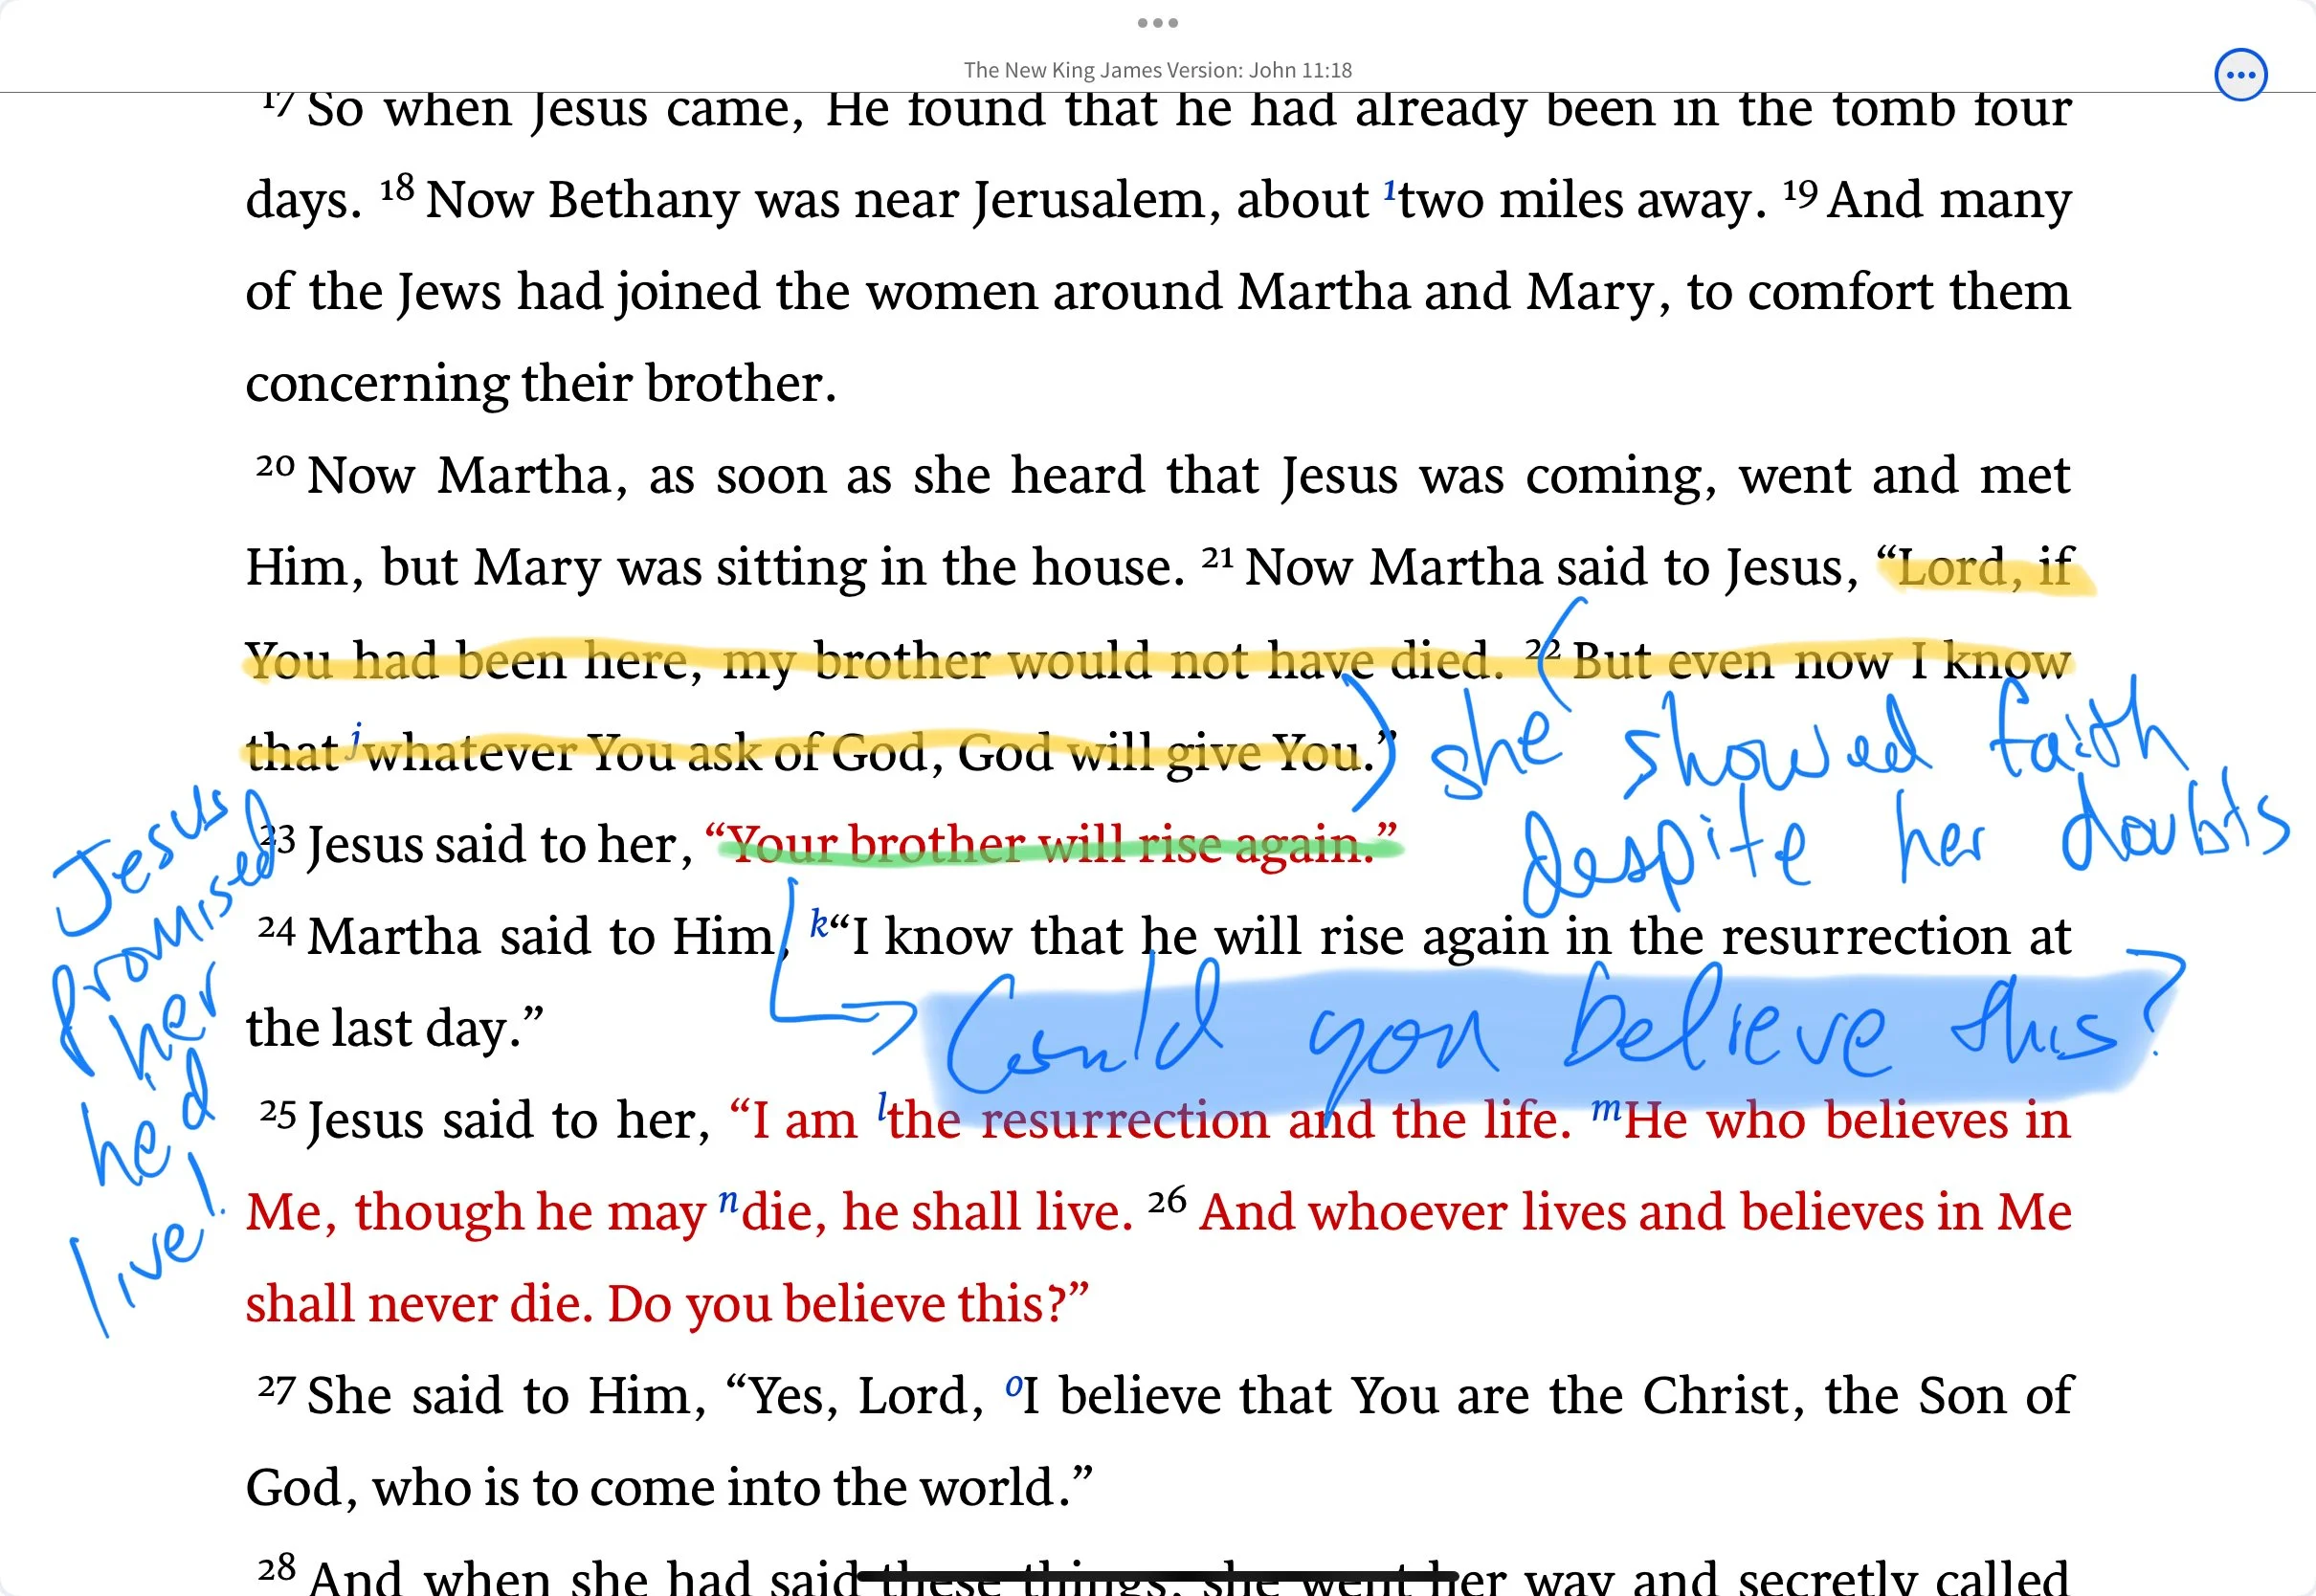
For personal edification as you study a passage and want visual markings that you can save in a Logos Note attached to a passage.
Underline.
Take notes in the margins.
Highlight.
Comment below ways you might use the Draw On Screen feature!
To save a Draw On Screen session to a Logos Note, exit the Draw On Screen tool by tapping on the menu (circle with 3 horizontal dots in the upper right corner) and choose Copy. Then Exit Drawing. Now create a note as you would normally by selecting text and choose Add Note from the pop up menu. Tap in the note and choose Paste. The app will take a minute to upload the image to the Logos servers and then the image will appear in your note.
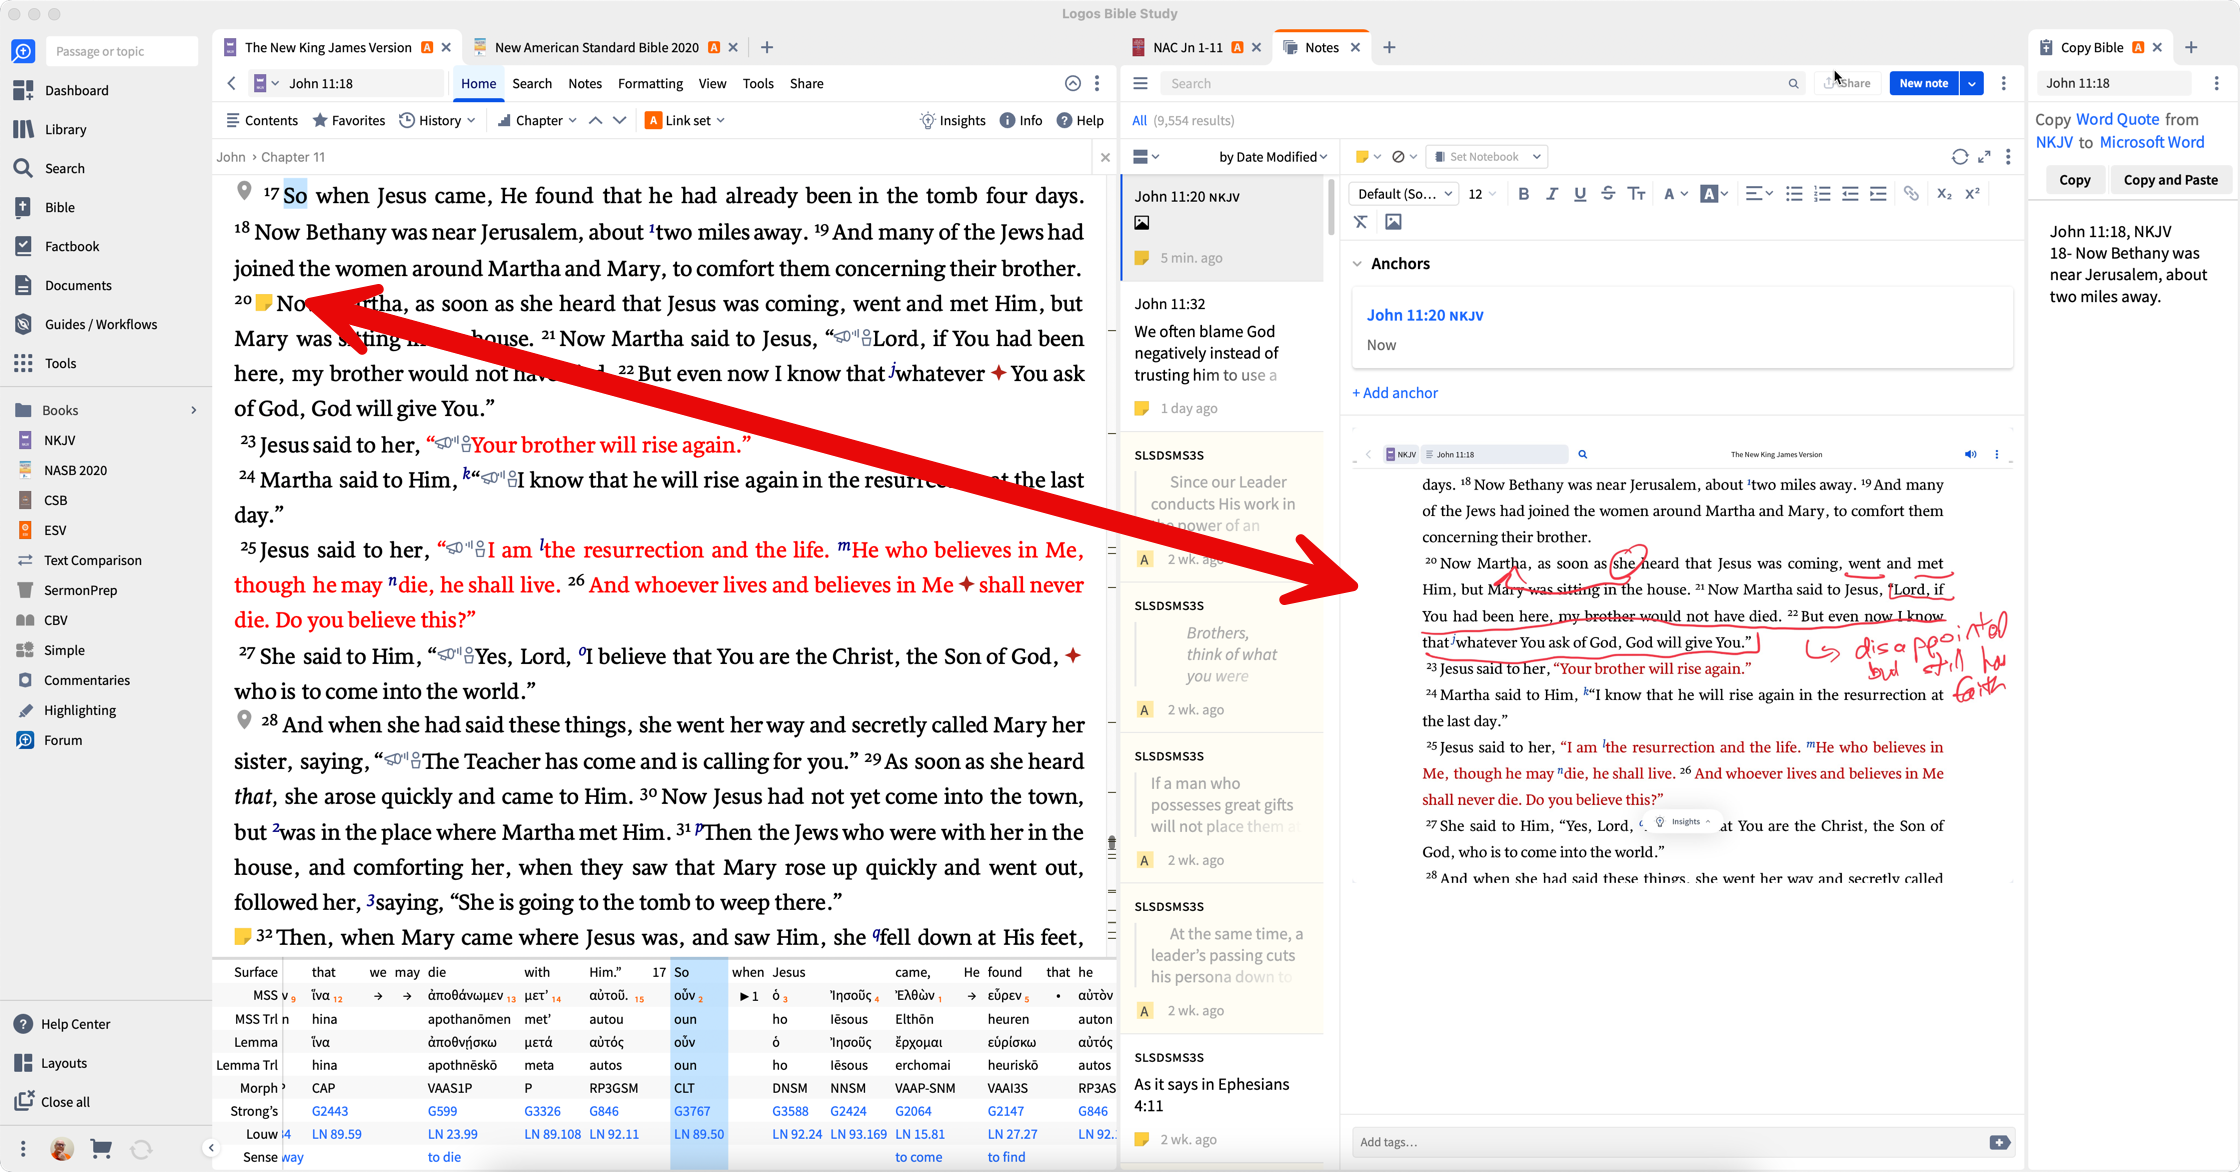
The next time you open Logos on another device or in the future on your iPad, you'll see the new note with the image in it.
You can immediately see that a note includes a Draw On Screen image. Change the note icon to something unique. I use a Red Pen icon. On your iPad, change the icon by tapping on the Note Icon in the Note pop-up box. In that box, you can choose a different color and shape for the Note icon. Tap Done to exit the dialog box.
Improvements Logos Needs to Make
First, saving a Draw On Screen image in a note should be automatic or at least easier than it is. Add the option to the menu found when you tap on the icon in the upper right corner of the screen (three horizontal dots). That would offer the best option, or they could use the Share Sheet function in iOS to create a new note in Logos.
Second, there's no way to scroll or swipe to a new page with the Draw On Screen feature turned on. I wish there was a way to scroll down or up or swipe to the left or right if you use that form of navigation.
Third, there is a version of Draw On Screen for the desktop version of Logos, but it is pretty terrible, and I would never use it. It doesn't let you interact with the program, like the mobile version. And it's challenging to draw with a mouse or trackpad.
If you want to use it or at least try it out, click on the menu button from the sidebar and click on Draw On Screen. On Windows, use the keyboard combination F8 or CTRL+F8 to turn it on/off. On Mac, use F8 or CMD+F8.