

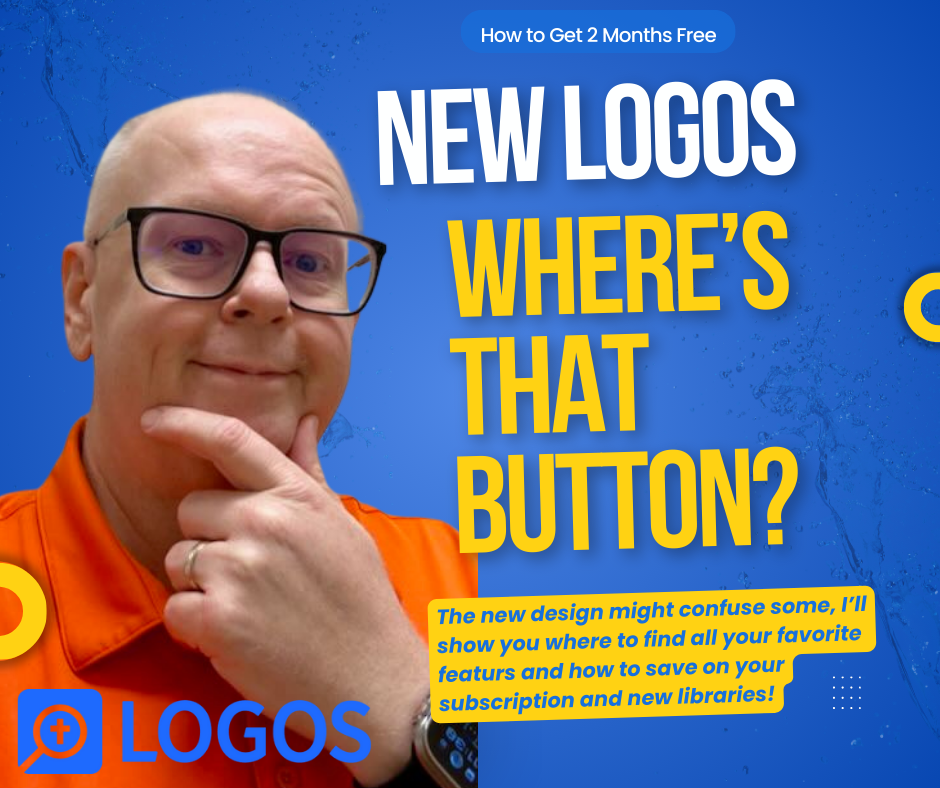
The New Logos Subscription Model and How to Save Money
What's with all these new Logos subscription tiers and libraries. We'll explain what's going on and what you should get. We've also got a deal for 2 months free.

Logos released a new version of Logos Bible Study on October 21. It includes some interesting new features and a new user interface; however, they also introduced a new subscription model. So, what's new in the new Logos, and should you subscribe to one of the three new tiers of Logos version 37?
What Do You Call the New Logos?
For over 20 years, I've used Logos 3, 4, or some other version that ended in a small number. When Logos 10 came out, that became the last version that we'd described that way. What we called Logos 10 was called something like Logos 10.24.01. They just dropped the final numbers and called it Logos 10. We're dropping the 10 and getting Logos 37 as the first version of the new Logos (my Partner Link gets you 2 free months), which we thought they'd call Logos 11.
Logos Changed the Way You Buy the Logos Bible Study Platform
In the past, most people upgraded to Logos XX by paying for new features plus a library of new books. Now, you pay for a monthly, annual, or two-year subscription and add a library of books in a separate purchase.

Think of it like this. You decide to lease a home to own. YOu're paying monthly for the right to live there and over time you build up enough equity that you can buy it and own it outright. However, you decided you also want to make some improvements, so you add on a new bedroom and bathroom. You turn on of the rooms into a home theater and you build a nice gazebo out back.
Logos asks you to subscribe to get the new version and then asks you to add-on. You pay monthly for the new version of Logos like you pay monthly for the house. You add onto the house and make improvements like you buy a 2025 Library for the new Logos 37. If you quit paying for the home, the bank will kick you out. If you quit paying for the new Logos, then you lose the new features, unless you subscribe for a minium time. I'll explain that below when we discuss the "Legacy Fallback License".
To get new features, you will have to subscribe. Logos told me:
We will no longer sell a perpetual license to feature sets to consumers. For software, subscription will be the only way to get a premium Logos experience.
The subscription doesn't give you libraries of books. You will get the tools needed to use the new features. These will mostly come from Logos and not other publishers like Zondervan, Holman, or Baker, to name a few.
Three Tiers of Subscriptions
Logos reduced the number of different groups of features from nine to only three. They are as follows:
- Logos Premium - Focused on lay leaders who teach a small group in their church or community. The tools sit at the intermediate level of skill or knowledge and focus on English language study. Think of the old Bronze level of feature sets.
- Logos Pro - Focused on pastors and preachers who pastor a church or often preach and teach the Bible. They need advanced-level tools and will get access to intermediate-level language tools in Greek and Hebrew. People who study deuterocanonical books will need this level of subscription. Think of the old Preaching Suite or Silver packages.
- Logos Max - Bible students who need serious language study tools for advanced research will want to pay for this level. You get the whole feature set at this level to study Greek, Hebrew, Latin, Syriac, and more. Scholars or language nerds will want this subscription.
Most Logos users will want the Logos Pro level unless they need hardcore Bible study tools. However, lay people should get Premium, and then if they think they need more, they should jump up to Pro. Start lower and move up if you need it.
Logos Subscription Pricing and Benefits

How much does the new Logos subscription cost, and what do you enjoy besides the latest features? We'll share the full price. You can get discounts if you own Logos 10 or an older version.
- Logos Premium - $9.99/month, $99.99/year, or $189.80 for two years.
- Logos Pro - $ 14.99/month, $149.99/year, or $284.80 for two years.
- Logos Max - $19.99/month, $199.99/year, or $379.80 for two years.
If you own Logos 10 Bronze or higher, take $3, $5, or $7 off the monthly price of the three tiers. What if you own something lower than Logos 10 Bronze now? The discount gets smaller ($1, $2, $3).
Logos also offers discounts for Faculty and Students who subscribe annually. These users also get excellent deals on libraries—more on those below.
What else do you get besides the new features? Take 5% off every purchase from the store. Get another free book each month and up to eight Logos Mobile Ed courses each quarter. Pro and Max subscribers get access to the Logos Sermons service, which lets you host sermons online in a podcast or transcript format.
Pro and Max subscribers will earn an annual coupon worth 5% of all purchases the previous year. This coupon arrives in February each year and is only for current subscribers. So, if you plan to cancel your subscription, don't do it until after February, or you'll lose this perk.
Legacy Fallback License
What happens if you cancel your subscription? You will lose access to the features that you get by subscribing. However, there's something Logos calls a "Legacy Fallback License," which allows users to keep offline features when they end their subscription after 24 straight months of subscribing. You'll keep the features that don't need cloud or AI. If you have any questions about this, contact Logos to see what you'll lose before you cancel.
What Do You Get in the New Logos Subscription?
What's available in Logos after a user subscribes? We'll cover the new features in another fuller article, but here's a quick listing of new features taken from Logos PR documents:

- Dark mode without restart.
- Get Started Wizard - shows up on the new Logos Dashboard.
- Smart Search - use regular language to search your library.
- Insights - quick looks at your most essential library tools with one click.
- Dynamic toolbar - we covered this in a previous article.
- Help Center (see screenshot below).
- Factbook improvements - new sections and "lenses" to see what's in their passage.
- Smart Synopsis - AI-generated synopsis from search results with footnotes.
- Summarize tool - quick summaries of books, passages, or search results. More is coming.
- Bible Study Builder - the Wordsearch Lesson Maker, but reimagined for Logos and with better-resulting questions.
- Sermon Assistant - Only for Logos Pro and Max Subscribers...
- Outlines - AI-suggested sermon themes and outlines.
- Questions - AI-suggested questions for discussion based on your sermons built using Logos Sermon Builder
- Applications and illustrations - AI-generated sermon applications and illustrations from your sermons.
- Sermon Builder/Manager on Android - Android users can now use this tool, not just iOS users.

New 2025 Libraries to Add More Books to Logos

If the three subscription tiers didn't confuse you, the three tracks of libraries with eight different levels will. Each comes with books you own and can use if you subscribe to Logos. We'll offer a more in-depth recommendation in another article. But let's look at the three tracks and who they're meant for.
The tree tracks focus on who's using Logos. For example, the Standard Track Libraries help people who use Logos for personal use and to teach a Bible study or small group. If you buy a Logos Premium subscription, then you'll likely want to consider the Standard Track Libraries. Take a look at the price and what each includes, and you can buy what you can afford or need.
Next, we see the Leader Track, which focuses on church leaders. Again, if you teach a class or Bible study, you'll want to take a look at this track. You'll get more intermediate-level books.
The Preacher Track Libraries were designed for preachers and pastors. Logos Premium subscribers will likely want to look here.
Finally, the Research Track Libraries will help people who subscribe to Logos Premium or Max. These users write commentaries, translate for new Bibles or in missionary settings, or teach at a seminary or Bible college.
Look for more complexity with Denominational Libraries coming in January 2025.
Recommended Upgrade Path for Different Users
What should you do if you want to upgrade to Logos. First, consider using my Partner Link. Logos gives you one month free and using my link gets you a second month free if you upgrade to a subscription.

First, choose a subscription level. Most users will want Logos Pro, the mid-level tier. You get the most bank for your buck. Since the majority of my readers are pastors, teachers, and serious Bible students who need to do language study, but might not possess an advanced level of Hebrew and Greek skill, then get this tier for $14.99/month, unless you already own Logos 10 Bronze or above. Then it's just $9.99. You can save more with an annual subscription.
Second, you need to pick a library of books. You can get the subscription alone, but why not add some books to your library at a discount. Take a look at the Libraries for 2025 and choose what you an afford. Logos will let you split up payments into a couple of months up to a year to pay off your purchase.
As we said above, they offer several tiers of libraries too. For now, go with Standard and then add to it later. Or jump to the Preacher level if you're subscribing to Pro. They seem to fit together well.
Logos gave me the the Gold Library, but if they hadn't, that's what I would have bought. You add the Preacher's Outline and Semon Bible, the ESV Expository Commentary Collection, and Theologocial Wordbook of the Old Testament to name a few. It's only $600 and if I wanted, I could pay for it over several months to make it more affordable. Logos doesn't charge interest, but you do pay a small fee for processing.

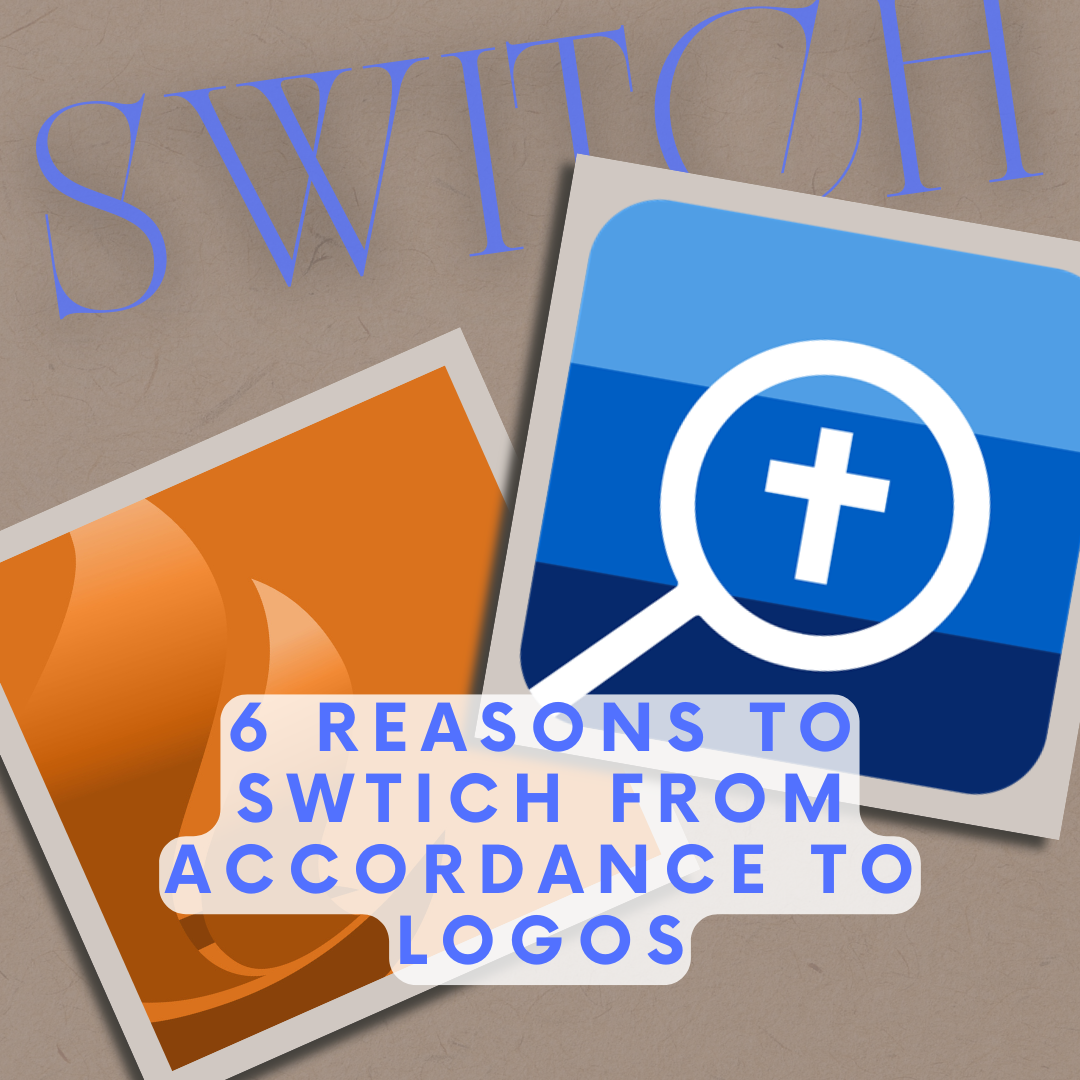
6 Reasons to Switch from Accordance to Logos Bible Software
A lot of people who use Bible software want to know if there's a good reason to switch from Accordance to Logos Bible Software. we've got 6 reasons to switch.
With the upcoming release of a new version of Logos Bible Software, many Bible software users might want to switch from Accordance to Logos. Why would someone go through the hassle of making the switch from Accordance to Logos Bible Software even though it means buying much of the same content you already own in the other program? Switching also involves learning a new user interface and finding new sources of learning or support for the new Logos.

Here are 6 reasons to switch from Accordance to Logos Bible Software.
Get Logos 10 With Biggest Discounts Ever Offered
In August, Logos will offer the most significant discounts on Logos 10. They called it their "Farewell Tour 2024 because Logos 11 will hit their store soon.

Click the image above, which will take you to my affiliate link to get...
- Full Feature Upgrades at up to 65% Off if you own Logos 10.
- Get a new Logos 10 base package and save up to 50% off for those upgrading from an earlier version.
- For first time buyers of Logos 10, get 5 free books.
Learn about the new era of Logos that will come with Logos 11.
Robust Sync Elements in Logos Bible Software Way Ahead of Accordance
This might seem like a strange place to begin, but it's one of the features promised when Accordance 14 came out a long time ago, and they still don't have it.
Syncing does more than keep your content, settings, and user-created content in more places. Change settings on your desktop, and it will sync to your laptop. Add notes on a verse with your phone while listening to your pastor, and they'll end up on your desktop. If you're studying on a friend's or family's computer, you can hit the Logos Web App, and your work will sync to other devices.
Syncing makes Logos great, but it also helps back up your work. If your computer dies, you can work on an iPad or a Samsung Android tablet. Then, once you get a new computer, install Logos, and your work will be ready to use after it finishes downloading and indexing your library.
Great Features that Make Logos Easier to Use for Bible Study
I could write a post on this topic alone. We may discuss it later, but here's a bullet list of why these features make Logos Bible Software a superior option.

- Advanced Search Features—Logos struggled with basic search, so many of us searched Google instead. That's changed with versions 10 and 11, which promised to improve it with built-in AI features. You won't get these in Accordance. See the link to learn more about how Advanced Search in Logos simplifies your research.
- Use of Louw-Nida Numbers—Louw-Nida Numbers offers access to the lexicon that many students love. The book description on Logos.com says, "This lexicon differs from other lexicons in that it does not arrange words alphabetically and does not give one listing of a word with all of that word's meanings after it. Instead, it breaks words down by their various shades of meaning." (See Above)
- Unicode Fonts - Biblical languages work better when they use Unicode fonts. You can type in Greek or Hebrew; they will look more readable.
- Print Library ISBN Scanner—Logos will let you scan your physical library books and show you search results from those books in your library if they offer them as Logos books. You can see where the search hit shows up in your book. You can take it off the shelf and read it or buy it from Logos. We learned about this new feature in our article on what's new in Logos Mobile 10. (See Below)
- Search books you don't even own - When you search your library, Logos also offers links to books you don't own. Some might not like this, calling it spam. But, if you need some information in a book you don't own, you can quickly buy it, download it, and incorporate it into your research.

Switch from Accordance to Logos Because of the Logos Mobile App's Full Set of Features
For years, I complained about Accordance's weaknesses on Android and iOS. Sadly, it never got better. Now, you can't even download the Android app from the Google Play Store. You must get it from the Amazon App Store for Android or Accordance's website. Even that link tells you it's on the Google Play Store, but if you click their link, you'll get an error saying the link isn't available.

Many Accordance users report issues with syncing content directly via their terrible sync feature or Dropbox. To sync with your computer installation of Accordance, you have to set both the app and the desktop program to sync over local Wi-Fi.
You can also connect both apps to your Dropbox, requiring you to rely on a third party. People complain that Dropbox sync often corrupts notes files.
Compare that to the iOS and Android versions of Logos. They include a large percentage of the desktop features. Syncing works quickly and automatically in the background soon after you open any version of Logos while connected to the Internet.
Accordance includes less than a third of the desktop program's features. That's a generous percentage.
iOS includes a little more than Android, but not much. Both are essentially book reader apps with unreliable note-taking and highlighting features. You can do some Bible study.
Logos includes many great language study tools, commentary searching, and much more.
Quick and Useful Updates
Logos updates their app often and usually with more stability than less. Accordance updates slowly, and the mobile seldom gets updates. Logos mobile on iOS went from version 30 to version to version 35 (all minor updates) in 8 months. That's a massive benefit if you use a feature that doesn't work. Logos will take your bug report and create a ticket, and their developers will work on it quickly. If they can fix it easily, it often gets fixed in a week or a month. Occasionally, it takes a little longer.
Accordance received only four updates on iOS in the last two years. All of them were minor bug fixes. As we said, you can't even get it on Google Play Store. The latest version (2.2.3) came out in Summer 2021. Not even one minor bug fix has come out since.
Significant updates on Logos for Desktop come out about once every two years. Accordance went from 13 to 14 two years ago. However, Logos aggressively updates their Desktop app with minor releases that add new features. They come out often monthly. Accordance for desktop doesn't update nearly as quickly.
The update to version 14 promised many great features. Two years later, we still do not see many of these, like an online version and syncing over the internet without needing Dropbox.
Best Online Bible App Bar None

We've looked at online Bible study apps in the past. We posted that here in 2020, and it needs an update. However, the best still comes from Logos.
The Logos Web App includes many features available in the Logos Bible Study App for your desktop or laptop. It's as good as or better than the mobile version.
The user-interface looks different on the web, but once you open your books and get to work it behaves much like the desktop. You have word study tools like the Exegetical Guide, reverse interlinear features, great searching features, and other guides (Bible Word Study, Sermon Starter, Passage Guide).
The Factbook offers a lot of the features from the Desktop as well.
Sadly, Accordance users don't have an online version. There's a promise that it will come soon, but I doubt it will. When it does, it won't likely offer more than basic book reading and searching tools. I hope I'm wrong, but I don't think so.
New AI Features in Logos Bible Software
I'm working on an article for ChurchTechToday.com regarding their new AI tools, and I'll link to it here.

The new features include Insights. Open a book, and you'll see a button on the book's toolbar labeled Insights. This button gives you cards showing information from Related books, Related passages, and Cross References.
A nice addition to the Search tool lets users search with natural language. Open Search and set it to Smart using the drop-down list button at the top right. Then, enter a natural language search. I entered "Where did Jesus first talk about discipleship?" and it returned hits from several spots in multiple translations since I had it set to search my Top Bibles.
The Synopsis tool in the resulting search will give you an overview of your search results.
I then switched my search to Downloaded Books, which yielded results for many book types. Again, the Synopsis tools summarized the results. You will see a number referencing the sources of the synopsis summary.
Those are just a few of the new AI-empowered features in Logos. I don't think Accordance has AI tools on its radar since it's still working to release the promised features from version 14. The company has a tiny programming team, so I understand why it's taking a long time, but I fear it will get left behind.

5 Amazing Desktop Gadgets to Improve Your Productivity

I recently bought a new desk for my home office, so I needed to improve my desktop setup. So, I found five amazing, cool desktop gadgets that made me more productive in my home office while doing digital Bible study or other ministry work. Here's my list below, with links to where I got them.
After you read about my favorite Desktop Gadgets, please comment below. What's your favorite Desktop Gadget? Either share an alternative to one of these or a new gadget I've not included.
HUANUO HNSS7 Monitor Mount Stand Desktop Gadget

I own a large 32-inch 4K monitor, and the stand that came with it takes up a lot of desk space. Mounting this monitor to the HUANUO HNSS7 Mount Stand freed up some desk space.
Below my monitor, I placed a stand for my iPad, which connects to my MacBook Pro for a third monitor. Thanks to Apple Continuity and Universal Control features, I can control the iPad with my desktop mouse and keyboard.

The stand connects to the back edge of my desk with a clamp. You can also put a hole through the desktop and mount it that way, but installing with the clamp takes less time and effort and works as well.
When I posted this roundup, the stand cost $90 with a 10% coupon, making it $81 with free Amazon Prime Shipping.
What I really like...
- Holds a large, heavy monitor up to 26 lbs.
- Easy installation with a strong clamp.
- It comes with a USB cable to connect to a monitor hub.
- The cable runs through the arm of the stand.
- With slight adjustments, the arm easily raises and lowers.
- The display can rotate 90 degrees.
Problems...
- Instructions are confusing.
- Adjustments aren't easy to make due to poor instructions causing many bad reviews on Amazon.
LG UltraGear QHD 32-inch Gaming Monitor
I love this monitor. It's designed with gamers in mind, but for under $500, it competes with high-end professional monitors with a 32-inch Nano IPS display, which offers superior color accuracy and a wider color gamut than conventional IPS monitors. This Nano IPS technology brings a more vivid and lifelike color representation to the screen, making it an excellent choice for writing with crisp text, color-accurate photo and video editing, and design work.

The refresh rate of 165Hz reduces the time it takes for the monitor to refresh new images, reducing eye strain while working for long editing sessions. A 1ms response time makes it adept at minimizing ghosting and providing a clearer, blur-free visual experience.
The stand's tilt/swivel/pivot/height adjustability provides maximum comfort for extended use. This makes it suitable for those long work sessions, allowing users to adjust the monitor to their most comfortable viewing angle.

What I really like...
- Excellent image quality and fast refresh rates.
- A large 32-inch screen makes it easy to read and see what you're working on.
- Adjustable tilt/swivel/pivot/height adjustments.
- Decent price for what you get.
- HDMI and DVI ports.
- Simple switching if you use more than one device with the monitor.
- Picture-in-picture and 2-in-1 feature with included software.
Problems...
- No built-in speakers.
- No USB-C in the USB hub.
- The on-screen control menu is annoying.
- Included control software is not good on a Mac.
You can get the LG UntraGear QHD 32-inch Gaming Monitor at Amazon for under $500.
ADEELIA 2-in-1 Foldable Magnetic Wireless Charging Stand

I wanted a cheaper charging dock for the road and found this gem for $36 as of May 2023. It charges an iPhone and AirPods at the same time wirelessly. However, it also claims to work with Samsung, LG, Google, Sony, and ONEPLUS phones. I only tested it with my iPhone 14 Pro Max, and it works great on the road and at home.

The will fold up for travel. I put it in my computer bag and folded it up. It takes up very little space. It charges with a USB cable. I have a ton of those and didn't use the included USB A to C cable.
When you fold it up, lay the charger flat or set it up so that it holds your phone up at multiple angles in both portrait and landscape.
You can get the Adeelia 2-in-1 Foldable Magnetic Wireless Charging Stand at Amazon for $35.99. There's a $5 coupon right now, so hit the link above and pick one up for your desktop or mobile kit bag.
What I really like...
- Works with MagSafe and other magnetic charging devices like Android phones.
- Charge in portrait or landscape mode.
- Versatile charging modes with foldable design.
Problems...
- Moving from mode to mode by rotating the two charging pads is stiff.
Focusrite Scarlett Solo 3rd Gen USB Audio Interface Desktop Gadget for Sound
Most people use their computer's audio interface to play music, video, or edit. You may also have a mic built into the computer. However, you can get better-sounding audio with the Focusrite Scarlett Solo 3rd Gen USB Audio Interface.

They advertise it as "professional audio" but I wouldn't go that far. However, for only $100, it sounds really good if you pair them with great speakers and a quality mic.
The company makes a bunch of these USB Audio Interfaces, but for one person, the Solo works best. It connects to my Mac via USB-C. On the back, you get two quarter-inch jacks to plug into a left and a right speaker. On the front, it has an XLR mic input, a quarter-inch input (for an instrument typically), and a quarter-inch output for headphones. The large volume knob controls the audio, not your computer.
The 48V button lets users switch between a 48-volt phantom power mic interface or non-phantom power. Check your mic to see if it needs the power. Another button labeled INST turns the front quarter-inch jack into an instrument interface. Otherwise, you can use a line-level input like a keyboard or external audio mixer via the quarter-inch jack.
Each front input has its own gain knob to get the right sound levels.
The device also comes with some excellent software bundled. Ableton Live, a 3-month subscription to Avid Pro Tools, a 3-month subscription to Splice Sounds library, and more.
Amazon sells the Focusrite Scarlett 3rd Gen USB Audio Interface for $99.99 as of the date of this post.
What I really like...
- The simple interface.
- A physical volume control ready to turn it up or all the way down without fumbling in software.
- Excellent sound outputs for two monitor speakers.
- USB-C.
- Small.
- The clipping indicator on each front input with colors indicates that you're getting close to clipping (orange).
Problems...
- The sound going to the computer can be low.
- If you need to control the audio input from software, you can't on a Mac.
Desktop Gadgets I Use With the Scarlett
I use the following accessories with my Scarlett Solo:
- WORLDS BEST CABLES Quad Balanced XLR - $27
- Hosa HSS-001.5 REAN Balanced Quarter-inch Cables - $7
- PreSonus Eris E3.5-3.5-inch Near Field Studio Monitor Pair - $99
- Shure SM58 Cardioid Dynamic Mic - $99

The Shure SM58 mics and the PreSonus speakers are excellent! They sound professional and don't break the bank. I have had no problems whatsoever.
Bose QuietComfort 45 Bluetooth Headphones
The Bose QuietComfort 45 Bluetooth Headphones sound great and feel comfortable. You can probably find better headphones on Amazon, but not for the under $300 price point.

Do you hate Bluetooth headphones? Great! You can use the Bose QC45s with a wired connection too. In fact, I've connected mine to the Focusrite Solo 3rd Gen USB Audio Interface above with a 3.5mm to quarter-inch conversion cable, and they sound better than over Bluetooth.

I like the convenience of Bluetooth. When I'm listening to music, watching a movie, or editing audio/video, I prefer connecting these headphones. They fit well on my big ears, and I can wear them for a long time before taking a break.
The headphones offer noise-canceling sound. You can switch from canceling to aware mode to hear your environment if needed.
Connect to more than one source and listen over Bluetooth for hours. Bose advertises 22 hours, and I can't dispute that because I've never worn out the battery before charging them.
Get them right now for $279 on Amazon.
What I really like...
- Great sound quality.
- Versatile with Bluetooth connection to 2 devices or a wired connection.
- Long battery life.
- Nice carrying case with all the cables you need.
Problems...
- I can't think of any.
Note all links above to the product purchase pages are affiliate links.

What's new in Accordance 14?
What's new in Accordance 14 Bible software. We go over what those new features are and how to use them with video.
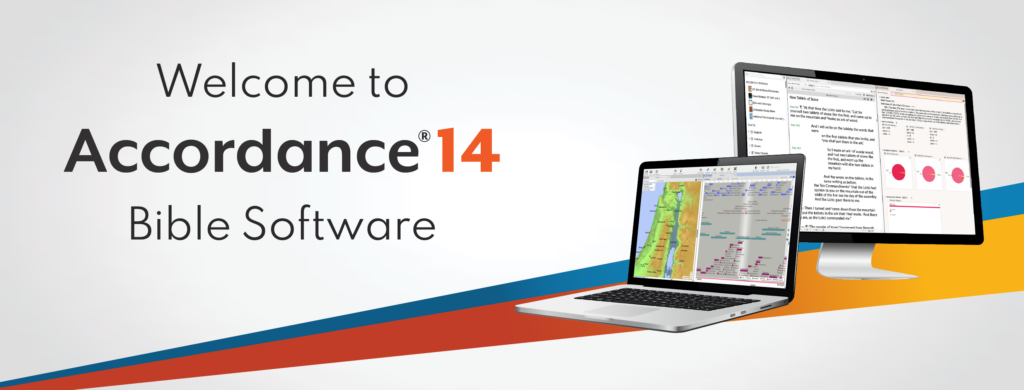
The Accordance 14 update came out with interesting new features and a troubling lack of quality control. Even though Accordance 14 came to users' computers last fall, I held off writing this until it became stable. While it's still not great, it's better on Mac, so let's look at what's new in Accordance 14 Bible software. Check out the sections below for each major new feature and the video demonstrating the Accordance 14 update on macOS. It looks and works the same on Windows with minor exceptions.
Below you can watch the demo video made by Accordance.
Open Accordance 14 Dynamic Word Study
Accordance 14 adds a new word study tool that you can use to study English, Greek, or Hebrew words. Bible students can understand the word and learn how to teach, preach, or apply it personally.
The most used way of opening these word studies comes from the context menu. Select a word in your Bible and right-click on it. Then look for the Research section of the right-click menu. Under that, you'll see Word Study. Select it to show the fly-out menu. You'll see options for Word or Key Number.

Each option shows content about the Word you're studying. Choose Word, and it will search the English term. Choose Key Number, and it will search using Hebrew or Greek Key Numbers as the foundation. A Word-based Word Study shows details about that word, like...
- Word Count - how many times it shows up in the Bible.
- Definition - shows the word in your highest-ranked dictionary.
- Text Compare - shows the difference between translations in English.
- Visual Details - pie or bar graphs on what Hebrew or Greek words were translated into English words.
- Dictionaries - shows your top five Bible dictionaries for that word.
The choice opens a new window with a Word Study tab open

Users open an Accordance 14 Word Study using the File menu. Click on File and New Tab. Then look for the Research section. Under it, you'll see Word Study with a fly-out menu offering three options for English, Greek, or Hebrew word studies. Choose one by clicking it. This opens a new tab ready to perform word studies based on the open Bible.

If you haven't opened a Bible yet, Accordance 14 will connect the new tab to your top-ranked Bible with language study tagging. You can also open the new tab using the New Tab button on your toolbar. Find the Research section, and click Word Study just below the section title. Choose one of the three language options to open a new Word Study tab.
How to Use Accordance 14 Dynamic Word Study
With the Word Study tab open, type in a word. You can type English words, and the results showing up after you hit enter come from that word in the translation selected in the drop-down menu in the upper left of the Word Study Tab.
Change your translation by clicking on the drop-down and selecting a new translation. This changes the results in the tab.
You'll see a few sections in this tab based on what kind of word you searched for. For example, an English search gives you...
- Word Info - content from your top English Bible dictionary.
- Text Compare - shows a list of the instances of your English word in the top translation. Click the plus icon to add other translations based on your text ranking in the Library.
- Word Graphs - includes Pie, Bar, and Frequency Graphs based on usage in your top Text. Add texts to see more graphs.
- Dictionaries - a list of your Bible dictionaries with that word in them.
Custom Phrasing
With the new Custom Phrasing feature, users can create diagrams of the text to show the text in a visual way. This shows the relationship between parts of the text to other parts.

Go into a Bible text in any language and use the setting drop-down box in the upper right corner of the pane.

Select Phrasing, and a new menu flies out to the right. The options include...
- Phrasing Break [Shift + Enter] adds a new line to a verse so you can show a phrase below another in a single verse.
- Phrasing Indent [Shift+Tab]moves the margin on the left of English texts over one tab at a time to place that phrase below a specific word above it.
- Phrasing Delete [Shift+Backspace] removes the tabs created with Phrasing Indent or Break.
- Hide Phrasing [No KB Shortcut] temporarily returns the look to the prior state. After doing this, go to the menu and click on Show Phrasing to bring it back.
- Lock Phrasing [No KB Shortcut] keeps the changes in place.
Why would a user want to create Custom Phrasing? This shows how various parts of the text relate to other parts of an idea. I use them to show things like major ideas and subpoints. You can also create visual lists in a text, like Galatians 5:22-23 which tells us about the "fruit of the Spirit."
Learn the keyboard shortcuts listed above to create these diagrams. It will speed up creating these Custom Phrasing outlines.
Easy Answers

Some books include things like questions with space to answer. In paper form, users could write in the space provided. Think about a workbook for your Hebrew class in Bible college or seminary class.
Digital versions of these books may still show discussion questions at the end of a section or in a workbook, but they're not easy to work with. You can add notes. But now Easy Answers helps for books that take advantage of the feature.

Easy Answers promises to make this possible in Accordance 14. You'll have to own a book that supports the feature. So look for this in future updates to books. I don't own any I know of, so I can't recommend or show you this feature. You'll have to search your library or the Accordance store for books with Easy Answers support. I know that Christian Worker's Commentary has this feature. See the screenshot above.
I will warn you that this feature is buggy on Mac. I experienced a few crashes while using it. It seems that when you open a Bible by clicking a link in the commentary, that it crashes once you click in the text box to add your answer.
Accordance 14 Offers New Citation Formats
Accordance added a few new official citation formats. You could always use Turabian, SBL, and Simple citations. But now you can use APA, Chicago Manual of Style, and MLA.

To change the default format, go into your preferences or settings. On a Mac, use the Accordance menu in the upper left of the menu bar. Then choose Preferences. You can also use the keyboard shortcut COMMAND + , (the Command key and the comma).

The above sets the default form of citation. Select something you want to copy with your preferred citation format. Right-click the selection and choose Copy As in the pop-up menu. Then choose Citation in the new flout menu. You could also use the keyboard shortcut COMMAND + CONTROL + C on a Mac.

Unicode Text in User-Created Tools
Tools created by the user can now use Unicode Text. Why is this important? Users creating tools in languages like Asian or other non-Latin languages.
Quick-Click Verse Picker - AKA Book/Chapter/Verse Chooser

Click on the new Quick-Click Verse Picker tool in the upper left corner of the Bible window in Accordance 14. Then a drop-down shows up with abbreviated Bible book names. Pick your book, then the chapter, and the verse. It opens the Bible to that reference. See the above animated GIF.
User Created Dictionaries & Commentaries

Accordance 14 offers new options for user-created tools. As a result, you can now create custom dictionaries, lexicons, and commentaries.

To create these, open the File menu, choose User Files, and then New User Tool.... Creating these tools is similar to creating General tools in previous versions.
Recommendations on Buying and Using Accordance 14
Should you go and upgrade to Accordance 14? Because it's not that expensive, I'd recommend you do so. At this point, version 14 has a lot of bugs that the company needs to fix. The Windows version has many more than the Mac version. Also, the iOS and Android verses are woefully behind the competition. If you buy the upgrade, you might want to keep 13 around by entering your Applications folder in macOS and renaming Accordance to Accordance 13. Then you can install Accordance 14. Look at our post on downgrading from 14 if you already installed it.

Logos 10 Mobile App: What's New?
Here are the top new features of the Logos 10 Mobile app with a demo video and instructions on how to use them.
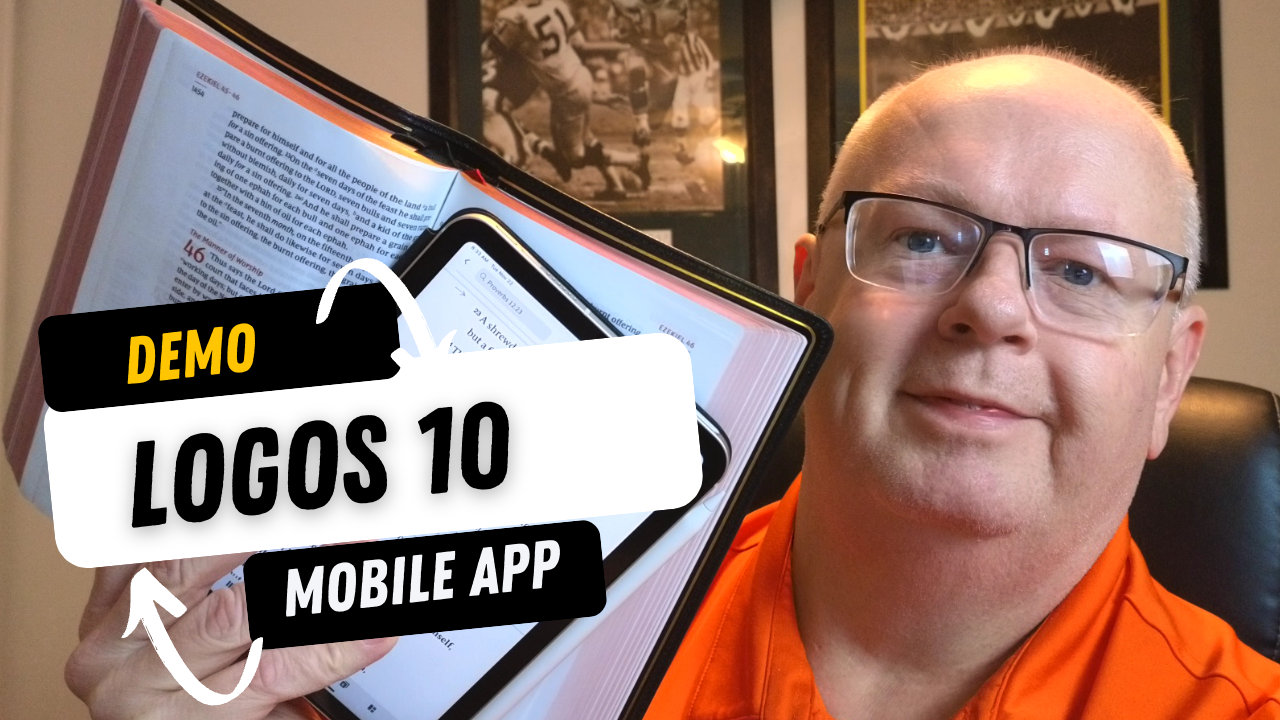
Faithlife, the makers of Logos Bible Software, updated their suite of Bible study apps and desktop/laptop programs, releasing Logos 10 Mobile for iPad, iPhone, and Android. Most new features work best on the iPad, but many also work on iPhone and Android. We've got a demo of all the most significant upgrades with instructions on how to use these new features.
Logos 10 Mobile App Adds New Selection Menu
When you want to select a verse or some text to highlight it, add a note, or look up information, the Logos 10 Mobile App improves the selection menu.


If you tap on a verse, a popup menu shows up with a few things in it. Depending on your selection, you'll see highlighters, buttons to interact with the verse, some information from your user notes, the Factbook, or other content. This works in non Bibles too.
The highlights come from the most recent first and then the top highlights in your highlighters tool.
The buttons that you can use to interact with a Bible verse include the following:
- Copy the verse
- Share the passage
- Add a Note
- Search
- Compare in multiple translations
- Perform a Passage Guide on the passage
- Perform an Exegetical Guide on the passage
- Mark the passage as a Favorite
- Translate the text using the new Logos 10 Translation tool
- Clip the selected content
- Create a Visual Copy, which makes the selection into an image to share on social media, save, or use in your presentation.
Below the buttons, you will see cards for items found in the selected text. These take you to the Factbook or Bible dictionaries. It might show an entry from a Lexicon. What it shows depends on what it finds in the selected text.

Slide left or right on the cards to see more of them. Use the menu button in the upper right corner of each card (it looks like three vertical dots) to do more with the content in the cards.

Press and hold on a single word and bring up a different kind of menu that shows info about that one word. You'll see Word Info that comes from tags on the word. For example, it will show an entry from your top Greek or Hebrew lexicon. You can open it by tapping on the More button.
You'll also see an entry from an English dictionary or Bible dictionary.
Print Library Tool
Now in Logos 10 you can search your Print Library. However, you'll have to first add books to the Print Library using the Logos 10 Mobile App.

Tap on the More button, which looks like three horizontal lines in the lower right corner of the screen. If it's not showing up, tap on the book's title that's open on the screen. In the top Library section of the menu, tap on the Print Library ISBN Scanner entry. This opens the camera. You might have to give the app permission first.

You can only add books to the Print Library if Logos also has the book in its digital library store. That's because they have to have the text of the book in their library to search for text in the book. Any book that you have with an ISBN bar code or QR code will work.
Now, when you search for words or phrases, they will return entries in the Print Library. You can't read the whole book in Logos, but the Logos 10 Mobile App will tell you where you can find it in your print copy of the book.
Read Aloud in Logos 10 Mobile App

If you like audiobooks, then you'll love the improvements to the Read Aloud feature in the Logos 10 Mobile app. It's easy to find in the open book's top toolbar. It looks like a sound icon. Tap it, and it brings up the reading feature at the bottom of the screen.
In the Read Aloud feature, listeners can pause and play the audio. They can also skip back a verse or a whole book of the Bible. Skip forward a verse or a book too. There's a speed option to read the book or Bible faster. I like to listen at 1.5 times to many books.
If the book comes with an audiobook version, a download button appears next to the X in the Read Aloud feature box.

Most phones let users add different voices to read books that don't come with an audiobook version. Open your phone's Settings app. In iOS, go to Accessibility and then tap on Spoken Content. That opens the screen where you can choose Voices to select your voice.
iOS lists voices by language first and then name. I tapped on English at the top and chose Samantha. The phone gives the user two options. One is regular Samantha and the other reads "enhanced". I picked the enhanced version and downloaded her voice.
Go back to Logos, choose a book that doesn't already have an audiobook associated with it, and follow the instructions at the beginning of this section to listen to the book using the iOS voice we chose in settings.

The Android version of the Logos 10 Mobile App plays audio almost identically, except for changing the voices.
Sermon Manager Update
The update to the Sermon Manager in the Logos 10 Mobile App allows users to edit and read sermons created, either in the app or on the desktop. Open the Sermon Manager from the More button, which looks like three horizontal lines stacked on top of each other in the lower right corner of the toolbar.

You'll find the Sermon Manager in the Tools section of the menu. Tap on it to open it.
You will see all the important features of the Sermon Manager on your iPad. This only works on iPad.
You can also open the Sermon Manager from the tabs button. Hit a plus button to open from the Tools section of the new tab feature.
Canvas Tool on iPad

A canvas shows information in a visual way. The iPad and desktop app tools include many drawing tools, diagramming tools, and text formatting. Add images, icons, and shapes. Do this all to show information in a visual way for presentations or documents. You could create them for your own benefit.


To open or create a Canvas, go to the More button (three horizontal lines in the lower right) and tap on it. Head to the Documents section. Tap on the Canvas item, and you'll see a list of any Canvases already in your library. Tap one to open it. Work with the canvas, and then you can work with the Canvas.
You can also create a new one from the Tabs screen. Tap the plus icon and go to the Documents tab (right button on the Tabs toolbar). Now tap on the plus icon at the top of the box, which shows a list of the kinds of documents you can add. Tap on Canvas to make a new one.
The Canvas feature is available only on iPad, and only in Bronze packages, and above.
Draw On Screen Feature on iPad
Teaching using Logos as a visual aid got easier with the update to Logos 10 Mobile thanks to my favorite new feature, the Draw On Screen feature on the iPad only. You can now draw on your screen and save that as a screenshot in notes or share it elsewhere.


Open the More button (three horizontal lines in the lower right) and choose Draw On Screen from the Tools section. This brings up the Apple annotation feature, which lets you draw using your Apple Pencil, a third-party stylus, or your fingers.
Drawings can use a pen, highlighter, pencil, eraser, selection tool, and ruler to make straight lines.
When you're finished drawing on the screen, share the drawing or exit without saving it. You can share the image in a few ways.
- Copy Image - copy it for pasting in a document or note.
- Save to Photos - save it in the iOS Photos app.
- Save as Note - saves the drawing as an unattached note, which you can then manually attach to a verse or paragraph.
- Share - use the iOS Share Sheet feature to send it to a Facebook post, a file on the iPad, Instagram, or other services you use.
Enhanced Panel Linking
You've been able to link books before so that your commentary would move along with your Bible as you swiped to advance to the next passage. Now, you can tweak these settings a little so that the Bible drives the link relationship.

Open a book and then slip the screen into at least two books. When you do, a new book will fill the second half. Then, if you like, then add other books. You'll see a box with the word None in it and a pair of linked chain links. Tap it to bring up the Enhanced Panel Linking feature. Tap the A to link to the other book. Then tap on Follow Only so that this book won't make the other book move, but the other book will move this one.
For example, I have the NASB and Faithlife Study Bible open above. If I choose Follow Only, then as I swipe up and down on the NASB or left and right in widescreen mode, the FSB will follow it so that the verse in the Bible matches the verse in the study Bible. However, if I choose Set all panels to match, then any book will force the others to follow it. Moving to a new chapter in the FSB will move to that channel in all linked Bibles.
You can also set this from the main book menu in the upper right corner of each book panel, which looks like three vertically stacked dots.
New Logos 10 Mobile App User Interface with More Tiles
The user interface on Logos 10 Mobile gets a much-needed feature update. You can now open as many as six books on your iPad. However, this doesn't work on the phone since it would be impractical to open that many on a small screen.


To open a layout with more tiles, tap on the Layouts icon in the bottom toolbar on the right. You'll see a little popup with options for...
- 1 book
- 2 books side-by-side
- 2 books, top and bottom
- 3 books with one on the left and two splitting the right side column
- 3 books with one on the right and two splitting the left side column
- 3 books arranged in verbal columns
- 4 books splitting the screen into four equal quadrants
- 4 books with 2 each in the vertical columns on the left and middle and two splitting the third column
To add two more books, open the layout in the top right of the popup. Then, from the toolbar at the top, tap on the 3 dots which opens the options menu. Choose Split this tile.
Deal on New Logos Books
If you want to get the new Logos 10 upgrade, then head over to my affiliate page to get a nice discount on Logos and some free books. This way you can use the Logos 10 Mobile app
6 Fun Cameras to Take Your Church Media Up a Notch
These 6 fun cameras will take your church media to the next level. Check out the cameras and have fun shooting creative images.

I love cameras, which help me promote my church and communicate with people. Most church media people or pastors take photos and videos with a phone like the new Apple iPhone 14 or the new Samsung Z Fold 4. Others have a DSLR or a mirrorless camera. Many people use a point-and-shoot they bought for $100-$200. But you can create more creative and fun images with these 6 fun cameras that can take your church media up a notch.
6 Fun Cameras and Their Uses in Church Media
What can you do with these cameras?
- Create social media posts that grab attention for your Facebook, Instagram, Twitter, TikTok or more.
- Add fun images of your church activities to the above sites or post them to your own website to drive people there more regularly.
- Share what groups and ministries in your church do to serve others and fellowship together, like Youth outings, Senior adult events, special programs by the children, or others.
- Create art for your church building walls.
- Add attractive images to your worship presentations for backgrounds, lyrics, Bible verses, announcements, or attention-grabbing loops before and after services.
- Illustrate ideas in your worship service, especially the sermon.
- Don't forget videos, like welcome videos or announcements.
However you use your camera, consider moving beyond the smartphone to something that makes more creative images.
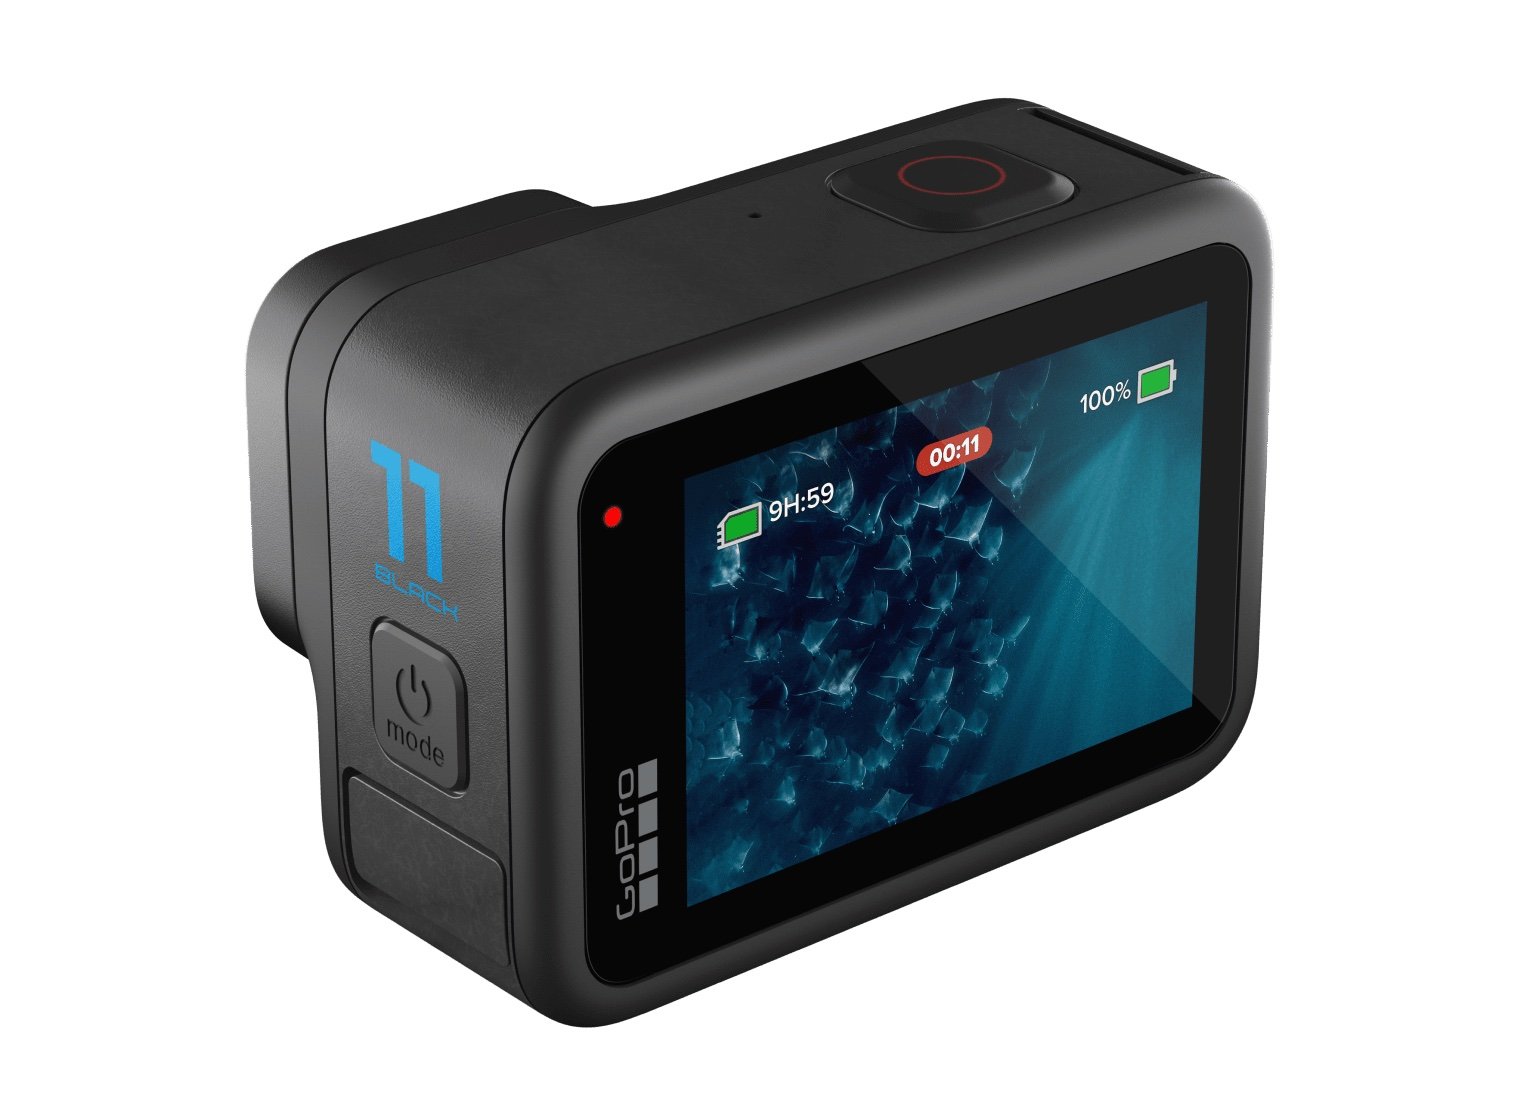
GoPro Hero 11 or Earlier

The GoPro created the "action camera" or at least popularized it. Most people think of them as tools for extreme sports. You can use it for that. If your youth or young adults go skiing, bring a GoPro to take some fantastic shots to show off the following week at church. You can also put them on the youth page of your website or social media. Save the shots or videos to promote the trip next year.

GoPro just released the GoPro Hero 11, and I upgraded my Hero 10. I probably shouldn't have, but I love having the latest and greatest. It costs $349.99 with a one-year subscription to their cloud backup service. If you buy from other stores, it will cost $100 more. The best deal costs $50 more with 2 extra batteries, a charger that charges up 3 batteries, a nice selfie stick that floats in water, plus a 32GB micro-SD card.
You absolutely should get one accessory for your GoPro. It's the GoPro Volta, a battery and tripod in one. It costs $129.99. Put the GoPro on the tripod and then plug in the cable to extend your GoPro battery. GoPros are notorious for short battery life, so an external battery like this will help.

DJI Osmo Action 3
I love DJI cameras. The DJI Osmo Action 3 is the competitor to the GoPro above. I post it here because it doesn't cost as much and has a few cool features you don't get on the GoPro. First, the price makes it worth a look. For the same price as a GoPro Hero 11, you'll get the DJI Osmo Action 3 plus some great accessories, like a magnetic connector that you can then snap to an excellent mount for your helmet, to a mount for your car, on a selfie stick, and more. It starts at $329, but the great combo packages run up to $439.


I did a nice slow-motion video of the leaves falling from a treat in my front yard. You could create a looping background out of a video like this for lyrics, or other fall uses in worship. It could also illustrate a sermon idea like a dying spirit that looks healthy but eventually becomes cold and worthless in the kingdom due to no connection with the tree, which is the church.
Which camera would I buy? I'd probably go with the GoPro Hero 11. The Osmo Action 3 produces slightly soft video; some even say their camera shoots blurry videos. Mine is not as bad, but it's not as sharp as I'd like.
Drone Cameras Like the DJI Mini 3 Pro

Did I say I love DJI? The DJI Mini 3 Pro drone can help you get some fantastic shots of your church property, activities, or general scenery. Use the images or video as slide backgrounds or foreground images to illustrate ideas. I shot the above photo using the bracketing feature on the Mini 3 Pro. It takes 3 or 5 images that are exposed differently so that they are...
- 2 stops darker
- 1 stop darker
- the main exposure
- 1 stop brighter
- 2 stops brighter
If you chose 3 images, you get the primary exposure plus one brighter and one darker.


I took the five shots and put them in a program called Luminar Neo which automatically combines them so that areas where you might see no detail because it's too bright or too dark, now shows plenty of detail. Tweak the photo to get better overall exposure, detail, and color. Then export it and add the words in a program like Photoshop, Affinity Photo, or Canva.

You can do a lot with a drone. Take photos of activities from above. Don't forget you can use it for close-up shots too. It makes an excellent tripod for large groups.
I recommend the DJI Mini 3 Pro because it's a fantastic starter drone. It's small, which makes it easy to take with you. It also weighs less than 250 grams, which makes it easier to use because larger drones come with additional FAA regulations.
DJI Osmo Pocket 2
Another DJI camera? Yes, because they are crushing it with creativity. The DJI Osmo Pocket 2 is a tiny gimbal camera that fits in your pocket and stays with you all the time. You can also mount it on a tripod or use other cool connections, but it shines as a handheld camera.
I had the first version, and it was pretty good. The 2 improves image quality and stability for $349. You can get it in white or black. There's a bundle with some great accessories for $499.
The video and images look good. For such a small camera, you'll get great quality.
Having the camera with you always means you don't have to worry about carrying around a big camera, and you'll get more stable shots than most phones.
You can connect it to your phone, giving you a larger image of what the camera's shooting. Or you can use it standalone, which is how I used the previous version most of the time.
Insta360 Go 2
The Insta360 Go 2 gives users a unique way of shooting 1st-person photos and videos by placing the camera on their chest, a hat, or on their head. You can put it in other places depending on your creativity.
The camera comes with some excellent stabilization, so it looks stable while you're running or walking around as you wear the camera. The case charges the camera and holds it to give you an instant tripod. It's so tiny, and you can carry it everywhere.


You'll get some decent-quality images that you can frame using the app on your phone. Also, the images look pretty good.
The camera costs $300 for a 32GB model, but I'd get the 64GB version at $329.
Insta360 One RS 1-Inch Edition or Insta360 X3
360-degree cameras shoot two photos or videos with two lenses on opposite sides of the camera. The software in the camera stitches the two images together to create a 360-degree photo or video.

I love 360-degree tiny planet photos. They're fun and show the scene in a unique way that you can't get with a traditional or phone camera. These images get attention on social media.
The two cameras I recommend come from the same company. Inste360 makes both of these cameras and the Go 2 mentioned above. They started making consumer-grade 360-degree cameras a decade ago. They weren't great, but today the Insta360 One RS 1-inch Edition shoots professional-quality images. You can do the fun photos above or shoot videos of events.
Our church held its Trunk-or-Treat event on Halloween night to give families an alternative to worldly events. There were people everywhere. Shooting with a traditional camera means you might miss what's behind you or beside you. With a 360-degree camera, you can shoot it all at once time and then choose later what to focus on by editing in the app on a phone or tablet or on a piece of software on your computer. The video above was shot using the Insta360 One RS 1-inch Edition.
What's the difference between the Insta360 One X3 and the Insta360 One RS 1-inch Edition? The X3 costs half as much at $450. It has a larger display, so you can better see the settings and the image. The One RS 1-inch has a modular design and better quality lenses for $800. I own the more expensive version and love it. But I do wish mine had a larger display.
Both cameras connect to an app on your phone. The app lets you set the shooting settings, edit the video or photos, and updates the camera. You can also live stream on Facebook or YouTube.
Which of These 6 Fun Cameras Should You Buy?
So which camera should you get? First, if you don't have anything but a phone, then grab the GoPro Hero 11. The DJI Osmo Action 3 will cost less, so it's an excellent second choice.
People looking for the most unique and attention-grabbing shots or videos look at a 360 camera. I'd start with the Insta360 E3. It's cheaper than the RS 1-inch Edition and works great. However, people who want higher-quality images should pay extra for the RS.
A drone is also a fantastic tool. The DJI Mini 3 Pro is the best first drone you can buy right now. However, I also own the DJI Air 2S. It's bigger and holds up better in the wind. If you plan to shoot near the ocean or up in higher altitude, you might want to consider it instead.

Logos 10: What's New and How to Get a Discount?
What's new in Logos 10 Bible software? Read about each new feature and watch my video demo.

That's right; Logos 10 shipped on 10-10-2022. Despite the marketing department at Logos taking advantage of the date and version number, this was a big upgrade. It marks the 30th anniversary of Logos first hitting the Bible software world. They weren't the first, but they indeed have outlasted most.
Users get some interesting new features with the latest version of Logos 10. I want to highlight what's new in Logos 10 on the desktop or laptop version, the mobile version, and the web app.
Many of the features listed below only come in advanced packages, like the Gold or Bronze. You can buy a package using my affiliate link. This gets you either 15% or 30% off the price plus five free books. I'll get a cut of the sale as well.
Logos 10 User Interface Changes

Users of Logos 10 will notice the new user interface immediately. The software displays the toolbar on the left instead of the top of the window. Users can change this, but it might conserve screen space if you use the program on a wide 16:9 screen aspect ratio.
I won't keep the toolbar on the left because I like to display the button label text to remind me of what each one does. You can show the labels on the left, but that takes up too much screen space. Without labels, people who can remember what each button does can collapse the toolbar. Here's how to change the position and collapse or expand the toolbar.
How to Move the New Logos 10 Toolbar Between Top or Left

Open your Program Settings. You can do that from the menu. On a Mac, click on Logos in the upper left corner and then choose Program Settings. The Logos menu in the upper left doesn't appear on Windows, only on Mac. The second item in the settings list will change position. Click the drop-down arrow to choose Top or Left.

Optionally, in the lower left, there's a menu button with three vertical dots. Click it, choose Program Settings, and then choose the drop-down arrow to select Top of Left.

Millions of New Factbook Tags
A new visual filter in Logos 10 shows users millions of new tags from the Factbook. The Logos 10 Factbook, like the one in previous versions, serves as an information treasure trove to help Bible students understand what their reading and studying in God's word.

With Logos 10, these tags appear as an underlined word with information about that term in the Factbook. You might find things like...
- Greek and Hebrew Lemmas - open them to study the original languages for that word in English or another language.
- Information about People, Places, and Things.
- Terms with theological significance like Propitiation or the word Conform from Romans 12.
Logos described these underlined terms like the Kindle X-Ray feature that shows definitions of words in your Kindle digital books.
How to Turn On or Off Factbook Tags in Logos 10
See my post about How to Get the Most Out of the Factbook in Logos

Factbook tags are like Visual Filters, but you don't turn them on or off from the Visual Filters menu. Instead, the Factbook gets its own button in a Bible or book window. It looks like a book with a checkmark and a drop-down arrow next to it. Click the arrow to open the menu and select which tags you want to turn off or on.

Not everyone will get these new Factbook tags. First, if you upgrade and buy a Started collection, you'll get the People tags. The bronze level will add Theological terms and Greek words. You'll need to buy Silver to add Hebrew and Aramaic.
Everyone must have their computer connected to the Internet to use the new Factbook tags. If you're not connected, then they won't work. Logos 10 still works, but the tag underlines don't show up.
Church History Themes
Another Factbook improvement comes from a dataset and resource that shows Church History Themes.

To find them open the Factbook from the toolbar. You'll see the three horizontal lines often called the Hamburger menu button. Click on the Dropdown box and find Church History Theme from the list.

You can also find it in the Advanced Timeline (see more below about the Advanced Timeline). Open the Timeline and click on the Hamburger menu (three horizontal lines). Find the Event Type section and then click on Church History Theme.
The information comes from two resources - the Essential Lexham Dictionary of Church History and the Church History Themes dataset. Open them from the Library and read or search for them from there.
Simpler Search Terms
To search in older versions of Logos, users had to know some complex boolean search terms to get advanced searches. With Logos 10, you get simpler search terms.

Logos gave the following example of one more straightforward search you can now perform in Logos 10 but could not in version 9 or earlier. If you wanted to find out where in the Bible Jesus mentioned Moses, you'd type in a search box the following:
<Person Moses> WITHING (Speaker <Person Jesus>) and hit enter.
Now, just type:
person:Moses IN speaker:Jesus
That's much easier to remember and to type.
Logos will auto-complete suggested search terms to help you. You may not even need to remember the search terms to search your Bible.
Another simpler search lets you do a Search All, and Logos 10 will find results in all your datasets without you even knowing the dataset exists.
Bring Your Print Library Into Logos 10
You can add your print books to Logos 10 without buying digital copies. This also works with Kindle books too. When you add such books to Logos using the camera on your iPhone and the ISBN code on a print book, the book shows up in the Logos 10 Library. When you search for something and find it in the books added, it shows them in your list of returned search results. You can find it by page number, open that book from your bookshelf, and turn to that page.
To import a print book into your Logos 10 Library, open the app and then tap on the menu button in the lower right corner. Next, tap on Print Library ISBN Scanner. Finally, scan the ISBN code on the back of the book.

2. Tap on Print Library ISBN Scanner.
3. Scan the ISBN code on the back of the book.
The feature comes with a few caveats.
- This only works with books in the Logos catalog of books. If they don't already have the digital text of a book, it won't work.
- You must spend time and effort adding your books one at a time.
- The search results only show a snippet of the content from the book. You'll have to read the book in the print edition.
- Only people who buy the Gold package will get access to the feature.
Searching the Print Library
The new books in your print library will appear in general searches, but you can't open those books. Instead, Logos tells you where to find the content in your print book by page number. You'll open the physical copy of the book and find the content.

However, if you want to search your print library books, you can use the Library window. Open a Library window and look for the Print Library item on the left-hand side of the Library window. Find the book you want to search, right-click, and choose Search this resource.

If you want to search the entire library, follow the above steps, but instead of right-clicking first, select all the books in the Print Library. Do this using the keyboard shortcut CTR+A on Windows or CMD+A on Mac.
After selecting all the books, you can right-click one of the selected books and choose Search these resources. This opens the Search panel. Type in your search phrase or word to find items in the book.

You will see results in the Search window. Find the Print Books section as seen above. Look at the results and find the entry in the book. Grab your book and open it to the page listed or the section listed. Not all books will show page numbers.
Import Multiple Sermons into the Sermon Manager in Logos 10
Logos 10 now supports importing a collection of sermons into the sermon manager. After you add them, you will get tags added for Scripture references in the text of the Word document.
The Sermon Manager import only supports Microsoft Word's DOCX format. Only buyers of the Gold package or higher in Logos 10 will get access to the tool. If you want to upgrade, use this link to get 5 free books and a discount.

Access the import tool by opening the Tools button from the toolbar (9 dots on it) and either click on Sermon Manager or type it in the search box to find it quickly. The Sermon Manager will open. Click on the menu button (three vertical dots) in the upper right corner of the Sermon Manager. Choose Import and then click on the Choose Files button in the lower part of the Import dialog box. Navigate to the folder that holds the sermons you want to import. You can select multiple files with the CTRL+A or CMD+A.

How to Find Imported Sermons
To find your sermons open the Sermon Manager in a separate full-screen window and choose the Date you preached the sermon. This makes working with the Sermon Manager easier, especially if you're using a small screen.
I had to open the Grid view and select All from the top of the window. I opened one of my sermons, and it the formatting I used didn't work with the Import very well. If you use the built-in Microsoft Word Headings, then it will work better for you.
Now you will want to clean up your imported sermons. Edit them to use things like Headings, the information pane that opens on the right side, and the slides. If you make slides from your sermon, then you can export them to programs like PowerPoint, Keynote, Faithlife Proclaim, or PDF documents.
Popular Quotes in Sermon Builder
The Sermon Builder gets an added feature called Popular Quotes. Preachers search for quotes to add to their sermons inside the Sermon Builder.

Open a new Sermon using the Sermon Builder from the Tools button (grid with 9 dots on the toolbar). Create a sermon and then choose the Popular Quotes button on the right when you want to add a quote. The button looks like a quotation mark.

A list of quotes will appear. Drag and drop any quote you want to add to your sermon from the right-hand column to the Sermon Builder. The Sermon Builder will add the default slide. Change it by clicking on the slide thumbnail. You'll see a menu appear. The list of options includes...
- Edit - change the look of the slide.
- Apply this style to quote slides - change all quotation slides to match this.
- Apply this style to all slides - change all slides in general to match this slide.
- Delete - delete this slide.
Advanced Timeline
The new Advanced Timeline shows historical events in the context of the era in which that event occurred. The timeline offers this in a visual way. Users can filter events to focus on what they're most interested in seeing.

To open the Advanced Timeline, click on the Tools button on the toolbar. It looks like a grid of 9 dots. Either type Advanced Timeline or scroll down to the Reference section on the Tools menu and click Advanced Timeline.
This feature only works on Bronze packages or above. You can buy the Bronze package at this link and get a discount plus 5 free books.

Interact with the Advanced Timeline using the sidebar or the toolbar. The toolbar at the top has the following...
- Button to open the sidebar, which lets you select the kinds of content you want to hide or show.
- A time range box where you enter years like 20-100 AD.
- Search box where you type what you're looking for.
- Zoom in, fit, and zoom out buttons.
- View the dropdown menu to limit by things like Bible & Church Eras or Western History Eras
- Info button
- Menu (three vertical dots)
Speed Improvements
Logos 10 boasts faster performance, especially for users of Silicon Macs that use M1 or M2 branding. These are modern processors that run more efficiently than Intel chips. They claim a 35% speed boost, especially while indexing your library. I can attest to this improvement. It used to take hours to index my library with 8,000+ resources. It now does it in around an hour.

The computer still chugs along while the program indexes the library. However, Logos 10 takes far less time to index on my M1 MacBook Pro, M1 Mac mini, and M2 MacBook Air.
For Windows users, you'll see a small speed boost. It comes thanks to something called .NET 6.
Auto Translation
![]()
In almost any book, open a side panel on the right that shows a translation of the book's text. To use it, open a book. Click on the Sidebar button in the upper right corner. A new window opens with the default language. You can use the language dropdown list to pick from dozens of languages. The above image shows a French translation of the open book.
If you want to copy the contents in the Sidebar, choose the copy button to the right of the language dropdown list.
Your computer needs an Internet connection to use the Auto Translation feature. You also have to own the Gold Package, which you can buy here and get a discount plus 5 free books.
Questions and Answers
Think of Dear Abbey only for Bible study. The Questions and Answers feature answers common questions you might have about the Bible. It also includes some obscure answers too. This all comes from a new dataset.

Use the feature by typing a question in the search box (magnifying glass icon on the toolbar). The program notices you worded it as a question and tries to find your answer in the dataset. The results come from your library. It also includes other kinds of results, so scroll down to the Questions & Answers card.

Which Apple iPad is Best for Bible Study?
The Apple iPad in whatever form factor destroys the Android competition for great Bible study on a tablet. Windows comes in a close second because you can install a desktop-class Bible study program on it if you have the storage.
Even if you assume I’m correct about the iPad, which is a big assumption, what iPad should Bible students choose and why?

To just get the conclusion, jump to the end for my Conclusion at the end of the page.
The 4 Apple iPad Form Factors
All four Apple iPads include a slab of glass housed in a rectangular case. They come with varying qualities of screens, speakers, and speed. However, users will not see a huge difference in running the most popular Bible study apps from Logos, Olive Tree, Accordance, and more on any of the four current-generation Apple iPad. Still, let's take a look at each starting from smallest to largest.

The smallest iPad also gives users the most mobile experience. The iPad mini feels more like reading a book than the other iPads. It comes with an 8.3-inch liquid retina screen when measured diagonally. That's 7.69-inches tall and 5.3-inches wide, about the same size as a small Bible but capable of carrying an entire theological library.

The iPad Air has Touch ID on the power button, a convenient security feature. You will also get some pretty decent speakers on the two shorter edges and USB-C for connecting chargers or accessories.
If you want to carry your whole theological library, then you’ll likely also want one with 256GB of storage. Unfortunately Apple stubbornly only offers two storage options. You can get a meager 64GB or too much for Bible students with the larger 256GB option. Most people need more than 64 and less than 256.

The two storage options cost $499 for the base model iPad mini 6 with Wi-Fi only. With 256GB you add $150. That's ridiculous, but necessary because after you own the mini for a while, you'll want to use it more and more because it's so convenient to carry out. So plan to pay the extra coin.
I personally chose to add Cellular as well making it cost $$800. I like that I can just open the cover and start working no matter where I am, almost since there are some areas without coverage in my semi-rural community.
Throw in an Apple Pencil 2 and a cover and you're over $900. That's a lot of money, but you can get it on a 0% interest payment plan with your wireless carrier or with an Apple Card.
The newer Apple Pencil 2 connects and charges while connected to the side of the iPad. It's a great stylus but costs. More on that below.

Some people call the basic model the iPad 9 or iPad nothing because it doesn't include a descriptive name like the mini, Air, or Pro. It's the cheapest option at only $329 for 64GB of storage and no Cellular.
It includes a larger screen at 10.2-inches diagonally or 9.8-inches by 6.8-inches when measuring the long and wide sizes of the entire device.
The iPad doesn't support Face ID but you can unlock it by touching the Home button, which has Touch ID built-in. It uses older technology than the Air or even the mini. However, it's a great starter iPad for most people. And if you only plan to study the Bible, strongly consider it since it costs less than any other device. Users can use the Smart Keyboard.
The iPad 9 comes with the same problems as the iPad mini with only two storage options - 64 and 256 GB. So you really want the larger storage option which brings the price to $479. If you want Cellular, then add $130 bringing your total to $609. Most looking for this budget model won't want Cellular, but get the 256 because 64 isn't enough.
The other problems with the regular iPad include...
- Lightning connector is slower and makes accessories more expensive since creators have to pay Apple for the right to include Lightning.
- Lower resolution screen that's not as good as the mini and much worse than the Air or Pro models.
- Slower A13 Bionic Chip compared to the A15 in the mini and the M1 Chips in the Air and Pro models
- Uses the older first-generation Apple Pencil that charges by sticking it into the Lightning port making it easier to break off the connector or lose the cap.
Apple offers the iPad as the budget option and that makes it a great tool for people who want a device for basic needs, including Bible study, reading, and Bible app research. You can also pair it with a Bluetooth keyboard for writing. Just don't expect the latest and greatest. Those tech specs aren't included.
Some call this the best deal on an iPad today. You get the most bang for your buck. However, it will cost you more than the iPad and iPad mini. It has a much better screen and a super fast and efficient M1 chip. Plus it records 4K video with the back camera and has a front camera that follows you when you're video conferencing. They call that Center Stage because it centers the camera on the subject.
The Air speakers sound great and the screen looks amazing. You can use the awesome iPad Magic Keyboard case or the awesome Smart Keyboard Folio with the trackpad. I love this keyboard. Also, the newer Apple Pencil 2 connects and charges while connected to the side of the iPad.
However, we still see the annoying storage issue with only 64GB or 256GB. Plus Cellular swells the price by another $150. That brings the total with 256GB and Cellular to $899. For Wi-Fi alone, you pay $749. Why does Cellular cost more on the Air than on the mini or the basic iPad?

The iPad Air is the prettiest coming in one of five colors including Space Gray, Pink, Purple, Blue, and Starlight.
The iPad Pro below comes in two sizes, 12.9 inches, and 11 inches. Don't get the 11-inch iPad Pro. Instead, get the iPad Air.

The most expensive, powerful, and feature-rich iPad seems more like a mobile computer than a tablet. The iPad Pro which you can get in 11-inch or 12.9-inch screen sizes offers the most power of the four sizes. It costs $799 for the 11-inch and $1099 for the 12.9-inch.
Apple offers 128GB for the base price. That's the sweet spot and should be the lowest storage offered on any device made by Apple. It's the perfect storage for most buyers. However, you can get 256, 512, 1TB, or 2TB. You don't need anything more than 128 for Bible study. However, you may want to choose higher storage if you plan to use this iPad for much more than Bible studies, like video and photo editing, gaming, and more complex uses.
Users may want the large 12.9-inch screen because they want more screen real estate for Bible study.
Other specs to excite buyers include:
- Liquid Retina XDR Display
- ProMotion
- M1 Chip with more memory than the others
- Face ID and Center Stage camera
- 5G Cellular optional along with Wi-Fi 6
- LiDar support for things like 3D modeling
- Thunderbolt USB-C port that's fast and will connect to a Thunderbolt monitor or incredible docks with a lot of ports
Recommendation for Bible Study Only

If you only want to study the Bible then you have to ask yourself a few questions. Do you want something small and easy to carry around like a small Bible? Then get the iPad mini. If you need a bigger screen then get the iPad Air. It's the most future-proof and with all the tech inside it will last for a long time. However, budget-conscious buyers should go with yesterday's technology in the basic Apple iPad.
Just remember this. I've never met anyone who actually used a tablet only for Bible study. So, you can see yourself possibly needing a little more power, a good typing experience, or some screen real estate to edit your photos or make video masterpieces, then get the Apple iPad Air.
Recommendation for Bible Study and High-End Multimedia
If you just read the above paragraph, then you know I recommend the Apple iPad Air for people who want to study their Bible with Logos, Accordance, Olive Tree, or some other Bible app and work with multimedia. But which iPad Air should you get?
The 256 is, unfortunately, the best option until Apple gets its head out of the sand and starts offering a 128GB option.
Recommendation for Those Needing a Large Screen

Buy the Apple iPad Pro 12.9-inch model with 128 GB if you only want to study the Bible or 256GB or more if you want to do high-end work like multimedia creation.
I bought the 12.9 Pro because I teach and preach from my iPad and due to my aging eyes the mini's just not big enough. The iPad Pro 12.9 means typing on a keyboard that's wide enough to enjoy. The Air was too narrow for my big hands. I spent more than I needed to. Until Apple offers a larger Air with 128GB, I'll happily keep my Apple iPad Pro 12.9-inch.
Recommendation for Buyers on a Budget
This one's simple. Get the basic Apple iPad for $329 if you don't own a large Bible library or pay more for the 256GB model. You won't get all the power and specs and it may feel old in a shorter time since it's not as fast, but for buyers on a budget, it's the best way to go.
The only other budget option is to buy a used device or get an older one. Look at your budget and something that fits in your budget that also fits your preferred form factor.
You can check out Apple's Refurbished store. For example, they offer the iPad mini 5 for the same price as the newest base model iPad. For slightly more than the base model you can get an Air with Wi-Fi for just $419.
Check out eBay, Facebook Marketplace, and Swappa as other options for used and refurbished products. You can get a great deal.
Must-Have Accessories
When you buy an iPad, you also have to factor in buying accessories. Other tables like the Samsung Galaxy Tabs come with at least a writing device. You can use the tablet alone, but I wouldn't. You'll need the following accessories.

- Cover or Case - you will want to protect your device.
- Keyboard or Keyboard Cover - you can study the Bible on your iPad more efficiently with a keyboard connected.
- Apple Pencil - you may want a Pencil to write or take handwritten notes in apps that you can use alongside your Bible apps.
- Screen Protector - I used to not protect the screens on my tablets, but when you carry it around naked you should.
- Headphones - many Bible apps include audiobooks or videos.

Let me offer my top recommendation for each category above.
- The Apple covers or cases work best, but if you want to save money go with cases from Moko, Spigen, or Moshi.
- Apple's Keyboards or Keyboard Covers are the best options for the Air or Pro. The Magic Keyboard is $300 and the Smart Keyboard Folio costs $180. I love typing on my Magic Keyboard cover connected to my iPad Pro 12.9. However, Logitech makes great keyboards too if you want to use your iPad at a desktop. I have the Logitech MX Keys and MX Keys mini. You can also buy Apple's Magic Keyboards with or without Touch ID.
- Apple Pencil is the best writing device and I wouldn't buy another one. However, the Logitech Crayon is a $70 alternative.

- Screen Protectors are a budget item. They shouldn't cost a lot of money. Just get a glass screen protector. However, here's one alternative that some people really like. Get a Paperlike screen protector, which does two things. It protects the screen and gives users a paper-like experience for drawing and writing.
- Get the Apple Airpods or Beats to use for Headphones. They work best with Apple products and sound really good. However, not everyone wants to pay that much. Be careful which ones you buy, because sub-$100 Bluetooth earbuds usually sound like junk. To save money get Apple's USB-C to stereo adapter and plug-in wired headphones.
Conclusion

To do only Bible study, then get the iPad mini. You'll enjoy using it for hand-held study. If you want to put it on a table and need more screen real estate, then buy the iPad Air with an Apple Magic Keyboard. Add an Apple Pencil to either device if you plan to take notes in your own handwriting or want to write. Add a handwriting keyboard replacement app like Handwriting Keyboard ($3.99). Throw in a great note-taking app like Notability or Good Notes. This way you can have the Bible app on one side and the note-taking app on the other while holding the tablet.
Get Logos Legacy Library for 25% Off
If you need to buy a good Bible software package, consider using my affiliate link to get Logos Bible Software. You can get what they call "Legacy Libraries" for a nice discount of 25% off. A legacy library is a collection of books that they sold when they released previous versions of Logos from versions 5 through 8.

iPad Mini 6 Review for Ministers and Everyone Else
One of the best tablets for pastors is the iPad mini 6. Here's why I love it so much for ministry and general use.

The Apple iPad mini 6 came out and I couldn't resist getting one. In fact, I sold my 12.9-inch iPad Pro and my iPad mini 5 so I could get the 256GB model. Here's my iPad mini 6 review for ministers and everyone else.
Let's start with how the iPad mini 6 ($499 for base, $649 as reviewed) fits in my life. I use it as my primary tablet and, for a little while, my only iOS device because a couple of months ago I switched from using an iPhone 12 Pro Max to a Samsung Galaxy S21 Ultra 5G. I moved back to the iPhone after that failed experiment. I shared thoughts on that transition in another post. The iPad mini 6 handles...
- Reading my Bible and others books in Bible apps and the Kindle app.
- A complement to my phone for checking email, Facebook, Twitter, and Instagram.
- Watching videos or listening to podcasts using YouTube, YouTube TV, Pocket Casts, and other streaming video services.
- Playing casual games.
- Quick photo editing for posting online.
- Quick video editing - mostly trimming videos, combining clips, color correcting, adding titles, and music but not complex edits.
- Flying my DJI Mini 2 drone.
- Taking notes in meetings with Notability and the Apple Pencil.
- Preaching from my tablet with Word or using Keynote for presentations.
We'll look at the uses listed above and then the hardware. If you just want to see what I think without the detailed iPad mini 6 Review, then jump to the bottom to get my recommendation.
iPad mini 6 Review: Bible Study and Reading Books
The screen on the iPad mini 6 looks pretty nice while reading books. The iPad mini 6 works well for studying the Bible in several Bible study apps and the Kindle app for reading books. Read magazines using the Apple News app.

I like reading on a screen. My wife prefers the Kindle Paperwhite and won't read books on a tablet, but I love using the iPad mini thanks to the sharp and clear display. If you hate reading on a screen and prefer e-ink or real paper, then don't buy the iPad mini 6 for reading. You won't enjoy it. However, I would recommend trying it out. Borrow a friend’s mini or spend some time at an Apple Store or Best Buy reading to see if you could use it. It’s nice caring only one tablet for reading.

All the Bible apps that run nicely on an iPhone look great on the mini 6. The screen's just big enough to open 2 books at once time or open a book and a note screen. The new window management in the iPad mini 6 or any of Apple's iPad thanks to iPadOS 15 makes it easier than ever to open two apps at once. You can...
- Open one Bible app and take notes in another
- Open your Bible app and a word processor like Word, Pages, or Notes
- Use your inking app, like Notability, and take handwritten notes while also studying the Bible in your favorite Bible app.
- Research topics on the Internet while and studying the Bible in your chosen Bible app.

The Kindle app and Apple News app look great. Reading other text in a browser, email, or social media also looks sharp and crisp.
Margins Notes or Highlighting like a Paper Book
Most of the Bible apps and the Kindle app won't let you take handwritten notes inside the app. iPadOS 15 added a new feature where you can grab your Apple Pencil 2 (sorry, but the first-gen Pencil doesn't work) and swipe from the lower right corner. Apple Notes opens a note and you can take what they call Quick Notes. These Quick Notes are attached to the content on screen. You can type or draw and write in your own penmanship.

While I would not use this for really important Bible study and research notes, it's great for a quick note that you can save and later add to the notes feature. I type faster than I can write with the Pencil, but Quick Notes works great for those instant observations in another app outside your main Bible app, hence the name Apple gave the feature.

If you love to write in the margins of your books, then convert them to PDF and get an app like Notability, Liquid Text, or Good Notes. You can find others, but make sure they support importing PDF files. I use Liquid Text for this. It supports PDFs and Word docs. By the way, the OneNote app also supports handwriting with the Apple Pencil.
You could always highlight the Bible in the best Bible apps. This also works great on the iPad mini 6.
iPad mini 6 Review: Preaching from Digital Notes

When I preach, I always bring my iPad into the pulpit and view my sermon notes in Microsoft Word. It worked great on my 12.9 iPad Pro. Young people or those with great eyesight will love using the iPad mini 6, but it's a little too small to lay down on the pulpit. Word will enlarge the text, but then you don't see enough of the outline at one time. So, going forward I will not use my iPad mini 6. However, if you want to, open the document, put it in reader mode by tapping the icon on the toolbar (see the GIF above), and then pinch to zoom text.
You'll need to decide if your eyes see well enough to use the smaller iPad mini 6 for preaching notes. If you used an older iPad mini, then you'll like the new one. The screen measures slightly larger than the old version with an 8.3-inch display versus the older 7.9-inch on the 5.
Presenting Using the iPad mini 6

Presenting suffers the same problem for my older eyes as reading my preaching notes. However, I can use it and if you've used a small display for presentations before, then the iPad mini 6 will work for you.
If you simply plug in and swipe or tap to advance slides, the iPad mini 6 will work great. If you like to write or draw on the screen as I do (see above GIF), then the size might limit you. It's harder to present on the smaller screen compared to the 12.9-inch Pro display or the 10-11-inch display on the basic iPad, iPad Air, or smaller iPad pro.
With iPadOS 15 and macOS Monterey on a Mac, you can send the display of your iPad to the Mac using screen sharing (see GIF above). This would let you connect to a Mac hooked up to a projector or TV. Then screen share your iPad screen to the Mac.
iPad mini 6 Review: Screen and Input
Pick up the small and light iPad mini 6 and type on the screen with your fingers or write using Scribble, the new Pencil-based input system in iPadOS 15. The mini 6 handles this kind of input. However, I don’t really like Scribble, so I’ve installed a keyboard that lets me draw text and it converts it to printed text on the screen. It’s called Handwriting and handles handwritten text input better than Scribble.
iPad mini 6 Review: Performance
I'm not going to run benchmarks or battery tests. You can find those on more technical reviews elsewhere. Rene Ritchie does a great job of these kinds of reviews on his YouTube channel.
If you plan to use the iPad mini 6 as a tool in ministry, it performs efficiently and offers a nice improvement over the 5. It's snappier, scrolls through websites and books faster, and the inking smoothly displays your handwriting and drawing.
Some people report seeing a strange effect while scrolling. It's the great "Jelly Scrolling" controversy of 2021. See the effect in the video below.
The jelly scrolling issue clearly shows up in the video above. But, I don't see it on mine. It seems like you have to really look for it to see it. And if you do, then you may not see it again. If you get one that looks more noticeable, then get return it and get a replacement.
Since I don't notice the problem, I can't complain about it here.
Other than the Jelly Scroll issue, the iPad mini 6 performs well. I played videos, games, and read on it a lot over the first couple of weeks, and loved the experience. It feels like a good improvement over the 5, which I owned.
iPad mini 6: Video and Photo Samples
Most people will still use their phone or a dedicated camera to take pictures or shoot videos. However, I use my iPad mini to scan documents and the rear-facing camera works great. I import documents into my note-taking apps or scan them for storage in my OneDrive folder. After worship, I scan all the guest cards to contact them. I also scan new member cards to add them to our church role.
More people will use the front-facing camera to stream themselves on social media or for FaceTime, Skype, or Zoom calls. The camera works fine for these situations.
A new feature on the iPad mini 6 enables ultra-wide video so that the camera will follow you around your room even if the iPad remains stationary. The software will zoom in and focus on your face so you can get up and move left or right and then back to the center frame.
In a pinch, the camera does a nice job of taking photos and videos. Here's a sample of photos taken on the iPad mini 6 camera. They are all without edits and exported from Photos to JPG. The one of me in my orange shirt is taken with the front-facing camera. The other four are taken with the rear camera.


The colors look nice. Each photo seems sharp enough for snapshots. I wouldn't try to get high-art photographs with the camera. All of that said, the camera impressed me. Until this model, I wouldn't even consider taking this much time in a review to discuss the quality. But this camera works better than any previous iPad camera.
iPad mini 6 Review: Flying My DJI Mini 2 Drone

Flying a drone usually starts with connecting a phone to the drone controller. However, I never really liked using the small screen of the flown. There's too much on the screen for even a large screen like the one you get with the iPhone 13 Pro Max. So, flying a drone with an iPad mini 6 makes drone pilots happy.


The above set of screenshots shows the interface of the DJI Fly app, used to control the DJI Mini 2 drone. All the controls show up with plenty of room to see the images from the drone's camera.
To fly a DJI drone with the iPad mini 6, you'll need a special attachment like the Drone Valley Gear Tablet Mount ($18.95) that I bought on Amazon. It fits an iPhone, iPad mini 6, or another tablet of similar or even larger size.

If you want to learn more about the mount, see Drone Valley's video below.
iPad mini 6 Accessories
I bought the official Apple Smart Folio in Electric Orange for $59. I also accidentally got the Dark Cherry, but it showed smudges too much, so I stuck with the bright orange Smart Folio and I'm glad I did.
The case covers the back of the iPad mini 6 then wraps around the left side of the device to cover the front. The back snaps into place thanks to magnets that reliably hold it on the iPad.
The front part of the Smart Folio folds up into a triangle to turn into a stand. It will hold the iPad up in an angle best for watching a video and a lower angle for drawing.

The magnets in the front part of the Smart Folio snap onto the front part of the iPad and this turns the screen off until you open the case and it turns the screen back on. It also folds onto the back and snaps into place so you can hold it and read or do other things.
The Apple Smart Folio case feels like it will hold up, but for $59 it seems like it should feel more premium. It has a bit of a cheap feel to it. You can find cheaper cases, but I like Apple’s because they’re designed better even if the raw materials aren’t as premium.
The Folio also comes off easily making the iPad mini 6 lighter and therefore easier to read on it.

The Apple Pencil 2 snaps onto the right side (in portrait orientation) and automatically pairs with the iPad. It also charges while connected. The magnets seem stronger this time than my old 2020 12.9-inch iPad Pro.
The Apple Pencil costs $129, a little steep for a stylus. However, it's one of the best you can get especially for artists.

I don't use the iPad mini for typing very often, but Logitech makes the best keyboard you can pair with the iPad mini 6 or any tablet. The new Logitech Mx Keys Mini costs $99, a lot for an iPad mini keyboard. I use it with other devices so it's worth the price. You get a great keyboard that's small enough to carry in a bag but small enough that it doesn't take up too much space.
Add to the Mx Keys Mini, Logitech's great MX Anywhere 3 mouse, also pricey at $79.99, and you get a mini-computer on the go.
The above image shows a pair of Samsung Galaxy Buds 2, but the best wireless Bluetooth earbuds are the Apple Airpods Pro. They automatically switch to the iPad mini 6 when you put them in your ears and start playing media.
iPad mini 6 Review: Specs
- Screen
- 8.3-inch display with 2266x1488 pixels and 327 pixels per inch
- IPS LCD with 60Hz refresh rate
- 500 nits brightness
- System Hardware
- Apple's A15 Bionic processor
- Hexa-core 64-big
- 64 or 256GB storage
- Battery
- 5078 mAh LI-Polymer battery
- Runs over 10 hours in most tests
- Cameras
- Rear camera - single 12MP with F1.8 aperture
- Video recording at 4K 60fps and 1080P at 240fps
- Front camera - single 12MP with 1080P video
- Connectivity
- 5G, LTE Celular with dual sim support
- Wi-Fi 6
- Bluetooth 5.0
- Physical Size and Details
- 7.69 x 5.31 x .25 inches
- 10.34 ounces
- Volume up/down and power button with integrated fingerprint reader
- USB-C charging port with cable and brink included
- Comes in Space Gray, Pink, Purple, and Startlight
Recommendation
I love my iPad mini 6. It was nearly the perfect update over the 5 with a better camera, USB-C, faster processor, and just an overall better experience. If you own an old iPad mini, then seriously consider upgrading, especially if it’s a 4 or older. If you own an Android tablet or. Kindle, then the iPad mini 6 will cost more, but it’s worth it. Android phones might compete well with the iPhone, but I’ve never used an Android tablet that meets my needs as well as the iPad.
Bible by YouVersion Downloaded 500 Million Times: 5 Reasons Why
The Bible app from YouVersion, and Life.church announced that people downloaded their app 500 million times. Here are 5 reasons why.

500,000.000! That’s half a billion. That’s how many times people like me downloaded the Bible app from the folks at YouVersion by Life.church. I recognize that I downloaded the app probably 20-40 times alone over the years, but even if the 500 Million downloads represent 100 Million actual people, that’s a lot of people reading the Bible.
What makes this simple Bible reading app so popular that such an enormous number of people installed the app on their iPhone, iPad, or Android device? After all, it doesn’t have any commentaries, Greek or Hebrew word studies, or other theological tools. It’s mostly just a Bible reading app with social media features and sharing built-in to name a few features.

Let me share with you the 5 reasons why users downloaded the Bible app 500,000,000 times. Not only will you learn what sets it apart, but how to get the most out of the simple Bible app.
Bible App is Simple
I usually recommend complex Bible study tools like the apps from Logos Bible and Accordance Bible. If that's too complex I drop to the second tier of apps from Olive Tree Bible, Laridian Pocket Bible, or a few other third-tier Bible study apps. Most of my readers want at least basic original language study in Greek or Hebrew, commentaries, Bible dictionaries, and complex searching. The Bible App includes none of these advanced features and that's why so many love the app. They prefer simplicity over power.
Fire up the app and you'll find the Verse of the Day on the Home tab displayed in the text, visual form, and as part of reading plans that include that verse. There's also a video about the verse (see image above).
Tap on the Bible tab at the bottom of the page to read the Bible in your preferred translation. Users can quickly move to a new passage using the button on the top of the screen. The other top center button opens the library of translations and you can read almost any translation you can think of in multiple languages (see image below).

Other options let users open multimedia resources related to the current passage. You can also change the look of the text...

Above you'll see highlighting (left), a selected verse with the menu that shows the list below, and images that you can put behind the verse text and share with social media or other places (right above).
While reading a passage, tap on a verse to…
- Select the verse
- Highlight a version in multiple styles
- Copy a verse
- Create a visual image of that verse
- Share the verse
- Compare the verse in different translation
- Add notes or bookmarks
- Create a prayer list item
- Find related verse
You will also see little note icons that display translation notes.
If you want to select multiple verses, keep tapping on more verses.
There’s a lot here, but compared to more complex research apps, the user interface is quite simple to use and figure out.
Bible App Includes a Large Collection of Simple Reading Plans and Translations

The Plans tap at the center bottom of the app shows you all the reading plans available in the Bible App (see left image above). Users can find a large collection of reading plans based on topics, books of the Bible, or sections of Scripture, like the Sermon on the Mount.
When users select one of the plans, they can do the following:
- Read the Bible
- Share you progress with friends inside the app or on social media
- Get notification reminders to read your daily reading
- Search for plans
Notice in the image above that you can find Reading Plans in the Discover section too (2nd from left button on the bottom - see image above).
Bible App Shares to Social Media and More
The Bible App not only helps people read the Bible but helps them read it as part of a community. Like other social media networks, the Bible App lets users follow friends and see their progress, Bible images, and more.
Go to the Home tab and choose either Today or Community at the top. The Today screen shows your Verse of the Day, reading plans you’re reading, and suggests people follow, among other things.
The Community tab shows things you’ve shared and what your friends share with others, like their reading plan progress or Bible images. You can then comment or like their content. If you like a reading plan that a friend shares, then you can choose to start reading it yourself.
If you choose something in the app, you can use the phone or tablet operating system sharing features to share to places like Facebook, Twitter, Instagram, or directly via a text or some other direct messaging app.
These social media features might do more to spread the Bible App to others than any other feature. As people share things with friends and family, recipients then choose to download the app.
Bible App Syncs Highlights and Notes Across Devices and Platforms

Most people own a computer, a smartphone, and maybe a tablet. Tech enthusiasts like me might own a few of teach. The Bible App works on all of them. You can install it on...
- iPhone
- iPad
- Android phones
- Android tablets
- Kindle tablets
- The Web via a browser
Whatever you do in the app on a device, like an iPhone shows up on the website, your Android tablet, or your Kindle tablet. All your highlights, notes, and reading plan progress show up on each of these platforms. Create an account and log in on each device to sync the various content or progress.
Bible App Adds Multimedia Like Video and Images
As mentioned above, the Bible App doesn't just show you the text of the Bible. You can also view multimedia content like the Verse of the Day superimposed over beautiful images. View the ones made by the app developers, your friends, or create your own.
If you tap on the Discover tab at the bottom of the main screen of the Bible App, you will see Podcasts, Videos, and images.
The Podcasts include simple things like audio book versions of the Bible read by talented readers. You can also hear traditional podcasts that cover things like Bible teaching, help for teachers, and popular content like J. Vernon McGee’s Thru the Bible in podcast form.
The videos come from multiple sources like The Spoken Gospel, which is a video Bible. You can also see scenes from the popular tv series The Chosen. The Bible Project videos also show up here as well as the Lumo Project, another video Bible in multiple languages. You can spend hours watching the videos included in the app.
Summary
I prefer more advanced Bible research and study apps for most of my mobile Bible reading or and study. But for quick and simple Bible reading and for sharing with others, the Bible App does the best job. Since it’s free, everyone should get it and drive that number far past the 500 Million downloads
4 Best Audio Bible Apps for Android for 2021

Do you love to listen to the Bible? Then we've got the best audio Bible apps for Android for 2021. These also work on Amazon Fire Tablets plus your favorite Android smartphone from Google or Samsung Galaxy. I tested them out on a Samsung Galaxy S21 Ultra 5G primarily, but also on a Samsung Galaxy Tab S7. Give this a read and then download them for a good listen to the good book.
If you're looking for the Best Audio Bible Apps for iOS, then keep reading. These also come with iOS versions.
Bible.is - Our Winner: Best Audio Bible Apps for Android

People who want to listen to the Bible and do little else should look at Bible.is and nowhere else. Users agree with a 4.6 rating in the Google Play Store for this free app. You can also find it on iOS. Just a few of the key features that make it great include the following:
- Listen to the Bible in hundreds of languages with more coming all the time
- Create your own listening plans like you can with Bible reading apps - see the first and third screenshot below
- Share plans with other Bible.is users
- Read along with the audio Bible or just read when you can't conveniently listen - see the middle screenshot below
- Search the Bible by keyword, Bible text and phrases, or other words
- Watch Bible-based films like The Jesus Film

The Faith Comes By Hearing folks respond to user support issues and do a great job of pleasing those who have issues with the app. I've never experienced a problem.
YouVersion Bible App - Best Audio Bible Apps for Android with Social Networking
If you only downloaded one Bible app on your phone or tablet, it likely came from Life.church. Life.church brags millions of downloads and often shows up in the list of top apps on iOS and Android.

The church created the Bible app years ago and keeps developing it and improving it. The app excels as a basic Bible reader app with an elegant user interface. It primarily serves as a Bible reading app but adds audio Bible listening and does it well.
I include it here because of its great social networking features. Share Bible verses in a visual way. If your friends post pretty photos with Bible verses imposed over the top of them, the share likely came from the Bible app.
To use the audio Bible features, open in the Bib reader and you'll see a small audio icon in the top toolbar second from the right. Tap it to show the Bible reader pop up as seen in the left screenshot above. You can play from the current location in the Bible shown in the reader window. The fast forward and rewind buttons go forward or back by a chapter.
The settings at the bottom of the pop-up window control the speed and set a timer for how long the app will read the Bible. There's also a button to hide the controls. If you do, then you'll see the screen on the right which shows you smaller rewind, play, and forward buttons. They function the same way as the larger pop-up window.
Olive Tree Bible - Best Audio Bible Apps for Android with Advanced Bible Study Tools
Olive Tree makes the Bible overall Bible study app on Android and iOS. The app includes tools for advanced language study, commentaries, Bible dictionaries, media tools, and more. In addition, they offer a decent library of audiobooks. Check out the Audio Bibles sold on the Olive Tree website.

Open Olive Tree and go to the library to find your audiobooks. The books with audio show a headphone icon. Tap it to open it. You'll then see the audio controls to go back, play, and go forward. Below that, you'll see a toolbar with volume, playback speed, driving mode, and Bluetooth connection.

If you want to use your app while driving tap on the Driving mode icon. The larger play button and skip back button help you play or go back in case you missed something. The icon with the headphone inside a bookmark icon creates a bookmark so you can quickly go back to the spot in the book.
The Olive Tree app plays Bibles and other books too.
Logos - Best Audio Bible Apps for Android Honorable Mention
I've written a lot about Logos over the years including their advanced mobile app. It includes audiobooks too. Open them from the menu button in the lower right corner of the app. Find a book in your library and open it. You might also want to download the book from the library using the tiny download button next to the book title.

Once the audiobook is open you'll see the playback controls as seen above on the right. You can go back and forward by chapter or in 30-second intervals. Play or pause the book. The Contents button lets you jump to any place in the table of contents. There's also a playback speed control.
Recommendation
The playback interface in Logos offers the most options and controls. However, it's also the most complex of the apps and will overwhelm those who don't want to do advanced Bible study.
Bible.IS is the simplest for people who just want to listen to the Bible. If you also want to read and interact with other Bible readers then use the YouVersion Bible app from Life.church. The best overall mobile Bible app comes from Olive Tree. It's not as complex as Logos, but gives you more Bible study tools than the simpler apps.

5 Best Bible Apps for Android and Fire Tablets for 2021
What are the 5 best Bible apps for Android for 2021? These run on Android phones, tablets, and the Amazon Fire tablet.

If you own an Android smartphone or tablet or maybe an Amazon Fire Tablet, then we've got the 5 best Bible apps for Android. This list usually stays the same each year. So what has changed for 2021?

I tested these apps on the Samsung Galaxy Tab S6 Lite. I used to own the Tab S7 but handed it down to my son, an Android first guy. Most of the time, I use the iPad, but Android works great too. So, here's my list for 2021!
What's your favorite Bible app on Android or Amazon Fire Tablet. Comment below or head over to the YouTube video above and comment there.
Bible App by Olive Tree
Olive Tree's Bible App sits atop our list because it's still the best mobile Bible app available for reading, study, and sermon prep. Why do I call it the "best"? Olive Tree presents the Bible and Bible study material with the perfect balance of usefulness and simplicity. That's hard to do. Just ask the other more technical Bible study apps listed below.
UPDATE: The Bible App by Olive Tree is no longer supported on Amazon Fire tablets.

Open Olive Tree on a tablet, and you get two areas by default. On the left, you'll see a kind of Windows Explorer or macOS Finder kind of navigation window that takes up the left half of the screen when you tap the menu. To see this menu, you'll need to tap the menu button that looks like three horizontal lines in the upper left corner.

The Bible sits on the left when the menu isn't open. On the right, you'll see the Resource Guide. These two can link up so that when you scroll or swipe from page to page in the Bible, it will move the commentary you have open to the right.

Add word study features by opening a tagged Bible. Tap on a tagged word, and you'll see a popup window that defines the word in its original language. You also get Audiobooks, reading plans, devotionals, maps, highlights, note-taking, and it all syncs up with your computer version of Olive Tree.
There's more to this app, but this hits the highlights and explains why I put it first in my 5 Best Bible Apps for Android list.
Logos Bible App from Faithlife
The Logos Bible App (Amazon Fire App) and its other similar apps from Faithlife come in second in our roundup because of its power and array of useful features. It's a little bloated, but I'd rather have too many features that don't get in the way of the basics than not enough, like the ability to add user notes.

When you look at all that Faithlife packs into Logos, you can only say wow! There's a reason this ends up in our 5 Best Bible Apps for Android, but not at the number one spot.
The app divides into a few main areas.
- Home Screen - layouts for study are here, along with information from Faithlife about sales or books.
- Library - find your books to open and read.
- Book Reader - you can open a bunch of books, and they will show up on screen accessible via the center button, the toolbar at the bottom of the screen.
- Search Screen - use it to search your Bible or books.
- Main Menu - find all the major features of the Logos app here, like the Guides.

You can open multiple books and sync them using the center button on the bottom toolbar. Set up some or all of the books to sync up or don't. I have a few Bible translations and a few study Bible's or commentaries open all the time, all of which I set to sync up, so they move from verse to verse together. I also open books I'm reading too, but they don't sync with a Bible.

On the Bible, you can do word studies, searches, and add notes or highlights. Open the menu, and you can search your library in one of the Guides. A passage guide finds everything about your passage. The Exegetical Guide searches for content related to language study. Other guides work similarly.

You'll find many other features, mainly in the main menu at the far right on the bottom toolbar. And remember, it all syncs nicely with the computer app or their web app.
Faithlife also offers a few other apps for Bible study and reading. You can download...
- Faithlife Study Bible - focused on their study Bible and the Lexham English Bible translation.
- Faithlife eBooks - a simplified version of the app for reading books primarily, but still has some study features.
- Biblia - Spanish language version of the app.
- Verbum Catholic Bible - app focused on Catholic users.
The Bible App from Life.Church

I always fight with myself about adding The Bible App (Amazon Fire App) to my roundup of best Bible apps for any platform, but I always do it for one reason. It's the most popular Bible app available on mobile devices.
I don't like including The Bible App because it's not really a complete Bible study app. You can't do word studies or read commentaries and Bible dictionaries. But that's not what Life.Church intended for its users to do.

Instead of more advanced Bible study, The Bible App excels as a simple Bible reading app that also includes social networking built-in and sharing to social media easily and elegantly. You can...
- Download and read hundreds of versions of the Bible, most of them available offline.
- Listen to audio Bibles.
- Set the app to remind you to read a daily reading and devotion or see a verse of the day in text or visual format.
- See what your friends are reading, highlighting, sharing, or commenting about the Bible.
- Watch videos to help you understand the Bible.
- Bookmark verses.
- Share verses with others via social media, email, or text.

Accordance Bible Software
The Accordance App (Amazon Fire App) on Android has gotten better but still lags behind its iOS cousin and the other apps in our roundup for a couple of glaring weaknesses. First, you can't add your own user notes yet. That's gotta change, and Accordance should feel embarrassed they haven't added the feature in 2021.

Second, the syncing features in the app are weak by comparison. Accordance should add its own syncing tool to keep your user content fresh on Android and a computer.

While Accordance really needs the improvements above, it still deserves a spot in our top 5. Of course, you can read the Bible and other books in your library. Accordance sells a lot of great Bible study tools, thanks to a huge library of quality resources. They are often the first company to release a book when it gets published. For example, they released the new 2020 version of the NASB before the others on the list. Logos doesn't even have it out yet.

Accordance works great as a Bible or book reader. It lets you search, and you can select a word and Amplify it, which means study by searching for related content.
Tecarta Bible
Bible study observers may not know as much about Tecarta Bible (Amazon Fire App $5.99 for NIV) as the others in this roundup. But they should because it's a decent app.

The app includes the most-used translations. You can download the KJV for free and buy others for download. If you don't want to pay for a translation, you can "stream" them, which means use them as long as you have an Internet connection on your phone or tablet. You'll have to buy commentaries, but unlike others, Tecarta lets you try them.

The app displays parallel translations and shows the commentary in a 2nd or 3rd window. Add notes, bookmarks, highlights, or share verses.

If you tap and hold on a word, the app shows a box popup that says "Define," and it will go online to give you a definition from an Internet search.
5 Best Bible Apps for Android and Fire Tablets for 2021 Summary
Which of the 5 apps included in our roundup of the 5 Best Bible Apps for Android should you download? Why not download all of them? Of course, you should start with the app from the company you already use on a computer, if you own one. I'm a Logos Bible Software user on my Macs, so I primarily use Logos, even though I like Olive Tree better on mobile.
UPDATE: If you use an Amazon Fire Tablet, you can't download the Olive Tree app since it's no longer supported. For a fifth Bible app on a Fire Tablet, look at Laridian's Pocket Bible. It's also terrific.
Update: You can also install the Google Play Store on an Amazon Fire Tablet. It's complicated, but if you think you can handle it, fire up the Silk browser on your Fire and head over to the helpful how-to article at Android Police.
If you must make me recommend one over another, then I'm going with Olive Tree first. It's got the cleanest and simplest interface. It has enough features for most users. People who need more advanced tools will likely not work on a tablet or smartphone very long. They're using a computer-level Bible study suite from either Logos or Accordance. However, don't end your search with Olive Tree. You can try out all of them for free and settle on one with the best features for your needs.

Logos 9 Upgrade 6 Months Later - Is It Still Worth the Upgrade Cost?
It's been about six months since Faithlife released Logos 9 upgrade to focus on some key improvements to the computer app and the mobile app. Also, you can save $1,600 on a Logos 9 Base Package plus get 5 free books using the link provided in this article.

It's been about six months since Faithlife released Logos 9 upgrade to focus on some key improvements to the computer app and the mobile app. I published my review over at ChurchTechToday.com on October 30, 2020, and talked about it here as well.
The Logos 9 upgrade brought the following key improvements, like...
- Some user interface tweaks make the software easier to use.
- An update to the Factbook in the Logos 9 Upgrade
- The interesting Sermon Manager and Sermon Builder
- A Counseling Guide
- New sorting features in the Bible commentaries section of the Passage Guide
- Improvements to the Reading Plans and the Reading Queue
In addition to the above improvements in the Logos 9 Upgrade, we also saw some decent changes in the mobile app. They added the Factbook to the menu seen in the toolbar at the bottom right corner of the app. You can also use your iPad or tablet for preaching, thanks to the new preaching mode in the mobile app. I actually love using my iPad to preach.
15% Off Discount on Logos 9 Upgrade to Base Packages and 5 Free Books
From now till June 15, 2021, you can get 15% off a Base Package upgrade. To do that, follow this affiliate link, and you'll get a discount. Full-disclosure, I'll get a little kickback from Faithlife.
Follow that link, and not only will you get the 15% off discount when you use the code PARTNEROFFER9 at Checkout, but you can also get 5 free books. Select from 28 different books, including some great titles.

Here's a list of my recommendations.
- Spurgeon Commentary 1 Peter
- Lexham Research Commentary: Colossians
- St. Paul's Epistles to the Thessalonians by George J. Ellicott
- The Essentials of Prayer by EM Bounds
- The Life of St. Paul by James Stalker

Faithlife offers a myriad of Base Packages. Here's what I recommend depending on what you already own.
- Logos 9 Bronze - Great for people who are just getting started.
- Logos 9 Gold - Jump to this level if you already own a pretty big library.
At the bottom of the page, you see a link to see the other Base Packages. Follow that to find the Logos 9 Upgrade packages for Anglican, Baptist, Lutheran, Messianic Jewish, Methodist & Wesleyan, Orthodox, Pentecostal & Charismatic, Reformed, SDA, or Catholic (Verbum) users.
Logos 9 Upgrade: Best Feature is New User Interface Tweaks
One improvement stands above the rest. I like the features listed above, but the simple tweaks to the user interface on the computer version of Logos 9 made the most difference in my productivity with the Logos 9 upgrade six months after Faithlife released the update.

It sounds crazy, but the new button on the upper right corner of the screen helps users a lot. First, you can quickly jump to your account to see what you have or what pre-orders you might see published soon. You can also jump to Your Faithlife Profile, where you can interact with other users and see answers to your questions.

The other amazing new tweaks include transforming the program toolbar. For example, right-click on a book icon that you placed on the toolbar like I did as seen in the image above.

you now get a drop-down menu holding those books in that folder.
The new tweaks to the toolbar give you a drop-down list of icons from the toolbar that no longer fit on a narrow screen on small screens. See the image below to understand what I mean.
There's a new light mode, dark mode toggle in settings. People love dark mode, and I don't understand why. But if you do, then you now have it.

Other New Features in Logos 9 Upgrade
Logos seems most proud of the other new features in Logos, which include...
- Factbook
- Sermon Builder
- Sermon Manager
- Counseling Guide
- Improved Reading Plans
I like all of those, and you should see my review linked in the top section of this post from ChurchTechToday. The second feature I'm most excited about also doesn't seem big. Faithlife now added a feature to organize my library in a more useful way when I fun a Passage Guide.
Go to the Commentaries section of the Passage Guide and look in the upper right corner. You'll see ways to sort your books including...
- Priority - follows your customization where you rank certain commentaries above the others.
- Series - groups the commentaries by series, like the New American Commentary series or the Word Biblical Commentary series.
- Author - who wrote it?
- Denomination - what is the denomination of the publisher/editor/author depending on the commentary.
- Type - is it a technical or devotional commentary?
- Era - when was it published?
Mobile App Improvements
Logos added the Factbook to the mobile app too. You'll find it in the menu button in the lower right corner.
Faithlife added a preaching mode to the mobile app. That way, you can build and manage your sermons in the computer app. Then you can put your app in preaching mode and preach from the app.

Moment Pro Tripod Mount with MagSafe for iPhone 12 Review
The Moment Pro Tripod Mount with MagSafe for iPhone 12, iPhone 12 Pro, and iPhone 12 Pro Max uses the magnet to quickly snap a tripod onto the iPhone. Does it fulfill the promise?
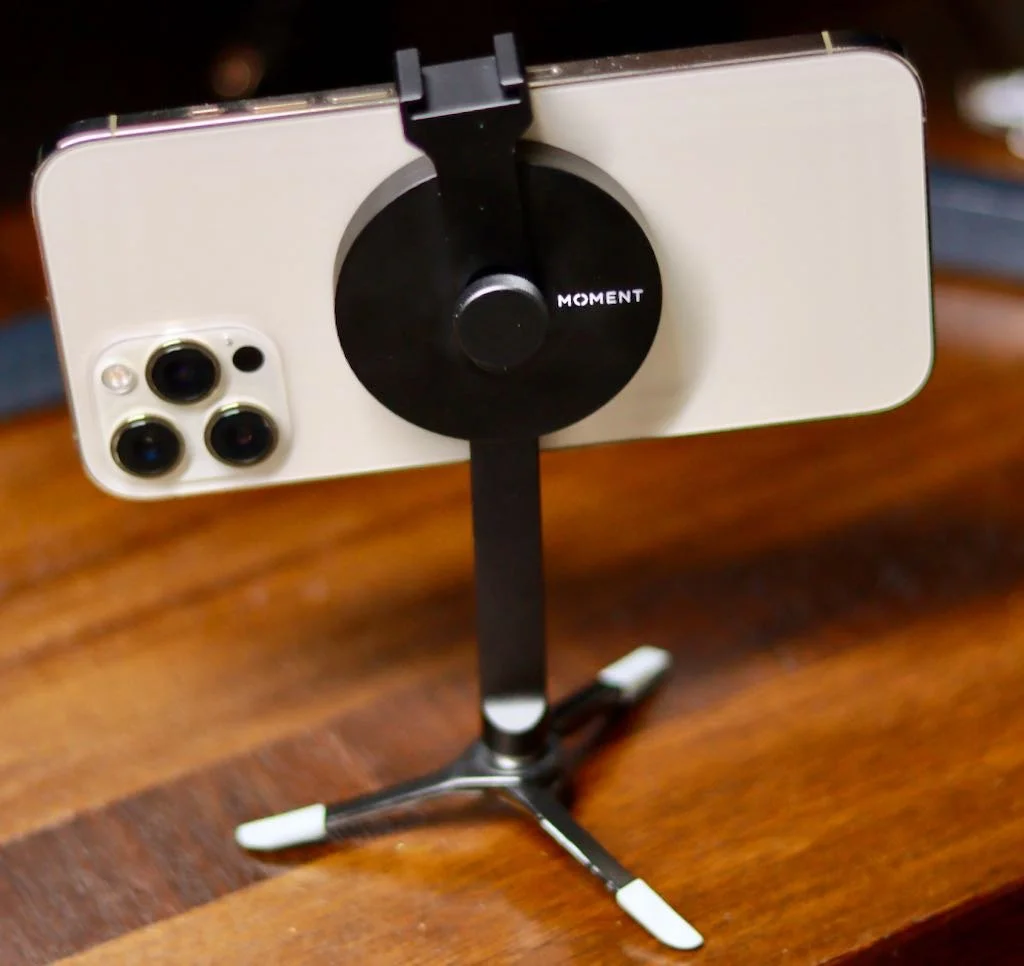
Moment began their business by selling lenses for iPhones and recently added photography gear for a wide variety of cameras. Yet, they still excel at creating great accessories for iPhone photographers. The Moment Pro Tripod Mount with MagSafe continues that line of iPhone photo gear using the MagSafe magnets in the iPhone 12, iPhone 12 Pro, and iPhone 12 Pro Max. The mount promises a quick and easy solution for taking steady photos and videos with the iPhone 12. How well does Moment deliver on that promise? Did they make another great accessory for iPhone photographers?
Moment Pro Tripod Mount with Magsafe for iPhone 12 - Design
The mount comes in two varieties, one for use as a landscape-only device. The other works in both landscape and portrait and has a longer shaft. I bought the one that works in both landscape and portrait modes.

The Moment Pro Tripod Mount with Magsafe connects to the back of your iPhone 12. The magnet in the MagSafe connector snaps onto the mount and holds it firmly. The round disk holds a cold shoe mount screwed onto the back of the mount. There's a short piece coming down out of the disk. There's a 1/4-20 connector so that the photographer can attach it to a tripod, whether it's something like a professional tripod or the small feet that came with my Joby GripTight tripod. The pad on the disk that snaps onto the back of the phone has a softer material. This keeps the metal on the mount from scratching the phone's back.

I also connected it to a clamp mount that I recently bought on Amazon. The Slow Dolphin Tripod Clip Clamp Mount screws into the 1/4-20 connector on the bottom of the MagSafe Tripod Mount. The two hold the iPhone in place for photography or for just viewing videos on Netflix, YouTube, or some other content (see below).

Users can swivel the holder to watch content in the landscape, as seen above. Or you can use it in portrait for those fantastic TikTok videos you shoot.

On top of the mount you'll find a cold shoe mount. Put a light or a mic like the Rode Wireless GO II Microphone.
Moment Pro Tripod Mount with MagSafe for iPhone 12 - Quality
Moment did a great job designing the Moment Pro Tripod Mount with MagSafe for iPhone 12. I've only had it a few days and used it for a few tasks plus every night for streaming Netflix. It works exactly as designed and probably will not fall apart easily. The disk holds the shaft with the 1/4-20 securely and firmly.
The cold shoe mount also serves to secure the phone in place. Press the cold shoe mount down against the phone to keep both in place.

On the back of the mount you there's a screw that holds the cold shoe mount to the MagSafe disk. Unfortunately, it doesn't seem to screw tightly. You have to press it against the phone, or it becomes loose. I'm not sure if that's by design or a design flaw. It doesn't seem to keep the cold shoe mount from working for now, but I'll be keeping an eye on it.

I do not use my iPhone with a case unless I'm taking photos with the set of Moment Lenses I own. I've tested it with my Moment Thin Case, and it does not hold the phone very well at all. That's a huge problem. You can see in the video below that it fall off the mount far too easily with the case on the iPhone 12 Pro Max.
Moment promises that it will work with any MagSafe compatible case. In fact, the magnet in Moment's tripod feels like it snaps to the phone more securely than Apple's own MagSafe products when I don't use a case. However, it's coming off too easily, so you can't confidently mount your iPhone 12 Prom Max with Moment's own case needed to use their lenses.
The mount sits on my nightstand so I can quickly throw it in my bag. The metal design means I need to be careful where I put it because I don't want to scratch my MacBook or iPad.
Recommendation
Moment Pro Tripod Mount with MagSafe for iPhone 12, iPhone 12 Pro, and iPhone 12 Pro Max works as designed on my naked iPhone 12 Pro Max. It's made of quality materials. At $60, it better work well. I love the idea of MagSafe and hope we see some other equally creative accessories. I wish the screw on the back held the cold show mount more securely, but it does work. I also wish it held my phone in a case more securely.

Moment makes several different MagSafe devices including...
- The landscape tripod mount - $59.99
- The landscape and portrait tripod mount - $59.99
- A wall mount that fastens to a magnet stuck to a wall - $19.99
- A car vent mount that holds onto the vents of your car's heater/air conditioner - $39.99*
- A cold shoe mount which is like the one I reviewed, but it doesn't have the shaft with the 1/4-20 connector - $39.99*
- A version of the tripod mount without the cold shoe mount - $49.99*
- A multi-threaded mount with 7 threaded holes on the back and no shaft or cold shoe mount - $39.99*
The items above with the asterisk (*) are either pre-orders or back-ordered. In other words, don't assume you'll get one within the next few weeks. It could take many months like mine did.
I didn't particularly appreciate having to wait for as long as I did to receive the mount. I ordered it soon after they announced that it was available for pre-order. It took many months to show up. Moment always has trouble getting things sent out, and new products often end up back-ordered. They promise that if you order today, you'll get it shipped starting the next day. You should receive it within a week to ten days depending on where you live instead of in 4 months.

What If I’m Discouraged in My Evangelism - Book Review
The little book What If I'm Discouraged in My Evangelism will encourage you with an emphasis on God's power meeting our willingness.
We all face it, and Isaac Adams takes a vulnerable approach to the subject in his short 9Marks title What If I’m Discouraged in My Evangelism. The book is part of a series called Church Questions. I reviewed another title in this series of helpful short books for believers called What If I Don't Desire to Pray.
In this title, Adams tackles evangelism's big problem in modern 21st-century churches with a hopeful approach. Too many believers struggle with evangelism because of fear, inadequacy, or just apathy. Adams tries to encourage believers struggling with sharing their faith by focusing on God's hopeful promises and his character. As he says, the book aims at "those who want to share the gospel message but, for whatever reasons, struggle to do so faithfully."

The Content of What If I’m Discouraged in My Evangelism
The book contains 9 sections discussing the Hope we Christians have in God. There's a great illustration for our reaction to the reaction by others to our message. Too many would-be evangelists avoid telling their story because they fear rejection by the recipient. Adams compares us to a mailman. Does a mailman feel anxious that those on his route will reject the letters, bills, and junk mail she delivers? No! She does her job and faithfully delivers the mail every day between Noon and 2:00 p.m. to the Purcell house.
After this great illustration, Adams begins dealing with the question: “What’s Our Hope?“ Each of the 9 answers comes with biblical support and real-world examples meant to encourage the reader. We read that we should...
- ”...fix your eyes on Jesus.” to avoid discouragement.
- Remember that we are evangelists in the home with our children.
- Be like Paul or Jonah and preach the word, whether you do so with great skill or meager efforts.
- Remember that God is the one who saves, not us or our methods!
- Know that rejection is a cause for celebration because it makes us more like Christ, who was rejected and promised we’d face rejection.
These are a few of the encouragements Adams offers.

One Nitpick Criticism
Under the sixth answer to the question “What’s Our Hope?”, the author uses Jonah as an example of a “reluctant evangelist.” I agree, as we all should, that Jonah didn’t want to go to Nineveh. He ran the opposite way. However, he also returned when God gave him a second chance. That’s a hopeful reminder.
The problem arises when Adams says Jonah then offered “the most pathetic call to repentance in all of Scripture.” He quoted Jonah 3:4, where we’re told Jonah measly said, “Yet forty days and Nineveh shall be overthrown.” The argument is that we get no other message or pronouncement. Is that true?
The book of Jonah doesn’t tell us of any other statements by Jonah, but the implication is that Jonah stood up and said nothing else in Nineveh. The converts began pouring down the aisles seeking salvation. Not really, but that’s how it would happen in a modern revivalist era. In Jonah’s day, they believed God and repented.
Did Jonah really never say another thing? I don’t know. Isn’t it possible that Jonah did say other things, but all we get is a brief summary? After all, we’re told in John 21:25 that we don’t get a record of all Jesus did because the world couldn’t hold all the books necessary to tell every detail of his life. Maybe the same holds true for Jonah.
As I said, that's a minor criticism of an otherwise fine work.
Recommendation
Isaac Adams did a good job of offering some simple encouragement with biblical support for the most part. He offers practical explanations of his main points and the practical application of how to move forward in hope.
The short little book won’t take you long to read. You could easily consume it over days with one section per day read devotionally along with your other scripture reading and prayer. You could also sit down and attack it in one or two sittings as I did.
However, you read the book, read it. As a pastor, I’ll possibly take the content and passages used to cover each of the 9 answers and turn them into a sermon series or, more likely, a three-part Bible study for a Wednesday night discipleship time.

Setapp Review: Worth the Cost to Get Dozens of Great Apps?
Setapp collects some useful Mac apps & utilities users can install and use so long as they pay for the subscription. Is it worth the price?

What if you could pay one fee and get access to dozens of great apps? That's what the Setapp subscription service offers. You pay monthly or yearly, and while you're paying, you can use any of the included services.

These kinds of bundles pop up on the Mac side, but Setapp is available all the time and keeps adding new apps that you can use all for one monthly fee.
Setapp made a name for itself because it doesn't just provide you with garbage apps no one wants from developers trying to make a name for themselves and can't get people to buy them. They don't offer old versions like those British computer magazines used to offer on a disk with the magazine I used to buy at Barnes and Noble. You actually get some established names too.
I subscribed months ago and used it to download some cool utilities and programs on my Mac and even my iPad. We'll look at the service and the apps and then decide if the price is right. We'll also list some of the best apps available.
See reviews of other tech products here on our site.
Video Review of Setapp
Here is my video review of the Setapp service from the Theotek YouTube Page. Go there and subscribe if you like this video.
How Does Setapp Work?
Install Setapp on your Mac. There's a 7-day free trial offer to test it out. I wish they gave a longer trial, like 30 days.

Run the app, and it puts an icon in your Menu Bar. You can click it, and you'll see a small popup window. This small window shows apps you can install, or you can open the full app. There's also a Settings icon in the lower right corner. Use it to close the app or change preferences.
Take a look at all the apps curated in Setapp and install the ones you might find useful. You can also get them on an iPhone or iPad.

The apps install through the Setapp app, which looks like the Mac App Store. On the left side of the app, there's a list of categories. A slideshow at the top shows the recommended apps. In the main section of the window, users will see Recommended for you, New arrivals, and Recently updated.

To see all the apps installed, click on the On this Mac section on the upper left. The Favorites section shows apps you choose as your favorites by clicking on the heart icon next to an app title (see above). Setapp sets up Collections of apps based on the ways you might use apps.

When you find an app, you might want, click on the app icon to learn more about the app. You can install it from that screen or the previous screen.

Install Apps on iOS
People who want to install apps on their iPhone or iPad can do so by going to the Available on iOS section at the bottom of the list on the left of the Setapp window.

Let's say I want to install the 2Do app on my Mac and iPhone. Install it first on your Mac using the Install button next to the app title. Then you'll see the iOS app button with a checkmark in the button next to the Install button. Click it to install the app.

Setapp shows you a QR code that links to the app in the iOS App Store. Use your phone's camera to scan the QR Code. After installing the app on your phone, click on the Next button on Setapp on your Mac. You'll see another QR Code that unlocks the app on iOS so you now own the app.

Value of the Setapp Service is in the Apps Available
The apps make Setapp worth $10/month or $9/month if you pay annually. I installed only a handful of apps on my Mac, but these apps' total cost if I bought them separately makes it worth the price. The 2Do app costs $50 alone. That's half the price of the subscription for a year. I also use Clean My Mac X, which costs $35/year in the app store or $90 for a one-time fee. Those two apps alone make it worth the cost for a year.

You have to factor in that you must pay every year. So some apps don't have subscriptions. You pay once and own it. If you only use those kinds of apps, then Setapp might not hold value for you.
I like that I can try out all the apps without paying extra. It's all you can eat. That's a good value.
I've discovered apps that I love, like News Explorer. It's an RSS reader, which curates news sites. I can open it and see my favorite blog headlines and open just those I care to read.
Setapp Categories
Setapp contains the following categories:
- All Apps
- Lifestyle
- Creativity
- Developer Tools
- Productivity
- Mac Hacks
- Writing & Blogging
- Education
- Maintenance
- Task Management
- Personal Finance
- Available on iOS
In the lists below, I mention the apps in one category even though some apps show up in multiple categories. For example, Gifox shows up in Lifestyle and Developer Tools. I only list it in the category where it best fits.
Lifestyle Apps Worth Downloading

Here's a list of some of my favorite Setapp Apps in Lifestyle:
- Canary Mail - one of the most popular Mac Email apps.
- Downie - download videos from video hosting sites.
- News Explorer - RSS feed reader mentioned above.
- Photolemur - a nice AI-powered photo editor.
- Swift Publisher - a powerful desktop publishing app.
- Touch Retouch - edit photos and remove distracting background people or objects in photos.
Creativity Apps to Look At

Check out these great Creativity apps on Setapp:
- Cleanshot X - a great screen capture app.
- FotoMagico Pro - powerful slideshow creation tool that puts your photos into beautiful videos of photo slide shows.
- GlueMotion - create time lapse videos using your photos.
Developer Tools
I'm no developer but even I find a few of these useful. Give a look to these Setapp Developer Tools apps:
- Coherence X - turns a website into a Chrome web app, great for Google Chrome browser users who work on a Mac and a Chromebook.
- Gifox - records screen and saves it as an animated Gif.
- Marked - write in markdown code and see what it will look like on your website.
Best Productivity Apps on Setapp
For people trying to get some work done, try some of these Productivity apps.
- 2Do - powerful task manager.
- BusyCal - a great Calendar replacement that runs from the Menu Bar and supports natural language input.
- InstaCal - another great calendar app that runs from the Menu Bar. which I like but not as well as BusyCal, but you may disagree so try both out.
- PDF Search and PDF Pen - two great PDF tools that give you a little more than just using the Preview app for PDF reading, writing, and markup.
Great Mac Hacks Apps
Here's a list of my favorite Mac Hacks apps:
- Bartender - a popular tool to keep your Menu Bar from getting too cluttered.
- Jump Desktop - a great remote computer application, which lets you access another computer over the Internet from your mac and also lets you access the Mac on which you install Jump Desktop.
Writes will Love These Writing & Blogging Apps

Are you a writer or blogger? Then try out these great apps on Setapp:
- MarsEdit - turn your blog into a word processor so you can write offline and then upload after you get your text just right.
- Ulysses - one of the best long document editing tools that helps writers compose their books, screen plays, or other long documents.
Education Apps You'll Love in Setapp
Educators and students will find these apps useful:
- MarginNote - a powerful note taking and annotating tool with automation features that make it incredibly useful for students.
- MindNode - create mind maps to help you organize papers, thoughts, or just study topics.
Cool Maintenance Apps to Make Your Mac Work Better
You can speed up your Mac or make it work more efficiently with these tools:
- BetterTouchTool - lets you program the Touch Bar on your MacBook Pro.
- ClearVPN - a basic VPN client that wouldn't be my first choice, but since it's here for free to Setapp subscribers, I use it and works.
- iStatMenus - get more information about your machine with this little Menu Bar app.
Available on iOS
Install the following apps on your iPhone or iPad:
- 2Do - task manager for Mac and iOS.
- MindNode - great mind mapper for Mac and iOS.
- Ulysses - also runs on an iPad.
Conclusion and Recommendation
The last two categories (Task Management and Personal Finance apps) don't include any apps that weren't already mentioned in the other categories. That's why you don't see them listed above.
Setapp costs $9.99/month. If you buy the one-year subscription, you'll save $12 for the year. You can get a family subscription that lets you install Setapp on up to 4 machines. That might help if you own more than 2 Macs. People with two will pay an extra $2.49/month for the second Mac. Add an iOS device for $2.49/month.
Try Setapp for one month and see what apps you'll use. Then do the math to see if the subscription saves you money over a couple of years. The apps I use would cost me hundreds of dollars, so it's worth paying for 2 Macs and one iPad.
Setapp would be a better deal if the $19.99/month family deal applied to Macs and iOS devices. I'd buy that and install apps on my 2 Macs and my iPhone and iPad.
I like that they add new apps almost every month or two. This increases the value. I'd like to see video demos of the apps inside Setapp. However, the apps include a link to the developer's website. These sites usually show more information that you get inside Setapp.

Does Grammarly Improve Writing Enough to Justify $140/Year Subscription?
Grammarly improves writing by checking your spelling, grammar, and writing style in real-time. You can use it for free to find simple problems in your writing, but is the subscription worth the money? Check out my review ot find out.
I recently discovered the writing service Grammarly. Grammarly runs on various platforms and analyzes writing for grammar, spelling, and style problems. You can use it for free and get spelling and punctuation assistance, or you can get advanced analysis by paying for a subscription. And it's not cheap! Is it worth the price?
Where Can You Use Grammarly?
Writers can run Grammarly wherever they write, so long as they use one of the supported platforms, which include:
- Microsoft Word Plug-in
- Browser Plug-in for Safari, Chrome, Firefox, or Microsoft Edge
- Web Application
- Desktop App for Mac and Windows
- Mobile Keyboard App for iOS and Android

When you install the Word plug-in, you write, and Grammarly offers corrections that you can easily click to change. The quick correction suggestions speed up my writing because I don't worry about going back to fix typos or errors until I finish typing a paragraph or more. Then I click a few times to fix things, thanks to the plug-in.
Open your Safari or Chrome browser, and you can correct as you type anywhere on the Internet. The extension checks your spelling, grammar, and style to help you write better. Grammarly helps when writing inside web forms or other places where there's usually no spell-checking or only rudimentary spell-checking. It's helped me with my writing in WordPress.
Grammarly Web App and Desktop or iPad App

To use Grammarly as a web app, open the site and create a new document. You'll see three columns. The writing area on the left has a toolbar on the bottom for formatting text and paragraphs.
There's a narrow column called the Assistant on the right that shows your document's analysis. It tells you whether your document has any problems and how clear, engaging, and grammatically correct it rates your document.
When there's an error, Grammarly shows the correction in the center column. Users can click to fix things quickly without retyping text.
Grammarly as a Replacement Keyboard


The mobile keyboard on iOS or Android replaces the built-in keyboard. As a user types into a text entry box or a document, the keyboard analyzes the words typed and offers to correct them in real-time. The keyboard includes things like slide to an insertion point by pressing and holding on the space bar, like the built-in iOS keyboard. I can't say if the Android keyboard does this since I've not tried it.
Value and Recommendation
Grammarly is a subscription service with three tiers.
- Free - The free version works in all the various apps and services listed above. Still, it only shows you spelling, grammar, and punctuation errors.
- Premium - Premium enhances the analysis to include writing style for multiple audiences and settings. Imagine an editor helping with more than simple errors to improvise your writing style.
- Business - The Business level subscription adds more features for a team of users.
How much does each level cost? Here's the breakdown:
- Premium Monthly - $29.95
- Premium Quarterly - $19.98 for 3 months = $59.94
- Premium Annually - $11.66 for 12 months = $139.92
The Business Plan changes in price depending on the number of users. If you pay monthly, the company charges $25/month for each member. However, if you pay annually, you get a discount as follows:
- 3 to 9 members — $12.50/member/month
- 10 to 49 members — $12.08/member/month
- 50 to 149 members — $11.67/member/month
The best recommendation I can give you is this: I bought Grammarly for one year. It really helps me with my poor typing skills. I use it as my primary keyboard on my iPad and iPhone. I installed the Word plugin and used it in Safari on my MacBook Pro and Edge on my Windows desktop.
The price seems steep. After telling a friend that I bought the subscription, I learned about something similar called Antidote. He uses it, and it costs half as much. They offer a free version, too, so give it a try before paying for Grammarly. You may get a better deal than I got with Grammarly. If you don't like it, give Grammarly a try. I decided it was worth the price to speed up my typing and protect me from making as many mistakes.
Samsung Galaxy Tab S7 Review for Ministers
The Samsung Galaxy Tab S7 is a premium Android tablet. The iPad dominates the tablet market. Is this tablet a useful tool for ministers?

Probably hundreds or even thousands of sites posted a Samsung Galaxy Tab S7 Review when it came out earlier this fall (2020). So, why does the Internet need another one? It doesn’t! Thanks for stopping by.
Actually, I’ll publish one anyway, because I want to focus on how I use the Samsung Galaxy Tab S7 in my ministry. My Samsung Galaxy Tab S7 Review will focus on the following:
- Bible study
- Reading books, magazines websites
- Preaching
- Presenting in a teaching situation
- Note-taking in meetings or study
- General tablet use including email, social media, web surfing, playing games, and watching video online

Samsung Galaxy Tab S7 Review: Screen and Input
The Samsung Galaxy Tab S7 blows away every other Android tablet. If you want a cheap tablet to read books, watch videos and play a few games, then consider a Kindle Fire. But if you want the best Android tablet available, then buy the Samsung Galaxy Tab S7 or S7+. I have a friend who is an Apple fan through and through. He said the Tab S7 is good enough to make him consider switching, almost.

Samsung offers two iterations of this stellar tablet each in three colors (Mystic Bronze, Mystic Black, Mystic Silver). One comes with an 11-inch WQXGA LCD with a 2560 x 1600 resolution. It's a beautiful screen even though the larger 12.4-inch Super AMOLED display with a 2800 x 1752 resolution. I looked at both at the store and wanted the smaller more portable tablet and didn't see a very big difference between the two screens. In theory, a Super AMOLED display should look much better, but the LCD on my tablet still looks amazing.
I primarily bought the tablet because I wanted a smaller tablet for reading, taking notes, and general media consumption. The S Pen competes well against the Apple Pencil on the iPad, whether you use the second generation Pencil on the iPad Pro or the older Pencil on an iPad mini, iPad Air, or regular iPad. It's a better size and fits in my large hands perfectly. I love taking notes in Samsung Notes. If they offered a slightly smaller 9-10 inch screen I probably would have picked that version, but my 11-inch S7 isn't unwieldy.
Samsung Galaxy Tab S7 Performance
The 865+ Qualcomm Snapdragon processor feels very fast with an Octa-Core 3.09GHz rating. Both tablets run on the same processor. The 11 gives users 8GB of RAM while the 12.4 strangely only has 6GB. You can buy them with three storage options - 128, 256, and 512GB of built-in storage. Add up to 1TB of expendable micro-SD card storage.
Specs don't matter if the software doesn't run fast. The Samsung Galaxy Tab S7 does. Everything feels smooth. Apps jump to life. I started it up and timed the boot and it took 28 seconds from start-up to the point I could launch apps. That does not include the few seconds when I paused my timer while I entered my password and restarted it as it finished booting.
I don't play a lot of games, but the few I do ran smoothly. You won't worry about speed on the Tab S7 or S7+. Find out all the detailed specs at Samsung's website, but here's the list of highlights.
Samsung Galaxy Tab S7 Specs
- Software: Android 10 and Samsung's One UI 2.5
- Processor: Octa-Core (3.09GHz,2.4GHz,1.8GHz)
- Display: 11-inch WQXGA display with a 2560 x 1600 TFT
- Memory: 128, 256, 512 GB storage, 8 GB RAM for 11-inch and 6 GB for 12.4-inch; up to 1TB micro-SD card slot
- Camera: Front = 8MP, Rear = 13 and 5 MP; Video Recording UHD 4K 30fps
- S-Pen support; Optional Keyboard case
- Wi-Fi -802.11 a/b/g/n/ac/ax 2.4G+5GHz, HE80, MIMO, 1024-QAM; LTE optional
- USB Type C; Bluetooth v. 5
- Fingerprint scanner and Face recognition security
- Weight: 1.1lb, Dimensions: 6.51x9.99x.25 inches
Samsung Galaxy Tab S7 Review: Bible Study and Reading Books
Many ministers will use their Tablets for reading and Bible study and I'm one of them. I primarily run Logos Bible Android App, Olive Tree Bible, and Accordance Bible. Sometimes I run the Bible app from Life.Church too.

These apps run perfectly fine. The Accordance and Olive Tree Bible apps will let you store your books on the micro-SD card, which helps if you have a really large library or want to keep them on external storage in case you have to erase the internal storage.

In addition to Bible apps, I use the Kindle app and read PDF files on my tablet. The screen may seem a little large for some, especially compared to a Kindle or smaller Kindle Fire. But I like it. I am getting older and can boost the font size to easily read.
Write in the Margins or Highlight like a Paper Book
If you convert your books to PDF format, you can import them into Samsung Notes or some other note-taking app and mark them up as you would with a pencil or pen and a paper book.

Samsung ships the tablet with Noteshelf, a great note-taking app that's also good for marking up books. When you create a new note, you can import a document and choose your PDF book from internal storage, the SD card, or a sync service like Dropbox or OneDrive. You have to set those services up and then they will show up as options in the Noteshelf import dialog box.

Now, use the S Pen to write notes in the margin or highlight the book. When you're done reading the book export the PDF with a slightly different name, like Book Name Finished.PDF.
Samsung Galaxy Tab S7 Review: Preaching from Digital Notes
When I preach, I don't take paper notes into the pulpit. I use my tablet. For years I used the iPad and then iPad Pro 12.9-inch. Now, I like using the Samsung Galaxy Tab S7 because it's a little smaller.

I write my sermons in Microsoft Word and then load them into the Android app on my Tab S7. In the upper right corner, there's an icon that looks like an open book. Tap that to get to Reader view. It loads the document in a larger font that you can adjust. Swipe left/right like a notebook. This view hides the toolbar.
Using the tablet is great. I think Microsoft needs to make their Reading Mode work on Android the same as iOS. You can swipe left/right like a notebook or scroll up down on iOS. You can scroll up/down on Android.
Presenting Using the Tab S7
Presenting requires connecting the tablet to an external display or projector. I use a USB C to HDMI cable for a reliable connection. Hook that up to a projector, as I do. Then I fire up Microsoft PowerPoint.

I love that I can annotate my slides using the S Pen. Touch in the top black bar above the slide to show the inking tools. Then when you're finished you can close the presentation and either keep or discard the ink markups.
Samsung Galaxy Tab S7 Note Taking
Notetakers can use one of the dozens or even hundreds of note-taking apps in the Android App Store. Samsung ships with its Samsung Notes app, my primary choice because it's simple to use and I don't really need much more than that. I can use the S Pen and when I write on screen I can rest my wrist on the screen while writing.

Samsung also ships with the above mentioned Noteshelf. It's also a simple note-taking app. I don't think it adds much that you can't get from Samsung Notes, so I don't use it.

INKredible offers another more powerful note-taking option. The one reason I like it is the zoom feature. See the image above. It pops open a box at the bottom of the screen. As you write in the zoom box, it enters the handwriting in the spot of the note above the zoom box. As you write, a gray shaded section appears at the left end of the line. When you finish writing at the end of the box you start writing in the left side gray area and it automatically moves the entry box over to the right of that line and then to the next line as you get to the end of the line. See it in the demo below, which is admittedly very old and out of date.
I take my Tab S7 everywhere. I take notes in meetings, when I'm doing my devotions with my print Bible, or when I'm brainstorming ideas for ministry or even my personal life. It's a great companion and I love taking notes on it.
Samsung Galaxy Tab S7 Review: Games, Media and Web Usage
As I said above, I don't play a lot of games. However, I enjoy simple games like the Microsoft Solitaire app, Real Pool 3D, and others. People who play more power-hungry games will likely enjoy using the tablet with 8GB of RAM and a fast Octa-Core 3.09GHz processor. Below you'll see a video demo of more powerful games like PubG Mobile from a gamer.
I do watch some videos, mostly using YouTube, Netflix, and YouTube TV. It's a great solution for that while out and about waiting for. The sound won't blow anyone away, but it's very good for what it does. They advertise the Dolby Atmos support, but my aging ears don't hear that much difference between average speakers and better quality sound like the Tab S7 should offer.
Volume sounds loud enough at about 75% in a somewhat noisy room. You can pump it to 100% to get louder audio, but your neighbors will get annoyed. Plug in or use wireless earbuds for most of your usage and you'll get better sound.
Samsung Dex
Some users long for a device that serves as their mobile phone or tablet and as a desktop computer. With Samsung Dex, you get just such an application.
I plugged my Samsun Galaxy Tab S7 into a monitor using a USB C to HDMI cable. Then I paired a Bluetooth mouse and keyboard to the tablet. The screen shows up on the monitor and works as a desktop computer.
Dex works as expected, but I don't really want to use Android as my desktop system. So, I didn't really use it much. I could in a pinch and I could see carrying around a good Bluetooth keyboard and mouse. You can also use the optional Samsung Keyboard Cover, but it's not cheap and doubles the thickness of the tablet and it's not easy to remove quickly for reading or taking handwritten notes with the S Pen. So, I don't bother. I returned the keyboard cover and got the thinner and lighter Book Cover. I used to carry around the mouse and keyboard but seldom used it so I quit doing that. You'll need to decide if you want to make use of Dex.
Recommendation
If you're looking for the best Android tablet in general, then go get the Samsung Galaxy Tab S7. If you want a larger 12.4-inch screen to use as a computer replacement, then get the larger Tab S7+, but that's the only reason. The smaller S7 holds up fine for the majority of users.
People who only want a tablet for reading, playing light games, watching videos, and doing some basic Internet activities, should really consider one of the very inexpensive Amazon Kindle Fire tablets. Get whatever size you prefer.
If you're deeply emersed in the Apple world, consider the iPad, iPad Air, or iPad mini depending on what size you want and what budget. The great Apple Pencil works on all of them.

40 Questions Series for Accordance Review
The 40 Questions Series for Accordance Bible Software seeks to answer questions about 8 different topics from an evangelical perspective. This review focuses on the content of the series and using them in Accordance Bible Software for various platforms.
The 40 Questions Series from Kregel Publications for Accordance Bible Software puts into digital format 8 of the useful theological series that seeks to answer questions that Bible students might have on a range of topics from Calvinism to Church Membership. The series includes 8 of the 17 books in the set, each with 40 questions about a topic included in the book. Is it a good addition to your Accordance library? We'll take a look at the series itself and at using it in Accordance Bible Software.

For full disclosure Accordance gave me a review copy of the set. They offer a special until October 26 on the series taking $52 off to give you almost a 30% discount. Buyers can also get the individual volumes for a discount. Here's what you get.
- 40 Questions about Creation and Evolution (Keathley, Rooker)
- 40 Questions about the Historical Jesus (Pate)
- 40 Questions about Heaven and Hell (Gomes)
- 40 Questions about Salvation (Barrett)
- 40 Questions about Calvinism (Wright)
- 40 Questions about Christians and Biblical Law (Schreiner)
- 40 Questions about Islam (Bennett)
- 40 Questions about Church Membership and Discipline (Kimble)
The other books in the series are not yet available on Accordance but they will be soon.
40 Questions Series: How the Series Answers Questions in Accordance
Since Accordance gave me a copy to review for their sale, I did not have time to read all 8 books in the series. I started with 40 Questions about Calvinism by Shawn Wright. He's a church historian, pastor and professor at Southern Baptist Theological Seminary in Louisville.

Each book includes 40 questions that introduce and examine the topic of that book. For example, some of the questions from Wright's book on Calvinism asks things like...
- What's the Difference between "Calvinism" and the "Reformed Tradition"?
- What are the Five Points of Calvinism?
- Does God Love All People?
- Is the Arminian Doctrine of Prevenient Grace Biblical?
The book breaks up the 40 questions in to sections on things like general questions, questions about God's character, about salvation, about human responsibility and more. The last section covers more practical questions.
I'm not a Calvinist nor an Arminian. You might call me a Molinist because I affirm free will and eternal security like most traditional Southern Baptists.
The book helped me understand what many Calvinists believe and how they don't really like being put in the box of the TULIP 5 Points. The fact that those points came as a reaction to Arminian theology helps add some depth to what I was pejoratively taught about Calvinism.
In spite of learning more about what Calvinists believe, I was not convinced. However, I would recommend Wright's book for anyone who wants clarity about Calvinism from a Calvinist.
Accordance does a very good job of creating quality digital versions of the books they sell. They're formatted nicely for screens. The book creators do a good job producing mostly error-free copies of their books, so you can trust them.
Installing 40 Questions Series in Accordance Bible Software's Various Platforms
If you purchase the 40 Questions Series for Accordance, you'll want to do a few things to make them more convenient to use. You probably already know how to download new books, but if you don't follow these steps:
- Open Easy Install from the Accordance menu on macOS or from the Utilities menu on Windows.
- Click on the Easy Install tab at the top of the dialog box.
- Click the boxes next to the book name
- Hit the Download button at the bottom of the Easy Install box.
- Let it download the books and when it asks hit the Install button to shut down Accordance and Install the books.
After that the program will restart. You'll find them in the various sections of your library. For example the following five books show up in the Theological section of your Library.
- 40 Questions: Calvinism
- 40 Questions: Christians and Biblical Law
- 40 Questions: Creation and Evolution
- 40 Questions: Heaven and Hell
- 40 Questions: Salvation
You'll find the other 3 in other sections. 40 Questions: Membership and Discipleship shows up in the Practical section. You'll find the last two on Islam and Historical Jesus in the History section.
If you don't see the library on the left hand side of the window, open it from the Library button or the Window menu. You can also use the keyboard shortcut OPTION+COMMAND+1 on Mac or CTRL+ALT+1 on Windows.
To make the new books easier to find you may want to move the books to the top of your Theological section by dragging and dropping them using your mouse or trackpad. Or you can right-click the section name and choose Alphabetize to put them in alphabetical order. We showed you how to do this in our review of the Christi-Centered Exposition Commentary for Accordance.

To install the books on your phone or tablet, tap on the center of the app and then tap your Library icon in the bottom left corner on iPhone or iPad. Then tap on the Download button in the lower left corner and wait for the list to show your books. Hit the select all button in the upper right corner 2nd from the left. Then tap on the download button in the upper left corner.

On Android, tap on the screen to show your menu. Hit the Menu button with 3 lines in the upper left corner. Tap on Easy Install to open the Easy Install box.
If you're not sure which section of the library holds a book, then just start typing in the search box at the top of the Library.
Reading Books in Accordance Bible Software and Apps
Reading and highlighting books in iOS and Android versions of Accordance are a pleasure. As you'll see below, note-taking with Accordance mobile is not possible right now. I hope this changes very soon.
It's pretty easy to simply read books in the Accordance Bible Software on your Mac or Windows computer. Just open them up and read. You'll find them in the various sections of your Accordance Library as seen above.
If you want to add notes or highlights, you can do so easily.

To add notes hover over a section you want to annotate, a plus button will show up to the right of the paragraph. Click it and it opens a notes editor.
Unfortunately, you can't add notes to books in the mobile apps. iOS lets you add notes to Bible verses, but not books like the 40 Questions Series. Android doesn't even let you add notes to Bible verses. If you prefer to read on a mobile device like me, you'll need to open another app and put notes there and then sync that note file to your comptuer and copy and paste to into the desktop versions of Accordance. It's not ideal, but is a way to get around the limitations.
I asked Rick Mansfield of Accordance Bible Software about this and he said that the developers see the importance of notes and want to add them soon.

Adding highlights requires you to select the text you want to highlight and then choose the highlight style from the highlighter tool that pops up or you can open the the Highlight pallette box by hitting the button on the toolbar. Make sure you select the right highlight file from the dropdown box in the pallette box. After that it's easiest to just use the little tool you will see just above your highlighted text. The previously used highlight style shows up on the left (#1 in image above) and the tool pallette box opens if you hit the other button (#2 in image above).
I use My Mobile Highlights, created by default when you install the program. This file syncs with your mobile device using either the built-in syncing feature that requires you to have the computer program open and the mobile device open.
A lot of people own convertible or 2-in-1 Windows computers these days. If you like reading books on yours, then you'll enjoy reading in the Windows version of Accordance. It's not as convenient on a Mac since Apple doesn't make a handheld version of a MacBook.
Syncing Notes and Highlights Between Different Operating Systems
The built-in Wi-Fi syncing in Accordance is not very convenient. I never use it and you shouldn't either unless you have a problem using Dropbox. The Dropbox highlighting is only a little better, but it is better than the Wi-Fi system. You have to connect your installation with Dropbox. See the video below for how to sync using Dropbox.
Accordance needs to improve it's syncing features. That's my biggest complaint regarding Accordance Bible Software's platform. You have to use a third-party service to sync. They need to bring it in house and make it secure. Second, it's not always automatic. You can set the Mac or Windows versions to automatically sync when you open and close the program, but you have to do it manually on iOS or Android. Third, they need to sync settings and library organization between all platforms too. Other Bible software platforms do.
Until they add automatic syncing, you'll want to sync manually. Use the same steps from above on how to install the books on your iOS or Android device and chose the Sync button. Make it a happen to do this each time you open and close the app.
Recommendation
First, I like the 40 Questions Series and look forward to reading the remaining 7 titles after enjoying and learning a lot from Wright's book on Calvinism. Second, Accordance does a nice job and offers them all for a great price right now of $122 for the set. Make sure you get them before the deal ends October 26.
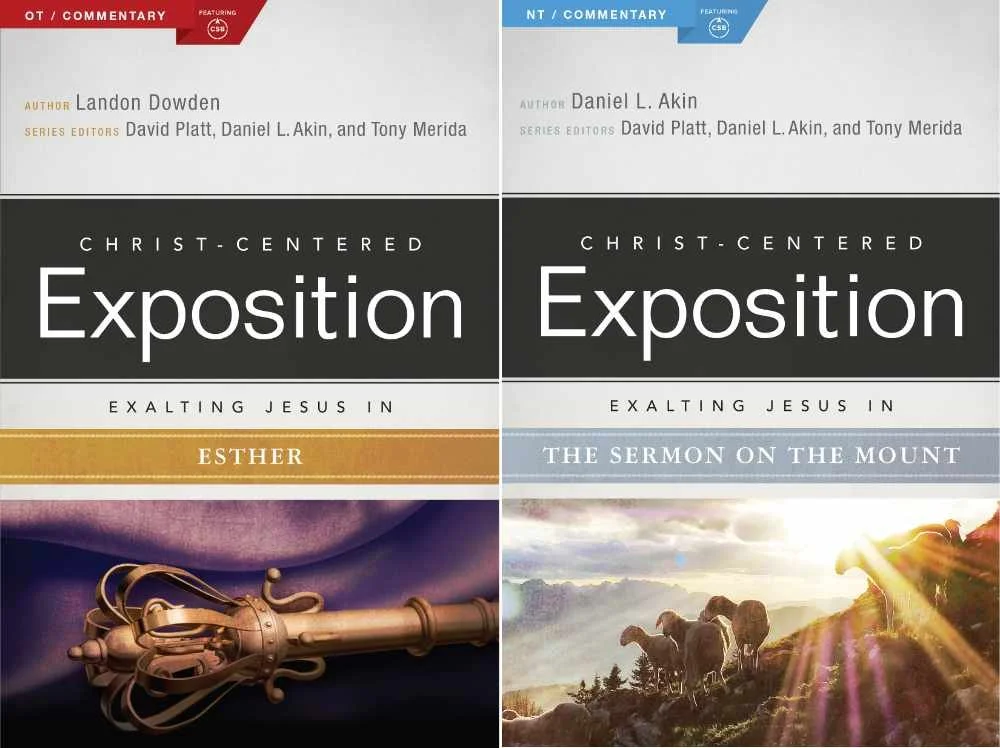
Christ Centered Exposition Commentary for Accordance Review

The Christ-Centered Exposition Commentary went on sale at Accordance recently and they gave me a chance to review it for you. How does this series help pastors and Bible students study the word? We'll let you know and show how to use it inside the Bible study suite.

What is the Christ-Centered Exposition Commentary?
Most commentaries come in one of a few categories depending on who will use them. Imagine a spectrum from right to left. Furthest to the left you'd find the most scholarly and technical commentaries that likely make use of original languages and focus a lot on translation, textual critical tools that help scholars at the graduate school or seminary level. You coudl imagine professors and translators using these.
On the far right end you would find what we call a devotional commentary that's meant to be read alongside the Bible for an average Christian whose reading their devotions and just wants a quick paragraph about a chapter or passage. Study Bibles fit in this spot on the spectrum.
The New American Commentary is one of my favorite sets and I own it in every Bible software package I own. It's closer to the center or slightly right of center depending on who you ask.
So where does the Christ-Centered Exposition Commentary fit? It's closer to the devotional side than the middle. It doesn't give users a word-for-word or even a verse-by-verse approach to Bible interpretation. Instead it reads a lot like the notes a preacher would make while preparing for a sermon. What if that preacher then chose to release those notes in book form and you get something like this commentary?
Tony Merida describes the series as looking at the text like one would use a magnifying glass to get up close to a subject or using a wide angle lens to get a wide vista. I would say it seems more wide angel than magnifying glass. But that's a good thing for teachers and preachers after they've spent time with the magnifying glass from other tools.
The commentary series includes 25 volumes from both the Old and New Testament. Here's the list of current books included and their authors.
Old Testament
- Exodus by Tony Merida (2014)
- Leviticus by Allan Moseley (2015)
- 1 & 2 Samuel by Heath Thomas and J.D. Greear (2016)
- 1 & 2 Kings by Tony Merida (2015)
- Ezra and Nehemiah by James M. Hamilton (2014)
- Proverbs by Daniel L. Akin and Jonathan Akin (2017)
- Ecclesiastes by Daniel L. Akin and Jonathan Akin (2016)
- Song of Songs by Daniel L. Akin (2015)
- Isaiah by Andrew M. Davis (2017)
- Ezekiel by Landon Dowden (2015)
- Daniel by Daniel L. Akin (2017)
- Jonah, Micah, Nahum, Habbakuk by Eric Redmond, Bill Curtis, and Ken Fentress (2016)
- Zephaniah, Haggai, Zechariah, Malachi by Micah Fries, Stephen Rummage, and Robby Gallaty (2015)
New Testament
- Matthew by David Platt (2013)
- Mark by Daniel L. Akin (2014)
- Acts by Tony Merida (2017)
- Galatians by David Platt and Tony Merida (2014)
- Ephesians by Tony Merida (2014)
- Philippians by Tony Merida and Francis Chan (2016)
- 1 & 2 Thessalonians by Mark Howell (2015)
- 1 & 2 Timothy and Titus by David Platt, Daniel L. Akin, and Tony Merida (2013)
- Hebrews by R. Albert Mohler, Jr. (2017)
- James by David Platt (2014)
- 1, 2, 3 John by Daniel L. Akin (2014)
- Revelation by Daniel L. Akin (2016)
Buyers can rest assured that the series authors hold a high view of the inerrancy and authority of scripture. They also put a strong emphasis on the role of Christ in every passage of the Bible, as the title suggests.
Editors David Platt, Daniel Akin and Tony Merida come from my denomination, the Southern Baptist Convention. Merida and Platt crafted the series with a pastor's heart while Akin brings a to the series his expertise as the President of Southeastern Baptist Theological Seminary in Wake Forest, NC.
Examples of Key Passages
Take the book of Daniel as an example. The commentary starts out with an introduction from this volume's author, Daniel Akin. The section for Daniel 1 begins with the Main Idea as follows:
Even in times of great trial and opposition, Christians must remain faithful to God and his gospel, imitating Christ’s own steadfastness as he endured persecution and death for our sakes.
Daniel Akin, Christ-Centered Exposition Commentary: Daniel (chapter 1 Main Idea).
As I've preached through both Ezekiel and Daniel over the last couple of years in my church, I've used this series from another software program. I've always appreciated that it offers thoughtful interpretation, with a scholarly background that doesn't hit you in the face. The authors are sure to show us how this passage offers a Gospel message where appropriate. It truly puts Christ at the center of their expository approach.
Readers will not get high-level discussions of grammar, translation or extensive history background. The authors do give the reader enough information about those sorts of details as they help support their interpretation.
Fast foward to Daniel 11:3-4 we get the following entry from Akin.
God Breaks and Divides as He Chooses (11:3–4)
There is a 150–year gap between verses 2 and 3. What happened in that period is not important for the story God wishes to reveal in this vision. Scholars agree that the “warrior king” (ESV, “mighty king”) of verse 3 is the Greek Alexander the Great (336–323 BC). Historians have written volumes about him. God gives him one verse in this chapter! He was a powerful king who conquered the known world of his day and ruled with absolute power. He indeed did whatever he wanted. But he died at age thirty-three. So, as soon as he is established, his kingdom will be broken up and divided to the four winds of heaven, but not to his descendants; it will not be the same kingdom that he ruled, because his kingdom will be uprooted and will go to others besides them. (v. 4)
This is precisely what happened. Alexander’s sons were murdered, and no part of his vast empire went to his descendants. As we mentioned [Dan, p. 140] earlier, following his death, four of his generals divided up his kingdom into four parts:
• Cassander took Macedonia and Greece.
• Lysimachus took Thrace and portions of Asia Minor.
• Ptolemy took Egypt and Israel.
• Seleucus took Syria and Mesopotamia.However, none of these kingdoms ever came close to matching the power and strength of Alexander’s brief empire. God plucked Alexander’s kingdom up, divided it into four pieces, and gave to others as he saw fit. And with that the great Alexander is finished. He served God’s plan and purposes. Off he goes!
Daniel Akin, Christ-Centered Exposition Commentary: Daniel (chapter 11 Main Idea).
Notice Akin brings out the history following the division of the Greek Empire after the death of Alexander the Great.
Jump forward to the book of Matthew and we read about the Sermon on the Mount in Matthew 5-7. David Platt writes in a way that reads like a sermon.
Platt introduced the section with a story about the great Billy Sunday, a 19th century evangelist. Sunday addressed vices from his day like dancing and playing cards. I bet few of us today would worry about such "vices" as Sunday called them. Platt uses the idea to illustrate that we should be extreme different than the secular world.
There was to be a clear line of demarcation between believers and unbelievers. These were things that marked off the people of God—things that marked out holiness, godliness, and salvation. He had a certain picture of what it looks like to be a believer in Jesus, and anything outside that didn’t fit.
David Platt, Christ-Centered Exposition Commentary: Matthew, Matthew 5-7
Platt then gives background on the sermon and dives into the text. This could easily be heard as a message in Platt's church. That's a good thing for preachers or Bible study teachers planning to share the message of the Sermon on the Mount. An ethical teacher or preacher could even use the story citing Platt as their own message introduction.
Tips for Getting the Most Out of the Commentary
When you buy the Christ-Centered Exposition Commentary, you'll download it using Easy Install in Accordance Bible Software. I recommend going into your Accordance Library and move it up the list towards the top. Even if you don't keep there, put there at first. This reminds you to use it each time you study a passage for a sermon, Bible study or your personal edification.
To promote it towards the top of your commentary list, open the Library from the toolbar button. It looks like an open book and by default sits on the left end of the toolbar.
If you removed the Library button, you can access it using the keyboard shortcut COMMAND+OPTION+1 or CONTROL+ALT+1 on Windows. You can also open it from the Window menu.

Expand your Commentaries section the Library. Look for the two new books added to your Library by Easy Install. They'll probably show up at the very bottom of the section. If you have the two-volume set with one book for OT and one for NT, then look for Jesus in the NT and Jesus in the OT. If you bought the single volume set, then look for Christ-Centered Exposition. I wish they would have titled them more like the original titles with something like "Christ Centered Exposition" still keeping it short so you don't have a really long entry in your Library.
When you find them, drag them to the top or near the top. I put them just below New American Commentary, which is my favorite.

Now, if you use the Info Pane or the Amplify menu, the books will show up where you dragged them, in my case just after NAC.

Recommendation
The Christ-Centered Exposition Commentary serves it's purpose well. God used it to help me better focus my study of the books of Ezekiel and Daniel plus other texts from various books of the Bible over the last several years. I look forward to seeing the missing books of the Bible added. Three volumes that you can get in physical or eBook form still don't show up in the set available from Accordance. You can see the whole list with more detailed information about each book at the commentary's website.
Don't expect in-depth exposition on every detail and word. Do expect a pastor approach to the text.
I used the series after doing my own carful observations, word studies, and reading more scholarly commentaries. But I seldom preached a passage without first reading this work if it had a volume on the book I was preaching. I also, often found the preaching focus useful as I introduced a passage using one of the stories the authors included or driving the main idea home for my audience with concluding illustrations borrowed from the authors.
Learn more about the Christ-Centered Exposition Commentary series from Accordance. If you think you could use a commentary that more than just a devotional commentary, but also more accessible than more advanced scholarly sets, then hurry over to Accordance to get on sale until October 26. It's on sale for $99.90 or $50 as a crossgrade if you own it in another Bible program.
For full disclosure I was given a free copy of the set in order to write this review. However, I liked it enough to pay for it in another program when it first came out a few years ago.
Note this version of this article was updated to explain that there's a 2-volume version and that the publishers have a few more books available net yet showing up in the Accordance version.