


What's New in Logos 10 Web App with Video
Now that Logos 10 is here, check out this demo of the Logos 10 Web App. We go over the major new features in the Logos online Bible study site.

When Faithlife released Logos 10, they also updated the Logos 10 Mobile app and the Logos 10 Web app. We've got the major new features of the Logos 10 Web App, with screenshots and a video showing how to use each feature.
If you want to upgrade to Logos 10, consider using my affiliate link to get a discount and help me pay for this site and the video I made about the update.

Why would you want to use a web app instead of software?
- Chromebook users can install the Android app, but it's not as good as the iOS app and not even close to the desktop app. The web app does a good job of presenting users with some good Bible study tools.
- People sometimes use a computer they don't own and can't install the software. Travel to a friend's house or borrow your spouse's system and log onto the Web App and you can access all your books and many of the advanced Bible study tools of the mobile and desktop apps.
- Small SSDs in systems like the Microsoft Surface Go or other older systems can run the Web App and still use your huge Logos library.
- A web browser and the Logos 10 Web App run faster than Logos 10 on the desktop. You might want to read some text or quickly run a simple search.
The new Logos 10 Web App offers a slightly changed user interface. You also get a few other features that we'll demonstrate in the video below and in each section after that below.
Video Demonstrating the Logos 10 Web App New Features
Logos 10 Web App Simpler Search
Logos 10 simplified search and ported that feature to the Logos 10 Web App. The new Simpler Search cuts down on some of the arcane syntax users needed in previous versions. The example they give is as follows:
For example, <Person Moses> WITHIN {Speaker <Person Jesus>} becomes person:Moses IN speaker:Jesus, to find all the times Jesus talks about Moses.
You no longer need brackets or curly braces to search in Logos. They say it’s more like a Google search. That’s a good thing because searching in Logos made things too complicated. Many of us just opened a browser and searched Google for simple searches trying to find a specific passage.
For the Logos 10 Web App, you can use their auto-complete to add search terms for special syntax. You can still use the old terms if you struggle to remember the changed syntax. Logos will translate it into a new way of searching.

To use the feature, click the Search button and then type in your search into the search box, as seen above.
Logos 10 Web App Sermon Import
The Logos Web App now lets users add their sermons thanks to the Sermon Importing feature. Add sermons you wrote in other software like Word or Google Docs. Then automatically create slides to export to Proclaim, PowerPoint, or Keynote. The Web App offers other options as well.
You can import existing sermons into Logos to take advantage of Preaching Mode, automatic slide creation, Sermon Manager planning, and wider integration into Logos.

Open the Sermon Manager from the tools menu. Then click on the three vertical dots in the upper right corner of the Sermon Manager and click on Import to add your sermon files. A dialog box opens up. Click on Choose files. Select one or more documents to import.

Logos 10 Web App processes the files adding tags for things like Bible passages. You can edit each file with the information you might find in the Sermon manager's Sermon Info sidebar on the right after selecting a file.
Popular Quotes in Logos 10 Web App
Using Sermon Builder, you can search for quotations to help illustrate ideas in your message. Open the Web App, go to the Tools menu (the 9 dots in 3 rows), and open Sermon Builder.

You'll see a single quotation mark in the upper right corner of the Sermon Builder. Click on it to open the Popular Quotes feature. You'll now see an entry box that you can use to search for passages, text, or topics. The tool searches the quotations dataset and finds applicable quotes.

Find your quote and drag it to the sermon editor. The Web App will create a slide to export to Proclaim, Keynote, PowerPoint, or other useful destinations. If I used it, I could export it to the worship presentation tool made by Faithlife called Proclaim.

Only customers who bought the Silver package or above of Logos 10 will see this feature in the Logos Web App.
Advanced Timeline in Logos 10 Web App

Logos updated the Timeline feature in the Logos 10 Web App and gave it a new name: Advanced Timeline. Open it from the Tools button on the toolbar (9 dots in three rows next to the search box on the main toolbar). You'll see Advanced Timeline in the drop-down box.
You'll need the Bronze package of Logos 10 or higher to access the new Advanced Timeline.
Church History Themes
The new Church History Themes feature brings a "combination of a new dataset and resource" to the Logos 10 Web App, which will help users better understand theology in the historical setting.
Logos added many pages to the Church History Themes section of the Factbook. These themes show the historical movements inside the history of the church. The entry in the Logos communities says...
Every Theme begins with a summary and lists Key Developments. It goes on to identify key People, Events, Places, Concepts, and Documents, which link out to other Factbook pages for further detail.

Here's how to use it. Open the Web App and then click on the Factbook icon, which looks like a book with a checkmark next to the search icon on the toolbar. In the Factbook, click on the drop-down list and choose Church History Themes.

You'll see a list of items in the left column of the Factbook. Choose one to study that item. The main window to the right shows content from the Factbook and your library regarding the item you selected.
How to Open Church History Themes from Advanced Timeline
Users can also open the Church History Themes feature from the Logos Web App Advanced Timeline. Click the Tools button on the toolbar. Then choose Advanced Timeline to open it.

Now click on the Facets button in the upper left of the Advanced Timeline Window. You may need to open the Subject Area section. Click on Church History to see the Church History Themes in the timeline.
How to Open Church History Themes from Library

You can also open the Church History Themes content from your Library of Resources. Click on the Library button on the main toolbar. Then search for either...
- Essential Lexham Dictionary of Church History
- Church History Themes
You can open one or both of these books to read and find content.
Auto Translation in Logos 10 Web App
Users can open a resource or book, and on the right side of the window, there's a new feature to translate the book or resource from the currently published language to another language.
![]()
See the screenshot above. Click the button second from the right in the resource's window. This opens the Auto Translation Tool. Choose the language you want to translate from the drop-down box that lists the languages. The Web App instantly translates the open book into the new language.
MyWSB Brings Wordsearch Bible Software to the Internet
Wordsearch has a new online Bible study website called MyWSB.com. How good is it and can you use it instead of their mobile apps?
Lifeway updated the MyWSB website for a better online experience for Wordsearch Bible Software customers.
If you use an iPad or another tablet or you own a Chromebook then using Wordsearch Bible Software wasn't possible. They offer a simple book reader for iOS and Android, but it's not enough for most students of the Bible. The MyWSB web app doesn't give us everything found in the Wordsearch 12 program for desktops and laptops. However, it's better than what you get with the iOS or Android mobile apps. They're pretty horrible for anything other than simple book reading.

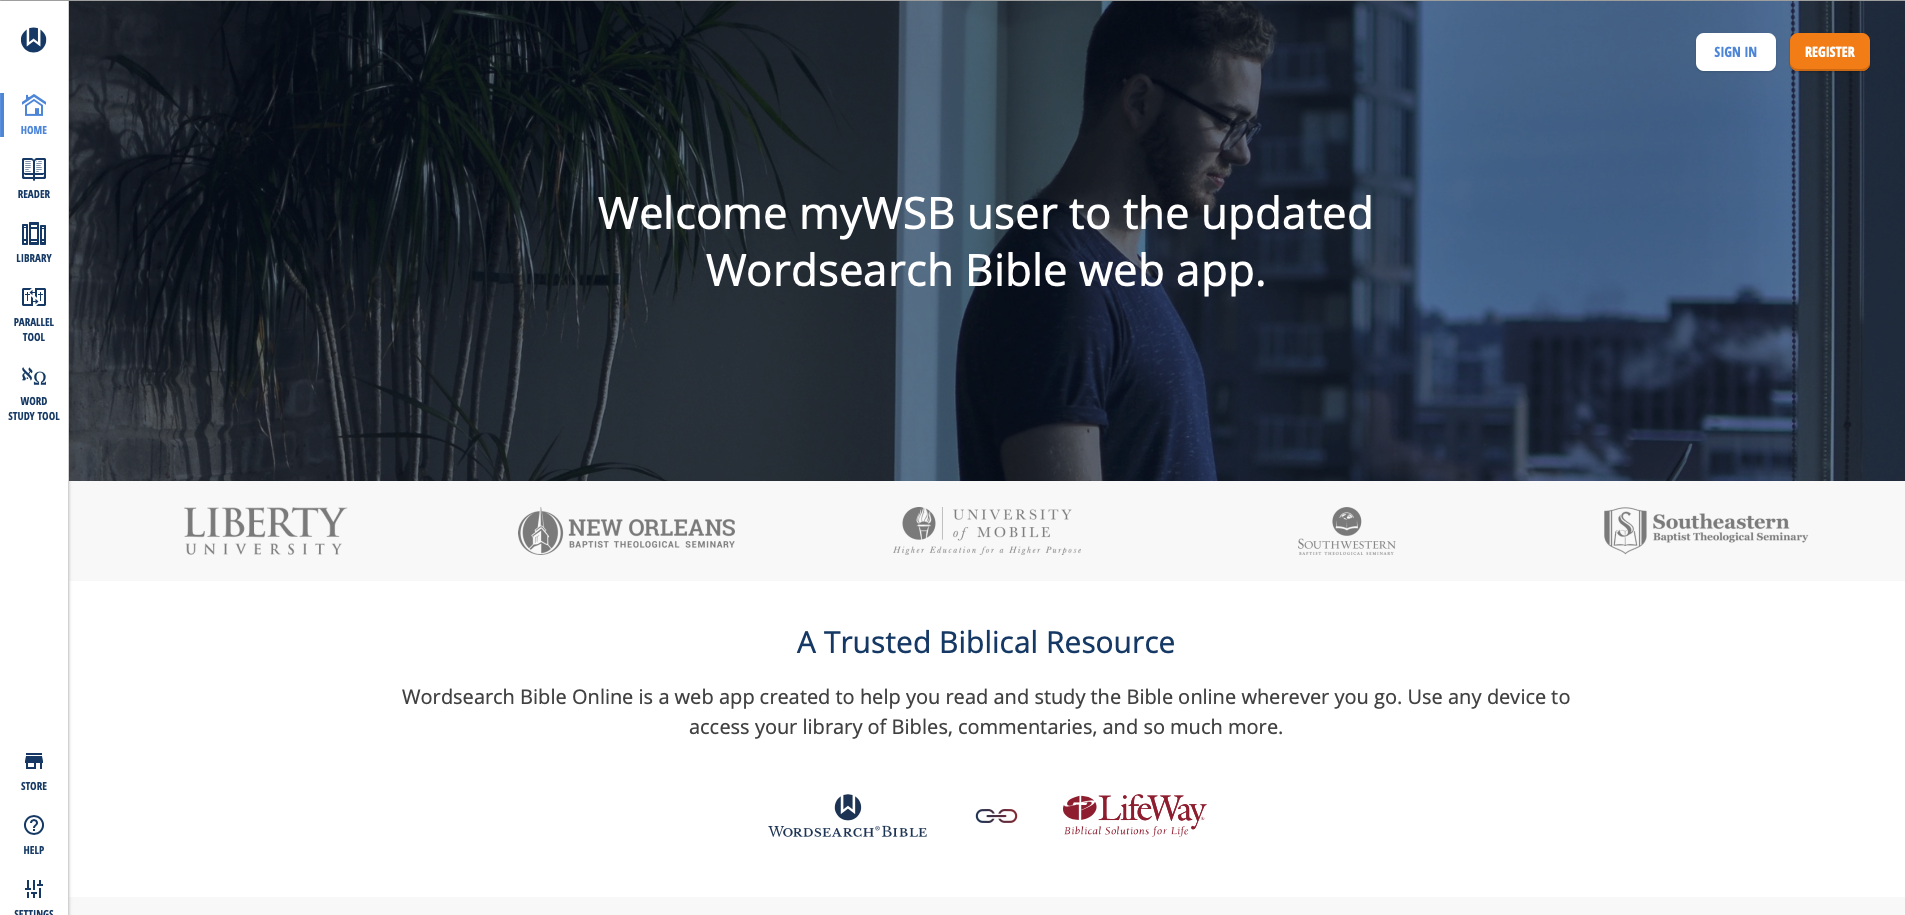
What's New in MyWSB Wordsearch Online?
What's new in the online app? Most important, Wordsearch updated the user interface. Take a look at the screen shot above and you'll see the modern look. Sign in and see the home page that offers news about the website. Along the left there's a sidebar of links represented by icons. That's where you access your tools for Bible study.
Here's what each icon does...
- Home - shows the main page seen above.
- Reader - the reader lets users open books and read them with window panes (see more below).
- Library - see all the books in your library with categories of books along the left and cover icons in the main section.
- Parallel Tool - opens a window pane with parallel bibles in the Reader.
- Word Study Tool - opens a Word Study Tool pane in the Reader.
- Store - towards the bottom fo the sidebar we see the Store link where you can find new books to add to your library.
- Help - learn how to use MyWSB.
- Settings - change how the app works.
- Profile - manage the Lifeway account profile details.
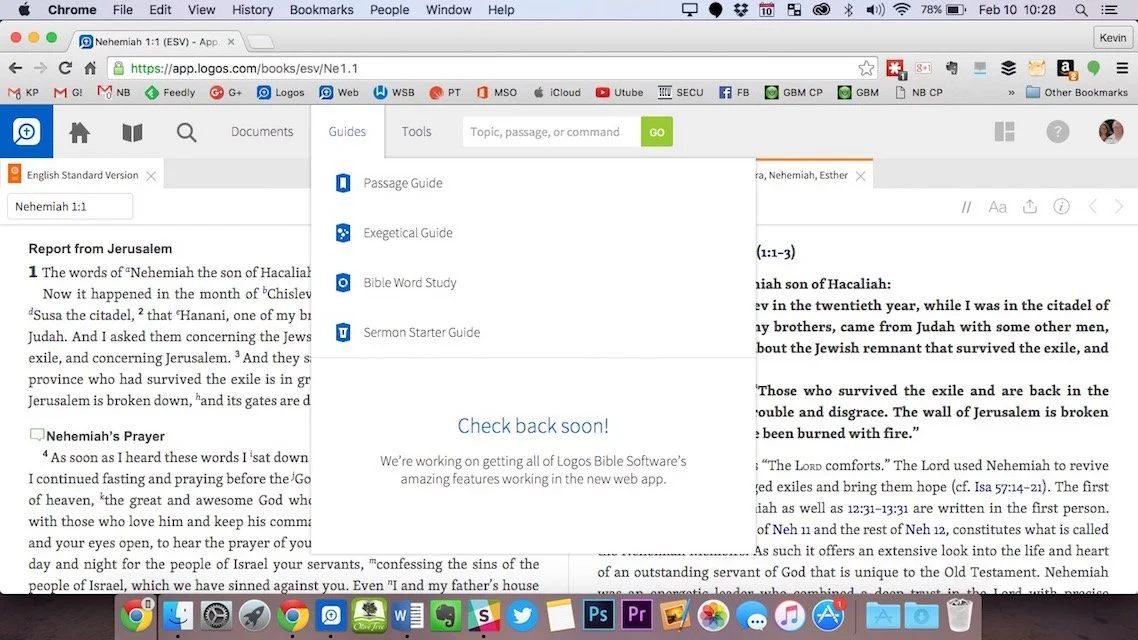
The MyWSB Reader

The Reader will display your books in window panes with a toolbar. The toolbar has navigation buttons with back and forward buttons represented by large left and right pointing block arrows. These go back and forward one chapter in the Bible or section in a book. They sit at extreme ends of the toolbar. There's also a thin back arrow button that takes you back to the previous passage displayed. There's a table of contents that shows a list view of the contents of the book. Bibles or books tied to passages also have a menu that shows a grid-based book/chapter/verse chooser menu.

There's also a button to search the book or Bible. The small AA button decreases or increases the size of the book's font. And the full screen button sits to the right of that.
On the top you see name of the book open in that window pane. Left of the name is the book's info button. On the right end of the title bar you'll find a bookmark button, which opens the bookmarks toolbar. The next button returns to the regular toolbar described above. Then there's an X that closes the book.
The user can resize the window panes using the handle seen in the center of the screen in the screen shot seen under the section heading.
If you highlight some text in a Bible or book, a new toolbar appears at the bottom. It gives options to highlight the text, bookmark it, add a user note or copy a link to that verse. The link will take the person who clicks it back to this spot on MyWSB.com.

Regular readers of this page will know I am a Bible study notes afianado. The notes tool in MyWSB are pretty basic. You can type in basic text, add tags and that's it.
Word Study Tool

Some Bibles support Strong's Numbers. These books also have a button to show or hide them inline. Also, some books support displaying the Bible in paragraph or one verse per line. Those books have a button which toggles that method of display. See the NASB95 above with the Bible in verse-per-line mode and with Strong's numbers showing.
The Word Study tool is open on the right. It shows the Strong's concordance entry first. Then we see a section named Dictionary Reference. It has the dictionary entry showing a transliteration of the Hebrew or Greek word, a phonetic pronunciation, and the dictionary definition. You can choose which translation with Strong's tagging you want to use. The drop down is in the toolbar at the top of the Window.
The final section shows the Usage Study section. This lists all the entries of that word in your chosen Bible. Expand each book of the Bible to see the references for that book. The Word Study Tool will show the text of the verses in your chosen translation.
Combining Lifeway and Wordsearch Accounts
The other major change in MyWSB comes in the account backend. Ever since Lifeway bought Wordseach, they've wanted to combine accounts so that users have one single sign-on email and password. Finally, they've achieved that with this update.
In the past users had to link their two accounts. Now, after they link them one time, they will use their Lifeway user account to log into MyWSB.
Better Mobile Browser Support
The website works much better on a mobile browser. I use an iPad Pro for sermon prep and the iOS app doesn't work that well. From now on I'll use the MyWSB app. In fact, I created a website app icon on my iPad home screen.

Add a bookmark to the Home Screen on your iPad by tapping the share button on the Safari toolbar. Find the Add to Home Screen (black box with plus icon in center of the second row above). The Home Screen icon's not very attractive. Lifeway needs to fix that with a better site icon.
My Evaluation & Recommendation
I really like MyWSB.com for online Bible study. Logos really stepped up their game and they offer an excellent tool, but Wordsearch users will find a lot to like about this site. They site is simple to use and has enough features to make it useful. You can do nice Word Studies and general reading. Make sure to check it out.
I'd rank MyWSB second on my list of favorite online Bible study tools ahead of Bible Gateway and below Logos. That's only because I have a large Logos library and it has more advanced Bible study tools. It also syncs with their mobile and desktop programs.

Online Bible Study: Theotek Podcast #055
Can you prepare your sermons using online Bible study sites? We try to answer that question and give a few recommendations if you choose to give it a try. At the end of the podcast we also give a few recommendations in our new segment, "Our Favorite Things".https://www.youtube.com/watch?v=Nj4ixnyNm9sWe only had three of our team members in this podcast. Rick Mansfield works with Accordance Bible Software and didn't think that online Bible study sites were good enough to do full sermon prep yet. Users often don't have access to the Internet or they don't have a reliable connection. Most of the online sites don't give users enough power to do serious word study. Most them include limited options for commentaries and word study tools. The ones included usually are only public domain works.Antoine Wright from Mobile Ministry Magazine was a little more bullish since he's a mobile-first kind of guy. He recommended a site called Bible Web App. It suffers from the same weaknesses of the other online sites with limited options and mostly public domain. It's fast and clean and does most of what Antoine needs. I like online sites and use a few. Last year I reviewed 6 online Bible sites in a two-part post. You can find part one and part two to see the video demos of the 6 sites (three in each post). Two of the sites I reviewed are no longer my favorites. Instead of My Study Bible from WORDsearch and Lifeway, I now recommend their new site MyWSB.com. Second, Logos has a site for subscribers to either their Logos Now or Logos Cloud services. Learn more about Logos Now in a recent post and Logos Cloud in another post.
 The online sites from WORDsearch and Logos above will cost you a little bit. The best option for those looking for a free site comes from Bible.org. It's called Lumina.
Our Favorite Things
 In "Our Favorite Things" this week we recommended some apps, a utility and an accessory. Rick recommended a USB C dock for the new 12-inch MacBook (not the Air or Pro). It's the HyperDrive USB Type-C 5-in-1 Hub with Pass Through Charging for $50. It connects to the USB C port on the MacBook and adds ports for an SD card, micro-SD card, 2 USB 3.0 ports and a USB Type-C port for charging or hooking up a 4K video adapter.Antoine recommended a list of Lent Apps he put together on his website. They can help Christians who observe Lent.
 My recommendation comes from github. It's a free utility that helps the user switch their MacBook screen resolution. It's called DisableMonitor and runs in the OS X menu bar. A drop down box shows all the resolutions your monitor supports. This gives you far greater control over the screen resolution settings than the built-in Display Settings in System Preferences in OS X. I wrote up a full How To post on it at Notebooks.com.