


New Logos Redesign - Where Is That Button in Logos 11

First, let's discuss one important element we'll all need to get used to—Logos will no longer be called Logos 11 or any other number. Instead, the new Logos redesign comes with a new designation. They will call it simply Logos and then use version numbers like version 37, the shipping version of the brand new Logos, which many will want to call Logos 11. Think of Logos 11.37, but they're dropping only the 11 part of it.
Second, the new Logos Redesign moved around many things thanks to a new Logos Resource Toolbar in Logos version 37. You might ask, "Where is that button I need?" We'll show you where that button went and the new user interface of Logos version 37 and beyond.

Get the New Logos Now
If you read this article and decide to invest in the new Logos subscription, visit their subscription page. You can also invest in a library to get extra non-subscription content. Let me recommend a few things.
First, the new Logos comes in 3 subscription levels targeted at 3 groups of users.
- Logos Premium—for the average user, it costs $9.99/month or $99.99/year unless you already own Logos 10 Bronze, in which case you'll only pay $6.99 or $69.99. Use my link above to get two months free.
- Logos Pro - for pastors or serious Bible students who don't need academic tools. It costs $14.99/month unless you own Logso 10 Silver and up, in which case it only costs $9.99/month. Yearly discounts cost $149.99 or $99.99, and using my link gets you two free months.
- Logos Max - the highest tier meant for academic users. It costs $19.99/month or $12.99/month for Logos 10 Full Set owners. Logos 10 owners pay $199.99/year or $129.99/year.
These subscription tiers come with discounts for people who subscribe for two years. You get five months free.
Watch the Logos announcement video below.
Subscriber Perks for the New Logos 11
Logos doesn't call it Logos 11 anymore, but they do still offer some great perks. They include the following:
- 5% off store-wide for all subscription levels.
- Extra free book each month for everyone who subscribes.
- 8 Logos Mobile Ed courses focused on the people Logos expects to subscribe to each tier.
- Logos Sermons adds some sermon prep tools for Pro and Max users.
- 5% Annual Reward for Pro and Max users gets you a discount of 5% of your annual spending in February each year for active subscribers as a reward for subscribing. So, if you spent $2,000 on Logos in the past year, you'll get a coupon for $100.
Libraries for the New Logos Subscription
Second, get one of the 2025 Logos Libraries, which are only available to subscribers. These libraries use the same names as previous versions. They range from Starter, which costs as little as $23.79 for Logos 10 owners or $33.99 for owners of older packages, to Collector's Library for $10,999.99. The best bang for the buck comes at the Silver or Gold levels, costing $250 or $850 for new users. Owners of previous versions will pay less.
The above are for Standard Track Libraries. They confusingly offer many other tracks for Leaders, Pastors, and Researchers, and they add to that their denominational Libraries. I suggest that you start with the Standard if you're an average user. Preachers and pastors should look at the Preacher Track Libraries, and academic types or language nerds should go with Researchers Libraries.
Since I'm a preacher, I'd go with the Preacher Track and look at the Silver or God Libraries. This would add to my library the ESV Expository Commentary Series or Biblical Greek Made Simple for Silver. In Gold, I'd get the Preaching the Word Commentary, The Concise Greek-English Lexicon of the New Testament, and The Preacher's Outline and Sermon Bible. Each of those links is a partner link.
Logos Redesign Changes the Home Page to the Dashboard
We'll start with a minor change. Logos used to boast a cluttered Home Page, including things like book information, layouts, reading plans, and ads. You could add them by clicking a plus button in the upper right corner.

The new Logos Redesign changed the Home Page to the Dashboard. It's not that different, but it has a new name. If you use the default toolbar location, look for it in the upper left corner. People who position their toolbar on the top edge of the program window will find the button to the right of the Logos logo. Hover over it, and you'll see the popup tooltip that shows the Dashboard label.
You'll find a few important features on the new Dashboard.
- Welcome to Logos Video - click this video in the upper left corner labeled Welcome to Logos Pro or whatever subscription level you use. You can watch the short intro video that explains many of these new changes.
- What would you like to do today? - The lighter blue square next to the Welcome video square shows five options, including...
- Personal study
- Group Bible study
- Write a sermon
- Original language
- Pick up where I left off
- Need some help? - gives help for using Logos with options to:
- Ask about Logos - ask natural language questions about how to use Logos.
- Get Started - opens a page for those new to Logos.
- Videos and Webinars - take users to the great Logos tutorial videos and helpful webinars page.
- Features - opens a page with training videos covering several features in Logos.
- Technical Support - helps you find various technical support options.
- Community - opens the great Logos community forums page. They've promised a new forum interface coming soon.
- Help Manual - opens the Help Manual built into Logos.
New Logos Resource Toolbar
Logos now offers a helpful new toolbar called the Resource Toolbar. This toolbar reorganizes the buttons to make the program more efficient; however, changes take time to get used to. Let's look at this new Resource Toolbar.

The new Resource Toolbar now has a set of tabs across the top of the Bible window. You can toggle it on or off by clicking on the names of each tab on the toolbar.
- The Back Button takes you back to your browsing history, like you'd find in a web browser.
- In the Book Dropdown Box, click the down arrow button with your book cover. You will see a list of your Bible translations, commentaries, dictionaries, or other books similar to the one currently displayed.
- An Entry Box lets you type in a Bible passage or other entry, which will take you to the passage or article you entered.
- Home - shows the primary tools in a toolbar below the Resource Toolbar as follows:
- Contents
- Favorites
- History
- Chapter with Up and Down Arrows
- Link set - this used to be in a different location, so note that you now connect books to the Bible translation you want to drive the others. For example, set your commentary to follow your Bible when you move from passage to passage.
- Insights - a new feature that shows your top related books and passages connected to the passage open in a Bible translation.

- Search - opens a search box. Notice the three links at the right end. YOu can click these to narrow your search results or change where Logos will look for results.
- Notes - includes options to show or hide notes in text, add notes or highlights, and filter your notes. It also has arrows to jump to previous or next notes.
- Formatting - change the formatting of the text in the open book.
- Factbook Tags - shows what words in your text have Factbook entries. Click the drop-down to change what tags show or don't show.
- Markers - Logos includes icons that show it has more information on things like Addresses, Speakers, Timeline Events, and Media
- Emphasize - emphasizes corresponding words when you hover over them or click on them by highlighting a word used multiple times.
- Reformat - change the look of text in a book.
- Reading Plans - shows markers for the beginning and ending points of any reading plans active for a passage or book.
- Passage Lists - shows passages found in any passage lists you've created.
- Visual Filters - shows any visual filters you created.

- View - change the look of the book display.
- Add parallel text—you can add columns of text as seen above or rows of texts, depending on which button you select in the pop-up window.
- Interlinear - turn on the Interlinear using this button. You can customize which information shows up in the Interlinear.

- View Continued...
- Paged view - shows you either a paged view with columns like you might find in a printed bible with multiple columns of text or show a single column that scrolls. YOu can also change how many columns of text show up.
- Location bar - turn on and off the Location bar that shows where you are in the current book or Bible, like "Hebrews > Chapter 4" seen in the above screenshot.

- Tools - shows tabs for tools used to interact with the text.
- Compare - opens text comparison.
- Translate - opens the AI Translation tool.
- Summarize - opens the AI Summarize tool, which summarizes the current article in the open book.
- Read aloud - reads the current text using the computer-generated voice of the OS.
- Start reading plan - opens a new reading plan for the current book or Bible.
- Printer/Export - opens the Print/Export Dialogue box.

- Share - offers various methods of sharing what you're reading.
- Copy - select some text and click this button to copy it, or use CTRL+C on Windows or CMD+C on Mac
- Copy special - shows some of the options you would find in the Copy Bible Verse tool.
- Copy link - creates a link you can use in notes or online which will open Logso to the present location of the book or Bible displayed.
- Create slides - opens the Media generation tool which lets you create visual copies of text for us in Proclaim, PowerPoint, Keynote, or other apps.
- Send to - sends the current selection to a Clipping, a Passage List, a Canvas, or Proclaim.
- Print/Export - opens the Print/Export dialog box.

You'll see a blue New button, which opens a Logos Community post. This will likely go away eventually. Also, at the far right end, you'll see a button that looks like an up or down arrow in a circle. This toggles the Resource Toolbar on or off. Finally, there's the menu button (it looks like three dots stacked vertically). Here, you'll see controls that work with the current book window.
- Find in this panel - type something, and you'll see corresponding highlights showing the text in the open book.
- Send hyperlinks here - when you click a Bible reference link in another open book window, the links are sent to this window.
- Open in a floating window and Open all in a floating window - opens the current book in a separate window or floating window or all the books in that tab in floating windows.
- Duplicate this tab - open another copy of the current book in the first tab in a second tab, just like it.
- Reopen the closed tab - if you recently closed a tab, it opens again.
- Close this tab, other tabs, or all tabs - self-explanatory.

How to Downgrade from Accordance 14 to Accordance 13
People don't like Accordance 14 because it's buggy and many new features don't work. So here's how to downgrade to Accordance 13 from 14.

Accordance 14 came out a few weeks ago, but many report significant problems with the update. That's why people want to downgrade from Accordance 14 to Accordance 13.
Fortunately, downgrading safely is easy. Here's how to downgrade from Accordance 14 to Accordance 13.
How to Downgrade to Accordance 13 from Version 14

- Right-click the file in the Applications folder on your Mac. Sorry, this only works on a Mac.
- Choose Rename. If you have Accordance 14 installed, then rename it to Accordance 14. It will, by default, be named Accordance.
- Now hit Enter on your keyboard or click anywhere outside the pop-up menu. You've now renamed the app to Accordance 14.
- Install Accordance 13 by downloading it from the Accordance website. Double-click the downloaded file, which is most likely saved in your Downloads folder.
- Drag the file to the Applications folder. This will appear in a window that opens when you double-click the downloaded file. See below.

If you want to clarify that this newly installed copy is version 13, you may want to follow the above steps to rename the new app Accordance 13. Then double-click it or open it from Launchpad.
This should keep all of your customizations and settings in place. You won't need to download the library files again.
How to Backup Accordance Settings
Some people in the Accordance user forums report that this method messed up their library organization and settings. To ensure you can get yours back, backup the right files to quickly restore them if installing Accordance 13 alongside 14 messes up your installation.
Open Finder and go to your Home folder. It will probably have your name on it. Then click on the Go button on the Menu bar while you hold down the OPTION key on your keyboard. This shows Library as a destination. Click on Library and then release the OPTION key.
Click on Application Support and then Accordance in your Library folder. You could just copy all the folders in this Accordance folder to a temporary place, like your Desktop.

After downloading Accordance 13 from the Accordance website, open the file, and the DMG will pop up with two icons. One for Accordance 13 and one for your Applications folder. Drag the Accordance file into the Applications folder. I'd suggest renaming Accordance to Accordance 13, so you can differentiate between versions 14 and 13. Now open it.

Everything should be as it was when you finished customizing things like your library and display theme. If your Library is not in the custom order, you place it in, then restore your files from the backup. You don't really need to restore all of them. Only the Text Library.apref file and the Tool Library.apref file need to be copied back to the proper spot.
Close Accordance, open two Finder windows with the backup folder in one, and open the other to Library, Application Support, Accordance, and Accordance Preferences. Drag the Text Library.apref and the Tool Library.apref from the backup folder to the Library folder.

5 Ways of Using Apple TV in Church
The new Apple TV is a great tool for fun, but you can also use Apple TV in church. We've got 5 uses for Apple TV in church or ministry.

Apple just shipped the new Apple TV and I got one because I love the little black box but hated the old remote. It got me thinking about using Apple TV in church and I came up with 5 ways you can use the new Apple TV in church or in ministry.

What Is the New Apple TV?
Apple first produced a set-top box way back in September 2006, but it didn't really take off till the company updated it 4 years later. Now it's a small black box that looks like an oversized hockey puck. It now comes with a metal remote that's tiny and useful for watching streamed content and even playing some casual games. You can connect a keyboard or a game controller via Bluetooth. You can also connect Bluetooth headphones, Apple AirPods, or a speaker.

Apple added a streaming service called Apple TV+ that includes content made for the service and gathers content from other streaming apps that run on the Apple TV like Netflix, Amazon Prime, Hulu, and more.
Apple added a streaming service called Apple TV+ that includes content made for the service and gathers content from other streaming apps that run on the Apple TV like Netflix, Amazon Prime, Hulu, and more.

This week (May 2021) Apple starting shipping the 6th version of the Apple TV. The following list shows the specs of the latest version, also called the Apple TV 4K 2nd Generation...
- Fast A12 Bionic processor
- High frame rate 60fps HDR
- HDMI 2.1
- Wi-Fi 6
- New color optimization using the iPhone camera
- tvOS 14.5 or higher
- AirPlay
- New and improved remote replacing the horrifically bad touch remote from previous generations

Most people probably think of Apple TV as a way to consume content for entertainment or maybe education. It's also a gaming system for casual gamers. However, you can use it in ministry or the church. So, we've got some tips for using Apple TV in Church.

The new Apple TV costs $179 for a 32GB model and $199 for a 64 GB model. Unless you think you'll install a lot of games or apps, you can get the 32GB model. However, I'd recommend buying the 64GB model since it only costs $20.
Using Apple TV in Church for Presentations
This tip seems obvious. Use an Apple TV in Church for wireless presentations from either your Mac, iPad, or iPhone. If you have an Android device, you can find apps that work with Apple's AirPlay.

Start with traditional presentation apps like Keynote, PowerPoint, or a lesser-known presentation app. Use AirPlay to connect to the Apple TV and fire up the app. It will allow you to mirror the screen or display your slides on the Apple TV and the presenter's view on the iPad, iPhone, or Mac.

If you need the details about how to connect over Airplay, use the tips on Apple's support site. Here's the support page for using a Mac to present.
Set Up a Foyer Information or Announcement Kiosk
You can display photo slideshows on an Apple TV. That's a great use for an Apple TV in Church. Get a TV in the foyer or in any room where you need to display announcements or informational slides. Hook up an Apple TV and set it to play the slideshow.
Put all your photos or slides in an album in the Photos app for the account connected to the Apple TV. Then follow the steps on this Apple Support page for setting up the Photos App to display the slides or photos.
You can use it for...
- Announcements
- Informational slides - for visitors, families, etc.
- Slideshows of events from recent activities in the church - consider putting these in the midst of the announcements or info slides.
- Play a video message - you can also place this in the slideshow of photos or announcements and info slides.
Play Music to Set Tone of a Room or Worship Event
Sometimes I fire up the Apple TV in our church's fellowship room and play some background music. It's great at holiday events or a supper for the church or groups in the church. I also occasionally play music to set the tone for a Bible study or worship event. Then after the event's over, I might fire up the music again with a playlist that sets the tone of how we want to send people on their way.
Stream Video Content
Of course you can stream video content on an Apple TV in church, but why would you?
- Show videos of past events
- Share a video message from a shut-in shot on an iPhone and stored in Photos
- Use one of the many Christian and Bible-centered apps like the Life.Church Bible, Faithlife TV, or RightNow Media Media.
- YouTube videos
- Facebook Watch videos
- Plex to stream your own videos
- Hold a movie party for a small group
That's just a handful of useful ways to use the streaming capabilities of the Apple TV in Church. You can watch any video that you want, so long as you're not breaking copyright laws.
Educate People on Using Software and Websites
If your church just got a new Church app, then use the Apple TV to demonstrate how to use the new app. AirPlay the screen on your iPhone or iPad. You could create a video and stream it.
Use AirPlay to show off your church's new website. Maybe you want your people to use another website. Demo it using Apple TV.

If you have a group of people who want to learn more about studying their Bible with Bible study software or an app, then you can teach them by opening the app or software and then use AirPlay to connect the computer, iPad, or iPhone.
Conclusion
The Apple TV can help save money and make you more successful in communicating with your church. Instead of a long cable run, connect an Apple TV to a projector. Also, it's cheaper a whole computer hooked up to a display.
While the new Apple TV is a great box for using an Apple TV in church, you might want to consider an older 1080P Apple TV. They're cheaper and will still work great. If you're getting one of the new 4K models for home, then maybe you can re-purpose an old 1080P model for the church.

Drone Tricks: 6 Ways to Use a Drone Like the DJI Mini 2 for Church and Ministry

I bought the DJI Mini 2 drone for church ministry and fun. At the same time, I love flying it for fun because it's a simple to use drone that doesn't break your bank and is easy to fly. However, it's also a great tool for church ministry. So, I rounded up 6 Awesome ways to use the DJI Mini 2 for church and ministry. These will work with almost any drone like the DJI Mavic Air 2, the Skydio 2, or any other drone.

DJI Mini 2 Drone Overview
DJI promotes the Mini 2 as a light drone that weighs under the 250kg that the United States FAA sets as the limit for registering a drone. The DJI Mini 2 comes in below that number, so pilots don't need to register the drone with the FAA.
The company also advertises the 4K camera and 31 minutes of flight per battery. It costs less than most drones making it a great option for an entry-level drone buyer. That means it will also fit well in a church or ministry toolbox. It's cheap, doesn't require a lot of training to pass a government test, nor does it mean you have to register the drone.
The DJI Mini 2 serves the budget-minded drone pilot costing $449. Here's the list of what's in the box:
- The DJI Mini 2 drone
- OcuSync 2 Remote Control with Control Sticks
- 1 Battery
- Cables to connect to Android or Apple devices
- Spare propellers and the screws/screwdriver to connect spare propellors
Add $150 to get the Fly More Combo. You'll get...
- 2 extra batteries
- A nice charger to charge three batteries
- A protective cover for your gimbal and camera
- A strap to protect your propellor blades while it's stored away.
The gimbal and propeller strap makes it easier to throw the DJI Mini 2 in the Fly More Combo bag or throw it in a backpack.
Most of the DJI Mini 2 users brag about the excellent OcuSync controller. The wireless technology means pilots can fly their drones further away than older models without the new technology.
Specs hunters can read more about the technical details of the drone at the DJI website. Some of the highlights include...
- 31 minutes of flight time/battery
- 4k video and 12MP images
- 35mm sensor and f2.8 aperture
- Shoots in JPG+RAW
- Video supports 4K, 2.7K, and 1080P video at 24/25/30fps in 4K, 24/25/30/48/50/60fps in 2.7K, and 24/25/30/48/50/60fps in 1080p
- It has 4K 2X Zoom
- micro-SD Cards supported for storage
Inspect Your Church's Building with Your Drone
Recently one of our church's leaders noticed some discoloration on the backside of our steeple. He asked me if I could fly my DJI Mini 2 close enough to see what the discoloration came from in a meeting. I wasn't sure, but I certainly was excited to try it. I actually said, "You don't have to beg me to fly my drone."

The next day, I took off, got as close to the steeple, shot some video, and took photos of everything I could find. We found out that we had some mold and a few places where the paint bubbled up and cracked, revealing some dark spots below the white paint.

The DJI Mini 2 has a 2X zoom feature, as many smartphones have. I used that to get close with the camera while still flying far enough away from the steeple. That way, the wind didn't blow the drone into the steeple. The DJI Mini 2 handles moderate to light wind fine, but I still wanted to fly safely.
Take a Large Group Selfie with Your Drone
Have you ever tried to get a selfie of a large group? Rick Mansfield on the Theotek podcast described a time when he took part in one of these large group shots. The photographer climbed a ladder and yelled at the participants until they were all in place. She took the shot.

The old-fashioned group shot leaves out one person unless she's got a remote or uses the timer. But a drone can easily take off and move up and away far enough to take a shot with everyone in it. Plus, the group shot will look a lot cooler with some elevation. You can also make some videos using the cool automated shots that a lot of drones include.
Video Directions Shot with Your Drone
Your church website should include at the very least your church's address and a photo of the building. Wouldn't it look cooler to offer a video that shows how a person can find your church building?
Guests can drive to our church from four different directions. So, I took off and took a shot of every direction and then created an image with visual indicators of finding their way from those four different directions.
Be careful shooting video or taking photos of traffic patterns. Never fly directly above roads with cars on them. Get the video or photos when there's almost no traffic. You can also fly your drone over a field or large yard next to the road.
Also, don't shoot video while driving a car. Never shoot video or take photos during heavy traffic, even if you're not the one driving the car.
Scenic Video for Worship Service Presentations
Have you ever seen beautiful scenic videos shown during worship as lyric backgrounds in a song or behind a Bible passage? Why not create your own? This works best when you know what the lyrics or Bible text says. Then try to find some video or photos that are thematically connected.
The video below shows how one media person creates motion looping video. He created his video with a drone.
Create Cards, Posters, Instagram Stories, or Any Inspiring Media Using Pictures Taken With Your Drone
We post a lot of images online, so why not make your own. It's fun, and you don't have to pay for images from stock sites or deal with copyright from a public domain or creative commons file stores.

Use your drone shots in the following ways:
- Send photo postcards to people in your church that haven't attended in a while.
- Create a welcome card for guests with a scenic view of the community, church members, or other inspiring photos.
- Put a photo on the cover of your bulletin if you still print one.
- Post images on social media of events taken with your drone.
- Illustrate the Bible passage for this week's sermon, a Sunday school lesson, or a Bible study topic.
- Shoot video of events and create a memories video for participants to share online.
The list above hits on just a handful of cool ways to use your media shot on a drone.
Make Awesome Videos to Put on Social Media Grabbing Attention
Use your creative skills to create fun or attention-grabbing videos to put on social media. A cool video of events at your church will grab some attention with drone shots added to your videos. You're only limited by your creative ability.

How to Subscribe to Podcasts in Your Favorite App
If you want to enjoy the new Theotek podcast, we'll show you how to subscribe to podcasts in various apps or with an RSS link.

You hear a lot about podcasts, but how do you listen to them easily without going to the podcast's website? We'll look at how to subscribe to podcasts in your favorite app, like Apple Podcasts, Google Podcasts, Spotify, or my favorite, Pocket Casts.

Listeners can easily subscribe to podcasts by opening their podcast app of choice and search for it. If you own an iPhone you have an accept podcast app already. Apple Podcasts come installed on your iPhone. If you removed it or it's not there, just search the App Store on your iPhone or iPad and download it.
How to Subscribe to Podcasts in Apple Podcasts

Fire up the app, hit the Search tab in the lower right corner, and type in the Podcast title. If you type in Theotek, it should be the first one on the list, but the jerks at Apple prioritize other shows not named Theotek, so slide right to find it. Tap the cover art as seen above and then hit the three little dots menu button in the upper right. Choose Subscribe.
How to Subscribe to Podcasts in Pocket Casts

My favorite podcast app works so much better than Apple's app. Pocket Casts finds the right Theotek podcast when you search the title. Open it up and tap on Discover instead of Search like you did in Apple Podcasts. Type in the tame Theotek or another podcast title. Tap on the cover art that shows our faces and hit Subscribe.
I don't use Google Podcasts or Spotify, the other most popular apps. Unfortunately, the Google Podcast app doesn't find the right Theotek podcast. It finds the old one that we used to host on our website. So you'll need to use this link to subscribe to Google Podcasts from the web. Here's a link for the podcast on Spotify.
How to Subscribe to Podcasts Using the RSS Feed Link

If you want to subscribe to the Theotek podcast or any other podcast using an RSS feed, then you'll need to find the feed link for the podcasts. For example, here's Theotek's RSS feed link.
https://anchor.fm/s/4739b4e8/podcast/rss
You can also go to the Anchor.fm website to find links to your favorite Podcast service.
Every podcast has a unique URL called an RSS feed. A URL is a website address like www.kevinpurcell.org for this site. However, an RSS feed tells a Podcast app or an RSS reader important information to find a new episode of a podcast and tell your podcast or newsreader to get the new episode.
I use an app called Pocket Casts. The app finds every episode each time the app sends a message to the website asking if there's new content. If there's new content, the RSS feed replies saying, "Yes. We have a great new episode, and you can download it at this address."

Using Pocket Casts, users can add a new RSS feed by going to the Search tab and paste the RSS feed into the search field. Hit the Search button, and it will show you the Podcast. Tap it to go to the page. Tap the Subscribe button in the upper right corner.
Other apps or services have similar methods of subscribing to a podcast. For example, Google Podcasts allows you to add them on the website - podcast.google.com.

In the upper left corner of Google Podcasts website, you will see a link that reads + Add by RSS Feed. Click it to add the podcast RSS feed URL manually.
How to Add a Podcast RSS Feed Link to Apple Podcasts

Using Apple Podcasts, you can subscribe with an RSS feed too. Tap on the Library tab at the bottom of the page. Then find the Edit button in the upper right corner. Tap it and select Add a Show by URL... at the bottom of the list.
7 Best iOS Bible Study Apps on M1 Macs
What are the best iOS Bible apps that you can run on an M1 MacBook or M1 Mac mini? We offer some suggestions after showing how and asking if you should.

Did you know you can install iOS Bible Study Apps on an M1 Mac? You can, but should you? We'll take a look at the best iOS Bible Study apps that you can install on your Apple silicon Mac with macOS Big Sur.

When Apple released the M1 MacBook Air, Pro, and Mac mini, they possibly revolutionized the computer market with their incredibly efficient Apple silicon processors. These processors speed up things like video editing and encoding on powerful programs like Final Cut Pro. It also makes the MacBook Air or MacBook Pro run fast. But not all Bible study programs built for macOS run faster than they do on Intel-based Macs. So, let's take a look at the iOS Bible Study apps available from the app store.
How to Install iOS Bible Study Apps on an M1 MacBook
If you want to install one of these iOS apps, open the Mac App Store on macOS Big Sur as you would normally. In the upper left corner, you'll see the search box. Note, this doesn't work on older versions of macOS or on any computers that do not use M1 Apple Silicon processors, like the MacBook Pro, MacBook Air, or Mac mini.
Type in the name of an iOS Bible Study app like Logos Bible or Accordance Bible.

The next screen will show the search results for macOS apps. Click on the iPhone & iPad Apps tab as seen below.

This will show you the available apps that you can install on your M1 Mac.
Not all developers will let you install their iOS apps on a Mac. They have to turn this on, so contact them if you don't see it. Below you'll see the ones we like that you can find as of the date this article was published.
Why Only Some iOS Apps Will Install on M1 Macs
Since not all Bible Study Apps will install on an M1 Mac with Apple Silicon, we've got a list that will look different than our favorite five Bible Study apps. When you do see one taht's available it might give you a warning that isn't verified by the developer to run on the computer.

There's a link under the name of most of these apps as seen above. Click it to get an explanation from Apple. It reads as follows:
Most iPhone and iPad apps are compatible with a Mac with M1, but some may not be available because they require capabilities unique to iPhone or iPad. A developer may also choose to make their app unavailable on Mac.
"Not verified for macOS"
Some apps available on Mac may not function as they normally would on iPhone or iPad. For example, features that rely on hardware unique to iPhone or IPad - such as a gyroscope or a screen that supports complex Multi-Touch gestures - may not work on Mac.
That only means the apps that you can install may not work properly and some won't install because the developer chose to block you from installing.

To log into a couple of these apps I had to enter my computer password and/or my Apple account password.
7 Best iOS Bible Study Apps to Install on M1 Macs
Here's our roundup of the 7 best apps to install on your M1 MacBook Air, Pro, Mac mini.

- Logos Bible Study Tools - because the desktop version of Logos runs a little slow, it's not bad to install their iPad app. It's a bit awkward to get it going, but once you do it works well.
- Accordance Bible Software - the best mobile app for use on a Mac comes from Accordance. It runs okay and lets users enjoy all the mobile features. It did crash. a couple of times, but once I got books installed it seemed to run great.

- Bible from Life. church - not technically a Bible study tool but still good to install on your Mac. This gives access to some of the multimedia content in the Bible app but on a computer. You can also use the NASB 2020, something you won't find in many apps.
- Tecarta Bible - this useful study Bible style app works great. Download your tools and run the app. You can't use Tecarta on a Mac any other way.

- Laridian PocketBible - one of the first apps to offer a Mac version for M1 computers came from Laridian. It runs just like it does on an iPad making it one of the best of this breed.
- The Bible by eBible - if you're an eBible user on the web, you'll possibly enjoy using it on your phone, tablet and now Mac. It installs fine, but only runs in a small window.
- Mantis Study Bible - this humble little app was once one of the best mobile apps and it runs fine on a Mac, although only in a small window.
Did I miss any? Comment below which mobile Bible apps you want to see running on the M1 MacBook Air, Pro, or Mac mini?
Should You Run iOS Bible Apps?
All of the discussion about running iOS Bible apps on your new M1 MacBook Air, Pro, or Mac mini begs the question, "Should you run iOS Bible apps or iPad Bible apps meant to run on an iPad or iPhone?"
Most of the time you shouldn't bother. I'm I can now install these apps on my M1 MacBook Pro, but after a few weeks I haven't run many at all. I wanted to run the Logos Bible app because they need to fix a few minor annoyances with their Mac-based software. However, the Logos iOS app doesn't run as well as other apps either. So, I probably won't really run many.

Olive Tree Resource Guide - How to Customize the Guide
The Olive Tree Resource Guide shows all the content in your library related to a passage when it's displayed in the main window. Here's how to customize it.
Olive Tree Bible Reader helped revolutionize the study of a passage with their useful Olive Tree Resource Guide. The guide behaves like a study assistant and goes to your library and finds all the books with content related to the passage shown in the Olive Tree Bible Reader. We'll show you how to get more out of the Olive Tree Resource Guide using the Windows version by customizing the guide to your preferences. This looks almost identical on the Mac, so you can use this guide if you run it on macOS. We'll also give some tips for what to change in the guide.
How to Reorder the Olive Tree Resource Guide List of Resources

Before you can effectively customize the Olive Tree Resource Guide, you want to open it. You do this by clicking on the link at the lower right-hand corner of your Bible Reader window.

Now you can see the contents of the guide. You'll also see three other tabs in the new Window that shows up on the right-hand side. Look for the four icons in the lower right corner of the program. They include:
- Resourced Guide - as shown above
- Parallel - a window to show tow books on screen at once and lists all your books in alphabetical order when you first open it.
- Notes - shows your notes.
- Search All - a search box shows up that lets you search your entire library.
Here's a list of the contents of the guide in the order they show up by default.
- Content - shows content from the Bibles like cross references seen in verse notes indicated by an asterisk in the Olive Tree Bible text reader.
- Related Verses - shows the cross references based on translation. For example the ESV shows up in the list and when the user clicks it they will see the related verses for the passage from that translation's notes.
- Commentaries - commentary entries for the current passage.
- Bibles - displays text of your other translations so you can see them parallel to your main window's Bible translation.
- People - shows content about people mentioned in the passage shown in the main window.
- Places - shows content about places mentioned in the passage shown in the main window.
- Topics - shows topics from the main window passage and then shows various content from your library about that topic, like topical Bibles, dictionaries and more.
- Maps - shows maps from atlases and other books related to the main passage.
- Charts - charts from things like study Bibles and such related to main passage.
- Images - any images from your library of books related to the passage in the main window.
- Sermons - sermons from sermon collections on this current passage in the window.
- Outlines - outlines from books that contain them like commentaries.
- Introductions - book introductions from books that have introductions to each book of the Bible.
- My Notes - notes attached the current verse.
- Tags - tags you've created for the current passage.
- Get More - a link to a built-in store to buy more Olive Tree books.
You can customize the resource guide in one of three ways. First, you can reorder the sections. Second, you can add or remove sections. Finally you can do both of those books in each section. Here's how to make those changes.

Click on the Settings button the Olive Tree toolbar. Then choose Advanced Settings from the drop down menu. Clicking on the Advanced Settings button will open the more advanced settings screen.

At the top you'll notice an option to go into Advanced View. In the resulting Advanced Settings window, click on the Resource Guide from the left-hand list. You'll see a list of the sections that show up in the guide. You can click on the buttons to turn off certain sections. Which sections you turn off depends on your preference on how to use the program.
On this screen you can turn on and off each book from each section. You can also reorder the book list by clicking and then holding down the right mouse button and then drag up or down. Click on each section from the left-hand list to change each section. Then go back using the arrow in the upper left corner to go back to the main screen.
On the main Resource Guide screen in settings you can reorder the sections by dragging them up or down.
Tips for Better Using the Resource Guide
On Settings Screen seen above, you can off the Content section. That is the first one listed above. Turn it off. Just trust me. It shows the content of all the other sections in one section, but it's too hard to manage. It's much more manageable to work with each section instead of this one monster section that contains all the content from every other section.
Start by turning off sections you don't want to use. Then reorder the sections. Here's the order I prefer...
- Commentaries
- My Notes
- Related Verses
- Introductions
- Outlines
- People
- Places
- Topics
- Maps
- Charts
- Images
- Sermons
- Bibles
I turn off Tags and Content because I don't use them. Here's the next step.
Hit the Advanced View link at the top of the screen. I turn off the commentaries I don't use first and then reorder them by my preference. I usually put my more advanced commentaries first and then study Bibles after the more advanced commentaries.
Now you can turn off books you don't use from each section. For example, from the Commentaries section, I only use a handful of my commentaries. I can still open them from the library, but I almost never do. So I turn them off here.
In some sections there's not to reorder. You just turn them on or off.
If you own multiple sets of a commentary, you may want to turn off the ones with fewer volumes. For example, I own the New American Commentary. Instead of showing up just once, you get multiple entries. One for the Old and New Testament individually. There's also a15, 17 and 18 volume New Testament set. The Old Testament set has one with 23 or 25 volumes. I turn off the 15 and 17 New Testament sets and the 23 volume Old Testament set. You will then see those entries in places like Introductions and Outlines as well. So, turn them off there too.
Other Settings to Change in Olive Tree
While you're in the settings screen, click on the General Settings tab. Take a look at settings you may want to change here. Then do the same for Colors and Fonts section and the Privacy section.

As an example, I have the following settings in my General section:
- Last Opened for Default Bible for Hyperlinks
- Sync Enabled (on)
- Color Jesus words (on)
- Hide/Show Strong' numbers set to Hide (off)
- Verses don't start new lines (off)
- Show notes and highlights in text (on)
- Iinclude verse numbers (on)
- INclude reference (on)
- At the beginning (off)
- Place on its own line (off)
- Exclude title (off)
Notice that as you turn the above settings on or off the setting text description changes. So the list above shows whether I turn the setting On or Off.
In Colors and Fonts and in Privacy I use the default settings.

Laridian PocketBible for Mac 1.3 Update Released
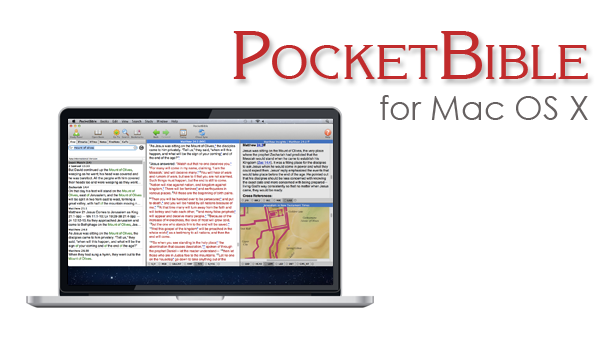
Laridian PocketBible for Mac version 1.3 hit this week with a few new features for users of the deceptively simple yet powerful Bibles study tool. One notable feature includes support for Laridian's latest Bibles that display text in a more useful way. This includes one example, mentioned in an email from Craig Rairdin, Laridian's CEO and chief programmer. The NIV with Goodrick-Kohlenberger Numbers will not support Laridian PocketBible for Mac.
How to Install Laridian PocketBible for Mac 1.3 Update
To get this free update you only need to select Check for Updates in the Laridian PocketBible for Mac menu at the top left of the Mac menu bar (see below). The download will install bringing your copy up to vision 1.3.
 If you own a copy of Laridian PocketBible for Mac but don't already have it installed, then go to the company's website and log in. Click on Download from the top of the website or click on the link labelled Mac OS X along the right side under Download Our FREE PocketBible App! as seen above. This puts a DMG file most likely in your Downloads folder. Double click it and then drag the PocketBible icon into the Applications folder seen in that window that pops up when you download the DMG file.
How to Install Books on Laridian PocketBible for Mac
You will need to register the program after you open it for the first time. MacOS may give you a warning before it opens the newly installed PocketBible for Mac, but it's save to let it open. Then register by typing in your email and password. If you're installing this for the first time not your Mac, then click on the Books (#1 above) menu at the top next to the PocketBible menu on the left side. Then click on Cloud Library or if you prefer use the keyboard combo CMD+L. This opens the screen that lets you install books. You can install all books by clicking the Download All Books (#2 above) button on the lower left of the window. You can help yourself to find only new books by click on Hide books already downloaded (#3 above).Aside from supporting new Laridian Bible formats, they also fixed some minor bugs. There was something they called "wiggling" that happened when you moved to a new verse. Text would "wiggle". I've not seen this, but I'll take Mr. Rairdin's word for it that he fixed it since I don't see it in v. 1.3.
Lairdian PocketBible for Mac Advanced Feature Set Updates
If you own the Advanced Feature Set, then you can hover over a Bible reference and your settings will let you either show or hide the footnotes in a pop up window. You can add the set from the PocketBible menu. The Advanced Feature Set costs $9.99/year on Mac only and $17.99/year for all platforms. Some of the benefits of the Advanced Features Set include (copied from Laridian's website):
- Searching enhancements - search your entire library in one operation (normal search applies only to the active book).
- Note-taking enhancements - create Journal Notes that are not connected to any Bible verse or reference book. Will sync with other versions of PocketBible that have this feature (currently iOS).
- Automatic Study Options
- A Library Navigator shows you everywhere in your library that the current Bible verse is discussed.
- Automatically produce an in-depth study of any verse using all (or selected) books in your library.
- Automatically produce an in-depth study of any word using all (or selected) books in your library.
- Automatically produce a document containing today's (or any day's) Bible readings using one or more devotionals and one or more Bibles from your library.
- Hover over Bible links in books to quickly read the verse from your preferred Bible.
- Highlighting Enhancements
- Rename your highlight colors to be more relevant to the purpose of the color.
- Speech Synthesis Enhancements
- Uses built-in OS X speech synthesis to read a selected passage, read the linked-to Bible verses, or start reading until it is told to stop.
- Choose custom voices and speaking rates for English books, Spanish books, and the Greek New Testament.
- Layout Enhancements
- Create multiple, named screen layouts for different purposes (for example, one for devotional reading, one for lesson preparation, and one for note-taking during sermons).
- Create a special layout for devotional reading that will be activated when the Today button is pressed.
- Maximize a book to use the entire PocketBible Window.
- Maximize a pane to use the entire PocketBible Window.
- Miscellaneous
- Control Special Offer notifications telling you about recent discount offers for which you have been made eligible.
- The Study Panel uses a small toolbar instead of text tabs.

How to Convert Books to Digital Books While Destroying Them
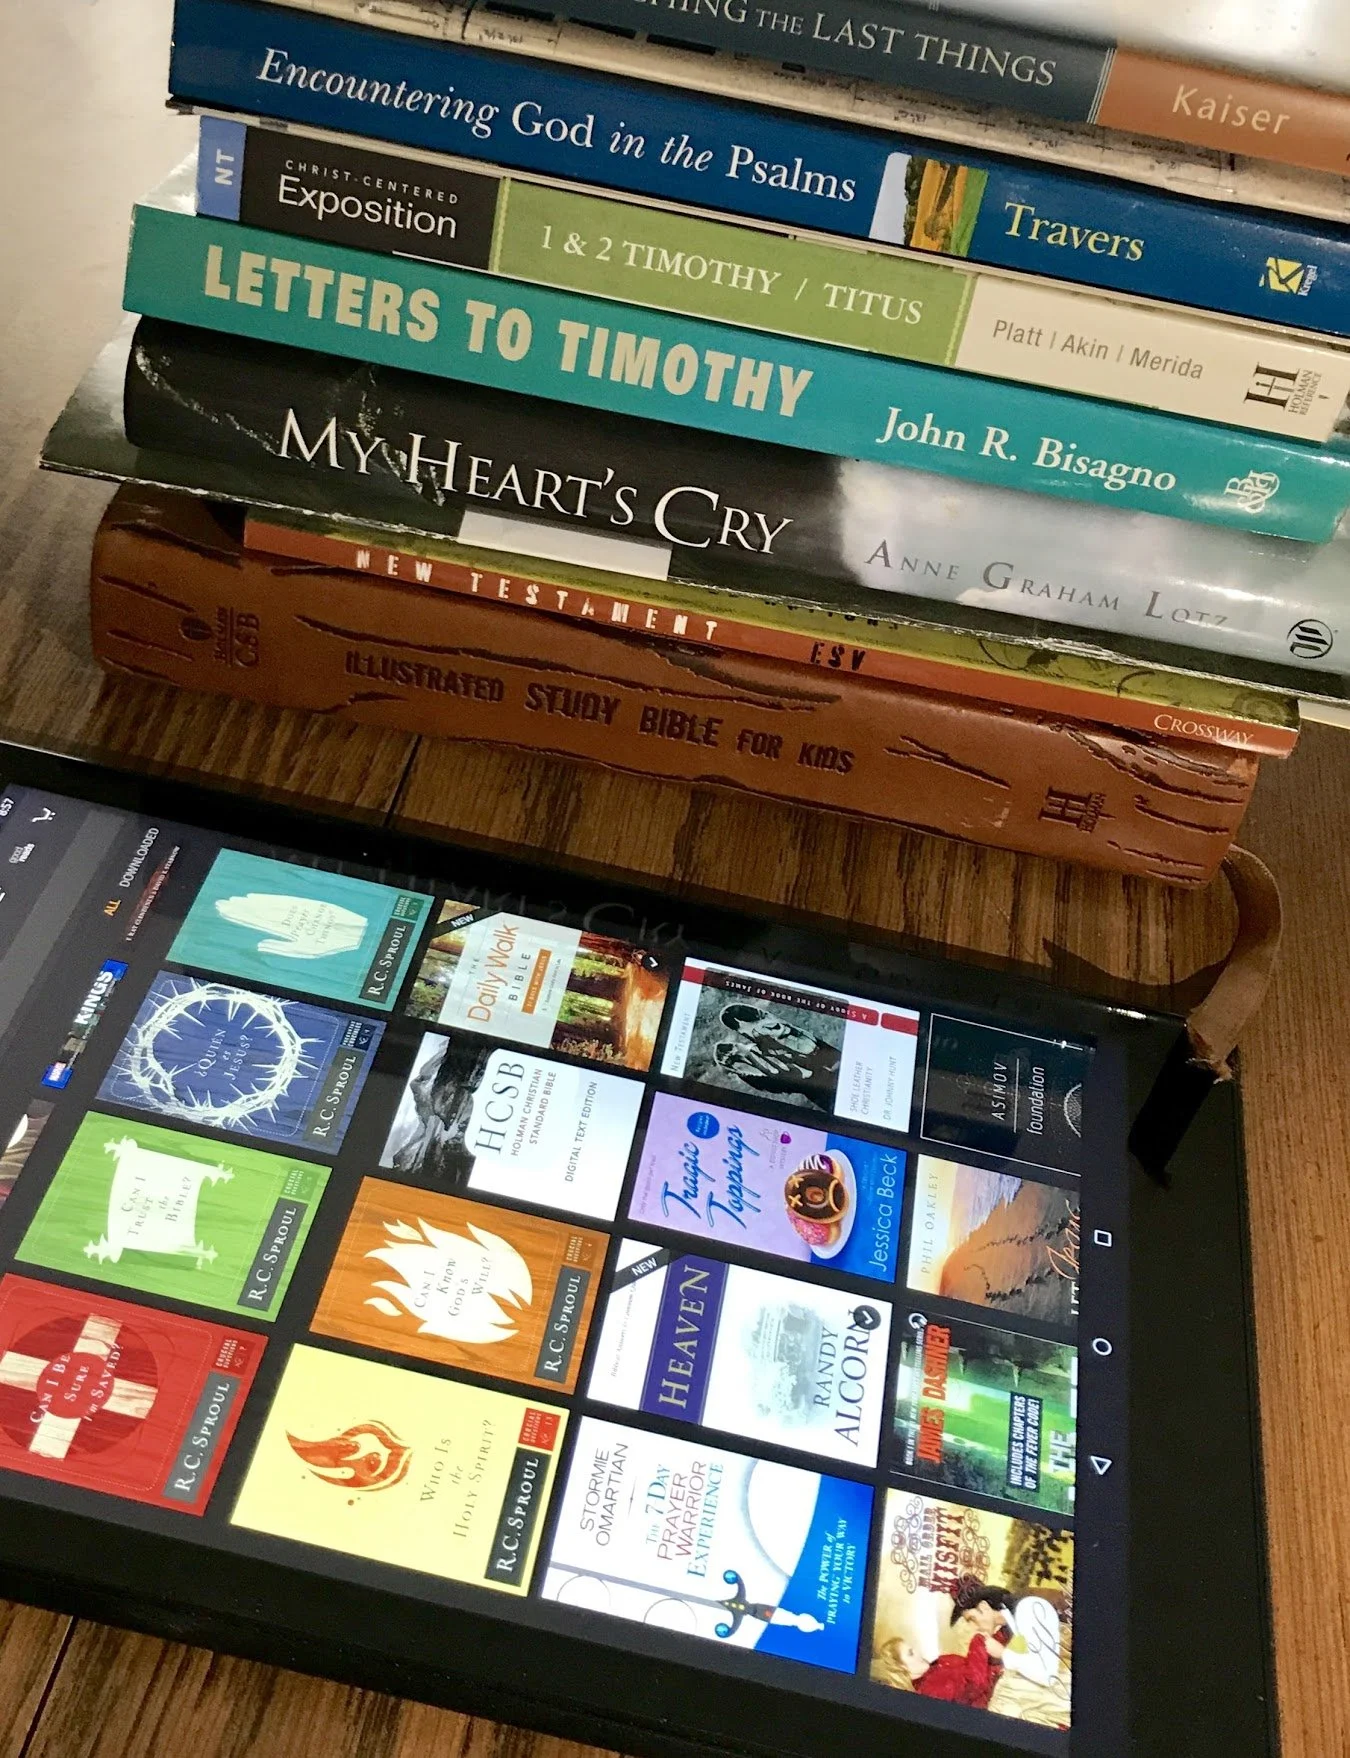
Do you own a stack of books or even a library full of print books that you'd love to read, but prefer to read digital books?Who wants to carry around a backpack full of books when you can carry one small device full of eBooks? You could just buy digital versions of these books on Kindle, Nook or in an eBook app or in your favorite Bible software, but that can get expensive. That's why, in certain circumstances, scanning the book and saving them as a PDF gives readers the best option. Here are the steps to convert books to digital books using a scanner.
- Cut the binding off the book at a copy shop or office supply store.
- Scan the book in a sheet fed scanner or multi-function printer.
- Save it as a PDF file or other format.
- Upload it to a cloud storage site, like Dropbox, OneDrive or Google Drive or in the case of an eInk Kindle book reader email it to your Kindle.
- Open it in your favorite tablet book reading app or on your eBook reader.

Preparing to Convert Paper Books to Digital Books
To get started pick out the books you want to scan. Start with one book to see if this process works for you.I don't convert books to digital books with my hardback books or to books that are special to me. I have a few books with author signatures or that I know I'll want to share with others by letting them read the paper book. Also, you want to display some books on the shelf. I usually pick books I will only use once like the study guides for big Bible studies that I teach at my church. The local Staples store in my town will cut the binding off a book for about $2 depending on the size of the book. Go ask the copy center of your favorite office supply store or a local print shop. Kinko's will do this also. You could just saw them off yourself, but that's not easy and it will probably end up with a mess that's hard to send through the scanner.After cutting off the binding, fan the pages to make sure they cut through the book. Sometimes a few pages will stick together. Usually the first page after the front and back cover will not come loose without your help.
Scan the Book Using a Sheet Fed Scanner
 I reviewed a Fujitsu ScanScan professional sheet fed scanner when I used to write for Notebooks.com. It's a great scanner that does the job perfectly nearly ever time. However, it's also costly.You probably own a sheet fed scanner if you have a multi-function printer that scans, faxes, copies and prints. These have a feeder on top that sends multiple pages through. You need one that will scan both sides of the page at once. However, you can make do with using the kind that only scans one side at a time. Your scanning software will need to combine such books by collating the odd and even pages to put them in order. It will take a long time to manually collate the odd and even pages so they show up in order if you're scanning a long book. It's better to buy the digital book or just read it in paper form.
 Most sheet fed scanners will work best with a limited number of pages. I try to scan as many as I can at once, but seldom more than 100 pages (that's a 200 page books with pages on both sides of each page). The ScanSnap software handles this job very well automatically saving it as a PDF file when it detects that it's scanning text on a page instead of photos. It then asks me where I want to save the file, but it automatically saves it to a folder on my computer that I choose the first time I open the software on my computer.I open the PDF file on the computer first to check it and Adobe Acrobat will automatically recognize the text, which we call optical character recognition or OCR. This makes the book searchable.https://www.youtube.com/watch?v=y37V2wqUFloSometimes I have to fix a page or two by rotating images. That seldom happens, but on occasion it will. For some reason the software sees the image and thinks the page was loaded sideways even when it wasn't.
Send the Converted Digital Book to Your Device
Finally, I save the file in my Dropbox folder, which automatically loads it to the cloud storage site. Then, I go to my iPad or Kindle Fire and download it from Dropbox.If you plan to open the file on a Kindle with eInk display instead of a Kindle Fire or tablet that runs apps like the Dropbox app, then you'll need to email the file to your Kindle. You can find this email at Amazon's site. Amazon has a help page to show how to do this. You can find the email address on your Amazon Manage Your Devices page.https://www.youtube.com/watch?v=aOmuJX09X5o&feature=youtu.beA Kindle or Kindle Fire will manage PDF, Word Docs, Kindle's .MOBI, .AZW files, image files or HTML files. If you plan to read your books on an iPad, then get a good PDF file app. I use Metamoji Note, a note taking app that lets me import PDF files and then mark them up using my Apple Pencil on an iPad Pro. This also syncs so that I can see the PDF in the app on my iPhone, Windows computer, or Android device. Other apps like it include Notability, Liquid Text or even the Kindle App. The previous links send you to the iOS App Store site. Metamoji Note is the only one that runs on Android too. See a demo in the video above. You can email books to the Amazon Kindle app on your iPad, iPhone or Android tablet/phone too using the same steps found in the Amazon site linked above.
How to Create and Publish an eBook: Theotek Podcast #093

Pastors and ministers can make use of their sermon series' and bible studies by turning those into an eBook. They might have a devotional book they want to use to disciple their congregation or a small group. Whatever you want to put out there in digital written format you can do with an eBook. We discussed how to make an eBook in this podcast with special guest Kathy Mansfield, wife of our co-host Rick Mansfield and a talented children's eBook publisher and author.https://www.youtube.com/watch?v=-SIPn_PA7Cw&feature=youtu.beIn the podcast we referred to Kathy Mansfield's author page on Amazon. Be sure to check it out and get some of her books, especially if you work with young kids or have some in the home. You can also find Kathy at her website And a Poem, which she explained in the podcast, so be sure to listen below or watch it above. That's also her official Twitter author account.Kathy was a school librarian for 26 years and now serves as the state library consultant for the Kentucky Department of Education.
Tools for Making an eBook
We discussed a bunch of tools that help people make eBooks. Here's the list...
- Pixabay - a great site for free, public creative commons photos you can use in your projects.
- Create Space - the site used by handling eBook publishing via Amazon's website and eBook store.
- DIY Book Formats - a great site to help you learn how to create eBooks and how to format them for publishing.
- APE by Guy Kawasaki - I mentioned this book by former Apple Computer evangelist Guy Kawasaki who has published a bunch of eBooks.
- Sigil - a tool for creating eBooks.
- Creative Book Builder - another tool for creating eBooks mentioned by Wes Allen
- Press Books - yet another site dedicated to helping you create your eBooks mentioned by Wes.
- Smashwords - a place to distribute your eBook instead of using Amazon
- Creative Penn - another site dedicated to helping you create your eBook.
If you use any of these or any of our suggestions to publish your book, please be sure to let us know and we'll publicize it on our show. Get LaRosa Johnson's book RAW Material to help in your own discipleship or someone else's as a gift.