


Logos Bible Software Bought Wordsearch. What does it mean for me?
Now that Faithlife bought Wordsearch, what does it mean for users of both programs and where will Bible software go in the future?
In case you didn't know, the publishers of Logos Bible Software and Proclaim Worship Software, Faithlife, bought Wordsearch Bible Software from LifeWay, the publishing arm of the Southern Baptist Convention. I shared a little about it here and at ChurchTechToday.com, where I sometimes write.
When we face significant changes, we feel afraid and wonder what will happen and how will it affect us. Those feelings will affect Wordsearch customers more than Logos customers. However, it will also offer some positive changes. We'll look at both the negatives and the positives and then consider the future of Bible software.
Simplicity and Comfort with Wordsearch for Users
People who used Wordsearch for a long time liked that they could collect a large library of excellent Bible study tools and ministry books from excellent publishers. Wordsearch produced a lot of great digital content for their software users. Wordsearch also presented those excellent tools in a simple, familiar format. The program added features and changed the way it looked over time, but it always had a look that reminded us of Windows Explorer or macOS Finder. The list of content showed up in easy to recognize folders along the left, while the content showed up on the right. You could display a Bible in one window, a commentary in another, and notes in a third. It all made sense.

Moving from Wordsearch to another program felt more jarring than most moves because the other high-powered windows software looked very different. At least Accordance had the library list on the left. Logos hid their library in a drop-down list that you could open as a window and put on the left, but it took some work to set up a familiar layout that Wordsearch users would consider familiar.

Disappearing ZipScript; Gone But Not Forgotten
ZipScript appealed to Wordsearch users and many of those trying to jump to Logos, the new Wordsearch overlords, experience consternation at seeing it go away when the program stops working. Understand that the deadline won't come anytime soon. But one day it will quit.

ZipScript ran in the background and grabbed scripture from a chosen Bible from the Wordsearch library. Users could quickly paste it into a Word document or some other text editor or even a website. It worked simply and elegantly.

Logos has something similar in the Copy Bible Verse tool, but you have to open Logos to get at it. We'll show you how to use Copy Bible Verses in Logos below.

And that leads me to some hope for Wordsearch users. You can do most of what you really love in Logos or some other third-party application. It will take some time and training to get the most out of it. So let's look at the hopeful side of the buyout of Wordsearch by Faithlife.
Reasons for Hope for Both Logos and Wordsearch Bible Software Users
Logos users will experience the most hopefulness with the purchase of Wordsearch. Users now can access a large library of books and tools not available before in Logos.
The Complete Biblical Library includes a commentary and some language study tools to name a few resources. Logos didn't offer this package until now. Wordsearch and Accordance did. That's just one of the hundreds of books Logos users can now buy and use. More will become available as they finish converting the digital files into Logos book formats.
Wordsearch users will also get access to a lot of resources that weren't available to them before. Both customer bases could buy thousands of Bibles, commentaries, reference books, and other titles. Now they can get even more.
In addition to more books, Wordsearch users willing to take the time to learn how to use the powerful and complex features in Logos 9 will discover that their new program is more like owning an aircraft carrier than a 400-foot luxury yacht. Both float in the water and both will get you across the Pacific Ocean, but one can do it in a simple familiar way while the other feels more like a highly technical piece of machinery ready to attack any task with skill and advanced expertise like nothing else in existence. I think Accordance would disagree with that last bit. It's similarly powerful, but I hope you get the meaning of my flawed analogy.
I recommend that Wordsearch users patiently take the time to learn to use Logos. Here are a few ways to help...
- Logos Support Page has plenty of training
- Logos community forums is full of helpful users
- Check out one of the advanced training schools online like Morris Proctor and LearnLogos
- Visit Theotek here and on YouTube
- Take time to look around the software
- Open Wordsearch and Logos at the same time and take a look at what you love about Wordsearch and try to mimic that capability inside Logos
- Take a look at other Bible software like Accordance, Olive Tree, e-Sword, PocketBible and more.
- Keep using Wordsearch until you can't
The last recommendation above is important. Just because you won't likely get any software updates in the future from Logos, the program will probably keep running fine until Microsoft updates Windows and breaks it. If that happens, then don't upgrade windows. I'm guessing you can keep using Wordsearch for at least another year or more. That might extend for years, especially if you don't mind staying on current versions of Windows. Eventually, however, it will shut down and you'll have to move on.
The Future of Bible Software
Where will the Bible software community end up in a couple of years or longer? That's a hard question to answer and I've never been a good prognosticator. I thought Covid would last a few weeks at most. But let's give it a try.
Bible software is both expanding and contracting at the same time. Over at ChurchTechToday.com my editor, Lauren Hunter, wrote about the future of Bible software quoting Rick Meyers, the generous creator of e-Sword. He said...
“This same decade has seen new Bible software companies emerge who are embracing these new hardware/platform changes. So, in the decade which saw WORDsearch first sold to LifeWay, and now to Faithlife, we have seen the rise of YouVersion. One generation of programmers hands off the baton to the next generation of programmers; meanwhile, God’s Word remains as popular as ever.”
I agree. We see more options for quality Bible software. At the same time, we now have fewer options for the advanced Bible study needed for academic Bible study or translating the Bible into more languages on the mission field.
With that, I think that Bible software companies that offer a strong online presence will win in the long run. And that means Logos. They are the only advanced Bible study option that works on all platforms including...
- Windows
- Mac
- iPhone
- iPad
- Android
- Online
- Chromebooks
- Kindle
Others work on many of those like Olive Tree, but they don't offer a website for Bible study. Accordance is in the same boat.
Some of the best online sites work great in a desktop browser, but not as well on mobile. Some of those show up as apps in the app store, but not all.
With the contraction of the number of powerful programs, it may seem like Bible software is in trouble. However, the big names are strong and not going anywhere soon. So, I'm hopeful.

The 4 Best Camera Styles for Streaming Church Services Live in 2021
What's the best camera for streaming your church services live on Facebook or YouTube. We'll give you some tips for choosing the right camera.
When churches shut down due to Covid-19 we looked at the 4 best camera styles for streaming church services. It's almost a year later and time to update that for 2021.
In a previous post about streaming church services live, we looked at the best way to stream with an iPhone or Android phone. To offer a professional live stream of your church's worship service, you'll want a dedicated camera instead of a phone. In this post, we'll look at picking the right camera for your needs. Again, a phone might fit your budget, but this time we're assuming you want something that creates better quality for streaming church services.

Here are the other posts in this series:
- Streaming Church Services Live from a Phone Made Simple
- Streaming Church Services Live Using Facebook or YouTube Apps or Pages
- 7 Best Tools for Streaming Church Services
- Streaming Church Services Life and Cheap
What Kind of Camera Should You Use for Streaming Church Services?
People can pick from a few different kinds of cameras aside from their phone camera. Most people think of a webcam when they think of live streaming. However, webcams only work if you're streaming yourself sitting at a desk or in a room close to the camera. The quality of the image that a webcam produces usually won't compare to a dedicated camera. The camera, if it zooms, usually uses digital zoom, which looks bad. You'll have to put the camera very close to the pulpit and it will distract the people from attending the stream. Don't use a webcam for streaming church services live.
The best options include the following styles of cameras:
- A video camera or camcorder with at least 720p resolution that also has an HDMI output that shows the live view of the camera video.
- A DSLR or mirrorless camera that also offers a live output of the video of the camera.
- A PTZ IP Streaming Camera that you can connect over an Ethernet cable and offers remote control of the panning and zooming of the camera lens.

Let's take a look at some options for each kind of camera.
Video Camera or Camcorder

Before cameras on smartphones got so good, most people owned a camcorder or video camera. Basic consumer-grade camcorders made in the last few years will offer a 1080p or even a 4K video option. You can spend as little as $250 for a very good Canon camcorder that offers HDMI output and a live view of the image. B&H Photo has a few ranging in price from $250 to $2000 depending on your church's budget. The cheapest option, the Canon VIXIA HF R800 Camcorder offers the following features needed for a good streaming camcorder.

- Optical Image Stabilization - less wiggle as the camera operator movies it from side to side.
- HD Video - 1080p is the sweet spot, but lower quality 720p usually looks good enough and high-quality 4K video may offer too much making it harder to stream on a slower network. This camera offers 1080p which gives your viewers good image quality.
- 32X Optical Zoom - avoid using digital zoom because it gets closer to the subject, but looks horrible. The optical zoom looks much better. If your camera has a digital zoom, turn it off in settings.
- Powered via Power Adapter - you want to plug it into the wall so you don't have to worry about your battery running out. If you do this remove the battery so you don't ruin it by keeping it plugged in. That way you can still use the camera for recording video outside of the sanctuary.
- Mic Input - the camera comes with a mic input if you need to use it in other situations outside of streaming your worship service. While streaming church services, you'll get sound from the soundboard going into the computer.
Consider a Higher-quality 4K Camcorder
The above Canon camera gives users an adequate option, but if you want 4K streaming you'll have to find another camera. The Canon VIXIA HF G50 4K Camcorder (seen below) gives a higher resolution but costs 4 times as much. But you'll get a much better image. It will also require higher bandwidth, so make sure your Internet connection is fast upstream as well as downstream and can handle streaming church services in 4K.

Despite the higher price, the HF G50 cuts the optical zoom by a third. That means you won't get as close to the people on stage while recording from the same spot. If you can place the camera person closer to the stage, then this will work fine.
You can go nuts with high-end professional cameras that cost thousands of dollars, but people who need those cameras probably already know more about cameras used for streaming church services live than I do.
Mevo Camera for Streaming Church Services Live
The Mevo Camera gives churches a specialized camera for streaming church services live, but you'll have to place it close to the platform like a camera phone.
The Mevo Start ($399) streams or record locally in 1080p. Use the Mevo App to control the camera on a smart phone or tablet. Set things up so it looks like you have multiple cameras all using the one camera and the app.
The Mevo Start is small and has a battery that should last long enough for most worship services, but you can also plug it in. The built-in mic will pick up audio or there's a built-in 3.5mm mic input to connect a higher quality external mic. Most churches will connect their soundboard to the smartphone or tablet instead. You'll need to connect some specialized cables to make that work. I'd suggest going to the Mevo Facebook group to get further support from other experienced users.

An Example of Using Mevo in Church
You can view an example of the Mevo in action at my church's Facebook page. Look for our Sunday School on Wednesday night videos. We use a regular camcorder for our Sunday morning, but we use the older Mevo Plus camera for Wednesday night streams. Here's the company's ad for the Mevo Start.
The camera will connect either to your phone or your tablet. I'd recommend using an iPad since that's larger and you can see more on the screen at one time.
The app runs on iOS and Android. Find out more about that from Mevo.
The Mevo camera works best in smaller sanctuaries or for churches who want to stream things like interviews or events in a small room. If your room requires you to be further than about 10-20 feet, this option won't work well for you and the image quality is lower than even a camera phone.
DSLR or Mirrorless Camera
Churches can use the above cameras for streaming church services live online, but they may want better quality images and a camera that they can take off the tripod and use for take photos of church events. A good DSLR or Mirrorless camera will fit that situation better.
What are DSLR or Mirrorless cameras? The video below explains it better than I can. If you don't care and just want recommendations, then skip to the next paragraph.
Mirrorless camera give the user a smaller camera while still offering beautiful photos and video. The DSLR is the style of camera that's been around forever, but now they're digital. Mirrorless is the future.
Canon M6 Mark ii
I used to recommend the Canon EOS M50, but a friend had a lot of trouble using one for his church. So I now recommend the Canon EOS M6 Mark ii. That's the camera I own and occasionally use for live streaming.

Canon released a brand new utility called the EOS Webcam Utility that lets users turn their DSLR or mirrorless camera into a webcam. You can hook your camera up to your computer with USB-C. The new utility will make it available in your software as a camera for streaming. It works fine for Facebook or YouTube live streams.
The camera might run out of battery power before your service ends, so get the power adapter that lets you plug the camera in AC power. It costs $24 as of this writing.
Get a zoom lens with at least 200 mm of zoom. You'll still have to place the camera little closer than you may like because 200 mm zoom is like 6.5X zoom on a camcorder.
Canon EOS Digital Rebel T7i

If you don't own a Windows computer, consider then take a look at the Canon EOS Rebel T7i DSLR camera which starts at $680 without a lens. Pay $1000 to get a long zoom lens.
I prefer Canon because they offer better color than Nikon or Sony camera. But you can find comparable cameras from those manufacturers that will work for you. Other companies like Panasonic, Fujifilm and Olympus make great camera. Here's a list of options at Amazon.
Look for...
- 4K resolution for shooting
- Live video output for streaming
- A lens from 200mm zoom or higher
- Stays on and offers live video for a long enough time to stream your entire service since some cameras shut off after 20 or 30 minutes.
- An adapter for powering the camera while using it because most batteries won't last for the full length of a worship service.
You may not be able to find the above things mentioned in the camera's description at your store of choice. Ask the seller or post a question in a place like Amazon.
The last item on the list is a must. Get the power adapter for your camera like this one for the T7i mentioned above. or the one we linked to above for the Mark 6 Mii.
PTZ Streaming Video Cameras
A friend of mine chose to buy another kind of camera that I've not used. It's called the Avipas AV-1081G 10x HDMI PTZ Camera ($620) with IP Live Streaming. PTZ stands for Pan Tilt Zoom, which describes the way it can move (panning left-right, tilting up-down and zooming in and out).
It only offers 1080p video, which is fine for now. It says it's a 10x zoom camera, but only the digital zoom is only 5x, which is not going to be good enough for medium to larger sanctuaries.
These IP cameras are usually smaller, so you can put them in your sanctuary and they'll seem less noticeable. You won't need a big tripod because you can install it permanently.
The camera connects via a network cable. You can control it from a computer or with a special remote control box. The box or the software will control the panning (left right) and the tilting (up and down) while zooming in to the subject.
Recommendation
For those who worship in a large sanctuary, get a camcorder with a 32X zoom or higher. They are usually the cheapest option and you can get a good 1080p or 4K camera for hundreds instead of thousands of dollars. Then invest in good software to make it work, although Facebook alone does the trick for most people. If you plan to stream to another service, ask them what they recommend. The best free software for streaming is OBS Studio. The open-source software comes with a large community of users who can help you get it set up.
Here's what you'll need to get it all working if you're streaming from your church sanctuary:
- Canon VIXIA HF R800 Camcorder - $250 at B&H Photo
- A mini-HDMI to HDMI out cable with an adapter for your computer like to convert the HDMI signal to format that streaming software can use - $100 for both.
- A good streaming computer like the new M1 Macs - $900+.
- A cable to connect your soundboard to your streaming computer. You'll have to determine what kind of sound output your board has - $10-$50.
- Open your web browser and use Facebook Live Streaming from your church's Facebook page or if you want more features get OBS Studio which lets you set up multiple camera inputs, an input for your worship presentation (lyrics and sermon slides), and other interesting graphics - Free.
For people who are streaming from a smaller room, consider going with the Mevo Camera and a good phone or tablet. Here's what I use to make it all work:
- Mevo Start Camera - $399 or $384 on Amazon.
- A mini table-top tripod like the Manfrotto PIXI Mini Tripod - $18 on Amazon.
- iPad to control the Mevo Camera app - $319 for a 32GB base iPad from Amazon or $329 from Apple.
- Zoom Podtrack P4 mobile mixer with 2 Zoom mics - $390 from Amazon
The last item on the list is a new addition to my setup. We had a lot of trouble getting audio right with the Mevo over my iPad. However, this mixer fixed it all. If you already have a headset, two XLR mics, and cables, then you can buy the Podtrack P4 for only $200. Check back here for a full review of the Zoom Podtrack P4 at a later date.
5 Ways the M1 MacBook Makes Ministers More Productive and 1 Way It Doesn’t
The new Apple M1 MacBook Pro boosted my productivity in the weeks I've used it. It's not perfect and won't save you hours of time, but will help make you a little more efficient. Find out how with these 5 productivity boosters.

I bought the new M1 MacBook Pro and over the last week, it made me more productive. Here are 5 ways that this new M1 MacBook Pro can help make ministers more productive in ministry and at the end, I'll offer one reason that it's not all perfect.

In case you didn’t know, Apple released a significant update to its MacBook Air and MacBook Pro line. They replaced the Intel processors with Apple Silicon, which streamlined interconnection between the brain of the computer (processor) with the memory and graphics processor to make the computer faster and more efficient. It runs a lot of things faster and the battery lasts longer, up to 20 hours long depending on how the user sets their preferences and what software they’re using. That's Apple's figure not mine.

How does a computer make someone more productive? I’ve got 5 ways the M1 MacBook Pro makes me more productive. This applies to the M1 MacBook Air and M1 Mac mini too, since the internal hardware of the new Apple M1 MacBook Air and Pro perform similarly.
M1 MacBook Battery Lasts a Long Time
When I first opened and set up my new Apple M1 MacBook Pro, I plugged it in because that's the popular wisdom - charge your tech to 100% right away. After doing that I didn't plug it in for a couple of days of heavy use. I didn't time it so I don't know how long it lasted. But it lasts a long time.

My friend who also got an M1 MacBook Pro took his computer to a coffee shop. He worked with it untethered to power all day long and reported in the early evening that it still had 63% battery life left at 4:07 in the afternoon. That's stellar battery life.
I typically use mine for about 3-5 hours per day on battery power and I don't charge it for two or three days at a time. Even then, I only do it to be safe. I could probably go 4-5 days easily.
This kind of battery life makes you more efficient because you don't have to worry about finding your charger. Leave the charger at your desk, nightstand, or wherever you top off the battery. It may not save hours a day, but every five-minute saving helps. You’re not worried about battery life so you can work anywhere instead of seeking out a table or booth at the coffee shop near the power outlet.
M1 MacBook Keyboard Enters Text More Accurately
Apple customers have a checkered history with Apple's recent keyboards. Until a few years ago, they made the best mobile keyboards around. My first Mac was a 2nd generation MacBook Air and I loved that computer because of the keyboard, the trackpad, and the operating system.
Apple kept the stellar trackpad but wanted to make their computers thinner so the designers at Apple crippled their amazing keyboards making them nearly unusable. Fortunately, this changed with the newest MacBooks released in 2019 and 2020. The new M1 MacBooks also sport the new keyboards that actually work great, feel great and type accurately if you're a quick touch typist.

Not everyone agrees that the newer keyboards work better, but most do. I hated the previous versions and feel like these latest keyboards work more like that first MacBook Air I received nearly 10 years ago.
M1 MacBook Screen's Brighter and Easier to Read
Do you know what 400 or 500 nits mean? Neither do I. Practically, it means a bright monitor that you can keep at about 50% most of the time. A nit is a measurement of brightness. The word comes from the Latin term nitere meaning to shine.
A bright screen saves battery life and stays crisp and bright enough to see text, view video, and enjoy using your MacBook. I can read my M1 MacBook Pro screen easily while out and about keeping it at 50%. Most computers I've used or tested had to be set at about 70-80% in most bright rooms for me to view them comfortably.
The M1 MacBook Air is 20% darker than the M1 MacBook Pro officially. The Air offers 400 nits of brightness while the Pro has 500 nits. When my son and I placed our two M1 MacBooks together, we didn't notice as much a difference as I expected. See that in our unboxing of his new M1 MacBook Air in which we put my M1 MacBook Pro next to his Air to compare the two.

M1 MacBook Always Stays On So No Waiting to Boot
My old MacBook started up pretty quickly. It took a few seconds from sleep mode and less than 20 seconds from off. However, opening the lid on the new M1 MacBook Pro turns on the screen and the computer snaps to attention instantly ready for your input.
Instant-on displays won't save you hours a day or a week, but it does make you more efficient.
Consider this scenario. You have an idea, so you pop open the computer and start typing within a few seconds. With older MacBooks or a PC, you open the screen and often you have to wait for the computer to boot up or wake from sleep. It takes 5-30 seconds or some Macs and longer on old systems, maybe 5 minutes.
You wanted to quickly get an idea written in your sermon notes or the Bible study notes, but the slower computer means you're waiting. In the interim, you get interrupted by someone and you forget to write down that idea. That perfect ending to your sermon or the excellent illustration of your third point is gone into the recesses of your aging mind. I hate when that happens. It's less likely to with an instant on display that pops up the moment you lift the lid. How often does this happen? Not very! But one time makes this a nice added benefit of a faster computer.
Bonus Benefit: iOS Apps on Your M1 MacBook
Did I say five benefits? Well, here's a bonus sixth benefit of the new M1 MacBook Pro and Air - iOS Apps on your Mac. You read that right. You can install some of the apps you love using on your iPad or iPhone on your Mac.
It's too simplistic to say that the new M1 MacBook is just a glorified iPads, but they do run Apple Silicon just like an iPad or iPhone. For that reason, Apple designed the new macOS 11 Big Sur with the ability to install iOS apps, if the developer makes that option available.
Not all developers flipped the switch to turn on iOS app installation on the Mac. For example, I edit my sermon podcast on the Ferrite iPad app. It's quick and easy to use and I'd love to edit my sermon podcast with Ferrite my new M1 MacBook Pro too. Ferrite won't let me do that right now. But they'd be insane not to offer a version. This would give them a large number of potential customers. I'm guessing they will make it available in the Mac App Store, but they'll charge an added fee. Ferrite's so good I'll pay extra if it's not too expensive.
A few Bible app developers flipped that switch already. You can install a few great Bible apps for iPad on your Mac.
M1 MacBook Performs Some Tasks Faster
The video above exported from Final Cut Pro, a video editor from Apple that Apple updated to take advantage of the power of the new processors. It exported in under three minutes. On my old MacBook from 2017 that would take about 15-20 minutes depending on how complicated I made the edit with tracks and transitions.
If you use Apple's iWork apps like Pages, Keynote, or Numbers you'll seem excellent responsiveness. iMovie or GarageBand run quickly too.
Any application made to run natively on the M1 Apple Silicon Processors will run more efficiently than the previous generations of those programs. Here's one example. I created a twelve-minute video about how Bible software runs on my new MacBook. See it below. Microsoft released new versions of their Office apps with M1 Mac optimization support.
1 Way an M1 MacBook Doesn’t Boost Minister Productivity
Notice the previous section heading says "some". Not all macOS software runs screaming fast. Traditional software that developers failed to update to an M1 optimized system require something Apple calls Rosetta 2. Rosetta 2 takes the software coded to run on the old Intel-based systems and helps them work on the new Apple Silicon processors. Think of it like a translator who listens to you speaking English and translates your message to Sign Language for a hearing impaired person.
All Bible software that I'm familiar with requires Rosetta 2 to run on an M1 MacBook at this point. The previous video shows you how well most of the Bible software runs, but it's not perfect. I experienced some slow performance in both Logos and Accordance. It's minor, but worth mentioning. You can use these programs, but you will not see an increase in productivity till Faithlife and Accordance or the other developers update their programs. I'm told Logos is looking at 6 months to 18 months depending on how they attempt the update. Accordance isn't saying anything publicly, but I hope it will be sometime in the next year.
7 Best iOS Bible Study Apps on M1 Macs
What are the best iOS Bible apps that you can run on an M1 MacBook or M1 Mac mini? We offer some suggestions after showing how and asking if you should.

Did you know you can install iOS Bible Study Apps on an M1 Mac? You can, but should you? We'll take a look at the best iOS Bible Study apps that you can install on your Apple silicon Mac with macOS Big Sur.

When Apple released the M1 MacBook Air, Pro, and Mac mini, they possibly revolutionized the computer market with their incredibly efficient Apple silicon processors. These processors speed up things like video editing and encoding on powerful programs like Final Cut Pro. It also makes the MacBook Air or MacBook Pro run fast. But not all Bible study programs built for macOS run faster than they do on Intel-based Macs. So, let's take a look at the iOS Bible Study apps available from the app store.
How to Install iOS Bible Study Apps on an M1 MacBook
If you want to install one of these iOS apps, open the Mac App Store on macOS Big Sur as you would normally. In the upper left corner, you'll see the search box. Note, this doesn't work on older versions of macOS or on any computers that do not use M1 Apple Silicon processors, like the MacBook Pro, MacBook Air, or Mac mini.
Type in the name of an iOS Bible Study app like Logos Bible or Accordance Bible.

The next screen will show the search results for macOS apps. Click on the iPhone & iPad Apps tab as seen below.

This will show you the available apps that you can install on your M1 Mac.
Not all developers will let you install their iOS apps on a Mac. They have to turn this on, so contact them if you don't see it. Below you'll see the ones we like that you can find as of the date this article was published.
Why Only Some iOS Apps Will Install on M1 Macs
Since not all Bible Study Apps will install on an M1 Mac with Apple Silicon, we've got a list that will look different than our favorite five Bible Study apps. When you do see one taht's available it might give you a warning that isn't verified by the developer to run on the computer.

There's a link under the name of most of these apps as seen above. Click it to get an explanation from Apple. It reads as follows:
Most iPhone and iPad apps are compatible with a Mac with M1, but some may not be available because they require capabilities unique to iPhone or iPad. A developer may also choose to make their app unavailable on Mac.
"Not verified for macOS"
Some apps available on Mac may not function as they normally would on iPhone or iPad. For example, features that rely on hardware unique to iPhone or IPad - such as a gyroscope or a screen that supports complex Multi-Touch gestures - may not work on Mac.
That only means the apps that you can install may not work properly and some won't install because the developer chose to block you from installing.

To log into a couple of these apps I had to enter my computer password and/or my Apple account password.
7 Best iOS Bible Study Apps to Install on M1 Macs
Here's our roundup of the 7 best apps to install on your M1 MacBook Air, Pro, Mac mini.

- Logos Bible Study Tools - because the desktop version of Logos runs a little slow, it's not bad to install their iPad app. It's a bit awkward to get it going, but once you do it works well.
- Accordance Bible Software - the best mobile app for use on a Mac comes from Accordance. It runs okay and lets users enjoy all the mobile features. It did crash. a couple of times, but once I got books installed it seemed to run great.

- Bible from Life. church - not technically a Bible study tool but still good to install on your Mac. This gives access to some of the multimedia content in the Bible app but on a computer. You can also use the NASB 2020, something you won't find in many apps.
- Tecarta Bible - this useful study Bible style app works great. Download your tools and run the app. You can't use Tecarta on a Mac any other way.

- Laridian PocketBible - one of the first apps to offer a Mac version for M1 computers came from Laridian. It runs just like it does on an iPad making it one of the best of this breed.
- The Bible by eBible - if you're an eBible user on the web, you'll possibly enjoy using it on your phone, tablet and now Mac. It installs fine, but only runs in a small window.
- Mantis Study Bible - this humble little app was once one of the best mobile apps and it runs fine on a Mac, although only in a small window.
Did I miss any? Comment below which mobile Bible apps you want to see running on the M1 MacBook Air, Pro, or Mac mini?
Should You Run iOS Bible Apps?
All of the discussion about running iOS Bible apps on your new M1 MacBook Air, Pro, or Mac mini begs the question, "Should you run iOS Bible apps or iPad Bible apps meant to run on an iPad or iPhone?"
Most of the time you shouldn't bother. I'm I can now install these apps on my M1 MacBook Pro, but after a few weeks I haven't run many at all. I wanted to run the Logos Bible app because they need to fix a few minor annoyances with their Mac-based software. However, the Logos iOS app doesn't run as well as other apps either. So, I probably won't really run many.

12 Days of Logos Deals and Demo in Logos 9
The 12 Days of Logos brings steep discounts on Logos Bible Software books and tools as well as packages. Use the link in this article to save up to 60%.

Every year Faithlife offers what they call the 12 Days of Logos, where they offer 12 different products for steep discounts. That benefits you if you want to buy any of these 12 products for Logos 9. We'll take a look at them and give you some tips as to which ones you should consider and maybe avoid.
What are the 12 Products Available This Year?
On our list this year, we get some really great books and tools for Logos 9 and Logos Bible Software, which you can use with their latest desktop version of Logos 9 or you can get it on their mobile Logos 9 Mobile app. They also work on the web app.

Here's the list of the 12 products and how much they cost. If you want to buy one of these, I ask you to consider using my affiliate link because it helps me continue my work of writing reviews and how-to articles about Bible software and ministry-related tech topics.
- Bible for Everyone Commentary Collection (35 vols.) 62% off, $119.99 sale price
- Challies Recommends: Best Old Testament Commentaries (55 vols.) 50% off, $442.99 sale price
- Romans-Philemon, 21 vols. (New Testament Technical Commentary Collection) 65% off, $232.99 sale price
- New Studies in Biblical Theology Series Collection | NSBT (50 vols.) 52% off, $299.99 sale price
- NIV Application Commentary: New Testament | NIVAC (20 vols) 55% off, $199.99 sale price
- New International Commentary: Old Testament | NIC (28 vols.) 51% off, $499.99 sale price
- Popular Patristics Series Collection (53 vols) 54% off, $229.99 sale price
- Ancient Christian Reference Collection (55 vols.) 50% off, $549.99 sale price
- Smyth & Helwys Bible Commentary | SHBC (36 vols.) 55% off, $499.99 sale price
- Welwyn Commentary Series | WCS (56 vols.) 60% off, $199.99 sale price
- New Covenant Commentary Series | NCCS (16 vols.) 54% off, $99.99 sale price
- The Life Application Bible Commentary (17 vols.) 60% off, $49.99 sale price
Let me highlight a couple of the above books. I use the New International Commentary: Old and New Testament sets regularly. Faithlife is offering the Old Testament package for only $500, a 51% discount. That's steep. It's both an easy to understand commentary, but has a technical level of information for advanced Bible students and people who teach and preach the Bible.
The NIV Application Commentary: New Testament comments on the text and then offers some practical application to the commentary. This helps the average Bible student or the teacher/preacher alike. You'll pay only $200, a great price for this product.
The Life Application Bible Commentary focuses on real-world use of the teachings of scripture to help Christians in their growth. It comes in at 60% off.
Deals on Logos 9 Packages

In addition to the above tools, you can also get one of the Logos 9 packages available from Faithlife with some deals. Logos identifies them by colorful names like Silver, Gold, and Platinum. You can follow my affiliate link, which gives me a 5% commission to help me continue writing helpful reviews and how-to articles about Bible software and ministry tech.
M1 MacBook Pro and Bible Study Apps
How well do the top five Mac Bible study apps run on the new M1 MacBook Pro? We ran five of the best programs and share our results.
Are you curious how the new M1 MacBook Pro handles Bible study apps and programs? I was too and couldn't wait to test this out. You can find the results as I tested Logos 9, Accordance 13, Olive Tree, Laridian Pocket Bible, and e-Sword X on the new M1 MacBook Pro.
UPDATE: Added a video under the Logos 9 on M1 MacBook Pro section below.
Why I Bought the M1 MacBook Pro
For the past year, I actually transitioned to a Windows-centric computer experience by giving my 2018 MacBook Pro to my son, a videographer and photographer who really wanted to go Mac. I bought an excellent HP Spectre x360 13 2-in-1, but then reluctantly decided to go back to Apple after my office PC failed and I got a Mac mini from a friend.
I bought the 2020 MacBook Pro that Apple released earlier this year based on Intel's processor. That was in late October and then Apple released the new M1 MacBook Air, M1 MacBook Pro, and M1 Mac mini. Fortunately, I got mine at Best Buy and I could return so I did and picked the M1 MacBook Pro with 8GB of RAM and 500. It's not the highest-end M1 MacBook, but it's what could get in exchange without paying too much more.

Best Buy shocked me and told me I could get the new computer the next day, but that was wrong. It showed up the Monday before Thanksgiving instead of one week before Thanksgiving. That's not bad considering Apple shows a date in mid-December before you can get one directly from them.
Installing Bible Programs on the M1 MacBook Pro
The new M1 MacBook Pro showed up and I unboxed it and starting setting things up. Soon I was installing my Bible study programs. I use three Bible apps but for this test, I installed five of the best Mac Bible study programs you can buy today.
- Accordance 13
- e-Sword X
- Laridian Pocket Bible
- Logos 9
- Olive Tree Bible Study
For the most part, these apps installed without much concern. It's interesting that the first time you install a program that's not optimized for the M1 chip, macOS 11 Big Sur will ask you if you want to install something called Rosetta 2. It didn't take long to download and install, but it stops you from launching your app. I had to launch Logos 9 again after Rosetta 2 finished installing.
The other apps installed quickly. Accordance takes a little while to download your books if you have a large library. Olive Tree Bible Reader, Laridian PocketBible and e-Sword X don't take as long. In fact PocketBible has the best installation process of the group. It takes little time at all.
Logos 9 on M1 MacBook Pro
Let's first talk about Logos 9 because it's the most demanding of the five programs. It Typically, I start the installation, plug in my laptop, and leave for hours. When I come overnight or after a full day away, it finishes and we're ready to study the Bible.
As you can see from the video above showing the installation and indexing process, it took 3 hours and 47 minutes to install, download my 27GB library, and index the library. The download seemed faster than normal. Then indexing went quickly.
My friend LaRosa compared the indexing process to taking a long trip on an Interstate. It takes a little while to get on the road, but once you do and get up to speed, it runs quickly. Then, the off-ramp time slows down. That's how things went with the M1 MacBook Pro. It starts slow, speeds up, and then finishes slowly.
Normally, when Logos 9 indexes the library it takes up a lot of resources and you can't really use your computer much. You can, but it's infuriating because Logos takes up all the memory and processor. However, with the M1 MacBook Pro, Logos 9 ran slowly, but the rest of the system ran smoothly. For example, I hit the Home button in Logos 9 and scrolled through the Home page. It stuttered running haltingly. It's not smooth at all.
In spite of how slowly Logos 9 itself performs, the rest of the system runs smoothly during the indexing. That's abnormal with Intel or AMD based computers. They usually don't run smoothly.
Battery Life for Running Bible Study Apps on M1 MacBook Pro

The battery life stood out on my new M1 MacBook Pro. The process of installing Logos 9 on laptops usually kills a battery. On my previous HP x360 13 and my older 2018 MacBook Pro, I would never attempt to install Logos without plugging in. I didn't have to on this computer.
Add the wonderfully bright screen and crisp text, you get a fantastic experience writing and reading. I put the screen at 50 percent and it looks like other computers I'm used to using when they are set to 75-80 percent.
After I killed the battery installing Logos I used it for a couple hours and went to bed with it at 40 percent. This morning, after running on battery at 50% for about 4 hours, my battery reads 76% left. That's fantastic. My 2020 12.9-inch iPad Pro doesn't last as long in real-world use.
Hard to Tell Difference on M1 MacBook Pro

What's the final takeaway for running Bible study apps on the M1 MacBook Pro? For four out of our five apps, there's little to no different. I couldn't tell the difference between running Accordance, e-Sword X, Olive Tree Bible, or PocketBible on this computer.
Logos 9 is a little different. Installation was a slightly better experience. You can set it to download and index your library and get some other work done while it happens in the background. That's a huge improvement compared to running the program's installation on other computers.
Once you install Logos 9, it runs well. There's one issue that's more a Big Sur problem than an M1 MacBook Pro problem. Over in the Logos 9 forum, there's a post listing one issue as follows:
The Logos Desktop Team has tested Logos 9 and Logos 8 on macOS 11 "Big Sur." So far we discovered some minor styling issues (see below), but have not encountered any major issues.
Known Issue: Table of Contents arrows are duplicated.From Logos 9 forum
The above issue with arrows is an extremely minor issue. You may find others, but right now that's all.
In another Logos forum post, Phil Gons from Faithlife said the company has no definite plans to make Logos 9 run as an M1 Mac application. That's not saying they won't do it, but they are not announcing anything publicly. I'd expect this to take a long time since the current version of the software works so well. I look forward to the time when these five all run as a native app.
There's one thing that you can say about running Bible study applications on the new M1 MacBook Pro. Launching these apps takes a lot less time than they used to. Of our five, Laridian PocketBible and e-Sword X jump onto the screen instantly. Olive Tree Bible Reader loads in a couple of seconds and Accordance launches in a few seconds. Sadly, Logos 9 still takes longer than the others. But it loads faster than it did on Intel Macs. Running the programs speeds up on these new M1 chips too.

Slide Over on iPad Makes Your Bible Study More Productive
How can Slide Over on iPad make your more efficient and productive as you study and prepare for sermons or Bible studies? We'll show you how.
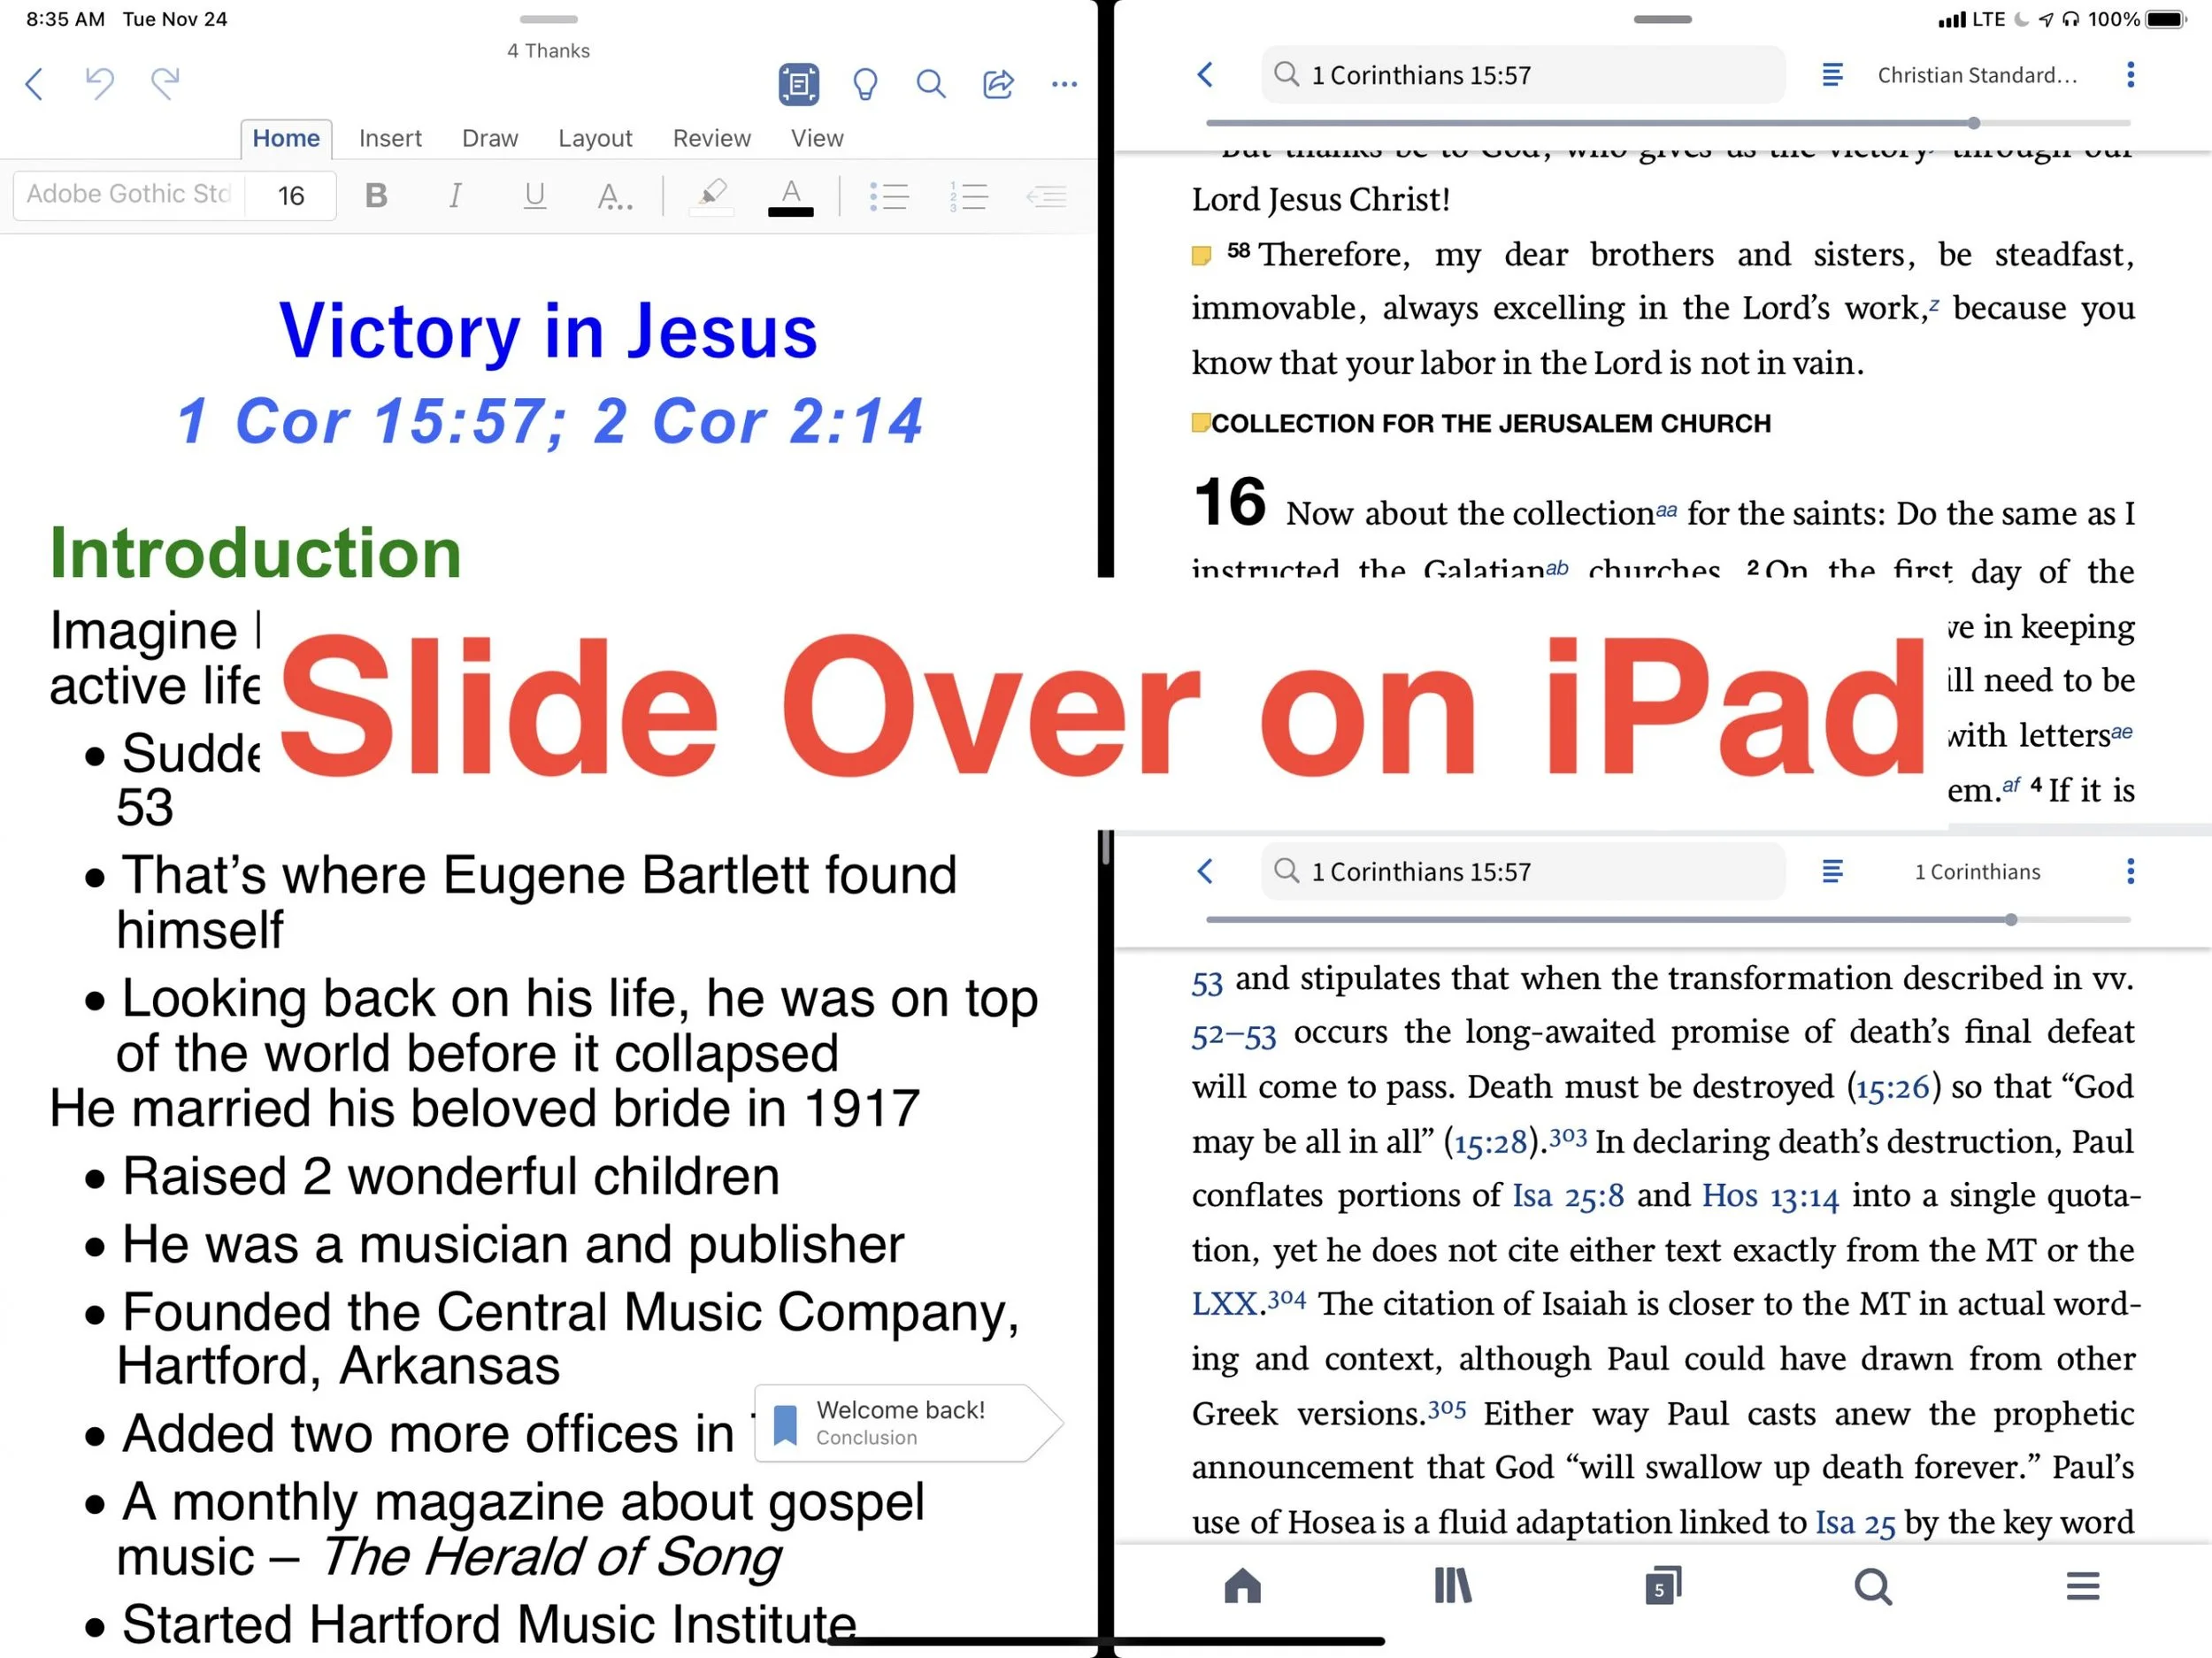
Do you use Slide Over on iPad as you study the Bible? If not, you should because it can increase productivity. Take a look at the following tips for effectively using Slide Over on iPad as you study the Bible or do other tasks on your iPad.

Switching back and forth from your Bible study app to your word processor or other mobile apps, while prepping sermons feels laborious. However, thanks to Slide Over with iPadOS digital Bible students can productively work with two apps at a time on larger iPad screens.
What is Slide Over on iPad?
When Apple released the first version of iPadOS more than a year ago, they perfected a feature called Slide Over. Think of it as two apps on the screen at the same time. Apple didn’t do it first, but iPad users found it cumbersome to use in previous releases.
The iPadOS will show you two apps at once. You can view them with both apps taking up half the screen or you can view them with one covering two thirds and the second app covering another third. The smaller window can sit on the left or the right side of the screen.
How do You Turn On Slide Over?
To open an app in Slide Over the app has to show up in your iPadOS dock. The dock sits at the bottom of the screen and holds all of your favorite or most-used apps plus three of the most recently used apps.

I keep my most-used Bible study app in the dock. But if you want to use another Bible study app that you don’t have in the dock, then open it first. Now slide up from the bottom of the screen slightly. You see a black line just above the bottom edge of the screen start swiping from that line and swipe about half an inch or so until you see the dock. Tap and hold a second app from the dock and drag it up to the right or left side of the screen. If a menu pops up then keep dragging up and over to the side of the screen.

The screen will show your two apps each taking up half the screen. If you want to adjust the size of the apps, drag from the line in the middle of the screen to the right or left to make one app smaller than the other.
When do I Use Slide Over in Bible Study?
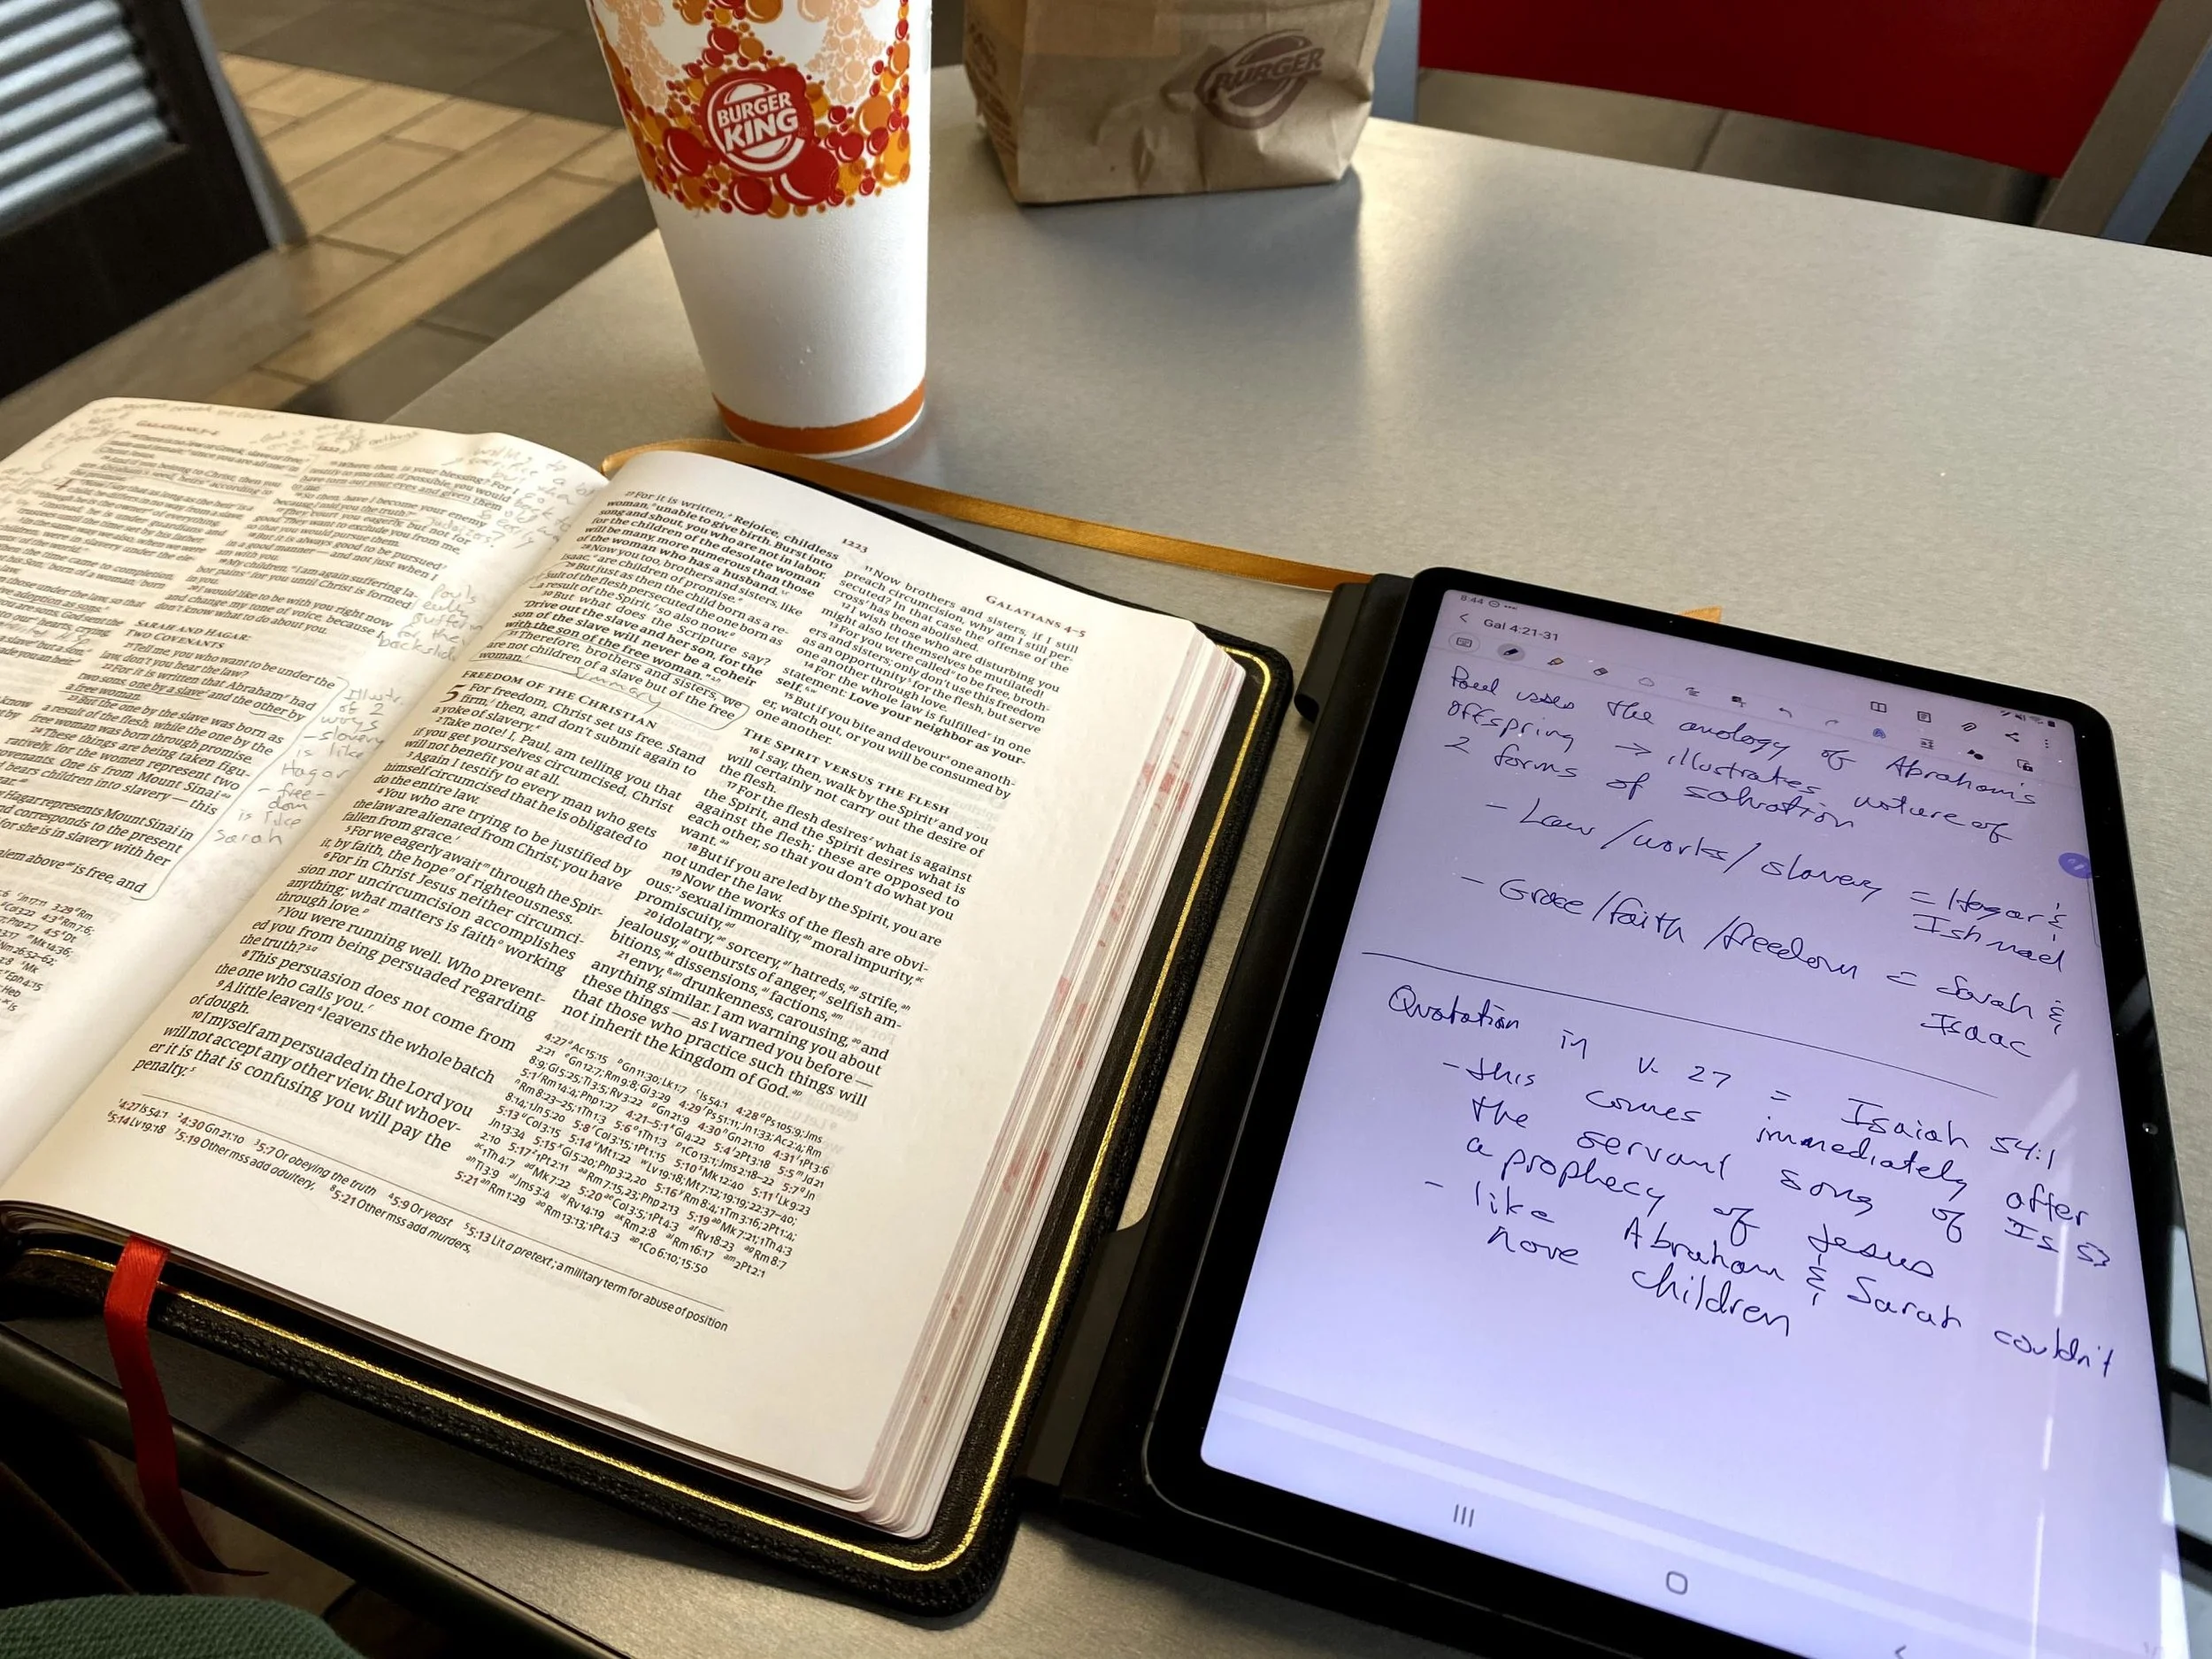
I own a few Bible study apps that I regularly use in my sermon and Bible study prep. Sometimes, I want to read books in one app, but keep all my notes attached to the passage I’m studying in the same app. So, I open the app where I want to keep my notes and then I open the other app. That way I can read the second app while writing notes in the first.
During the sermon or Bible study writing phase, I’ll open Microsoft Word and my Bible app where I’ve kept all the study notes. That way I can easily refer to the notes as I write my sermon or Bible study.

Sometimes I want to research some idea on the web in order to come up with an interesting sermon illustration. I keep Word and Safari open at the same time. Sometimes I’ll open a video in YouTube or some other streaming app to quote the video in my sermon. Any app you might use it prep a sermon that supports Slide Over can be opened.
If I’m presenting while preaching or teaching, I’ll open Keynote and my sermon in Word at the same time. Or, I open Keynote and Safari to drag and drop images from the web as I put the presentation together.
Tips for Using Slide Over
You can master Slide Over with the following tips:
- Open apps not in your dock before trying to use Slide Over so they will appear in the recently used section of the dock on the right where your three most-used apps show up.
- If one app doesn’t need half the screen, give more screen inches to the other app by sliding the center adjustment line over a little.
- Set up multiple app combinations for Slide Over and use the switching feature to switch between these multiple app combinations.
- You change one of the two apps into a floating window by dragging from a small dark line at the top of the active app by pulling down slightly and hold it till it pops from the side to a floating window. Grab the line and pull down and to the right to put it back.
- While in the floating view, you can remove the window by swiping up or down to swipe it away.
- Move an app from one side to another by dragging it from the tiny black bar at the top and then slide it over to the other side of the screen until it snaps into place.
- Create multiple pairs of windows and swipe between them the same way you would swipe between apps.
Samsung Galaxy Tab S7 Review for Ministers
The Samsung Galaxy Tab S7 is a premium Android tablet. The iPad dominates the tablet market. Is this tablet a useful tool for ministers?

Probably hundreds or even thousands of sites posted a Samsung Galaxy Tab S7 Review when it came out earlier this fall (2020). So, why does the Internet need another one? It doesn’t! Thanks for stopping by.
Actually, I’ll publish one anyway, because I want to focus on how I use the Samsung Galaxy Tab S7 in my ministry. My Samsung Galaxy Tab S7 Review will focus on the following:
- Bible study
- Reading books, magazines websites
- Preaching
- Presenting in a teaching situation
- Note-taking in meetings or study
- General tablet use including email, social media, web surfing, playing games, and watching video online

Samsung Galaxy Tab S7 Review: Screen and Input
The Samsung Galaxy Tab S7 blows away every other Android tablet. If you want a cheap tablet to read books, watch videos and play a few games, then consider a Kindle Fire. But if you want the best Android tablet available, then buy the Samsung Galaxy Tab S7 or S7+. I have a friend who is an Apple fan through and through. He said the Tab S7 is good enough to make him consider switching, almost.

Samsung offers two iterations of this stellar tablet each in three colors (Mystic Bronze, Mystic Black, Mystic Silver). One comes with an 11-inch WQXGA LCD with a 2560 x 1600 resolution. It's a beautiful screen even though the larger 12.4-inch Super AMOLED display with a 2800 x 1752 resolution. I looked at both at the store and wanted the smaller more portable tablet and didn't see a very big difference between the two screens. In theory, a Super AMOLED display should look much better, but the LCD on my tablet still looks amazing.
I primarily bought the tablet because I wanted a smaller tablet for reading, taking notes, and general media consumption. The S Pen competes well against the Apple Pencil on the iPad, whether you use the second generation Pencil on the iPad Pro or the older Pencil on an iPad mini, iPad Air, or regular iPad. It's a better size and fits in my large hands perfectly. I love taking notes in Samsung Notes. If they offered a slightly smaller 9-10 inch screen I probably would have picked that version, but my 11-inch S7 isn't unwieldy.
Samsung Galaxy Tab S7 Performance
The 865+ Qualcomm Snapdragon processor feels very fast with an Octa-Core 3.09GHz rating. Both tablets run on the same processor. The 11 gives users 8GB of RAM while the 12.4 strangely only has 6GB. You can buy them with three storage options - 128, 256, and 512GB of built-in storage. Add up to 1TB of expendable micro-SD card storage.
Specs don't matter if the software doesn't run fast. The Samsung Galaxy Tab S7 does. Everything feels smooth. Apps jump to life. I started it up and timed the boot and it took 28 seconds from start-up to the point I could launch apps. That does not include the few seconds when I paused my timer while I entered my password and restarted it as it finished booting.
I don't play a lot of games, but the few I do ran smoothly. You won't worry about speed on the Tab S7 or S7+. Find out all the detailed specs at Samsung's website, but here's the list of highlights.
Samsung Galaxy Tab S7 Specs
- Software: Android 10 and Samsung's One UI 2.5
- Processor: Octa-Core (3.09GHz,2.4GHz,1.8GHz)
- Display: 11-inch WQXGA display with a 2560 x 1600 TFT
- Memory: 128, 256, 512 GB storage, 8 GB RAM for 11-inch and 6 GB for 12.4-inch; up to 1TB micro-SD card slot
- Camera: Front = 8MP, Rear = 13 and 5 MP; Video Recording UHD 4K 30fps
- S-Pen support; Optional Keyboard case
- Wi-Fi -802.11 a/b/g/n/ac/ax 2.4G+5GHz, HE80, MIMO, 1024-QAM; LTE optional
- USB Type C; Bluetooth v. 5
- Fingerprint scanner and Face recognition security
- Weight: 1.1lb, Dimensions: 6.51x9.99x.25 inches
Samsung Galaxy Tab S7 Review: Bible Study and Reading Books
Many ministers will use their Tablets for reading and Bible study and I'm one of them. I primarily run Logos Bible Android App, Olive Tree Bible, and Accordance Bible. Sometimes I run the Bible app from Life.Church too.

These apps run perfectly fine. The Accordance and Olive Tree Bible apps will let you store your books on the micro-SD card, which helps if you have a really large library or want to keep them on external storage in case you have to erase the internal storage.

In addition to Bible apps, I use the Kindle app and read PDF files on my tablet. The screen may seem a little large for some, especially compared to a Kindle or smaller Kindle Fire. But I like it. I am getting older and can boost the font size to easily read.
Write in the Margins or Highlight like a Paper Book
If you convert your books to PDF format, you can import them into Samsung Notes or some other note-taking app and mark them up as you would with a pencil or pen and a paper book.

Samsung ships the tablet with Noteshelf, a great note-taking app that's also good for marking up books. When you create a new note, you can import a document and choose your PDF book from internal storage, the SD card, or a sync service like Dropbox or OneDrive. You have to set those services up and then they will show up as options in the Noteshelf import dialog box.

Now, use the S Pen to write notes in the margin or highlight the book. When you're done reading the book export the PDF with a slightly different name, like Book Name Finished.PDF.
Samsung Galaxy Tab S7 Review: Preaching from Digital Notes
When I preach, I don't take paper notes into the pulpit. I use my tablet. For years I used the iPad and then iPad Pro 12.9-inch. Now, I like using the Samsung Galaxy Tab S7 because it's a little smaller.

I write my sermons in Microsoft Word and then load them into the Android app on my Tab S7. In the upper right corner, there's an icon that looks like an open book. Tap that to get to Reader view. It loads the document in a larger font that you can adjust. Swipe left/right like a notebook. This view hides the toolbar.
Using the tablet is great. I think Microsoft needs to make their Reading Mode work on Android the same as iOS. You can swipe left/right like a notebook or scroll up down on iOS. You can scroll up/down on Android.
Presenting Using the Tab S7
Presenting requires connecting the tablet to an external display or projector. I use a USB C to HDMI cable for a reliable connection. Hook that up to a projector, as I do. Then I fire up Microsoft PowerPoint.

I love that I can annotate my slides using the S Pen. Touch in the top black bar above the slide to show the inking tools. Then when you're finished you can close the presentation and either keep or discard the ink markups.
Samsung Galaxy Tab S7 Note Taking
Notetakers can use one of the dozens or even hundreds of note-taking apps in the Android App Store. Samsung ships with its Samsung Notes app, my primary choice because it's simple to use and I don't really need much more than that. I can use the S Pen and when I write on screen I can rest my wrist on the screen while writing.

Samsung also ships with the above mentioned Noteshelf. It's also a simple note-taking app. I don't think it adds much that you can't get from Samsung Notes, so I don't use it.

INKredible offers another more powerful note-taking option. The one reason I like it is the zoom feature. See the image above. It pops open a box at the bottom of the screen. As you write in the zoom box, it enters the handwriting in the spot of the note above the zoom box. As you write, a gray shaded section appears at the left end of the line. When you finish writing at the end of the box you start writing in the left side gray area and it automatically moves the entry box over to the right of that line and then to the next line as you get to the end of the line. See it in the demo below, which is admittedly very old and out of date.
I take my Tab S7 everywhere. I take notes in meetings, when I'm doing my devotions with my print Bible, or when I'm brainstorming ideas for ministry or even my personal life. It's a great companion and I love taking notes on it.
Samsung Galaxy Tab S7 Review: Games, Media and Web Usage
As I said above, I don't play a lot of games. However, I enjoy simple games like the Microsoft Solitaire app, Real Pool 3D, and others. People who play more power-hungry games will likely enjoy using the tablet with 8GB of RAM and a fast Octa-Core 3.09GHz processor. Below you'll see a video demo of more powerful games like PubG Mobile from a gamer.
I do watch some videos, mostly using YouTube, Netflix, and YouTube TV. It's a great solution for that while out and about waiting for. The sound won't blow anyone away, but it's very good for what it does. They advertise the Dolby Atmos support, but my aging ears don't hear that much difference between average speakers and better quality sound like the Tab S7 should offer.
Volume sounds loud enough at about 75% in a somewhat noisy room. You can pump it to 100% to get louder audio, but your neighbors will get annoyed. Plug in or use wireless earbuds for most of your usage and you'll get better sound.
Samsung Dex
Some users long for a device that serves as their mobile phone or tablet and as a desktop computer. With Samsung Dex, you get just such an application.
I plugged my Samsun Galaxy Tab S7 into a monitor using a USB C to HDMI cable. Then I paired a Bluetooth mouse and keyboard to the tablet. The screen shows up on the monitor and works as a desktop computer.
Dex works as expected, but I don't really want to use Android as my desktop system. So, I didn't really use it much. I could in a pinch and I could see carrying around a good Bluetooth keyboard and mouse. You can also use the optional Samsung Keyboard Cover, but it's not cheap and doubles the thickness of the tablet and it's not easy to remove quickly for reading or taking handwritten notes with the S Pen. So, I don't bother. I returned the keyboard cover and got the thinner and lighter Book Cover. I used to carry around the mouse and keyboard but seldom used it so I quit doing that. You'll need to decide if you want to make use of Dex.
Recommendation
If you're looking for the best Android tablet in general, then go get the Samsung Galaxy Tab S7. If you want a larger 12.4-inch screen to use as a computer replacement, then get the larger Tab S7+, but that's the only reason. The smaller S7 holds up fine for the majority of users.
People who only want a tablet for reading, playing light games, watching videos, and doing some basic Internet activities, should really consider one of the very inexpensive Amazon Kindle Fire tablets. Get whatever size you prefer.
If you're deeply emersed in the Apple world, consider the iPad, iPad Air, or iPad mini depending on what size you want and what budget. The great Apple Pencil works on all of them.

Logos 9 Upgrade is Here: Get a Discount Here
Logos 9 upgrade came out and you can get 15% off using my affiliate link, but should you? We’ll give you a recommendation here.
Logos 9 dropped October 26 with some updates to the program. A lot of you will upgrade and you can get Logos 9 for 15% off using this link.

For full disclosure, Logos gives me a commission if you use this link. I don’t normally use affiliate links, but I’m placing this here so you can save some money by buying the upgrade using that link. If you do it helps me out too.
I wrote an article at Church Tech Today about what are the most important updates to the program. To learn more for yourself before that post comes out, head over to the Logos 9 page at the company’s website.
Logos 9: Top 5 New Features
The best new features included in the Logos 9 upgrade includes the following top 5 new features...
- Factbook Upgrade - click a word in your text with the Factbook feature turned using a toolbar button and it opens the Factbook to that subject.
- Sermon Builder - an upgrade sermon planning feature that takes passages from your favorite lectionary and populates a calendar that you can display in list mode or a kind of pie graph.
- Commentaries in Guides - users can now sort commentaries section in the Passage Guide by different ways including the author’s denomination.
- Dark Mode - I’m not a fan of dark mode, but people love it, so it’s here in Logos 9.
- Images in Notes - you can now add images to your notes.
That’s not a complete list, but it shows what most people will find interesting.
I will upgrade because I am that guy who always wants the latest greatest of the programs I use. If there’s an update to Windows, macOS, MS Office, I’ve used it in Beta for the last few months to help write my article for Church Tech Today.
Logos upgrades every couple of years. If you’re a Logos fan you’ll likely want to get the upgrade. For Wordsearch users who came over when Logos bought it, you may want to wait till you get used to using Logos 8 to make sure you’re a good candidate for the update
Logos 9 Free Engine Upgrade
The free Logos 9 software without all the new bells and whistles will likely show up in 2021. It comes with nothing but the basic program update. However, you can’t get it this year. So, if you’re patient and don’t think you really see anything that interesting in the new features list, then hold off till next year.

40 Questions Series for Accordance Review
The 40 Questions Series for Accordance Bible Software seeks to answer questions about 8 different topics from an evangelical perspective. This review focuses on the content of the series and using them in Accordance Bible Software for various platforms.
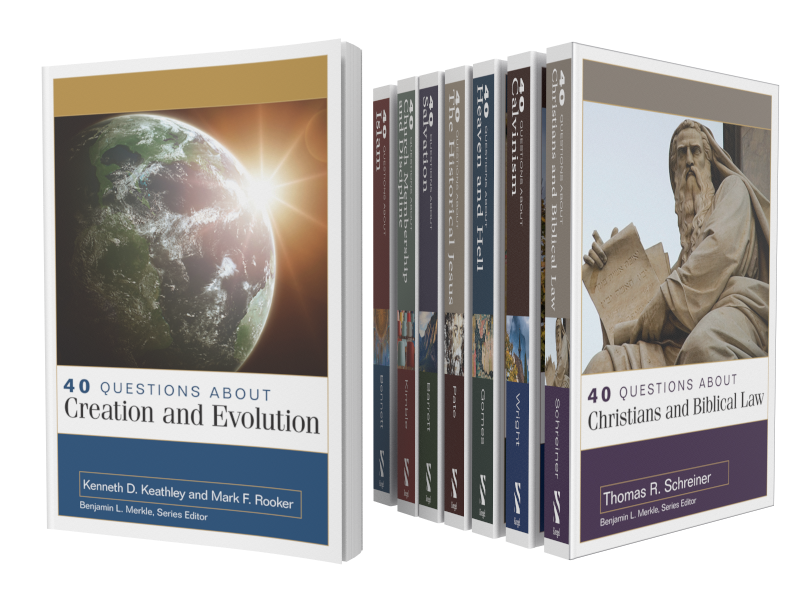
The 40 Questions Series from Kregel Publications for Accordance Bible Software puts into digital format 8 of the useful theological series that seeks to answer questions that Bible students might have on a range of topics from Calvinism to Church Membership. The series includes 8 of the 17 books in the set, each with 40 questions about a topic included in the book. Is it a good addition to your Accordance library? We'll take a look at the series itself and at using it in Accordance Bible Software.

For full disclosure Accordance gave me a review copy of the set. They offer a special until October 26 on the series taking $52 off to give you almost a 30% discount. Buyers can also get the individual volumes for a discount. Here's what you get.
- 40 Questions about Creation and Evolution (Keathley, Rooker)
- 40 Questions about the Historical Jesus (Pate)
- 40 Questions about Heaven and Hell (Gomes)
- 40 Questions about Salvation (Barrett)
- 40 Questions about Calvinism (Wright)
- 40 Questions about Christians and Biblical Law (Schreiner)
- 40 Questions about Islam (Bennett)
- 40 Questions about Church Membership and Discipline (Kimble)
The other books in the series are not yet available on Accordance but they will be soon.
40 Questions Series: How the Series Answers Questions in Accordance
Since Accordance gave me a copy to review for their sale, I did not have time to read all 8 books in the series. I started with 40 Questions about Calvinism by Shawn Wright. He's a church historian, pastor and professor at Southern Baptist Theological Seminary in Louisville.

Each book includes 40 questions that introduce and examine the topic of that book. For example, some of the questions from Wright's book on Calvinism asks things like...
- What's the Difference between "Calvinism" and the "Reformed Tradition"?
- What are the Five Points of Calvinism?
- Does God Love All People?
- Is the Arminian Doctrine of Prevenient Grace Biblical?
The book breaks up the 40 questions in to sections on things like general questions, questions about God's character, about salvation, about human responsibility and more. The last section covers more practical questions.
I'm not a Calvinist nor an Arminian. You might call me a Molinist because I affirm free will and eternal security like most traditional Southern Baptists.
The book helped me understand what many Calvinists believe and how they don't really like being put in the box of the TULIP 5 Points. The fact that those points came as a reaction to Arminian theology helps add some depth to what I was pejoratively taught about Calvinism.
In spite of learning more about what Calvinists believe, I was not convinced. However, I would recommend Wright's book for anyone who wants clarity about Calvinism from a Calvinist.
Accordance does a very good job of creating quality digital versions of the books they sell. They're formatted nicely for screens. The book creators do a good job producing mostly error-free copies of their books, so you can trust them.
Installing 40 Questions Series in Accordance Bible Software's Various Platforms
If you purchase the 40 Questions Series for Accordance, you'll want to do a few things to make them more convenient to use. You probably already know how to download new books, but if you don't follow these steps:
- Open Easy Install from the Accordance menu on macOS or from the Utilities menu on Windows.
- Click on the Easy Install tab at the top of the dialog box.
- Click the boxes next to the book name
- Hit the Download button at the bottom of the Easy Install box.
- Let it download the books and when it asks hit the Install button to shut down Accordance and Install the books.
After that the program will restart. You'll find them in the various sections of your library. For example the following five books show up in the Theological section of your Library.
- 40 Questions: Calvinism
- 40 Questions: Christians and Biblical Law
- 40 Questions: Creation and Evolution
- 40 Questions: Heaven and Hell
- 40 Questions: Salvation
You'll find the other 3 in other sections. 40 Questions: Membership and Discipleship shows up in the Practical section. You'll find the last two on Islam and Historical Jesus in the History section.
If you don't see the library on the left hand side of the window, open it from the Library button or the Window menu. You can also use the keyboard shortcut OPTION+COMMAND+1 on Mac or CTRL+ALT+1 on Windows.
To make the new books easier to find you may want to move the books to the top of your Theological section by dragging and dropping them using your mouse or trackpad. Or you can right-click the section name and choose Alphabetize to put them in alphabetical order. We showed you how to do this in our review of the Christi-Centered Exposition Commentary for Accordance.

To install the books on your phone or tablet, tap on the center of the app and then tap your Library icon in the bottom left corner on iPhone or iPad. Then tap on the Download button in the lower left corner and wait for the list to show your books. Hit the select all button in the upper right corner 2nd from the left. Then tap on the download button in the upper left corner.

On Android, tap on the screen to show your menu. Hit the Menu button with 3 lines in the upper left corner. Tap on Easy Install to open the Easy Install box.
If you're not sure which section of the library holds a book, then just start typing in the search box at the top of the Library.
Reading Books in Accordance Bible Software and Apps
Reading and highlighting books in iOS and Android versions of Accordance are a pleasure. As you'll see below, note-taking with Accordance mobile is not possible right now. I hope this changes very soon.
It's pretty easy to simply read books in the Accordance Bible Software on your Mac or Windows computer. Just open them up and read. You'll find them in the various sections of your Accordance Library as seen above.
If you want to add notes or highlights, you can do so easily.

To add notes hover over a section you want to annotate, a plus button will show up to the right of the paragraph. Click it and it opens a notes editor.
Unfortunately, you can't add notes to books in the mobile apps. iOS lets you add notes to Bible verses, but not books like the 40 Questions Series. Android doesn't even let you add notes to Bible verses. If you prefer to read on a mobile device like me, you'll need to open another app and put notes there and then sync that note file to your comptuer and copy and paste to into the desktop versions of Accordance. It's not ideal, but is a way to get around the limitations.
I asked Rick Mansfield of Accordance Bible Software about this and he said that the developers see the importance of notes and want to add them soon.

Adding highlights requires you to select the text you want to highlight and then choose the highlight style from the highlighter tool that pops up or you can open the the Highlight pallette box by hitting the button on the toolbar. Make sure you select the right highlight file from the dropdown box in the pallette box. After that it's easiest to just use the little tool you will see just above your highlighted text. The previously used highlight style shows up on the left (#1 in image above) and the tool pallette box opens if you hit the other button (#2 in image above).
I use My Mobile Highlights, created by default when you install the program. This file syncs with your mobile device using either the built-in syncing feature that requires you to have the computer program open and the mobile device open.
A lot of people own convertible or 2-in-1 Windows computers these days. If you like reading books on yours, then you'll enjoy reading in the Windows version of Accordance. It's not as convenient on a Mac since Apple doesn't make a handheld version of a MacBook.
Syncing Notes and Highlights Between Different Operating Systems
The built-in Wi-Fi syncing in Accordance is not very convenient. I never use it and you shouldn't either unless you have a problem using Dropbox. The Dropbox highlighting is only a little better, but it is better than the Wi-Fi system. You have to connect your installation with Dropbox. See the video below for how to sync using Dropbox.
Accordance needs to improve it's syncing features. That's my biggest complaint regarding Accordance Bible Software's platform. You have to use a third-party service to sync. They need to bring it in house and make it secure. Second, it's not always automatic. You can set the Mac or Windows versions to automatically sync when you open and close the program, but you have to do it manually on iOS or Android. Third, they need to sync settings and library organization between all platforms too. Other Bible software platforms do.
Until they add automatic syncing, you'll want to sync manually. Use the same steps from above on how to install the books on your iOS or Android device and chose the Sync button. Make it a happen to do this each time you open and close the app.
Recommendation
First, I like the 40 Questions Series and look forward to reading the remaining 7 titles after enjoying and learning a lot from Wright's book on Calvinism. Second, Accordance does a nice job and offers them all for a great price right now of $122 for the set. Make sure you get them before the deal ends October 26.

Olive Tree Resource Guide - How to Customize the Guide
The Olive Tree Resource Guide shows all the content in your library related to a passage when it's displayed in the main window. Here's how to customize it.
Olive Tree Bible Reader helped revolutionize the study of a passage with their useful Olive Tree Resource Guide. The guide behaves like a study assistant and goes to your library and finds all the books with content related to the passage shown in the Olive Tree Bible Reader. We'll show you how to get more out of the Olive Tree Resource Guide using the Windows version by customizing the guide to your preferences. This looks almost identical on the Mac, so you can use this guide if you run it on macOS. We'll also give some tips for what to change in the guide.
How to Reorder the Olive Tree Resource Guide List of Resources

Before you can effectively customize the Olive Tree Resource Guide, you want to open it. You do this by clicking on the link at the lower right-hand corner of your Bible Reader window.

Now you can see the contents of the guide. You'll also see three other tabs in the new Window that shows up on the right-hand side. Look for the four icons in the lower right corner of the program. They include:
- Resourced Guide - as shown above
- Parallel - a window to show tow books on screen at once and lists all your books in alphabetical order when you first open it.
- Notes - shows your notes.
- Search All - a search box shows up that lets you search your entire library.
Here's a list of the contents of the guide in the order they show up by default.
- Content - shows content from the Bibles like cross references seen in verse notes indicated by an asterisk in the Olive Tree Bible text reader.
- Related Verses - shows the cross references based on translation. For example the ESV shows up in the list and when the user clicks it they will see the related verses for the passage from that translation's notes.
- Commentaries - commentary entries for the current passage.
- Bibles - displays text of your other translations so you can see them parallel to your main window's Bible translation.
- People - shows content about people mentioned in the passage shown in the main window.
- Places - shows content about places mentioned in the passage shown in the main window.
- Topics - shows topics from the main window passage and then shows various content from your library about that topic, like topical Bibles, dictionaries and more.
- Maps - shows maps from atlases and other books related to the main passage.
- Charts - charts from things like study Bibles and such related to main passage.
- Images - any images from your library of books related to the passage in the main window.
- Sermons - sermons from sermon collections on this current passage in the window.
- Outlines - outlines from books that contain them like commentaries.
- Introductions - book introductions from books that have introductions to each book of the Bible.
- My Notes - notes attached the current verse.
- Tags - tags you've created for the current passage.
- Get More - a link to a built-in store to buy more Olive Tree books.
You can customize the resource guide in one of three ways. First, you can reorder the sections. Second, you can add or remove sections. Finally you can do both of those books in each section. Here's how to make those changes.

Click on the Settings button the Olive Tree toolbar. Then choose Advanced Settings from the drop down menu. Clicking on the Advanced Settings button will open the more advanced settings screen.

At the top you'll notice an option to go into Advanced View. In the resulting Advanced Settings window, click on the Resource Guide from the left-hand list. You'll see a list of the sections that show up in the guide. You can click on the buttons to turn off certain sections. Which sections you turn off depends on your preference on how to use the program.
On this screen you can turn on and off each book from each section. You can also reorder the book list by clicking and then holding down the right mouse button and then drag up or down. Click on each section from the left-hand list to change each section. Then go back using the arrow in the upper left corner to go back to the main screen.
On the main Resource Guide screen in settings you can reorder the sections by dragging them up or down.
Tips for Better Using the Resource Guide
On Settings Screen seen above, you can off the Content section. That is the first one listed above. Turn it off. Just trust me. It shows the content of all the other sections in one section, but it's too hard to manage. It's much more manageable to work with each section instead of this one monster section that contains all the content from every other section.
Start by turning off sections you don't want to use. Then reorder the sections. Here's the order I prefer...
- Commentaries
- My Notes
- Related Verses
- Introductions
- Outlines
- People
- Places
- Topics
- Maps
- Charts
- Images
- Sermons
- Bibles
I turn off Tags and Content because I don't use them. Here's the next step.
Hit the Advanced View link at the top of the screen. I turn off the commentaries I don't use first and then reorder them by my preference. I usually put my more advanced commentaries first and then study Bibles after the more advanced commentaries.
Now you can turn off books you don't use from each section. For example, from the Commentaries section, I only use a handful of my commentaries. I can still open them from the library, but I almost never do. So I turn them off here.
In some sections there's not to reorder. You just turn them on or off.
If you own multiple sets of a commentary, you may want to turn off the ones with fewer volumes. For example, I own the New American Commentary. Instead of showing up just once, you get multiple entries. One for the Old and New Testament individually. There's also a15, 17 and 18 volume New Testament set. The Old Testament set has one with 23 or 25 volumes. I turn off the 15 and 17 New Testament sets and the 23 volume Old Testament set. You will then see those entries in places like Introductions and Outlines as well. So, turn them off there too.
Other Settings to Change in Olive Tree
While you're in the settings screen, click on the General Settings tab. Take a look at settings you may want to change here. Then do the same for Colors and Fonts section and the Privacy section.

As an example, I have the following settings in my General section:
- Last Opened for Default Bible for Hyperlinks
- Sync Enabled (on)
- Color Jesus words (on)
- Hide/Show Strong' numbers set to Hide (off)
- Verses don't start new lines (off)
- Show notes and highlights in text (on)
- Iinclude verse numbers (on)
- INclude reference (on)
- At the beginning (off)
- Place on its own line (off)
- Exclude title (off)
Notice that as you turn the above settings on or off the setting text description changes. So the list above shows whether I turn the setting On or Off.
In Colors and Fonts and in Privacy I use the default settings.
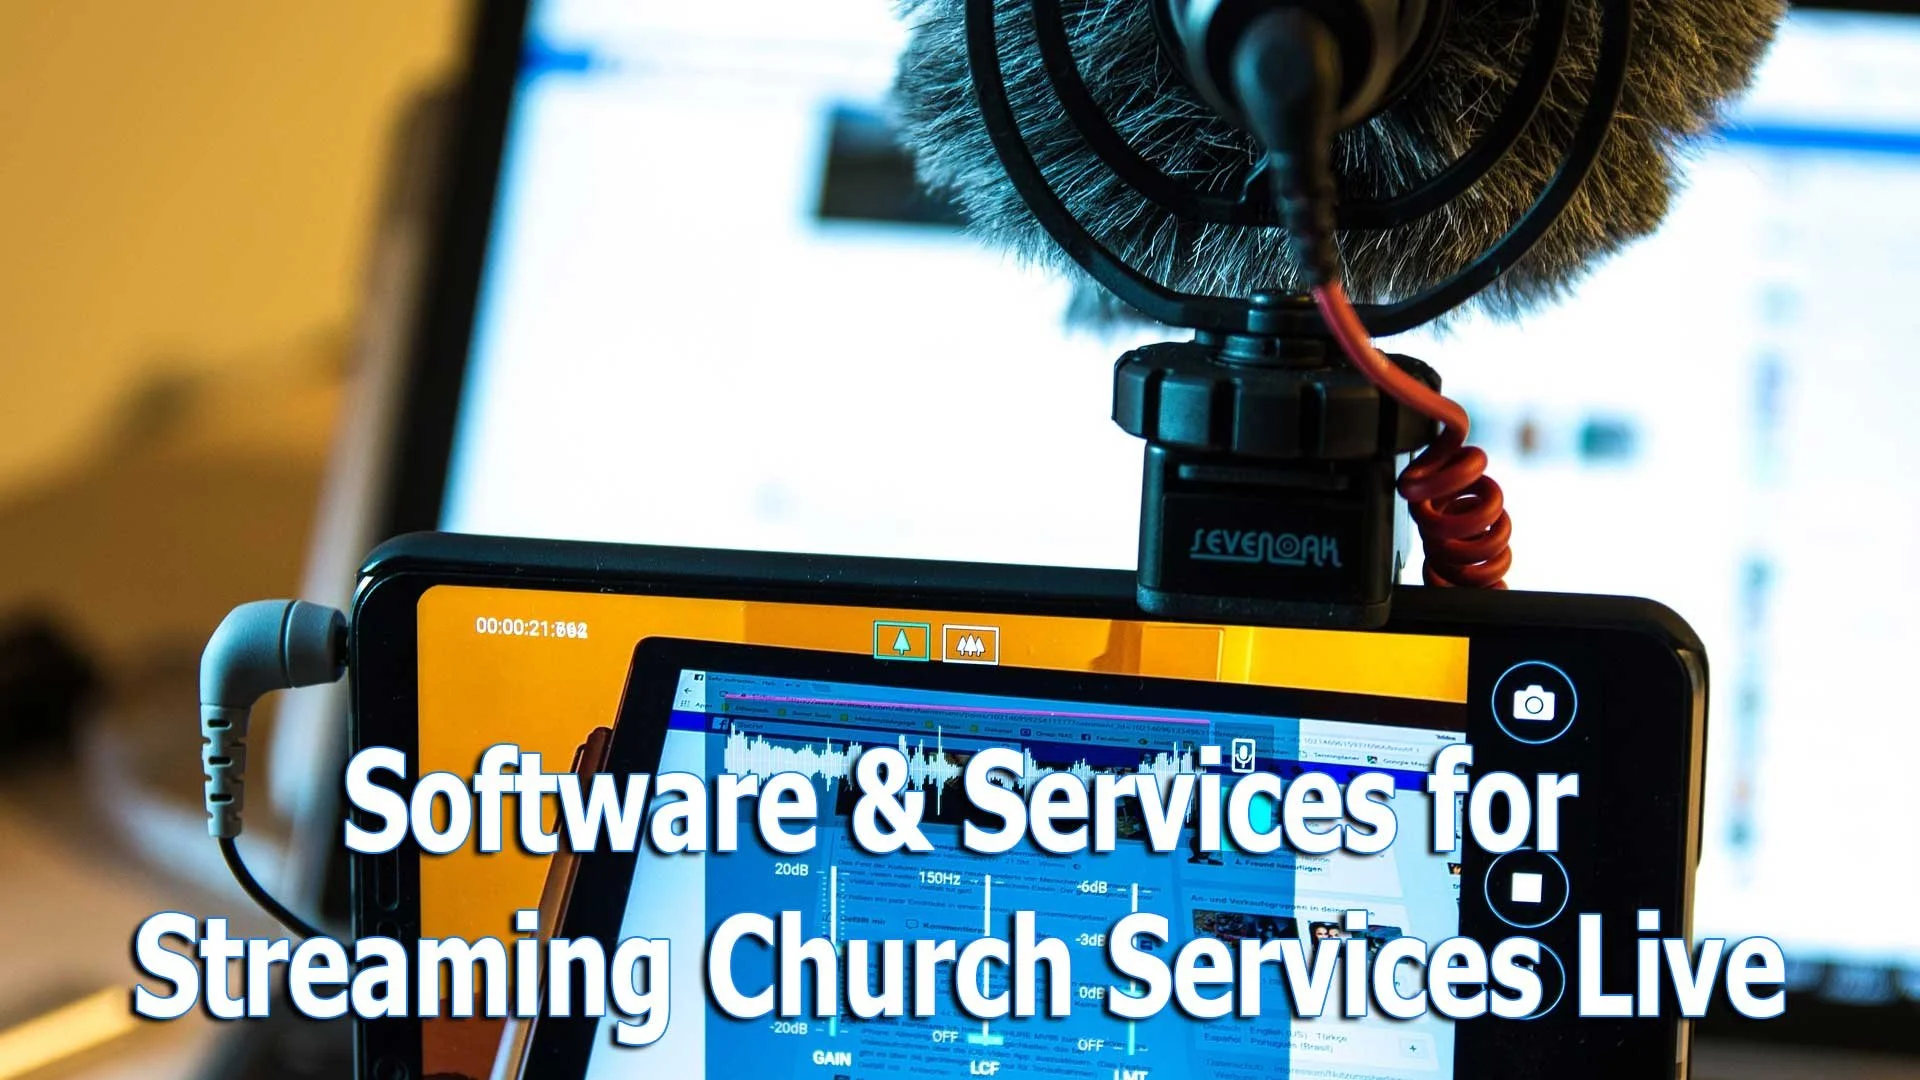
7 Best Tools for Streaming Church Services
Here's the list of the best software or services for streaming church services live on Facebook, YouTube or other services.

What software and services can churches use for streaming church services live on Facebook or YouTube or other platforms. This last part of our series on streaming church services rounds out the tools and gear needed to put together a professional solution for the future.
For most of the options below, you'll need to connect a camera up to you computer and you'll probably want to hook up your sound board to the computer as well. Then use the software solutions below to take that video and audio and send it out onto the Internet.
Here are the other posts in this series:
- Streaming Church Services Live from a Phone Made Simple
- The Four Best Camera Styles for Streaming Church Services Live
- Streaming Church Services Live Using Facebook or YouTube Apps or Pages
- Stream Church Services Live and Cheap
Ecamm Live on Mac for Streaming Church Services Live
My first choice runs only on Mac, making it a great tool if you own one, but not useful for Windows machines. Ecamm handles...
- Streaming church services on Facebook Live.
- Uploading to YouTube after your finished streaming.
- Saving the video file for editing or uploading to other services.
- Saving the audio file to create a podcasts or to upload to audio services.
You can download and test Ecamm Live for free. It comes with a watermark on the video, so I don't recommend using it for a long time. But test out the software.
The company offers guides on how to set up your whole system of audio and video equipment. You can use these same guides with the other software below, but it may take some tweaking if you're not using Ecamm.
If you users choose to go all-in with Ecamm, it will cost you $12/month billed annually. A pro version costs $20/month billed annually. With the paid versions you get...
- Watermark removed from video.
- Use other services like Restream (more on that below) to stream to multiple sites like YouTube and Facebook simultaneously.
- Use overlays to show branding of your church or graphics during the service to add a professional look.
- Green screen support.
- Support for talking to guests over Skype.
The pro version adds...
- 4K Streaming.
- Live video monitor to any display hooked up to the computer.
- Audio monitor much like many churches use in their nursery.
- Cross post to multiple pages on Facebook.
- Shows real-time bandwidth stats.
- Higher level tech support.
What if you don't have a Mac? Then consider one of the following services instead.
OBS Studio for Windows or Mac For Free
There's a free option out there called OBS Studio. It's a lot more complex than Ecamm Live. However, it's also free. If you have a tech savvy volunteer or staff member, then this might work better. It has a lot of the features you find with Ecamm, but you have to know what you're doing or spend some time learning how to use it.

OBS also offers some setup guides and shows users how to use it. Once you set things up, you can stream to Facebook, YouTube and even Twitter. If your service offers a way to setup third-party streaming services, you can configure that too. You'll need something called the RTMP information.
OBS will let you stream multiple cameras easily. Hook them up to the computer and the software makes switching between them easily. You could also easily share your screen to the video stream. You might want to show the slides on a song, Bible passage or the pastor's sermon images and notes.
OBS has more power and therefore more complexity than Ecamm.
XSplit Broadcaster - 3rd Best Option

XSplit Broadcaster ($25 to $200) - The third best option comes from XSplit Broadcaster. It's a marriage of Ecamm's simplicity with OBS Studio's power, but at a higher cost.
- 3-month subscription for $25
- 1-year subscription for $60
- 3-year subscription for $150
- Lifetime cost is $200
XSplit offers multiple camera inputs and sharing your images from the worship presentation. You can do Skype interviews and stream to more than one place at a time, like Facebook and YouTube or your own service.
Churches that want to stream to an overflow room or the nursery, can set up a monitor and stream to it locally over your own network.
Other Live Streaming Options
In addition to the above three best options, you can choose others. If you want a little more hand holding in the process consider some services for streaming church services. These will not help you stream to Facebook or YouTube, but that might work better for you. You have more control of your channel.
- Faithlife LiveStream ($90/month to $200/month) - If you're familiar with Logos Bible Software, then you may already know about Faithlife. They offer a live streaming solution. It's expensive but adds more than video streaming church services. You'll get online digital giving, Podcasting, and users can install an app to watch your service along with other church services.
- Restream.io ($16 or $41/month billed annually) - Churches can stream their services to as many as 30 different services at once with Restream.io. It has the benefit of working within a browser instead of installing software using Restream Studio. You can interact with viewers on all of the platforms from their Chat service. It also works with other software like Ecamm, OBS, Zoom and more. IT starts with a free level but subscribers can also stream to other services not officially supported. The Pro level takes away the Restream branding and lets you brand yourself. They'll soon add multi-camera setups.
- Dacast - ($X) - Dacast lets churches stream their services from their own website. I've used it and it's not bad, for people who want to set up their own site for streams. They host the video and you embed it on your sight.
- VMix - (Free to $1200) - I'm not as familiar with VMix but hear that it works very well. To get 1080p streams you will want to pay for Basic HD level at $60. It compares nicely to XSplit or Ecamm above. With that level of software you can stream to up to 3 services at cone and use overlay graphics. It also has the ability to stream to a monitor so you could send it to a hardwired overflow room or nursery.
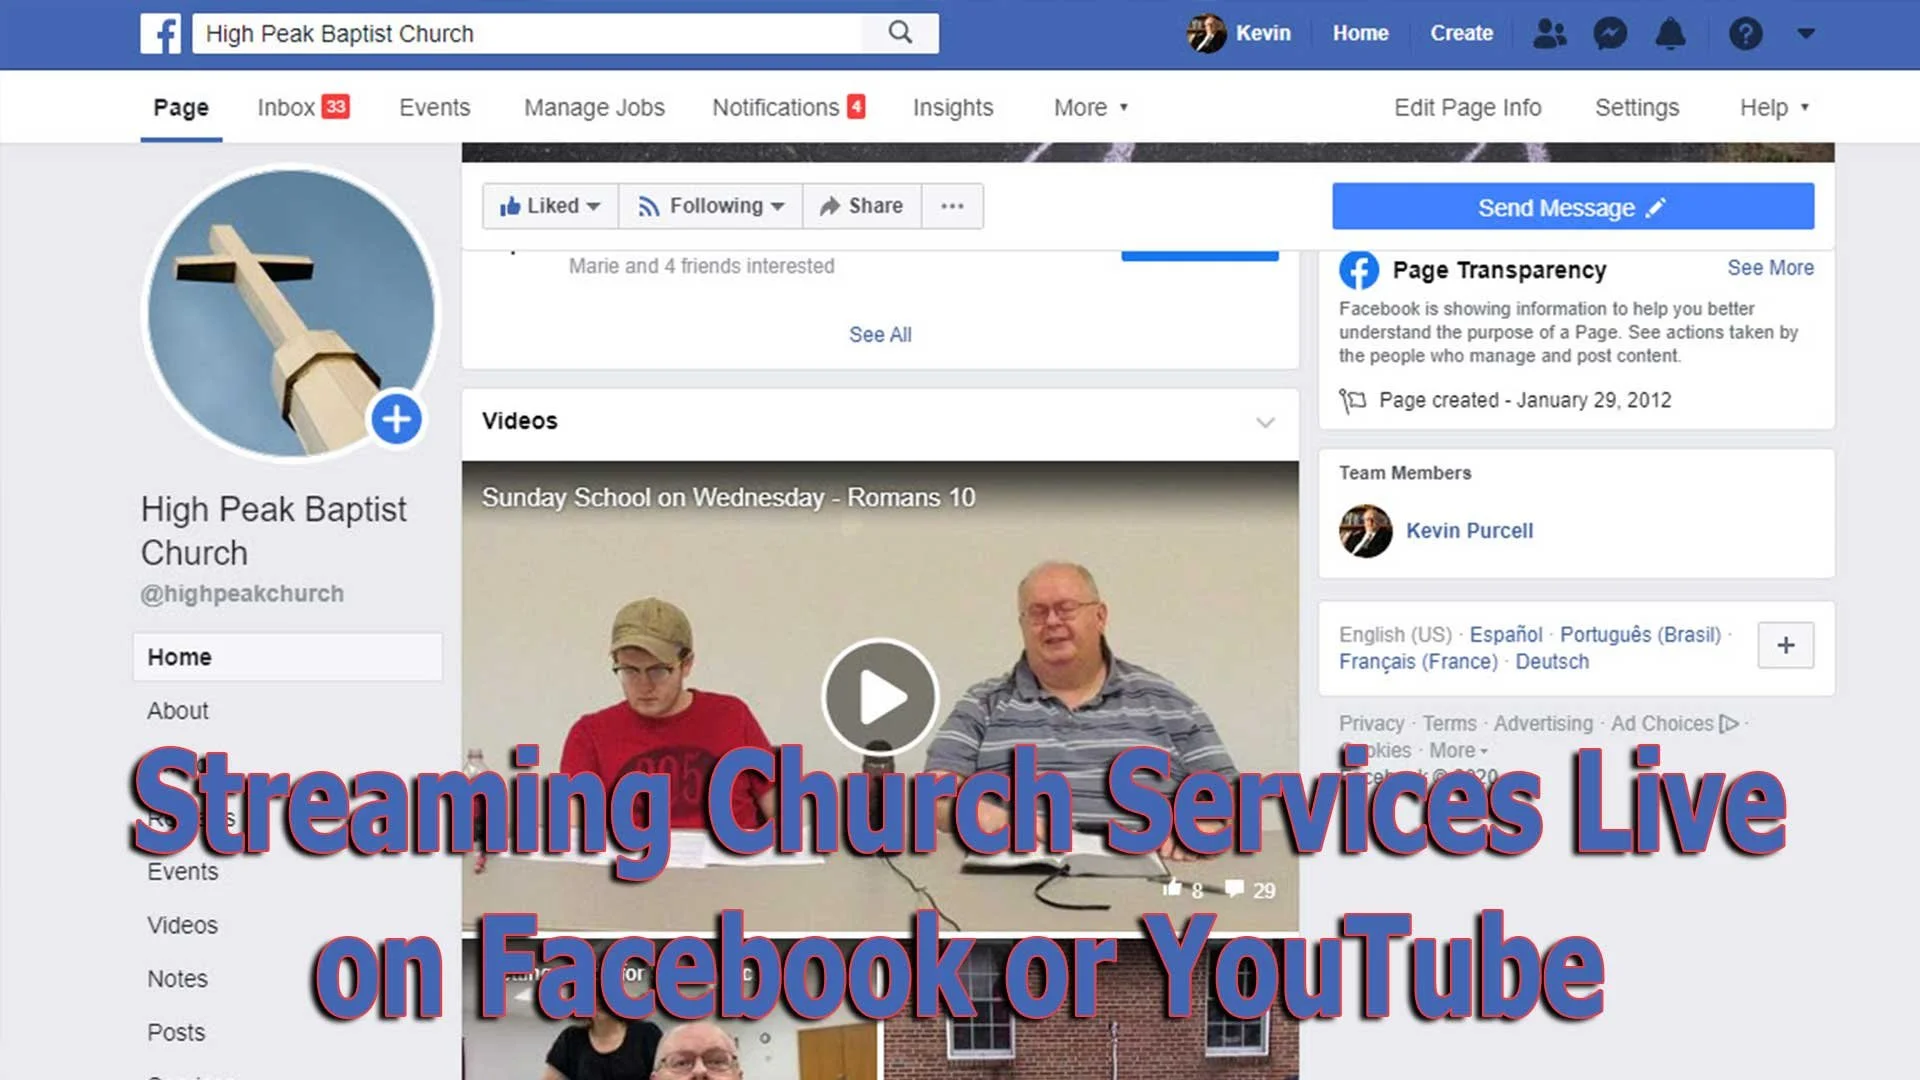
Streaming Church Services Live Using Facebook or YouTube Apps or Pages
Streaming church services live on Facebook and YouTube extends your reach as a church. We'll show you how to use their apps and websites for streaming.

Choosing the right software for streaming church services live actually impacts the rest of the decisions you'll make - equipment, cameras and accessories. If you want to start streaming church services live, then you will need some kind of software. We'll look at using Facebook or YouTube . Churches can choose between using an iPhone or Android phone and the mobile apps for these services. However, you probably should pick a computer with a camera hooked up and streaming using the Facebook or YouTube websites instead of a mobile app.
Here are the other posts in this series:
- The Four Best Camera Styles for Streaming Church Services Live
- Streaming Church Services Live Using Facebook or YouTube Apps or Pages
- 7 Best Tools for Streaming Church Services
- Streaming Church Services Life and Cheap
A lot of streaming platforms exist to help churches. You can buy a subscription to a dedicated service, but they can cost hundreds to thousands of dollars a year. It's also harder to garner an audience if you're a small to mid-sized church using one of these dedicated subscription services like the ones mentioned at the end of our post on the 7 Best Tools for Streaming Church Services. You can find even more services listed at ChurchTechToday.com. They range in price from $25/month to almost $150.

Most people reading this will opt for streaming to Facebook or YouTube since they're free and easier to discover by potential viewers.
Streaming Church Services with Facebook or YouTube Apps from a Phone
The Facebook app on an iPhone or Android phone does a decent job of helping churches share their worship services. However, in our last post in this series we argued for using a dedicated camera for a lot of reasons. You get better images, more versatility and placement is better with a dedicated camera.
However, if you must use an iPhone or Android phone you can go live from their mobile apps. The video below shows you how to stream from your mobile app to Facebook.
People who have enough subscribers can use the YouTube app on their iPhone or Android phone to live stream. The video below shows you how to use the app and how to go live if you don't have enough subscribers. By the way, you'll need 1,000 subscribers on YouTube to go live from the mobile app. But this videos shows you alternatives.
Streaming to Facebook resulted in more engagement for our church than we saw on YouTube. We used to go live on YouTube and would get at most 10-20 people for regular worship services and no more than 100 for special services. We moved to Facebook and those jumpers soared sometimes reaching hundreds of views. We average 80=110 in worship.
Streaming from the Facebook or YouTube Websites
Since it's better to hook up a dedicated camera to a computer for higher quality and more versatility, using the Facebook or YouTube websites will result in better quality streams. Third-party software gives churches more versatility, than the Facebook or YouTube websites. We'll cover that in our next post in this series.

To get started on Facebook, you'll want to set up a Facebook Page for your church. Facebook offers a good help page for doing this. Once you're done following that guide, you can log into your account, go to your Facebook page and then start a live stream. Take a look at the slideshow below.


First, click on the Pages link along the left (first image above). Then click on your page name in the resulting page. On that page click on Live (second image above).

Follow the steps in red above. First click on Use Camera. Then choose your camera and your microphone. Next, along the right, click on drop down menus to choose where you want your video to go. It should read "Share to a Page You Manage" and then the name of the page for your church.
Give your video a title in step 6 above. Make sure the video looks right in the box in the lower right (#7 above). Then when you're ready, hit the Go Live button in the lower left.
The resulting page will show you the feed and you can interact with viewers. I recommend putting a comment in the video and make it stick to the top that reads:
We welcome you to our church's worship service here on Facebook. If this is your first time viewing our Facebook Live worship service, hit the heart and we will get back to you with a special gift.
Now you can send them something special, like a coupon to a local restaurant's take out business and some info about your church. At the very least, leave off the gift and then just follow up with a note.
Since things change quickly and often on Facebook, if the above instructions don't work, head over to Facebook's Live Broadcasting help page.
YouTube Live Streaming Church Services
I prefer streaming to Facebook since most churches will see more engagement, but some prefer YouTube. You might already have a presence on YouTube. If you have over 1,000 subscribers, then you can stream live to YouTube too.


Click on the little camera icon in the upper right corner and choose Go live from the drop down menu. This opens a screen (second image above) if it's the first time you've tried to stream. It asks you to give permission for using your microphone and camera. Hit allow (third image above) and you're reading to set things up.

Give your stream a Title in the top box. Make it public, if it's not alreayd. Then click whether it's made for kids or not. Most churches should click No, not because it's not appropriate for kids, but because you are not targeting kids. You might be in a special service for kids. That comes with a special set of requirements that are not useful for this purpose.

Click on the More Options button at the bottom and make sure you selected the right camera and microphone. Also add it to the right camera by clicking the drop down box above the camera option. Choose Nonprofits from the list. The content above the category comes from the default description from your channel.
The Advanced Settings button opens another screen. Click the Allow Chat on or off depending on whether you want comments. You should leave it on unless you have some special reason for stopping viewers from commenting. Videos with comments get more engagement on YouTube.
Since you're a church, you should not take ads, so turn off the option that reads "This contains paid promotions...". Not click the back arrow. Then click Next and it will take a photo as a thumbnail. You should later replace this with a branded image for your church.
Next, you'll see a Stream preview. You can edit the details and share the stream on social media. In the Live Chat you should add a post targeting guests. Ask them to respond so you can follow.
Hit Go Live and you're streaming. When it's over you can end the stream and save it. You will want to edit things now like the thumbnail.

Streaming Church Services Live from a Phone Made Simple
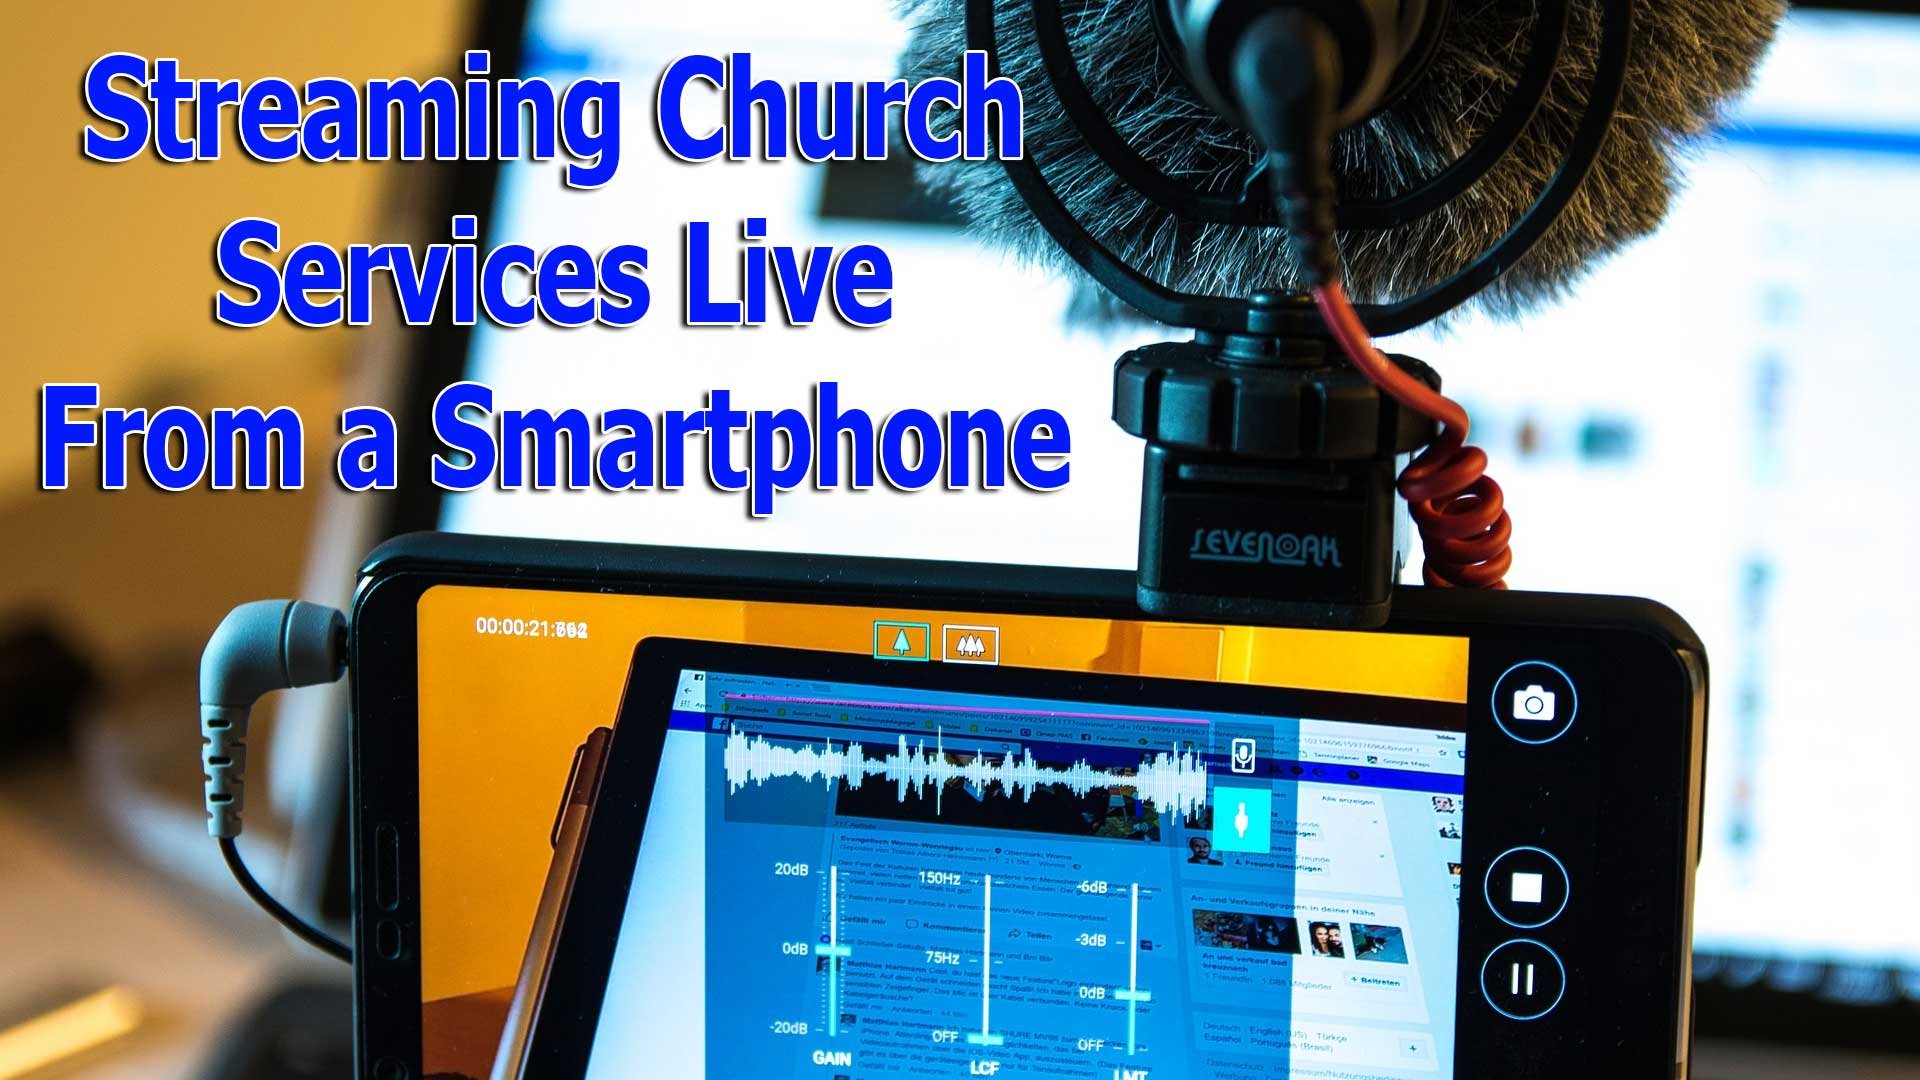
Churches that want to extend their reach should consider streaming church services to platforms like Facebook Live or YouTube. Church leaders might not know how to get started and what they need to stream church services live online. We'll help church leaders choose tools for streaming church services online live.

This first article in a series about streaming church services will focus on making the decision on how to stream and what tools you'll need to stream from a smartphone. Next, we look at the tools needed for streaming with higher quality cameras and equipment in article two. Then, we'll look at the software and streaming services in the third article. Finally, we'll put it all together in the final installment of this series on streaming church services live online.
Here are the other posts in this series:
- The Four Best Camera Styles for Streaming Church Services Live
- Streaming Church Services Live Using Facebook or YouTube Apps or Pages
- 7 Best Tools for Streaming Church Services
- Streaming Chruch Services Life and Cheap
Should You Use a Phone for Streaming Church Services?
First, let’s talk about how you plan to stream your worship services and more. Most people will stream their Sunday morning worship services. For a lot of us that takes place at 11:00 a.m. on Sunday.
Churches stream their worship service in a lot of different ways.
- Streaming Church Services on a Smartphone
- Stream from a dedicated camera through a computer or other device
- A professional setup with multiple cameras, a switcher and visual animations like a TV news broadcast
Of the three styles of streaming church services, the first costs the least. It's also more accessible for people with little to no tech skills. However, it also doesn't look as professional and will often sound subpar.
Sound is important and that's the biggest reason why I'd shy away from streaming from your iPhone or Android phone. You can still use it and if you connect an external microphone or find a way to connect the phone to your sound system, then it will sound better and seem more professional.
Some churches can't afford to pay for a camera, any accessories needed to connect to your sound system or make it sound better, or an installer to set things up. Just load up the Facebook app and stream using Facebook. You'll need someone to hold the camera from the front row. Tell them to hold it very still and don't make a sound.
For those who decide they still want to use their phone but want better sound and a stable video feed, consider buying the following tools:
- An external microphone
- A tripod
- A holder for your phone
Before you go all-in using your smartphone remember the following:
- Phone cameras can't get close enough to the speaker and singers on stage for a professional looking stream without distracting the service attendees.
- Pointing a phone up at a raised platform from the front row looks bad especially if you can't see the speaker or singer behind the podium.
- Holding a phone results in a wobbly video unless you put it on a tripod, which might not look very good to the worship service attendees.
- A phone mic sounds bad compared to your church sound system that you paid hundreds or more likely thousands of dollars to sound good.
- Unless you have someone operating the camera at all times, you're forced to frame the video so that the speaker or singer is always in view of the camera, which looks too far apart.
But how do you stream using your iPhone or Android phone and still make it look and sound decent enough for viewers to continue watching? Will they watch and consider joining you in person in the future?
Tripod for Streaming Church Services with a Phone
You've decided to stick with a smartphone like your Apple iPhone or a good Android phone with a decent camera. What do you need to make the stream look good enough to keep people watching?
First, use a tripod to keep the video stable. Any tripod will do if you get the right accessory to hold the phone. I like products from smartphone accessory maker Joby. They offer phone tripod mounts that work great and don't cost too much. Take a look at their guide on buying mounts for your phone. These will hold the phone in either portrait or landscape mode and attach the phone to any standard tripod. They even sell tripods.

The Joby GripTight Pro Phone mount costs $30 and secures the phone tightly. Screw it into a tripod mount with a typical 1/4"-20 tripod mount. That's the little screw that you screw into the bottom of a traditional camera on top of the tripod.
This mount will rotate from portrait to landscape mode. That means holding the phone so it looks tall (portrait) or wide (landscape). The best option for professional looking streams is landscape or wide mode. The person watching on a phone can rotate their phone but the person watching on a computer or a TV with the phone or computer connected to it can't rotate the computer or TV screen easily.
Always use widescreen mode unless you know that 100% of your viewers want to watch it on portrait or tall mode.
You can use almost any tripod to hold the phone. A full-size tripod will offer the most stable option, but it might look bad to people attending the service since it has to sit close to the front of the auditorium.
You could choose something like a mount that holds the camera from on the front pew or seat. Joby also offers great options like their GorillaPod Line of tripods. You can get the above GripTight mount and the GorillaPod Tripod for $59.95 together.
This has legs that bend so you can fasten it to the front pew or seat back. You can also fasten it to anything else to bring the camera on your phone closer to the stage.
Any mount and tripod combination will work so long as the mount holds your phone in widescreen/landscape mode. Make sure the mount will fit your phone. Most modern mounts will, but measure it before you buy.
Sound for Streaming Church Services from a Phone
While camera phones often come with excellent cameras, they seldom come with decent microphones. That's compounded by the fact that you're usually not holding the phone close enough to yourself while speaking or singing. If a singer uses a canned accompaniment track or other instruments, they are not close to the camera.
The single biggest consideration for streaming live video isn't the video quality. It's the sound quality. Viewers care more about sound and will forgive lower quality video if it sounds good. Services like Facebook and YouTube actually put more of their focus on streaming good audio if the Internet connection gets week.
You can fix the audio problem by connecting a good mic system or by hooking your phone up to the church sound system. Let me offer three options.
Best Option: Wired Connection to the Sound System
Run a wire from your sound system to the phone. Find an output on your sound system and connect a wire to that output connection. Then connect the other end to the phone. If only it was that simple!
Your phone camera might sit too far away from the sound system to make this convenient. Try to run a longer cable if possible. It's the best option.
What kind of cable should you use? That depends on the sound system and the phone input. Let's start with the phone.

All recent iPhones use a Lightning connection and don't include a sound port anymore. You'll need to connect a Lightning to 3.5 mm Headphone Jack Adapter. It's only $9 at Apple.com. Don't bother with anything else. This works and they're cheap.
To connect the cable to the board you'll need what's called a TRRS to TRS adapter. What's that? If you don't care and just want buy one, check out Amazon. That link takes you to a search result on Amazon. Find one that's highly rated and read the reviews. Ask the buyer if it will work on a church sound system and see what they say. Now skip to the next heading below. If you do care what TRRS and TRS stand for keep reading.

Here's the explanation if you want it. A TRRS to TRS adapter lets you plug a cable with three lines to one with two. The letters stand for Tip, Ring and Sleeve (see above image). The ring separates the two black lines, which connect the wires in the cable to the device you're plugging into. So the above image shows a stereo cable with left and right audio.
A typical sound cable used just for sound will have a quarter-inch or 3.5mm jack with TRS like the image above. That means it has two wires for left and right sound connections.

If the cable has three (Tip, Ring, Ring, Sleeve or TRRS), it's designed for a phone with left, right and mic. These are used for earbuds or headphones with a mic so you can listen and talk on your phone. A sound system can't handle the TRRS or three connectors. So you need an adapter to take it from three to two.
Some sound systems have two outputs, one for left channel and one for right. Typically they will look like a red and white connector. If that's the case you'll need one of those too. Some use a larger quarter-inch jack to connect to the sound system. So, you'll need an adapter to connect the quarter inch to the smaller 3.5mm jack.
Second Best Option: External Microphone
If you don't connect the phone to your sound system, then you should get an external microphone. The best option comes from a company called Rode.
The Rode Wireless Go comes in two pieces, a transmitter and receiver, which wirelessly connect to each other. The receiver connects to the phone with a 3.5mm cable. You can use the adapter from the above part about connecting to your sound system.
The transmitter of the Rode Wireless God works like a lapel mic. It has a built-in mic. Turn both parts on and they will connect to each other wirelessly. The transmitter with mic works like a regular mic.
The transmitter also has an input for a 3.5mm connection from an external mic. I have a mic with a 3.5mm jack and plug it into the Rode Wireless transmitter.
Hooking Up an Android Phone
The above discussion focused mainly on an iPhone. Android phones have one of two connections. Does your Android phone have a headphone jack or not? If it does, then just use the cables mentioned above without the Lightning to 3.5 mm adapter from Apple. You don't need it.
How do you tell if your Android phone has a headphone jack? Look for a little round hole like the one below.

If your phone doesn't come with a headphone jack, did the manufacturer supply an adapter for you to plug into the power port? You can use that adapter or buy a new one like it. Most of these use USB-C connectors or they might have a micro-USB adapter.

USB Type-C users can get the Apple USB-C to 3.5 mm adapter. It works with Android phones and only costs $9 at Amazon. For Micro-USB to headphone adapters, check out this highly rated adapter from Amazon for $10.
Now use the above instructions in the previous section for what you need to hook up your phone to your sound system.
Should You Use the Zoom Feature on Your Phone to Get Closer?
If you're happy with the way your phone looks and where you placed it in your auditorium, then you can skip this section and the next one. However, some people may still want to put their phone back further while getting a close-up shot of the speaker or singer. Should you use the phone's zoom feature, where you pinch out to make things look closer? Some cameras like the iPhone 11 have multiple optical lenses so you'll see a .5 (for wide angle), 1x or 2X button in the camera app. Those are fine. But should you go beyond the 2X setting and zoom closer?

Do not use the digital zoom, where you go closer than the 2X if you have 2 lenses. Use only the optical zoom. Digital zoom looks terrible. It blows up the photo beyond what the camera lens sees naturally and degrades the image quality.
If you don't believe me, take out your phone. Take a photo of the pulpit in your church. Us the regular zoom level, the 2x Zoom and then go in closer with digital zoom. Now compare the photos. The regular image and the 2X will look fine. The digital will look grainy and even blurry. DON'T USE IT even if you think it looks fine. Almost no one else, including potential visitors will agree!!
But what if you want to get closer than the 2X zoom lets you?
Adding a Physical Lens to Your Phone
You can add zoom lenses that add closer zoom capability to your camera phone without degrading the image quality. These do not come cheap if you want one that looks good. Search on Amazon or Google and you'll find a bunch of garbage options that cost $10 or $20. You get what you pay for.

I've found two companies that make decent zoom lenses for the iPhone or popular Android phones. The best option comes from a company called Moment Lens. I own a set of their lenses and they're fantastic. They make a number of lenses, but for our purpose take a look at their zoom lens. The 58mm lens doubles the zoom of the built-in lens using high-quality optical lenses. Connect the lens to a case on your phone to make it a 2X on the main lens or a 4X on the built-in 2X zoom on an iPhone 11. Other phones offer other zoom levels and the Moment 58mm lens will double those zooms.

The Moment lens costs $119.99. It ain't cheap. but it's still cheaper than a dedicated camera and makes an phones like the iPhone, Samsung Galaxy s10 and Google Pixel 4 usable.
To use the Moment Lens you'll need a case for your phone. They offer cases for iPhones, Galaxy phones and Pixel phones. Buyers can also get a mount that will fit on other phones. They're not as good as a case, but still work well with other phones besides the ones they make cases for. These cases and mounts start at $20 and cost as much as $50.
Olloclip makes cheaper lenses, but they're not as good. They use lower quality lenses and work with fewer phones. I don't recommend them.
Putting it All Together
Now that you have the gear and the understanding that using your phone works for people who need a low-budget option, let's put it all together.
Connect everything you bought...
- Put your case or mount on your phone.
- Hook the lens to the case or mount.
- Attach the cables and adapters to the sound system.
- Put your phone in the mount that you've attached to the tripod.
- Turn on your camera app and test the recording.
Remember that playing back your recorded video won't play on the phone until you unplug the cable connected to the sound board. Test it out and then plug it back in.
If it doesn't work, make sure everything is connected properly. Reverse the audio cables or adapters if need be. If it still doesn't work, it could mean a faulty cable or adapter. It also could mean you plugged the cable into the soundboard in the wrong place.
We don't have to the time to talk out how to use Facebook for streaming church services live. The step-by-step will show up in a later post in this series. For now, use the steps from the video above.
iPhone 11 Pro Max Review for Pastors and Ministers
I bought an iPhone 11 Pro Max. Find out how well it works in a minister's life and why a minister might want to consider the upgrade.
A lot of my pastor friends love Apple products. I thought I'd write up a review focused on what the new Apple iPhone 11 Pro Max brings to the table for those of us serving in ministry. Is there anything here to make you want to upgrade or replace another phone running Android? Find out below.
Apple iPhone 11 Pro Max Camera
If you're like me, you take a lot of photos of your church ministry activities. In addition, I've started a YouTube channel focused on my ministry activity as a small church pastor that I call Behind the Pulpit.
I was really excited to get the new iPhone 11 Pro Max for the camera alone. Here's what Apple put in this new version...


- 3 cameras on the Pro Max for an ultra wide 13mm f2.4 lens, regular 26mm f1.8mm lens and a 2x 52mm f2.0 telephotos telephoto lens (see a comparison of 3 shots plus the camera interface above). These camera lenses give three options for focal lengths so you can get shots close up that won't cut off the edges of the scene while also grabbing a shot of something further away.

- Smooth zoom between the .5, 1 and 2x lenses with up to 10x zoom, but above the 2X images start to look really bad. See the sccreenshot above.
- Amazing 4K video with up to 60fps and excellent slow motion video on the front and back cameras. The front camera slow motion they called a "slofie" which the Internet erupted in ridicule over.
- Night mode that helps you take pictures at night that look like you had a bright flash on your camera.
- Better portrait mode, which you can use to take photos of people and even objects with the background all blurred out.
- New shooting modes where you can take a video by holding down the camera button in the camera app while you're set to take a photo and drag to the right to keep the camera video recording or release to stop. You can also press and drag left to get a burst of many quick shots in a row. See Apple's support demo video below.
- Thanks to the 3 cameras you can actually take photos of more than what you see on the screen.
- Object image stabilization which results in videos without as much shake.
All of the above translates to a great camera. You may not fully understand everything listed above, but head over to Apple's website to learn more. You can also find out more by watching the video below by one of my favorite YouTubers, Matti Haapoja.
So why should a pastor or minister care about the iPhone 11 Pro camera? First, if you already have an X or Xs, you don't. This phone doesn't offer enough to upgrade and I probably shouldn't have (see my video - the first one on this post above). However, if you have an older phone and think you're phone's getting a little long in the tooth, has some problems like a battery that's no longer getting you through the day or the camera creates ridiculously bad video, then consider it.
We ministers can do a lot to further our ministry by taking photos and videos and sharing them online via Facebook, Instagram, Twitter, TikTok and more. This helps us reach a more plugged-in audience like the younger crowd. If you do this, do it with excellence.
I took a class about using the vlogg format to boost your ministry reach. Trey VanCamp taught the course and inspired me to start my channel. Check out my article about the course on ChurchTechToday.com.
A vlogg shares parts of your day in a kind of "behind-the-scenes" or "reality-TV" format. This helps your church or ministry participants see a different side of your life. It also opens the door for prospective people to learn more about you or your church. Finally, it extends your reach beyond your local region.
In addition to social media, a good website will include a lot of media like video and photos. Shoot both and upload them so people can see what your church is like.
You can also use these photos and videos in your worship services. I took video of my family walking near a local park and used it in my YouTube channel video and showed a clip of it in my worship service as part of a sermon illustration. Why not do the same with the amazing iPhone 11 Pro Max camera?
Faster iPhone 11 Pro Max A13 Bionic Chip Speeds Up Apps
You may not notice the faster processor (the part that works like the brain of your phone). However, it will speed up some things. If you use an app that needs more power, this will help. Most Bible apps don't, but the Logos/Faithlife Bible apps on iPhone do need more power. Also, encoding video on your phone as you edit in the mobile version of iMovie or LumaFusion, the best video editor on iOS.
Extra Hours of Battery Life for Long Ministry Days
The A13 chip will mostly benefit users by giving them longer battery life. Apple says it lasts about 5 hours longer than the previous generation iPhone Xs Max. In other words, if your previous phone lasted until supper time, this one will take you to bedtime. My phone would get me through the day, but you never know when you might get called away to the emergency room at 9:45 p.m. because a Sunday school teacher had a car accident. With the extra battery life, you won't need to look for an outlet to charge your phone when you most need it to just work and you need to focus on your church members facing a crisis.
Super Retina XDR Screen Makes Bible Apps Text Easier to Read
You probably use your phone for a lot of reading, including a Bible app, the Amazon Kindle app, checking email or reading websites. Thanks to the awesome new screen, you get better text crispness that's easier to read. Also, your photos and videos look better. Watching TV as you wait for something to happen looks better on this beautiful screen.
Stronger iPhone 11 Pro Max Glass Survives Bumps and Drops Sort Of
Have you ever dropped your phone? I hope you had a case and even a tempered glass screen protector on it. If you didn't you probably at least ended up with some scratches or dents.
The new iPhone 11 Pro Max has a tougher body and screen. Apple promises it will break less often during drops of six feet or fewer.
One popular Apple fan girl who goes by the name iJustine dropped her iPhone 11 Pro while testing out the front facing slow motion camera.
In spite of the stronger glass, I still recommend getting a case. Don't pay for the expensive Apple branded cases. Get one off Amazon for under $20 unless you're a phone punisher. Then pay extra for a good rugged case like those you get from Amazon.

iPhone 11 Pro Max is More Water Resistant, They Say
Like drops, water can destroy a phone unless it comes with iP68 certification. That term means that it meets an objective third party standard that says it should survive dropping it into some water that's up to 30 minutes at a depth of 1.5 meters (nearly 5 feet).
I'm not going to test the water resistance of my phone. I don't trust it, but I have accidentally splashed water on it and it works fine.
Sounds Better With or Without Headphones
People who listen to music, videos and more on their phone will want good speakers. I recommend Apple's own AirPods. I love mine. However, you can listen to the sound right out of the phone. Thanks to Dolby Atmos certification, the speakers should sound better.
Apple also advertised something called Audio Sharing. If you have AirPods you can connect two sets of AirPods (two pairs) to one phone and listen to the same thing at the same time. That's great for letting people listen to a video of a recent church event. Audio Sharing works in iOS 13 on some older phones too. See how to do this in the video below.
Shoot your video of a worship event, fellowship, or other activity at church. Then head over to a shut-in's house or the hospital and let the person hear the video, either on the phone or if they also have AirPods on those.
Dual Sim Support for International Mission Trips
Do you travel outside the country for mission trips or other reasons? Maybe you're a missionary and you want a phone plan for the United States and another country. Apple now supports dual sims. You can actually have two lines on one phone.
Some churches don't have an office. Maybe you're a small church pastor or a church planter without a building yet. You can have your church phone number and your home number on the same phone.
Consider Apple Watch Series 5 with WatchOS 6
I already mentioned the AirPods above. There was another new accessory released with the new iPhone 11 Pro Max. The Apple Watch update didn't add enough for people to upgrade from a Series 3 or 4 Apple Watch. However, if you don't own one or have one of the first generations, then consider the upgrade.

I love that now I can actually see the time all the time. That's right, the previous generations of the watch turned off the screen. You had to lift it and look at it to get it to show up. Sometimes you had to actually wiggle your wrist. That's unconscionably bad. However, that problem no longer exists. You can glance down at your watch during meetings or a worship service without it being noticeable. See the two images above (left is fully on and the right is dimmed "always-on" low power mode).
Face it! We pastors are often fat! I'm tired of it and so I've started to work at losing weight. As of the day I 'm writing this, I'm down over 80 lbs. in about 3.5 mounts.
The Apple watch offer some nice activity tracking to help you get active and fit. You can track workouts. It reminds you to move every hour on the 50th minute if you haven't already moved that hour. And you can track how much you walk and how many calories you burn in a day.
For all the reasons above, the iPhone 11 Pro Max offers a nice upgrade for people who own an iPhone 7 or older. iPhone 8 users will even see a nice bump, but people who own an iPhone X or Xs should probably not bother unless you just want to or need to due to problems with your phone.
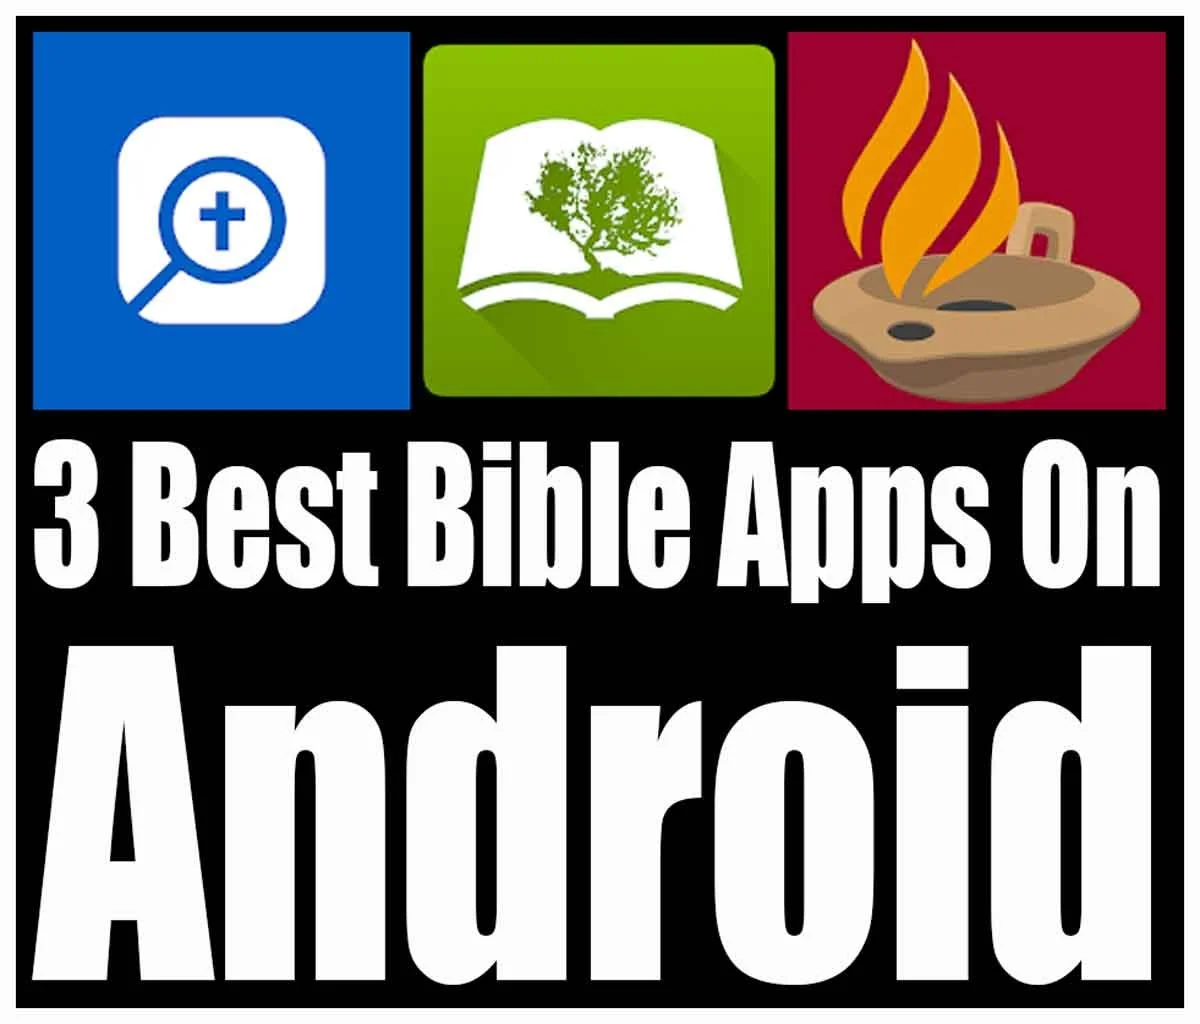
3 Best Android Bible Study Apps for 2019
Here are the 3 best Android Bible study apps for 2019. This focuses on serious study and not just Bible reading apps.

It's been a while since we rounded up the best Android Bible study apps so lets take another shot at it for 2019. This list of the best Android Bible study apps for 2019 includes Bible study apps as opposed to Bible reading apps. What’s the difference?
- Study original language with more than just Strong’s
- Offers modern translations and powerful searching
- Offers modern scholarly, pastoral and devotional commentaries
- May also offer other eBooks and digital reference books like dictionaries, lexicons and atlases
Please note that we've updated this to the 5 Best Bible Apps for Android. Click here to see it.

Many Bible apps will include a few of the above, but they usually only include public domain or just one or two. Instead the Android apps we're offering helps users study the Bible on a deeper level. A scholar or pastor could use them while mobile. Maybe they won't fully replace a desktop Bible research tool, but they can help the studier stay productive on the go while they wait at a restaurant for a spouse who’s shopping or while sitting in the car picking up their child from school or soccer practice.
To test these out and compare them, we'll give them a score of 1 to 20 in a five different areas.
- Ease of Use
- Cost of Ownership (app plus books)
- Quality of Features
- Library Size and Quality
- Attractiveness of the App’s Design
To get a full score in each of these the app would mean the app’s perfect in that area. So let’s take a look at the 5 Best Android Bible Study Apps for 2019!
Olive Tree Bible
It's not surprising that we'd put Olive Tree Bible (Free plus cost of add-on books) on this list since it made our list of top Kindle Fire Bible apps.
Olive Tree looks beautiful on most platforms. It's not as pretty on Android as it is on other devices, but does look nice and professional. You can tell that designers made the buttons and menus instead of just coders cobbling together something that's functional.

Olive Tree does a great job of quickly showing the user all of their content thanks to the Resource Guide. This section looks at the current passage and then display all the content in the user's library related to that passage. You can quickly find all the commentary entries, all the cross references and more.
For original language study, you tap a word with Strong's tagging added and a popup will show a definition of the Greek or Hebrew word. This will also let you look the word up in other lexicons and dictionaries as well as search the Bible for that word.
It's one of the easiest of the five to use, but could be easier. For example, it's a little clunky to add personal notes. A pop up note editor blocks your content. You can also use the Resource Guide to add and view notes, however, you can't do that and see your Bible and commentary or lexicon or dictionary at the same time.
The app is free but add-on books cost extra. They aren't the most expensive, but you can end up paying thousands for a scholarly level library. The company offers one of the biggest libraries of add-on books and their not just public domain books. You can get high-quality content.
Olive Tree packed more features into this app in a way that's easy to get at them.

- Ease of Use - 3
- Cost of Ownership (app plus books) - 2
- Quality of Features - 3
- Library Size and Quality - 4
- Attractiveness of the App’s Design - 3
- TOTAL SCORE - 15
We could say a lot more about this excellent app. Instead read my full review over at ChurchTechToday. Also see the video above.
Logos
Faithlife publishes the Logos Bible suite of apps. They don’t just offer one, but multiple apps. You can get the following apps.
- Logos Bible Study Tools - their main app with more advanced features.
- Study Bible by Faithlife - the same app with a focus on their Faithlife Study Bible book which is a nice study Bible.
- Verbum Catholic Bible Study - Like the main app (first above) but focused on Catholic students.
- Faithlife Ebooks (formerly Vyrso) - Focused mainly on reading eBooks instead of serious Bible study and not recommended for this list.
Logos offers an excellent collection of training videos, so that's one of the best ways for you to learn more about the Logos Bible apps.
The app opens to show you how to the main features work the first time you start it. Then it shows the main home page. From there you can use the tabs at the bottom to view the various sections of the app.
The app shows Bibles and books in a tabbed environment. The center button is where you open these tabs. You can connect them so they all advance to the same passages or just connect certain tabs.
The library shows all your books and lets you check out new books in the store. There's also a store button on the toolbar of the app. Open the menu to see all the advanced features like the Passage Guide (looks for content related to a passage and shows a list of entries), Exegetical Guide (same as passage guide but focuses on language study tools) and more.
The app includes a ton of features. In fact it's the most feature packed app in our roundup. You can use things like...
- Atlas
- Prayer lists
- Clippings (collections of things you find in your study)
- Word studies
- Text comparisons (show more than one translation at a time)
- Audio books
- Courses (Faithlife has a rich collection of high-quality courses similar to what you might get in a seminary or Bible college)

We scored Logos as follows:
- Ease of Use - 2
- Cost of Ownership (app plus books) - 2
- Quality of Features - 4
- Library Size and Quality - 4
- Attractiveness of the App’s Design - 2
- TOTAL SCORE - 14
We're just scraping the surface in this description. Take a look at my post about which Logos Mobile App to Use and my series on how to do creative digital sermon prep using Logos. I also wrote a review last year at ChurchTechToday.
Accordance Mobile
Accordance Mobile brings us one of the latest entries into the Android Bible app space. Their iOS version never really measured up till recently, but now they're doing a great job on both iOS and Android.
The app seems deceptively simple at first. However, under the hood, it has a lot of advanced features for you to discover. You can view two books at once with the main book and secondary book syncing up to scroll through a passage together if you wish.
Tap on verses to get more study options and tap on words to learn more about the word, especially if the Bible has strong's numbers attached.
The powerful Accordance search engine comes to mobile in the app. They're still adding more advanced features and it's growing more powerful all the time.

Here's how I'm rating the app:
- Ease of Use - 2
- Cost of Ownership (app plus books) - 3
- Quality of Features - 3
- Library Size and Quality - 4
- Attractiveness of the App’s Design - 3
- TOTAL SCORE - 15
While the app looks deceptively simple, it does have some powerful features. However, it's not as strong as it could be. In a year I expect that to change. You also have to play around to discover the advanced language study features it does have. Be sure to check out their excellent tutorials. Accordance also offers a great library of add-ons available to buy at great prices. If you already own a book on another platform, ask the company and they will likely give you a deal. I've saved hundreds by buying that way from Accordance.
I should probably add a category for support, because Accordance really shines in this area with some of the best training post purchase of any of the companies. They have live webinars both online and in person. Here's a recent podcast covering the Accordance Mobile app on iOS.
Here's a link to an episode of their podcast covering Android.

Accordance Bible Software 25-Day Switch: Observations
Conclusions about my 25-day switch from Logos Bible Software to Accordance Bible Software are here.

It's been more than 25 days since I decided to use only Accordance Bible Software and Accordance Mobile for my Bible study needs. During that time I both enjoyed using Accordance and felt frustrated using Accordance. I really wanted to choose to switch over to Accordance as my primary Bible study tool. Here's a list of the 3 reasons to choose Accordance over Logos.

Accordance Bible Software Speed
Accordance runs faster than Logos. It starts faster, it takes less time to install and there's no indexing stage that forces the user to step away from their computer. You can keep using Logos, but unless you own a super powerful computer, then it's just better to step away for an hour or more. Once you install both systems, Accordance runs faster.
The mobile apps run similarly on tablets and phones. However, Accordance does pop to attention faster than Logos.
Accordance Bible Software Simplicity
On desktop and on mobile, the user interface looks simpler on Accordance. On mobile Accordance looks deceptively simple, but it's still an advanced Bible study app.
The desktop apps both have incredible features with a high ceiling for Bible study users. You can start out as a avid Bible student. Then if God calls you to the ministry, a seminary student can grow into the more powerful features of both. Then, if you want to become a Biblical linguist or an Old Testament or New Testament scholar, you can't find two more powerful programs.
With all the power contained in both programs, when a new user opens Accordance and Logos, they will not feel as lost in Accordance. It has the traditional File Explorer or Finder look with your folders of library book genres on the left and the contents of books on the right and a toolbar across the top.
Accordance Bible Software Cost and Library Simplicity
You can get a decent library for a decent price from both companies. However, the cost of ownership of Accordance is lower. You need less powerful hardware. The cost of books are similar, however to move from say Olive Tree or Wordsearch to Accordance will cost much less thanks to their crossgrade program. You can buy a book that you own in the other programs and pay far less with Accordance than Logos. Also, upgrades to the software comes with every feature in Accordance while Logos requires you to pay to get all the features. You don't have to, but if you want them you'll pay more.
Buying a commentary set in Logos and Accordance outright usually costs about the same. On occasion a publisher will give one company a special discount they don't offer the other company's customers. But that's rare.
Logos Strengths
Understanding the above Accordance strengths, there are also some important strengths from Logos. I will outline those in the next article coming soon...

Apple-Pages Presenter Mode for Preaching is Awesome
Apple Pages Presenter Mode works great for teaching and preaching. Here's how to set it up.
I recently discovered the Pages Presenter Mode in Apple's iWork app for the iPad. It's awesome! So, here's how to turn on it on on your iPad so you can use it every time you teach or preach from your iPad.
The Pages Presenter Mode changes the way your document looks in Pages. You can use it on both iPhone and iPad. However, it works great on an iPad. The look of the document changes depending not he settings you choose in the mode.
Turn on Pages Presenter Mode

Turning on Pages Presenter Mode is easy. Open your document in Pages on our iPad or iPhone. In the upper right corner you'll see the menu button. It looks like three dots. It shows the Pages menu, which includes a slew of options. In the third section of the menu you'll see the Presenter Mode menu option. Tap it to turn it on.
The look of your Pages document changes. By default it gives the user a black background with text white, unless you've given it a different color in your formatting. So, red text stays red or yellow text stays yellow. But the black text turns white.
If you like the way the text and formatting looks and don't want the text to scroll automatically, then you're done. Just scroll through your text while you preach as you might if you preached from the Pages document.
Pages Presenter Mode Settings

Preachers or teachers that want to change the look of Pages Presenter Mode can tap on the Aa icon in the upper right corner of the screen. A menu pops up with six options as follows:
- Text size (smaller to larger)
- Background color (white, gold, dark gray, black)
- Font face - tap to show the available font faces that work in Presenter Mode
- Text Options
- Auto Scroll
- Scroll speed (slower to faster)

The Text Options item includes three settings. You can change the text to All Caps, if you think that's easier to read. Traditional prompters use all capital letters, so those used to this in traditional teleprompters. There's also an option to change the Line Spacing. I prefer to use single Line Spacing, but some want wider Line Spacing. Finally, you can change the Margins from smaller to larger Margins. Tap the plus or minus icons in the Line Spacing and Margins options.
The Auto Scroll settings will turn on this feature. With it turned on the text will slowly scroll up the screen as you speak. This works great for people who read their text as they speak. I don't believe preachers or teachers should preach that way. It's difficult for listens to pay attention to a preacher reading text unless the preacher possesses an extreme level of reading skill. Few do.
When a person turns on Auto Scroll, they can control the spread. The last option has a bar that you can drag from slow to fast. The slow end on the left shows a turtle with a rabbit on the right. That's a fun touch.
My Recommendations
I discovered Pages Presenter Mode only a week ago because Apple highlighted it in the App Store. This past Sunday I used it to preach my Sunday morning sermon and it was fantastic. I love this newly discovered feature in Pages.
Here's how I set up my Presenter Mode settings.
- Black background
- Helvetica font
- All Caps turned off in Text Options
- Line Spacing set and single space in Text Options
- Margins set to 5% on iPhone in Text Options or 10% on iPad, the device I use 95% of the time
- Auto Scroll turned off
Accordance Bible Software 25 Day Switch Part Two - Accordance Mobile
While switching to Accordance Bible Software for the next 25 days, I will use Accordance Mobile alone as my iPad Bible study app. How does it handle sermon prep?

If you read the first post about why I'm testing out Accordance for 25 days, then you'll know I vowed not to open my primary Bible software until it's over. That means I'll use the Accordance Mobile apps instead of the Logos Bible app. My previous entry covered using the Notes feature in Accordance.
Awhile ago I wrote a review of Accordance Mobile for ChurchTechToda.com and gave it a high rating. That review happened while I was also using my other Bible apps. This is the the first time I've used no other Bible app. Accordance Mobile alone! If you want a full review, go to the ChurchTechToday article. Instead this will serve as a comparison. See this as my strengths versus weaknesses of Accordance Mobile.

Please see my review of the NAC Studies in Bible & Theology in Accordance.
Accordance Mobile User Interface
Accordance Mobile looks so simple it will surprise you how many features they pack into the mobile app. It deceptively looks like a simple Bible reader app that also happens to let you open other books. Yet, I recently wrote a sermon primarily using Accordance Mobile to read follow my sermon prep steps which include:
- Reading the text in multiple translations.
- Studying the passage inductively by recording observations in my app's notes.
- Asking key interpretive questions about the text and finding answers in references books, other than commentaries.
- Checking commentaries to make sure my interpretive decisions up to this point are not way out in left field.
- Copying the passage and other supporting verses to my chosen word processor.
- Writing the sermon in my word processor.
- While I probably won't choose a mobile app for 100% of my sermon prep, I enjoyed using Accordance Mobile on my iPad. It works great. Let's start with the ways it excels.
Strengths of Accordance Mobile

All of my books reside on the iPad which makes the app fast. I navigate to a text to study it and the apps jumps to the new spot in my Bible instantly. I keep two window panes open with my favorite commentary in the right side and the Bible in the left. Both books jump to the new passage faster than I can tap the book, chapter and then verse in the navigation tool.

Doing word studies happens with a long press on a word. Above you'll notice I selected the word discouraged in Numbers 21:4 in the CSB. You'll see a popup box with the word study info from your top books. There's also a menu above the word. This menu doesn't help with word studies, but you'll see that you can do other things like "Define" the word in English.
You can also open a Hebrew or Greek text and do the same with Hebrew and Greek words. On those words, tap the Amplify button to see more details. Here you can study the Lexeme, Inflected word or the Root. The first pop up box also lets you choose to search for the word. It will search the English term in hour English text. If you have a Greek or Hebrew text open it will let you search by Lexeme, Inflected form, Root or the Tag.

The will let you share verses. Tap and hold on a verse number to do this. The top of the pop up menu let you add verses to the beginning or end of the chosen verse. That way you can copy a range of verses.
Finally, the Accordance system publishes an excellent collection of digital Bible study tools from every Bible text you probably want to a more commentaries than you can use. They have excellent reference tools and every tool I want to use works in my Accordance Mobile app.
People who want to also make a switch can jump from their chosen Bible software to Accordance by taking advantage of some crossgrade discounts. a crossgrade is like an upgrade, but instead it's buying a book you own in another company's library for a discounted price for use in Accordance. I saved hundreds of dollars over the years by taking advantage of this. I purchased the New American Commentary, Bible Speaks Today and more.
Compared to the Logos Mobile app, Accordance feels simpler and yet has some of the same powerful features. It's also not as cluttered. That said, I suggest the developers consider a few improvements.
Accordance Mobile Bible App Problems
As we noted in the post on Notes, you can't open your User Notes in the right hand window pane and edit it within the pane. Accordance has a real problem with this. You also can't do this on their desktop app.
At least on the desktop app you can open open it, click at an insertion point and start typing and the note's editor window pops up. On the mobile app you have to long press on the verse number and choose User Notes from the menu. Then you have to tap on the name of your User Notes document and it will open a pop up window that covers most of the window.
UPDATE: Please see the user comments below where Rick Mansfield from Accordance tells how to see your text. This makes what I wrote next less of an issue.
The Accordance Mobile notes user interface is a terrible design choice because I can't see the text of my Bible or a commentary while I'm typing in the note. It's the least usable notes user interface of any advanced Bible study app out there.
Since writing my last post on Accordance Notes, I've decided to stop using the notes function built into Bible software. Instead, I've started using Scrivener to record my sermon notes. I'm following a system that my friend a member of the Theotek Podcast team Wes Allen uses. See the video above for how he does that.
Accordance Mobile lacks one feature that I miss from Logos. On the Logos mobile app you can open their Text Comparison tool and read your passage in multiple translations seeing them all on screen at the same time. The desktop version has the new Text Browser tool. Select a verse and choose Text Browser from the Amplify drop down menu to open it.

Accordance added the Text Browser to appeal to Bibleworks users after that company announced they'd stop selling the program.
Logos offers a few other features that we don't find in Accordance.
- New tabbed user interface which lets you open more than two books at one time.
- Guides to help you study a passage or topic more quickly.
- User edited reading plans for Bibles and books.
I don't mind losing these features, but I mention it in case Logos users would feel limited in their study without them.
Olive Tree Bible searches your entire library and presents them in a easily accessible way thanks to the Resource Guide. We don't get anything like that in Accordance Mobile.
Conclusion
The desktop Accordance program goes toe-to-toe with the other Bible programs quite nicely. The Accordance Mobile app still lags behind a little. In spite of that, you can study the Bible using nothing but their iPad app. I wouldn't try doing it all on an iPhone or Android phone due to screen size, but I enjoyed doing my sermon prep last week with nothing but the Accordance Mobile app on my iPad.

Best Screen Mirroring Software for Each Platform
What's the best screen mirroring option for Apple, Android and even a few other platforms? We'll look at the options and how to do it.
Do you project or mirror your screen on a display, like a projector or TV screen? A reader asked me what's the best screen mirroring software for use on a Windows PC, and a Samsung Galaxy phone. I'll add a Mac, Chromebook and iPhone/iPad as well. So what is the best screen mirroring software or solution for each major platform?
What is Screen Mirroring Software?
In case you're not aware, it's possible to show the contents of your mobile device's screen on a TV or projector if you have the right connection, hardware or software. Wireless screen mirroring produces the most convenient results, depending on the source. A hardware connection produces the most reliable results. In a lot of cases you'll need a piece of software or an operating system that includes screen mirroring or screen casting built into the OS.
The source is the phone or computer where you can see what you want to show on the other display. The client devices is the TV, projector or an external monitor of some kind.
In rare cases, you can do this with another mobile device, like another tablet, phone or laptop. Since the reader asking the question asked about using their laptop or phone mirroring to a TV, we'll focus on that instead of on another mobile device. Why would you want to mirror to another mobile device. Let's say a teacher wants to share their screen to students or a salesperson wants to let a customer view a presentation. Since we're all about church and ministry, we'll assume the source is a presentation or something that a crowd will want to see.
Best Screen Mirroring Options for Android Phones and Tablets

The best option for Android devices includes the Android operating system's screen casting feature and a Google Chromecast or another device that support Chromecasting, like a Roku You can follow Google's support tutorial steps in their user help page for Chromecasting. Below you'll see Google's support video from YouTube.
The Google Chromecast connects to an HDMI port and needs USB for power. You can use your TV or projector's USB port or connect to AC with an adapter. They cost $35 for the basic model or pay $69 for the Chromecast Ultra, which supports 4K and wired networking.

Both of the Chromecast devices will work with a Google Home on the same network. You can ask Google to play YouTube videos, watch YouTube TV shows or play some music. It also supports third party apps like streaming TV services from HBO and others.
Many apps will support casting to a Chromecast. You can run presentations with the Google Slides app.

If you already own a Roku device, it will most likely let you cast to the Roku connected to your TV or projector. To test this, go into your Roku Settings and choose System. Find Screen Mirroring and select Always Allow ot make it work all the time.
The Chromecast Ultra wins this category. It's fast and reliable with a wired Ethernet connection, but versatile enough to use over Wi-Fi if wired networking isn't convenient. The Chromecast works with every Android phone or tablet out there and even interfaces with a Google Home or Home Mini.
A lot of Android phones or tablets will also let the user hook up to a TV or projector with an HDMI cable. You'll hae to check your device to see if it supports a wired HDMI signal from the micro-USB or USB-C port on the phone or tablet.
Best Screen Mirroring Options for iPhone and iPad - AirPlay
An iPhone or iPad runs iOS which includes screen mirroring built into the operating system. You can display the entire screen or, from within an app, you can send a video. This works with the Apple Videos app or Keynote for presentations. The iOS version of PowerPoint also works. Apple calls this AirPlay.
See my tips for making presentations on your mobile device.
The Apple version of the Chromecast costs a lot more but also does a lot more. The Apple TV costs $149 for the low end 32GB model that only supports 1080P. The 4K versions with 32GB or 64GB of storage cost $179 or $199. In other words, they cost many times what the cheapest Chromecast costs. The more expensive models come with a faster processor and HDR10 support.

The use AirPlay you'll need an iPhone or iPad and an Apple TV. There are some third-party options, but I don't recommend them. Apple does plan to let TV makers put AirPlay into their TVs. Samsung, Sony, LG and Vizio are the first brands to support this.
You can mirror the screen on your iPhone or iPad easily. Swipe down from the top of the screen on iPhone or the top right part of the iPad. This shows the Control Center in iOS. Find the Screen mirroring button. Tap it and it will show your options.
Inside apps you will look for the same Screen Mirroring icon like we see on the button in the Control Center. Tap it to show the options to mirror the screen to.
Apps that let you use AirPlay from with the app include Netflix, HBO, and other video apps. Some audio apps offer this option as well.

The Chromecast also lets you cast the screen from certain supported apps on iPhone and iOS. For example, Netflix supports this. So do Google's apps.. Look for the Chromecast icon (see image above - upper left corner). Tap it and you'll see the devices on your network that will let you cast your screen (see image below).

Like Android, you can always choose to connect to a TV or projector with a wired connection. To do this from iPhone and most iPads, you'll need a dongle from Apple or a third party to make it work. These cost anywhere from $30 to $50 depending on which one you need. You can find cheaper dongles form other companies, but I don't recommend them because they seem to work intermittently.

The dongle you need will depend on the devices you plan to use. Does your iOS device have a Lightning port or USB-C. Apple offers a Lightning to HDMI, VGA or DVI dongle. Notice the image above shows the HDMI out port next to a Lightning connector. Plug the HDMI cable into your TV or projector and the Lightning cable from a power source to keep your iPad or iPhone charging while playing the video or doing the presentation. You can also find dongles to connect a USB-C iPad Pro HDMI. If you own a display with USB-C inputs, then use it. It must support Thunderbolt 3 to work.
I use this last method to present at church during Bible studies. It works all the time and is more reliable than wireless AirPlay screen mirroring.
Other Options
If you need something that will connect a tablet to a computer , which you then connect to a display, look at AirParrot 2. This works great if you already have a computer connected to a projector in a sanctuary or classroom. You want to use your iPad or iPhone to show a video or present. Install AirParrot 2 on the computer and use the iPhone, iPad or Android device to connect to the computer. The software supports Apple AirPlay, Google Chromecast and even Windows Miracast.
Speaking of Windows Miracast, that's another option. It's not a common option, so we won't cover it here. Check out the Wi-Fi Alliance page to learn more.
Another option includes using a Kindle Fire and Kindle Fire TV. You could also connect a computer to the display and install screen mirroring