


Best Screen Mirroring Software for Each Platform
What's the best screen mirroring option for Apple, Android and even a few other platforms? We'll look at the options and how to do it.
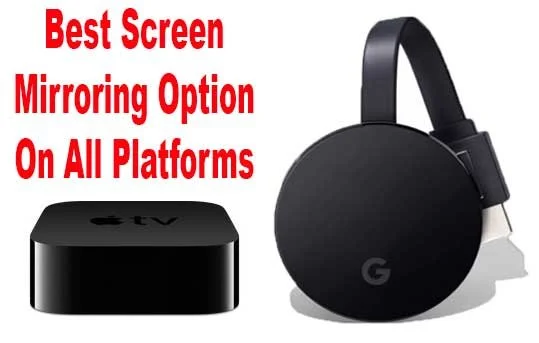
Do you project or mirror your screen on a display, like a projector or TV screen? A reader asked me what's the best screen mirroring software for use on a Windows PC, and a Samsung Galaxy phone. I'll add a Mac, Chromebook and iPhone/iPad as well. So what is the best screen mirroring software or solution for each major platform?
What is Screen Mirroring Software?
In case you're not aware, it's possible to show the contents of your mobile device's screen on a TV or projector if you have the right connection, hardware or software. Wireless screen mirroring produces the most convenient results, depending on the source. A hardware connection produces the most reliable results. In a lot of cases you'll need a piece of software or an operating system that includes screen mirroring or screen casting built into the OS.
The source is the phone or computer where you can see what you want to show on the other display. The client devices is the TV, projector or an external monitor of some kind.
In rare cases, you can do this with another mobile device, like another tablet, phone or laptop. Since the reader asking the question asked about using their laptop or phone mirroring to a TV, we'll focus on that instead of on another mobile device. Why would you want to mirror to another mobile device. Let's say a teacher wants to share their screen to students or a salesperson wants to let a customer view a presentation. Since we're all about church and ministry, we'll assume the source is a presentation or something that a crowd will want to see.
Best Screen Mirroring Options for Android Phones and Tablets

The best option for Android devices includes the Android operating system's screen casting feature and a Google Chromecast or another device that support Chromecasting, like a Roku You can follow Google's support tutorial steps in their user help page for Chromecasting. Below you'll see Google's support video from YouTube.
The Google Chromecast connects to an HDMI port and needs USB for power. You can use your TV or projector's USB port or connect to AC with an adapter. They cost $35 for the basic model or pay $69 for the Chromecast Ultra, which supports 4K and wired networking.

Both of the Chromecast devices will work with a Google Home on the same network. You can ask Google to play YouTube videos, watch YouTube TV shows or play some music. It also supports third party apps like streaming TV services from HBO and others.
Many apps will support casting to a Chromecast. You can run presentations with the Google Slides app.

If you already own a Roku device, it will most likely let you cast to the Roku connected to your TV or projector. To test this, go into your Roku Settings and choose System. Find Screen Mirroring and select Always Allow ot make it work all the time.
The Chromecast Ultra wins this category. It's fast and reliable with a wired Ethernet connection, but versatile enough to use over Wi-Fi if wired networking isn't convenient. The Chromecast works with every Android phone or tablet out there and even interfaces with a Google Home or Home Mini.
A lot of Android phones or tablets will also let the user hook up to a TV or projector with an HDMI cable. You'll hae to check your device to see if it supports a wired HDMI signal from the micro-USB or USB-C port on the phone or tablet.
Best Screen Mirroring Options for iPhone and iPad - AirPlay
An iPhone or iPad runs iOS which includes screen mirroring built into the operating system. You can display the entire screen or, from within an app, you can send a video. This works with the Apple Videos app or Keynote for presentations. The iOS version of PowerPoint also works. Apple calls this AirPlay.
See my tips for making presentations on your mobile device.
The Apple version of the Chromecast costs a lot more but also does a lot more. The Apple TV costs $149 for the low end 32GB model that only supports 1080P. The 4K versions with 32GB or 64GB of storage cost $179 or $199. In other words, they cost many times what the cheapest Chromecast costs. The more expensive models come with a faster processor and HDR10 support.

The use AirPlay you'll need an iPhone or iPad and an Apple TV. There are some third-party options, but I don't recommend them. Apple does plan to let TV makers put AirPlay into their TVs. Samsung, Sony, LG and Vizio are the first brands to support this.
You can mirror the screen on your iPhone or iPad easily. Swipe down from the top of the screen on iPhone or the top right part of the iPad. This shows the Control Center in iOS. Find the Screen mirroring button. Tap it and it will show your options.
Inside apps you will look for the same Screen Mirroring icon like we see on the button in the Control Center. Tap it to show the options to mirror the screen to.
Apps that let you use AirPlay from with the app include Netflix, HBO, and other video apps. Some audio apps offer this option as well.

The Chromecast also lets you cast the screen from certain supported apps on iPhone and iOS. For example, Netflix supports this. So do Google's apps.. Look for the Chromecast icon (see image above - upper left corner). Tap it and you'll see the devices on your network that will let you cast your screen (see image below).

Like Android, you can always choose to connect to a TV or projector with a wired connection. To do this from iPhone and most iPads, you'll need a dongle from Apple or a third party to make it work. These cost anywhere from $30 to $50 depending on which one you need. You can find cheaper dongles form other companies, but I don't recommend them because they seem to work intermittently.

The dongle you need will depend on the devices you plan to use. Does your iOS device have a Lightning port or USB-C. Apple offers a Lightning to HDMI, VGA or DVI dongle. Notice the image above shows the HDMI out port next to a Lightning connector. Plug the HDMI cable into your TV or projector and the Lightning cable from a power source to keep your iPad or iPhone charging while playing the video or doing the presentation. You can also find dongles to connect a USB-C iPad Pro HDMI. If you own a display with USB-C inputs, then use it. It must support Thunderbolt 3 to work.
I use this last method to present at church during Bible studies. It works all the time and is more reliable than wireless AirPlay screen mirroring.
Other Options
If you need something that will connect a tablet to a computer , which you then connect to a display, look at AirParrot 2. This works great if you already have a computer connected to a projector in a sanctuary or classroom. You want to use your iPad or iPhone to show a video or present. Install AirParrot 2 on the computer and use the iPhone, iPad or Android device to connect to the computer. The software supports Apple AirPlay, Google Chromecast and even Windows Miracast.
Speaking of Windows Miracast, that's another option. It's not a common option, so we won't cover it here. Check out the Wi-Fi Alliance page to learn more.
Another option includes using a Kindle Fire and Kindle Fire TV. You could also connect a computer to the display and install screen mirroring
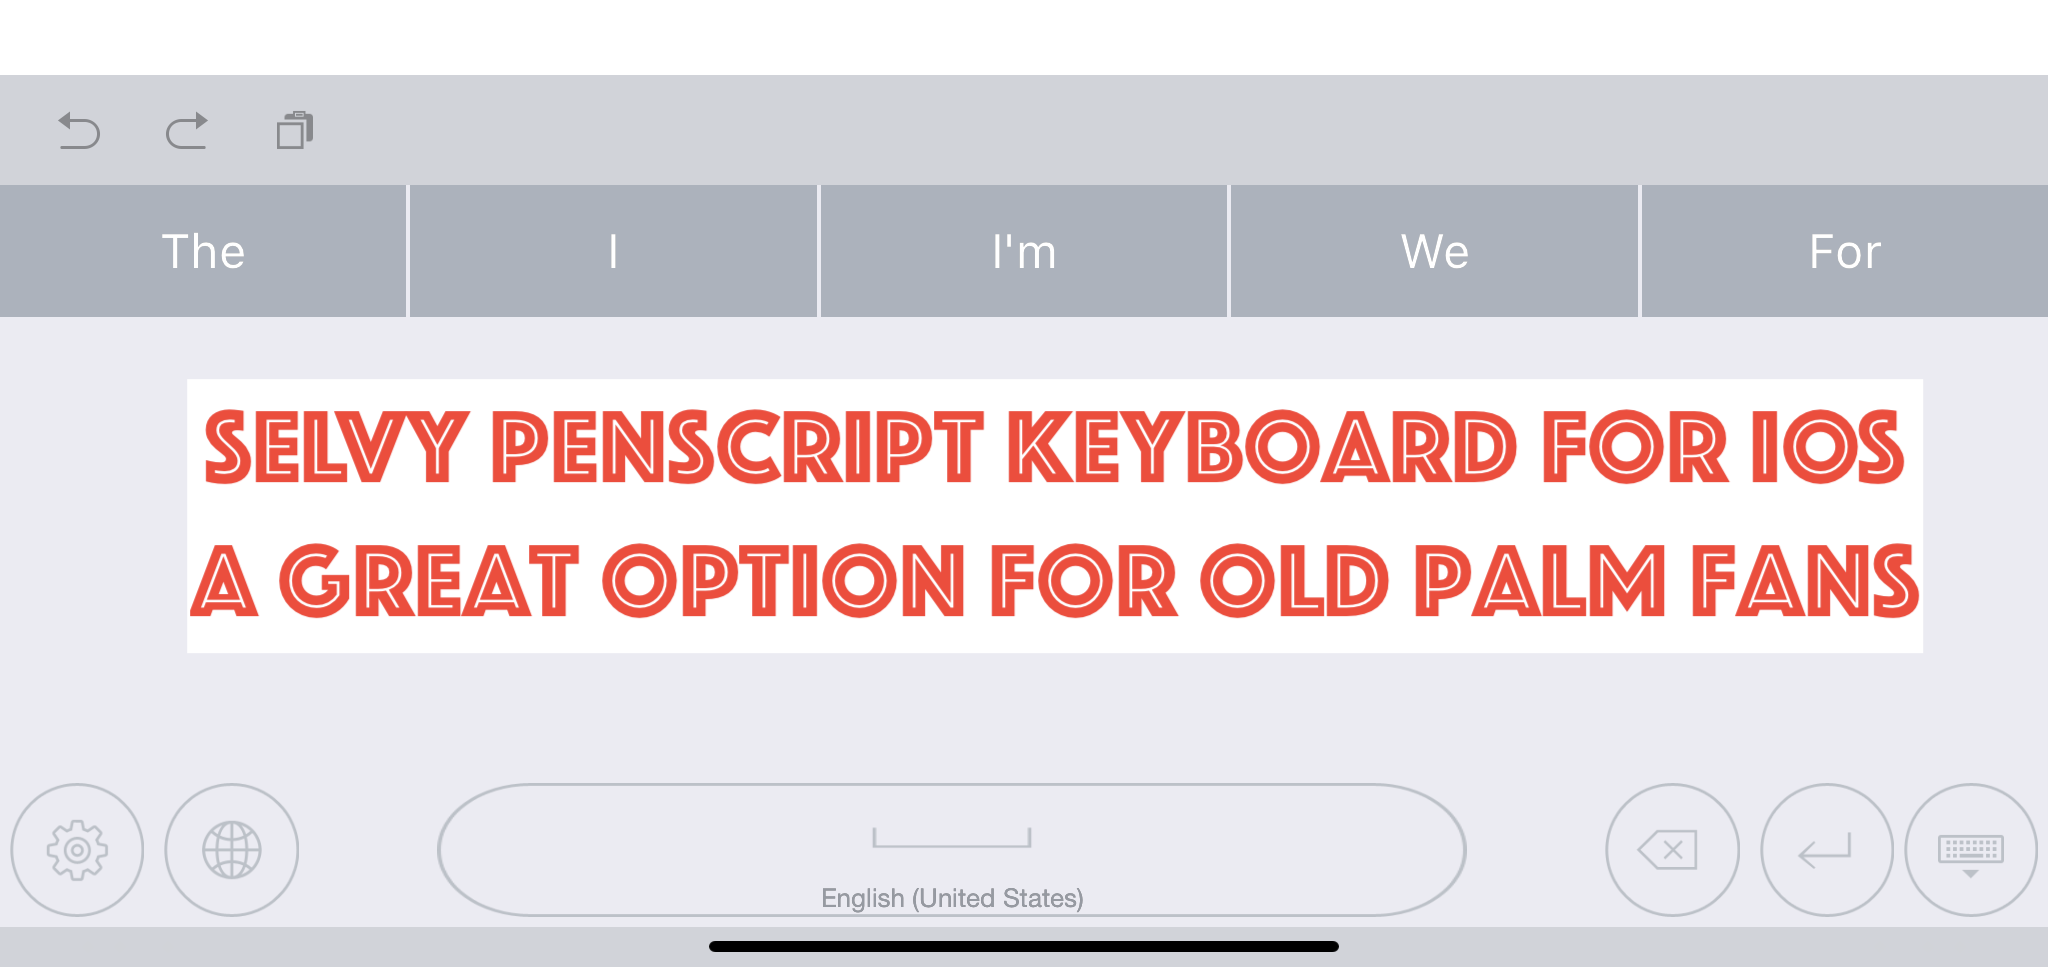
Selvy PenScript iOS Keyboard Recognizes Handwrting

Remember the days of the Palm, when you could pull out a stylus and enter text by using a strange handwriting that would let you "type" with your handwriting. The Selvy PenScript iOS Keyboard feels succeeds the Palm Graffitti input method with a modern handwriting recogniztion that doesn't force you to learn a new way to write. You just your own handwriting while entering text on your iPad or even an iPhone.
iOS Replacement Keyboards
If you're not familiar with, them a replacement keyboard installs like an app from the Apple App Store. Download the app from the store and then you have to configure the iPad or iPhone to allow the use of the keyboard.

Go into the Settings app after installing Selvy PenScript keyboard. Tap on General on the list in the left. Then tap on Keyboard from center. Tap on Keyboards on the next screen at the top. Tap on Add New Keyboard. You'll see the Selvy PenScript keyboard listed among others. Tap on it to add the keyboard. Then tap on the keyboard name again and choose Allow Full Access.
To use the keyboard in an app, tap in a text entry box. For example, open the Notes app and create a new note or open an old one. Tap as if you were planning to enter text. The regular iOS keyboard will pop up, unless you have an external keyboard attached. If you don't, the keyboard pops up with a small globe icon in the lower left corner of the keyboard. Press and hold that key and the list of installed keyboards will pop up. Choose the Selvy PenScript keyboard.
Selvy PenScript Handwriting Recognition.

When you enter text the Selvy PenScript will pop up and you can now write. This works okay with your finger on an iPhone or an older iPad. However, people who use the Apple Pencil first or second generation will love this app. Writing with the Pencil in apps is wonderful.
The keyboard entry box looks simple. It has the following buttons across the bottom:
- Settings
- Keyboard chooser
- Space bar - long press to change the language of the handwriting recognition
- Backspace
- Enter
- Hide keyboard
Above the writing recognition box you'll see a row of words. This shows you options for your recognized handwriting.
The row of words usually has the correct word. However, you don't need to tap the word to enter it. Just pause your handwriting for a moment and it enters the text in the text entry area of the app your writing in. Customize the length of the delay in the app settings.
Selvy PenScript App Settings

The Settings icon brings up the app. Tap on the button on the lower left of the keyboard. You'll then see the App Settings. The available entries include:
- Languages - choose your keyboard language.
- Customizations - the real settings are here. See below for more info.
- About - version numbers, etc.
- Feedback - send the developers your feedback and bug reports.
- Installation Guide - teaches how to make the keyboard work in iOS.
- Try It - test out the keyboard.

The top portion lets you choose your Pen Color. We then get an option to customize the thickness of the line. The next two sections show options for putting a space after a word and putting a period at the end of sentences. Finally, there's an option to change how long the keyboard will take to recognize the text and enter it wherever you're entering text.
Conclusions
The Selvy PenScript keyboard does a great job of recognizing your handwriting. If you own an Apple Pencil, then it's a great experience. However, for short text input the regular keyboard works better. I have used it a little for entering text with my finger, but that's not as satisfying.
Go grab the Selvy PenScript. It's free and works great. However, you'll want to remember that any text that you enter using the keyboard will go through their Korean servers. Some might find this worrisome. I don't.
Accordance Bible Software 25-Day Switch Part Two - Notes
During my Accordance Bible Software 25-Day Switch I'm trying to use the Accordance User Notes. How does it compare to my old go-to application, Logos?

Many Bible software users make use of the built-in notes feature in addition to reading Bible passages and commentaries, including me. To make the Accordance Bible Software 25-Day Switch, the notes feature will need to record my observations, questions and findings.
Since I work on both a desktop, laptop and my iPad, it will also need to sync between the three devices easily, I'd rather they synced automatically. Finally, I want some formatting options, including bullet or number lists, automatic hyperlinks to Bible passages and basic text and paragraph formatting.
How well does Accordance work? We'll take a look in part two of the Accordance Bible Software 25-Day Switch from Logos Bible Software and the companion mobile apps from Faithlife.
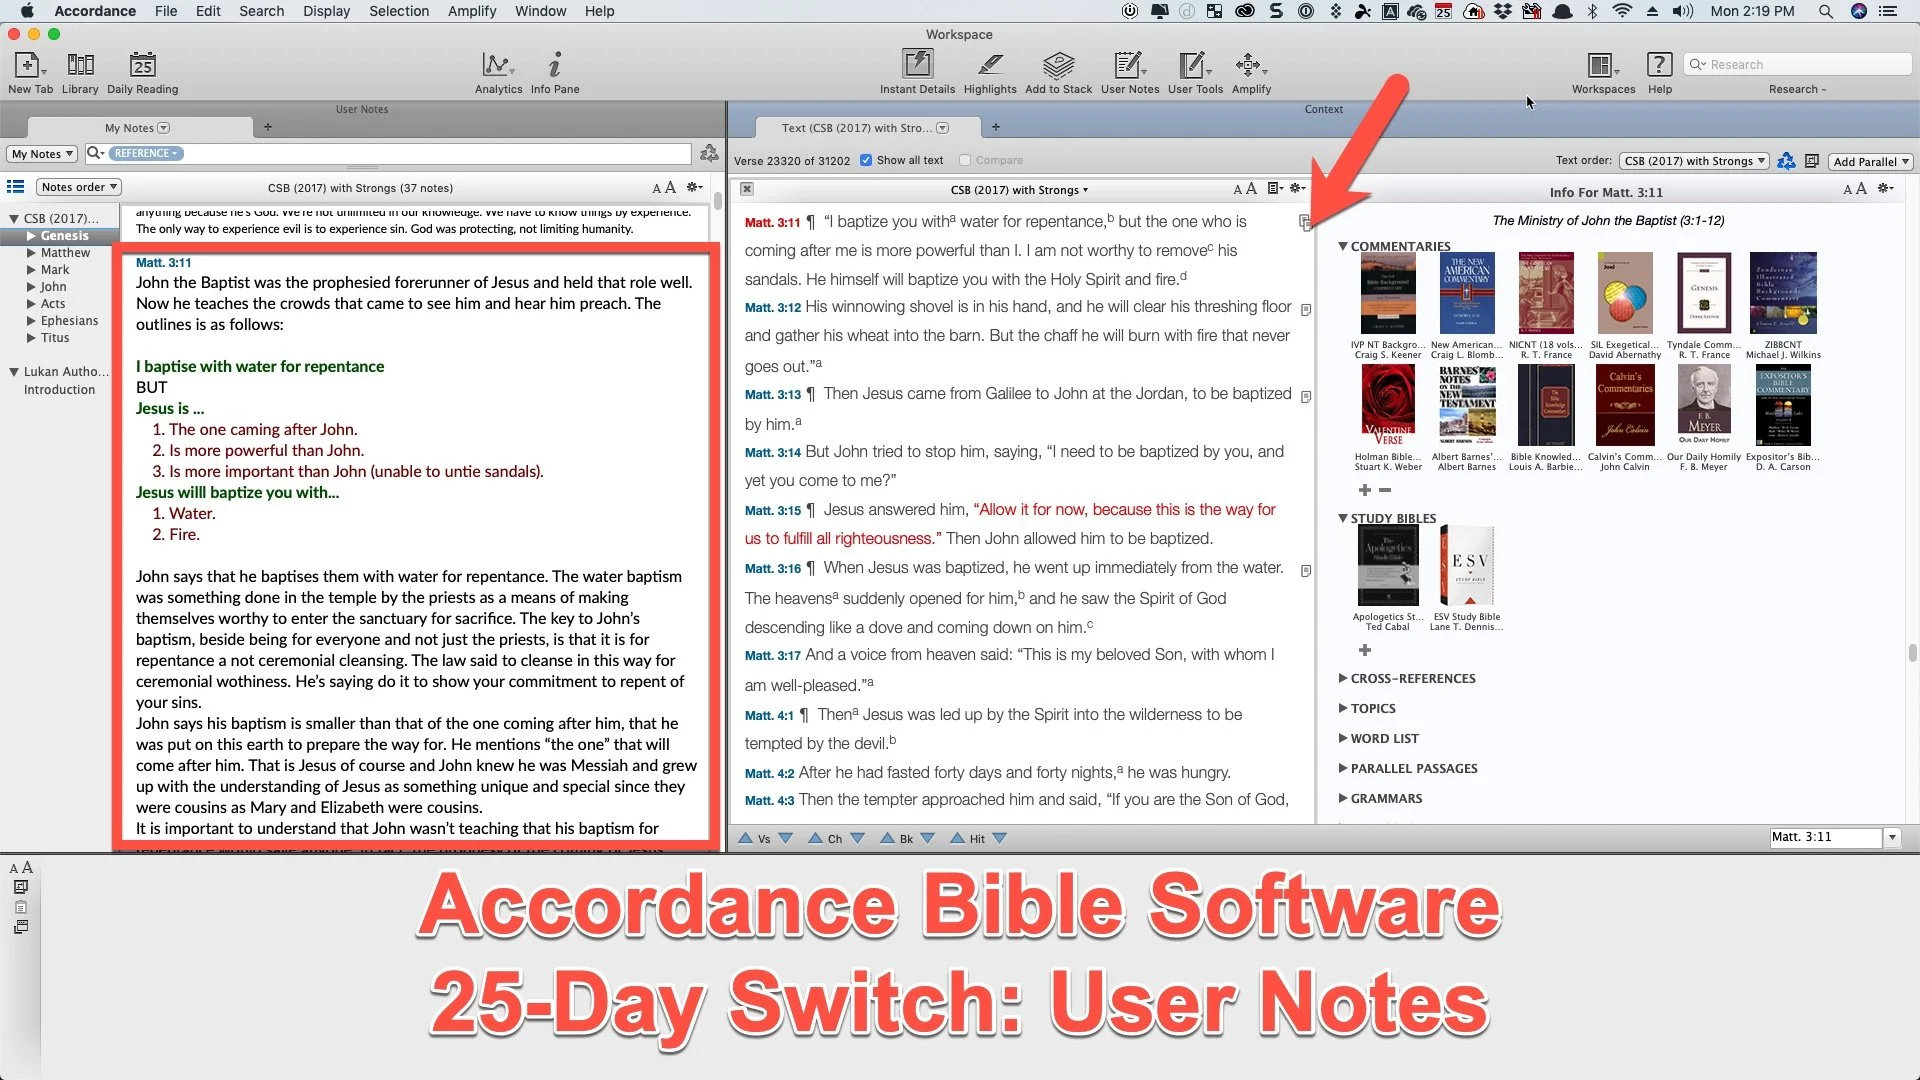
Accordance Bible Software 25-Day Switch: User Notes

First, let's take a look at the user notes in Accordance. Any verse with a note will show it with an icon in the right margin next to the verse. See the arrow in the image above. It shows the note on Matthew 3:11. The red box shows the content of the note opened in a separate window.

To add a new note, click on the blank spot next to the verse along the right edge of the Bible window. A dialog box will pop up asking which User Note file to add the note to. A window will pop up over the main Accordance screen to edit the User Note. After you create the note you can save it by clicking on the Update button in the lower right corner of the pop up window.
The Update button highlights my first big annoyance with Accordance Bible Software User Notes. You have to click Update! I'm used to Logos which automatically saves your notes while typing them. And it does this seamlessly and quickly for most users. The few people who struggle with this issue includes people with underpowered computers. That's merely an annoyance, however. I can get over it.
However, another significant annoyances comes from the fact that the User Notes tool pops up in a box on top of the Accordance Bible Software program. Why can't I open the note in a window pane and edit it right in that window pane? If you open your User Notes file in a new window pane and click in the note and start typing to edit it, the note opens in a User Note pop up window.

The User Notes window toolbar includes the following functions (from left to right):
- Keyboard chooser - drop down lets you pick...
- Default - COMMAND+OPTION+SHIFT+D
- Greek - COMMAND+OPTION+SHIFT+G
- Hebrew - COMMAND+OPTION+SHIFT+H
- Font face
- Font style (like bold, italics, etc)
- Font size
- Font color
- Bold
- Italics
- Underline
- Superscript
- Subscript
- Link - select text and click here or use link dialog box or select text formatted as a URL and OPTION+Click on this button to quickly add a simple link.
- Auto-link - click to create automatic. links out of Bible passages.
- Insert picture
For the Auto-link button to work, the passage will need to use typical passage formatting like John 3:16. URLs with HTTP:// work but not just www.kevinpurcell.org by itself.
At the bottom of the User Notes editing box we get arrow buttons. Two sets up of UP/DOWN buttons will jump to the previous or next note in your file or will add a new note on the previous or next verse. When you click these buttons they automatically update and save the note file. To delete a note, just clear the box and hit Update. If you close the Note editor, it will ask you to Update. That keeps you from entering a long string of notes and then fail to save the note.
After you save a note, the Notes box will open to show your notes. You can't edit them in this box, but they will be displayed here. That dialog box has a few buttons as well. You can close it using the little X in the upper left. The center to area has a drop down menu that shows all of your User Notes found by the program. The upper right has a font size Up and Down to make the notes look bigger or smaller in the display box. The last button in the upper right looks like a Settings icon. It has the following items...

- Move Up - moves the whole box to the right end of the current window.
- Move Down - moves the note box to the bottom part of the window.
- Show Interlinear - grayed out in a notes box, but there for when you're displaying a Bible.
- Enter Reading Mode - opens window in full screen without any window controls or toolbar (Keyboard shortcut CONTROL+R)
- Auto-scroll - starts to scroll the window automatically.
- Untie Scrolling - breaks the link between the Bible window and this window.
Accordance Notes Pluses
Here's what I really like about using the Notes Tool so far during my Accordance Bible Software 25-Day Switch. First, it's fast! Logos notes can get a little slow. The auto-update and sync feature on Logos probably slows it down since it's phoning home to the Logos servers every time it saves. Accordance doesn't do that until you sync them on exit or manually.
Second, the Notes Tool has all the basic features you need. We can format text and add images. It supports Unicode which means you can enter Greek and Hebrew text. Plus, it adds links to Bible passages and you can also add links to websites.
Third, users can link their notes to Bible passages, websites and even other books in your Accordance library. If you have a file on your computer, you can link to it too.

Select the text you want to add the link to and then click on the link icon (third from the right on the top toolbar of the User Notes Edit window). Choose the kind of note you want. If you are linking to a file on your computer, then choose File and click on the Choose File... button. Pick your file and then click on OK to create the link.
Resource links will let you add them to any book in your downloaded library. A drop down box opens so you can select the book. Play around with it to see all that this powerful linking tool can do.
Finally, Accordance gave us a better way to sync notes between the Mac, Windows, and mobile versions of Accordance. Instead of doing it manually over Wi-Fi as the used to require, users can connect their Dropbox account to Accordance and sync that way.
Syncing with Dropbox
See the video above to learn how to do this and how to use the sync feature. Unfortunately, it forces you to manually sync from the mobile app to Dropbox. You can set the desktop version to sync each time you exit the program. It's a shame the mobile app won't do this automatically. Since they require it, they should put the sync button in the main window of the app instead of nested in the library window, which forces you to tape a few times. I added a button to my toolbar on my Mac version of Accordance even though it syncs automatiaclly upon exit.
The Accordance video tutorial collection includes some great help on using their software. They offer an awesome one on using notes in Accordance Mobile. There’s another one covering the desktop version’s Notes tool.
BibleWorks users can import their notes into Accordance thanks to a recent update from Accordance.
Accordance Mobile Notes
In Accordance Mobile, add notes by long pressing on the Bible verse. A new window pops up with many options. Select User Note to add a note or edit one aloready in place. Now choose Notes file you want to use to add this note. I use the same file for all my tasks.

A verse with a note already attached will show a tiny note icon in the right margin (see the left image above). Tap on it to see a popup displaying the note. Tap on Edit to change the note or Open to read it in the lower half of the app.
Notice the Note editor has font formatting. You can't add links like you can in the Mac or Windows version. UPDATE: To add links to your mobile notes press and hold on text and then choose Link from the pop up menu. The Plus icon on the top toolbar will let you add images from your mobile device. The up/down arrow moves to the previous or next note.
Lessons Learned from Accordance Notes Use
Here's what I've decided after making this switch for the first few days. First, I will see if I can get used to using the Accordance User Notes tool in both mobile and on my Mac. I think I can adapt.
Second, I'm seriously thinking about dumping Bible software notes tools entirely. For years I used PC Study Bible and lost all of those notes because I didn't know how to get them out. e-Sword lets you move your notes out and so did QuickVerse. I used both of those for years. When I used BibleWorks for a few years before jumping to Logos, I loved that they saved their fils as RTF files. Logos makes it really hard to get notes out of the program.
I should probably use a third-party solution to record m notes. I may do that with a simple Word document for each book of the Bible. Some like Evernote, but I've stopped using the service due to the subscription fees. I already pay for Word. We'll see after this 25 days.

Accordance Bible Software 25 Day Switch Part One
To celebrate the 25th anniversary of Accordance, I'm trying to switch from Logos to Accordance. My Accordance Bible Software 25 Day Switch begins.

For the last 13+ years I've used Logos Bible Software plus others as I reviewed them. Today I am going through an Accordance Bible Software 25-day Switch experiment to jump from using Logos first to prioritizing Accordance Bible Software. What inspired this choice? How do I expect this change to affect my Bible study experience? Should you make a similar switch?

This post won't answer all of the question posed above, but it will answer the first and share my early experience. The Accordance Bible Software 25-Day Switch may be temporary. We'll see after it's over. However, it will be complete during that 25 days.
Why am I making this possibly temporary switch? There's a number of reasons.
- Of all the Bible software I use regularly, I'm least familiar with Accordance and want to become more adept with it.
- Logos works great, but it's a hardware resource hog and Accordance runs faster and takes up less space and power to run on both Windows and Mac.
- This experience, I hope, will inform readers what it takes to switch from one major Bible software platform to another.
- I like a challenge.
- The length will honor the history of Accordance, as they celebrate 25 years of publishing a world class Bible software program first on Mac and now on Mac, Windows, iPhone, iPad and Android.
Accordance Bible Software 25-Day Switch Rules
First, I won't use my old go to program or the apps related to the program. In other words, I can't launch Logos on my Mac or on my phone/tablet during the 25 days. There's one exception. If I'm studying a passage and need to open Logos to access a resource that I know will help me produce a better sermon or Bible study, then I will. My preaching and teaching ministry at High Peak Baptist Church matters more than an article written on this site.
Second, like most weeks, I can use other programs or apps. While I launch Logos first, unless I'm reviewing another program or app, I always use more than one Bible program or app to research my sermons. So this "switch" means that Accordance will dominate my study, but I'll continue to occasionally use other programs and app besides Logos when I need to.
Third, I reserve the right to cancel the switch at any time but not for any reason. If this switch means I'm so unproductive that the switch harms the affectiveness as I study the Bible. I'll write about it here.
Fourth, if I need to open Logos to get a screen shot or shoot video to explain differences between Logos and Accordance for articles in this series, I will. But I will only set things up to get the shot and then close it.
Accordance Bible Software 25 Day Switch Copying Passages to Other Programs
Logos helped me finish most of the in depth study for this weeks' sermon already. The first day of the switch came after that on purpose. I didn't want to dive head first into the Accordance deep end. Instead, I'm wading in the shallow end this week.
This week I began to prepare my preaching notes for this week's message. That means I'm copying passages from my Bible software to a Microsoft Word document. I take that Word document into the pulpit with me on my 12.9-inch iPad Pro. It's an extensive outline with the Bible passages copied to the document.
In Logos, copying a passage to Word is simple after some setup. The Logos Copy Bible Verse tool will let you select a passage and then choose the translation, a copy format and whether you want to simply copy the passage to the clipboard or copy it and paste it in one click. If you want to copy it, hit the copy button. Or you can hit the Copy-Paste button and it automatically inserts it into the Word document with the formatting chosen.
With Accordance you insert passages into Word or other programs on macOS by using the built-in macOS Services feature. You can download a Accordance Services Set and install them. To insert the passage, type out the reference in Word and select it. Then right-click it and choose Services and then Insert Verses.

I love the Logos Copy Bible Verses tool, but the Accordance use of services works. Also, you can do a little more. They offer services for ...
- View Verses - shows the reference in Accordance.
- Search with Options - searches the selected text using an options dialog box.
- Search for Words - opens a search in Accordance and looks for the selected text.
- Insert Verses from any Text - lets you choose which Bible translation to paste the passage from.
- Insert Verses - inserts the selected passage from your top Bible.
Users have created other services, which you can find in the Accordance Bible exchange site, which holds files related to Accordance, including this collection of user created services.
This process took some configuration to make the inserted verses look how I want. Go to Preferences and then look in the Citations screen to experiment with the options there to make things look the way you want them too. Here's my screenshot to make things look how I wasn't.

Here's the way the verses look when I paste them into Word. After pasting them into Word, I apply my Bible Quote Style. Logos does this with one click and in Accordance it takes several steps.

Here's how to insert text using Accordance and services.
- Type the reference in Word or another program.
- Right-click (or click on menu for Word, Services, Insert Verses) and choose Services and then Insert Verses (or one of the other services).
- The passage gets pasted using basic formatting so I have to select the passage and click on the Ribbon to apply my Style.
Logos handles this better, but if Accordance handles more of my Bible study process better than Logos, this minor weakness will not keep me from continuing my Accordance Bible Software 25-Day Switch.

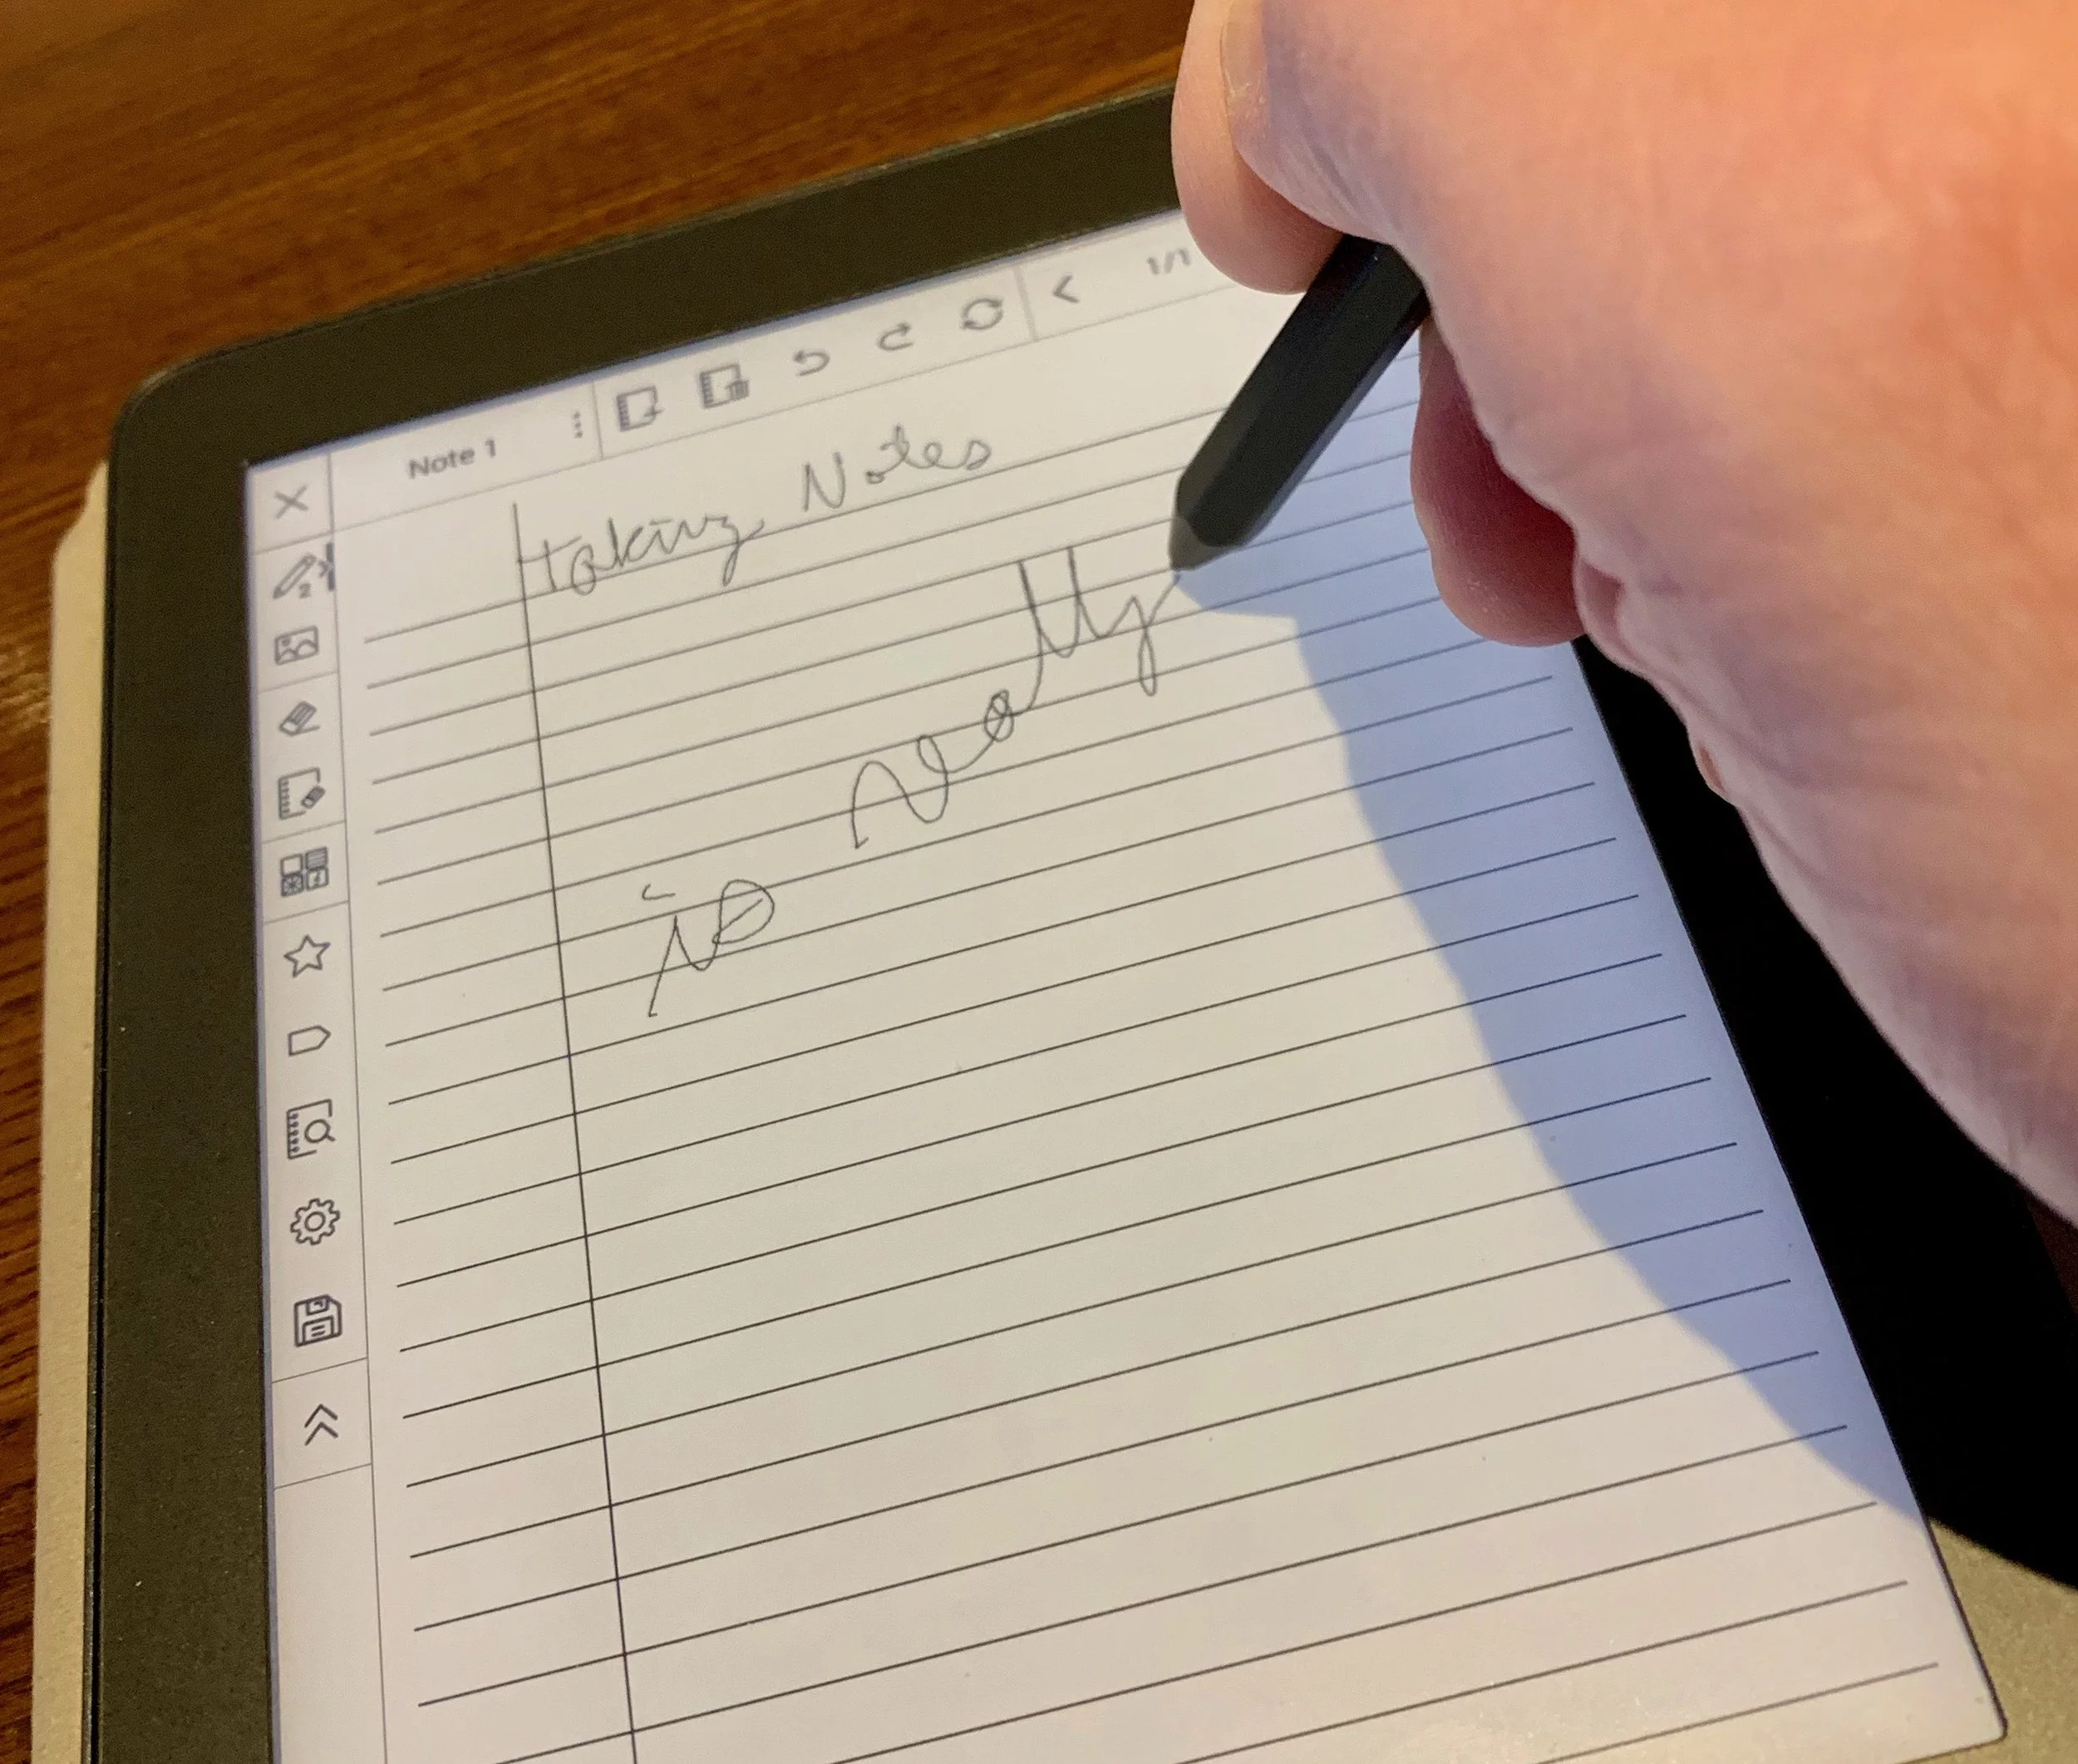
MobiScribe Notepad: The E-ink Notepad Android Device Review
The MobiScribre Notepad bring a high quality e-ink screen to note taking. How good is the tablet?
With all the glossy color screen note taking options on an iPad or Android tablet plus 2-in-1 convertible Windows and Chromebook computers, why would anyone want anything like the MobiScribe? Reading comments about it on their ads on Facebook and Instagram makes one wonder if anyone does, but then you talk to the committed core of Indiegogo backers who forked over $200 sight unseen and you get the idea that maybe MobiScribe discovered a niche that can propel them to success.

I recently received my new MobiScribe: The E-ink Notepad Android tablet after backing it on Indiegogo just a few months ago. That's a record. By comparison I backed a little selfy drone called the Selfly Drone and it took almost three years and when it arrived I tested it and wondered if I could find a way to get my money back. The MobiScribe instead came quickly and I'm enjoying it.
MobiScribe Review: Hardware
The MobiScribe E-ink Notepad runs Android 4.4, unfortunately. However, it comes with a bright and sharp e-ink display that's easy to read and responds fairly well to touch. The tablet also comes with a stylus so you can write in the note taking app built into the operating system. More on that below. The stylus also works like your finger as you interact with things on the screen. Add touch capability when not using the stylus.

The processor inside this notepad won't win any benchmarking awards. It's a Freescale i.MX6 Processor and runs at 1GHz. You also get 1GB of RAM and 8GB of storage (only 2GB of that is available to the users) with an expansion slot able to read up to 32GB micro-SD cards.
The MobiScribe Notepad measures about 6 inches wide and 7 inches tall. It's less than half an inch thick and weights only 8 ounces. With the case made by the company attached, it probably doesn't weigh even a pound.

The 3.7V 1500mAH Li-polymer battery gives the e-Ink MobiScribe great battery life. Under heavy usage for about four hours I only drained the battery about 30 percent. I've charged it only twice in over a week of sparing usage.
Kindle users will feel at home on MobiScribe's screen. It has a sharp 265 DPI screen. The front light offers warm/cold glow settings you can adjust in the Settings app. The Settings app also lets you change the font to make books and text easier to read.

On the top edge we find two buttons, one to turn the backlight on and off and the other turns the screen on and off. The bottom edge holds the card reader slot and charging port. It uses a micro-USB port. Some critics couldn't believe that the company didn't use USB-C. I agree. I wish they had, but USB-C still costs more and this thing definitely doesn't need that much charging power or speed, so I understand the choice.
Operating System
The custom version of Android on the MobiScribe Notepad runs on the old Android 4.4 Kitkat first announced on September 3, 2013. We're now seeing people upgrade to Android 9.0 Pie and the next version will come out sometime this year. The old OS hampers what apps run on the device.
Built in apps and the operating system respond adequately to touch and input. The familiar e-Ink flash when the page refreshes can get annoying in some situations, especially while running third-party apps. This slows down the performance significantly.

The company advertises the ability to run other Android apps. In my experience, none of the Bible apps I want to run worked. The Logos Bible app won't even install. It tells you that it's incompatible with the operating system. Logos users can find an old version of the Android apps that installs, but it won't let me log in using my correct email and password. The older apps aren't supported so don't bother to call Logos for help. Just give up.
Neither the Accordance Bible app nor the Olive Tree Bible app will install either. I get a "Parse Error" after I download them and try to run the APK installer.
I also tried to install the Kindle app and one called Kindle Light. Both of those were slow painful to use, both of which other MobiScribe Notepad users report working. Neither worked well for me.
The tablet makers promise that the device runs Android apps. They recommend using APKpure.com to download apps. I got Dropbox working, but it seems easier to download apps on a computer and put them in a Dropbox folder. The APKpure app is clunky and runs slowly on the MobiScribe Notepad.
Don't buy the MobiScribe Notepad to use as an Android tablet. Few of the apps I want to run work on the ancient version of Android included. Others will barely run on the hardware. I gave up at this point since I also own an iPad. I'll use it for mobile apps and the notepad for note taking exclusively.

The Home Screen has a toolbar on the top of the screen with...
- Back button
- Home button
- Task switcher - switches between running apps.
- Refresh button
- Time - doesn't do anything when tapped.
- Wi-Fi - tap to join or disconnect from Wi-Fi networks.
- Display Light - changes the brightness, warmth and contrast.
- Front Light - switch to turn on and off the screen's light.
- Brightness slider - from dark to bright light.
- Temperature slider - from cool to warm color screen.
- Contrst slider - makes contrast less or more extreme with a row of letter As to show the results.
- Settings
- Wi-Fi
- Display
- Storage
- Security Lock settings
- Language & input
- Reset
- Date & time
- About
- Battery - shows batter life but does nothing when tapped.
The Settings are basic compared to other Android devices and that's fine since it's not intended to function as a full Android tablet.
Notes App
Let's focus on what does work. The built-in Notes app runs smoothly. I bought the MobiScribe primarily to take notes in meetings or as I study. The Notes app is simple and responds quickly.

On the main screen you see two rows, one for Notes and one for Books. There's a "Create Note" button or you see the last few notes you edited. You can either tap on the "All Notes" link to see all of your notes or tap on the "Create Note" button to create a fresh note. If you want to open a recent note tap on it.
The OS lists all notes in one of a two ways - with a generic icon or a preview of the note as a small thumbnail. That view may bog down the system with a lot of notes.

The app has a toolbar along the top and the left. The top toolbar has buttons for...
- Title
- Menu to ...
- Rename
- Copy
- Save
- Convert - to PDF or an Image file.
- Backup - to the internal memory, SD card, or Dropbox.
- Restore - from memory, SD card or Dropbox if you used the Backup feature earlier.
- New page
- Delete page
- Undo
- Redo
- Refresh
- Back a page
- Jump to page number
- Forward a page
- Full-screen mode - to view note without toolbars.

The left side toolbar includes the following buttons:
- Pencil configuration tool to change the style and thickness of the pencil.
- Insert image
- Erase
- Erase page
- Change page background
- Star - to make this a favorite note.
- Tag - add a tag to the note
- Search - shows all notes
- Settings - lets you calibrate the stylus and change toolbar from left to right edge of the screen.
- Save the note
- Hide toolbar
I used the insert image to add a page I scanned using my phone camera. Back up the photo to Dropbox and add it via Dropbox on the MobiScribe Notepad.

Use the Background button to change your screen background. The MobiScribe Notepad offers 11 pre-installed backgrounds. You can also create your own with a custom background option.
The included backgrounds offer ruled pages, some with check boxes and others with meeting notes layout. There's also graph paper and musical notation pages. Two are just geometric shapes.

While writing with the stylus, you can adjust the size using the toolbar to change the input. The basic tool writes with a consistent width. The marker tool has some pressure sensitivity so you get a slightly wider line when you press harder.
Books
The MobiScribe Notepad claims to support the following formats:
- Mobi
- Epub
- AZW
- TXT
- FB2
- PRC
I can't get mine to open Amazon files even with the DRM removed. You get an error message like this...

The Books app works okay, but I'd ranter read on a Kindle. However, you can use it for the above formats. You'll need to find the right formula to make the book readable. I struggled to read PDF books, because most were laid out for 8.5x11 paper size. These don't display well on the smaller screen.
The EPUB format seems to work well. I used a program on my Mac called Epubor to convert Kindle books to EPUB. It's not an easy process, but works better than anything I tried. Epubor isn't free. It starts at $25/year for Windows and $30/year for Mac. You can get a lifetime subscription for $50 and $55 respectively.

When you put your converted books into a Dropbox folder on the computer, then open Dropbox on the MobiScribe Notepad, download the book files by tapping on them. You will get an error message saying that the Dropbox app can't open the file. You will have to choose the OPEN WITH... button and it offers to open the book with the HomeReader3 app or other apps installed on your Notepad.

At this point the book behaves a lot like it will on a Kindle Paperwhite. You get the ability to increase or decrease font size (tap the center of the screen and a font size slider shows up at the bottom) and you can bookmark spots in the book, but that's it. I couldn't find a way to highlight books and inexplicably there's no way to annotate the book with the stylus. That's an unconscionable omission for this device advertised as a great note take tablet.
Sometimes opening a book in the Book app takes a long time. That's going to happen with large books.
Tap on the left or right edge to go back or forward in the book. Tap on the top edge to bring up the toolbar. There's a progress bar at the bottom edge. Tap on it to quickly jump to a new place in the book.
MobiScribe Review: Accessories
The stylus feels light and some might call it flimsy. However, it's not bad while writing. The hexagonal shape runs up two-thirds of the stylus. The top third starts to become more round toward the top end. There's a fine tip on one end and button on the other. The other ends behaves like an eraser. That's something you don't get with the Apple Pencil that alone costs more than 50% of the price of the MobiScribe Notepad, which includes two styli.

The box comes with three extra tips and a tool to replace the tip. We'll see how long the tips last, but it feels sturdy and writes smoothly on the screen.

I got the branded case. The tablet attaches to the MobiScribe Notepad case with a small rectangular sticky adhesive. Pull off the protective plastic and press the table onto the case. It seems to stay put. Again, time will tell if it holds up or comes lose. Plenty of users complained about this design.

The case feels okay in the hand with a textured cloth they call "rugged fabric." It feels like it will wear out over time. Inside you get a felt fabric. On the right side of the internal part of the case next to where the MobiScribe sits, there's a recessed section and and elastic loop. That's where you put your stylus. On the top edges you get two tabs with magnets. They come together when you close the case and the magnets hold it closed to protect the screen while not in use. The case allows the user to easily plug in the charger without opening the case. However, the screen doesn't turn off automatically, so be sure to hit the button to turn it off manually or set the Sleep time under Display in the Settings.

Any micro-USB charging cable will power the tablet, but they do include a simple USB cable. You'll need to supply your own AC adapter or plug it into a computer to charge. The tablet arrived with about 65% charge and didn't take along to top off. I didn't time it, but it seemed like about an hour.
Conclusion and Recommendation
People who take a lot of notes and don't want to use paper and pen/pencil, can get a lot of functionality out of the MobiScribe Notepad. It works well as a note taking device. It's light and quick, as a note taking solution.

The MobiScribe team of developers respond quickly to users' wishes. People didn't like that you had to convert notes to PDF or PNG file before backing them up. So they changed the backup screen (above) to include a "Save file via" drop down box that includes Dropbox as an option. Now you can export and backup notes files in one step.
The book reader is subpar and I won't use mine for that reason. People who want a good e-Ink book reader should buy a Kindle. No other book reading tablet can compete.
Do NOT buy this device to run Android apps. The inability to open some favorite Bible apps disappointed me. I hoped I could use this device to read books on an excelllent e-Ink screen. It's not a good experience, even with the apps that do work.
Tips for Using the MobiScribe
- Turn on the ability to side load apps. You almost have to have Dropbox to use the MobiScribe Notepad. Without it, the experienced will be drastically limiting.
- Don't download the APK Pure app store as the recommend. Instead, just use it from your computer's browser.
- Find a way to convert your eBooks to a form that the MobiScribe can read, if you insist on using the device to read books. I like Epubor.
- Change background of paper in Notes and even create your own as transparent PNG files. Use drawing program to make a 3.75-inches x 5.0625-inches file with a transparent background. Then put it in your Dropbox folder to sync to the MobiScribe Notepad. Click the background button in the left or right toolbar, depending on where you put it. Choose Customized and select the file in your Dropbox folder.
- Join the MobiScribe Notepad Facebook users group. It's a closed group, so you'll need request membershi.
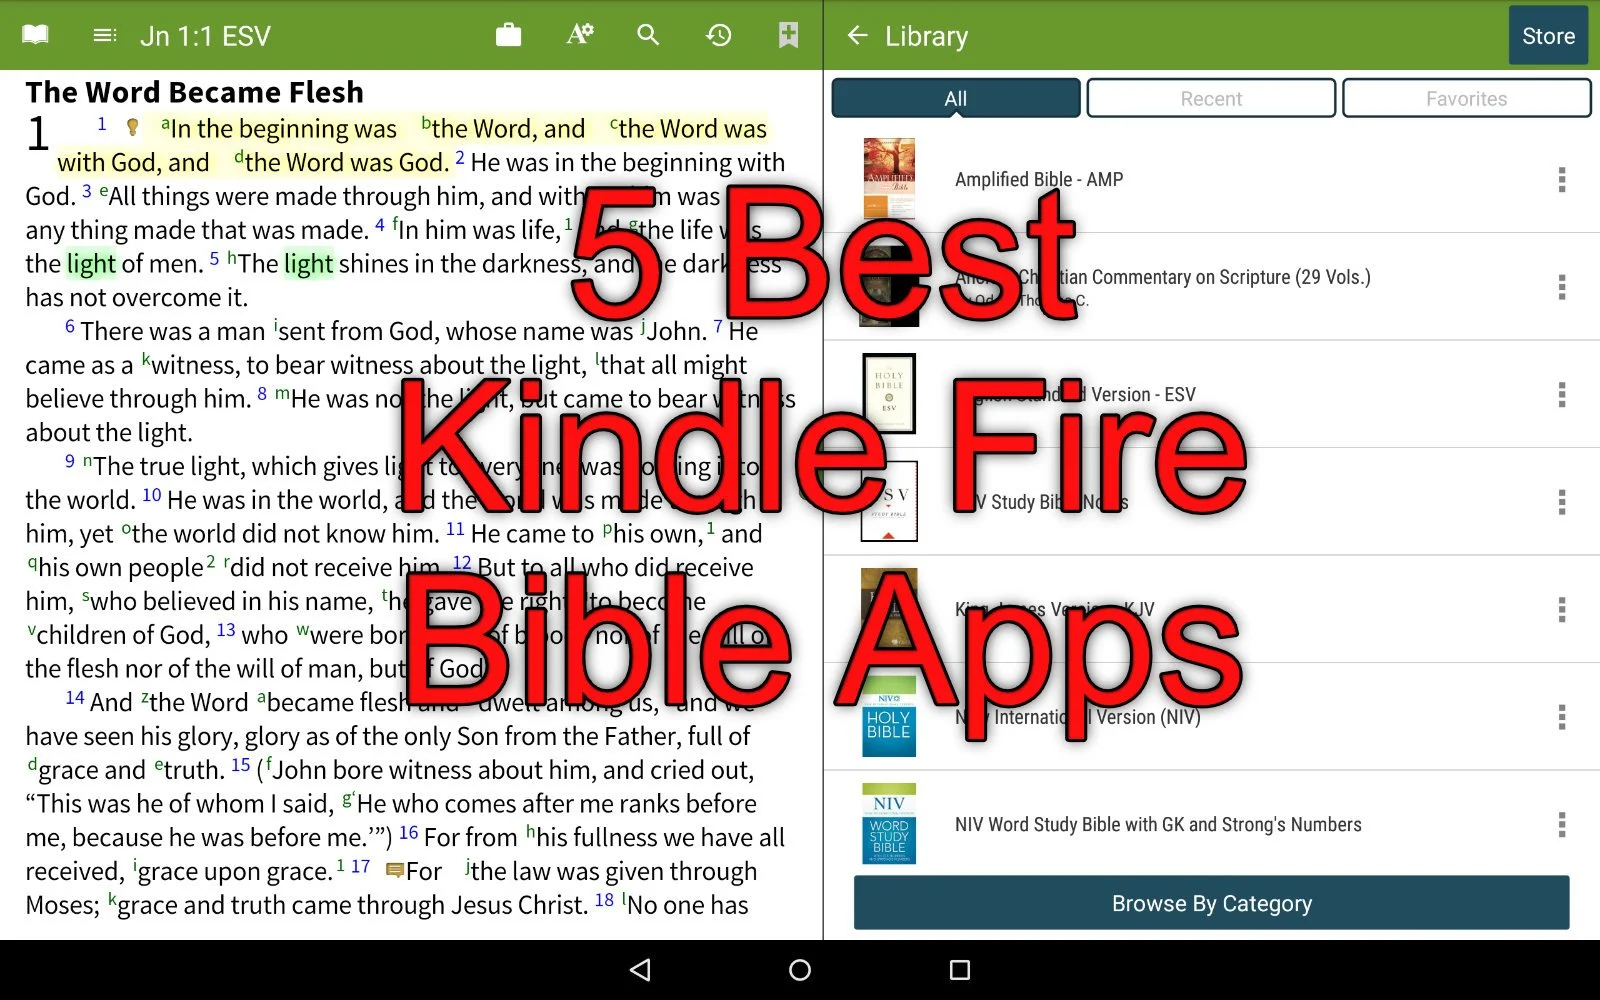
5 Best Kindle Fire Bible Apps
Would you like to find a great Kindle Fire Bible app? We've got the five best Kindle Fire Bible apps for you plus one app you should avoid for awhile.

The Amazon Kindle Fire appeals to people who like the idea of a tablet to read books, watch movies and do some simple things like surfing the web and checking their email. You can also play games. But how good does the Kindle Fire do for Bible Study apps. We've got the 5 best Kindle Bible Study apps that run on the Kindle Fire.
A Kindle runs a heavily skinned version of Android. The Fire OS runs Android 7.1 Nougat, which lags a few generations behind. Google released Android Pi in 2018 and will release unnamed Android O this year.
The fact that Fire OS uses Android means many Android Bible apps will run just fine on the Kindle Fire. However, the app creator must choose to send their app to the Amazon Kindle App Store, which has some of the most stringent evaluation processes of any App Store. This leads many app developers to ignore Amazon.
The following apps come in no particular order. I chose them based on…
- Price of the app plus add-on books
- Size of library
- Quality of the app and its features
- Stability and speed of the app
- Olive Tree Bible Reader
- Accordance Mobile
Bible by Olive Tree
The best Kindle Fire Bible app comes from Olive Tree. Bible by Olive Tree includes a simple user interface but also includes powerful enough features to let Bible students study the original languages and use most of the best commentaries available on mobile devices today.

The modern translations and better commentaries or other reference books will cost extra. They offer free books and even some language study tools for nothing extra. However, the Olive Tree library carries more resources than the other apps here.
Open your favorite Bible and then look at the Resource Guide, available along the right or bottom (depending on whether you hold the Fire in landscape or portrait mode). The resource guide will find all of the books in your library that include info about that passage.

The user can do the basics, like highlighting, searching, take notes, sharing verses and bookmarking. Add to that the excellent user of the tap and hold to work with the text and the resource guide, and you get an awesome Bible reading and study experience on the Amazong Kindle Fire.
Accordance Mobile

The Accordance Mobile Bible app gives users access to their Accordance books for free. Even Kindle owners who don't own any books on Accordance can download it for free and get some free books. Sign up for an account for free, also, and you'll get a few more books. However, it works best if users invest in the Accordance ecosystem on Mac or Windows.
When you see all it can do, you'll likely agree it's the best app for advanced Bible students while remaining simple enough for the average Bible reader. I prever the user interface of Bible by Olive Tree above, but Accordance comes in at a close second. The app's description lists the free resources. I quote it here:
The following free resources are included in your initial download of Accordance Mobile for Android:
• ESV Bible with Strong’s numbers (ESVi)
• World English Bible (WEB)
• Samples of the Greek New Testament and Hebrew Bible
• Easton’s Bible Dictionary
• Outlines of each book of the Bible
• Margin notes and cross-references
• Bible Lands PhotoGuide Sampler
• Kohlenberger/Mounce Concise Hebrew–Aramaic Dictionary
• Mounce Concise Greek-English Dictionary
• BiblicalTraining.org
If you register an Accordance account, you will also be able to download a free Android Starter collection including:
• The 1901 American Standard Version (ASV)
• French: Louis Segond Bible
• German Elberfelder 1905
• German Lutherbibel 1912
• Greek and Hebrew Strong's Dictionaries
• Hitchcock's Dictionary of Bible Names
• Nave's Topical Bible
• Portuguese Bible: João Ferreira De Almeida Atualizada (ALMEIDA)
• Spanish 1909 Reina Valera with Strong's numbers
• Dr. J's Bible Study Methods
• Maps Sampler
• Timeline Sampler
• Chronological Readings
• Devotional Readings
• Classic Passages
• Parables & MiraclesFrom Accordance Mobile page in Amazon App Store
You can read the Bible and search for words, topics and even more powerfully search for tags, lemmas and more.
The app lets you open two books at a single time and set it up so the app will scroll the two books together as you move through a passage. The Bible will cause the other book, like a second text, a commentary or study Bible, showing the information about the same verses displayed in the Bible.
Tap and hold on the word and you'll get a toolbar open up. Tagged English Bibles will let you look up the word based on the Strong's number. Greek and Hebrew words will let you see morphological details.
There's also a simple way to share text outside the app.
YouVersion from Life Church
The YouVersion Bible app from Life Church is the most popular Bible app available. It's not a powerful Bible study app, but it does a great job for people with simple needs.

The app is totally free and lets you download modern translations like the NIV, ESV, CSB, NKJV or NLT. You can also get the public domain books like the KJV. They don't offer Greek or Hebrew texts for original language research.
Life Church's apps excels at giving users a good Bible reading experience with a plethora of devotional reading plans. It also will share the app in beautiful mean-style images with text.
People who like to highlight and take notes in their Bible can do so with the Bible app. These will sync with the ministry's Bible website.
Do you want to keep up with another person's Bible reading? This helps with keeping one another accountable and YouVersion makes this simple. Follow one another and share your reading progress.
Because the Bible app's totally free, it also doesn't include things like language study, commentaries or other books to help you study beyond basic reading. You can listen to the Bible in the app.
Tecarta Bible
I use this app the least, but it always shows up as one of the most popular apps. It's a step above the Bible app from YouVersion, but below Accordance Mobile, Olive Tree and other more advanced Bible study apps.

Tecarta Bible costs nothing to download the basic app on the Kindle Fire. However, the more modern translations will cost the user. If you want to read the NIV, ESV, NLT, CSB or other modern translations you'll pay through either in-app purchases or on their website.
The user interace looks attractive and simple enough to learn quickly. Users can read, search, bookmar, take notes, highlight and study using commentaries and Strong's tagged Bibles (KJV and NASB).
Tecarta offers a subscription service that costs $5/month or $40/year. The first month is free. That's an interesting deal, but might get costly if you don't need a lot of books. Head over to their store to judge for yourself whether buying a few books or subscribing the premium offering works best for you.
Bible Gateway
Like Tecarta, Bible Gateway offers a subscription model for accessing books other than the ones that come free with the app.

The app focuses on Bible reading with a verse of the day feature on the main screen. Listen to the Bible or read following one of their many reading plans. You can also share verses through the app to social media.
When you subscribe you'll get access to more modern translations and some nice commentaries.
Like all the other apps, users can read, search, notate and highlight the Bible. Run the app with two books open on screen at a time. They will follow one another as you scroll through the book. Share verses with socila networks or family using your phone's sharing feature.
Where's Logos Bible?
A lot of people who read this site will ask, "Where's Logos?" I put it on my list best apps in more than one place. On iOS and more traditional Android phones and tablets, it runs well and would easily make this list. The app does not work well on a Kindle Fire.
I own the latest version of the Kindle Fire - the 2018 Kindle Fire 8. I bought it because I no longer own a Chromebook or Android phone. Instead of paying $150 for a cheap Android tablet or $550 for the Samsung Galaxy S4, the best Android Tablet for sale now, I chose to get a cheap Kindle Fire.
The Fire showed up in my mailbox so I opened it up and loaded the Logos Bible app on the tablet and fired it up. It takes a few minutes to set up in the background. So, I put down the table and let it do its thing. Then I downloaded a few books and opened up my favorite Bibles and Study Bibles the way I like.
Later, I came back to my newly setup Kindle Fire 8 and fired up the Logos Bible app and it took forever to load. Then it immediately crashed. A few attempts at restarting the app failed so I restarted the Kindle Fire and it loaded this time. But the app takes forever to do anything.
Some will tell you that the Logos Bible app needs to "phone home" meaning it connects to the Logos servers to a lot of what you want to do with the app. I downloaded books to the tablet and tried to run using only those books. The app still chugged along like a school bus loaded with 8 year-olds who are my size climbing the Appalachian Mountains along I-40 near my house. It can get there, but it won't be fast. It also seems to just stop for long periods of time.
You may not have any of these problems. I'd like to see a video of the Bible app from Logos running fine on your Kindle Fire. Post a link in the comments below and if I get a few I re-evaluate my situation and my chose to leave it off this list.

How to Add an SSD to a Mac Without Opening the Computer
We'll show you how to add an SSD to a Mac without opening the computer. This uses an external drive to boot and run the OS.
Apple charges ridiculous amounts for larger capacity solid state drives as an upgrade to a Mac. Here's how to keep from paying hundreds. We'll show you how to add an SSD to a Mac without opening up the case. The external SSD runs faster than an internal spinning hard drive. Today, Apple computer owners can't upgrade their internal drive. If you can, it 8takes some real skill to crack open the case and replace the internal drive.

Why Add an SSD to a Mac?
Let's say you bought a computer with a 128GB drive. Now that you've installed your large Bible study library all of your movies and the 10 years of digital photos you shot, the computer says it won't even let you install that tiny app from the Mac App store or download a new commentary series to your Bible software. The computer's running out of space.
The solve the problem of a full hard drive you have to add storage or replace the hard drive. In the old days we took off the bottom of the MacBook, unplugged the old drive and put in a new one. Replacing the drive in a Mac mini or iMac got a little more complicated, but the owner could still do it or take it to any computer shop. Today, you'll have to run through a complicated set of steps if you can even do the upgrade. A lot of Macs won't let users upgrade their storage without replacing the whole motherboard. Apple likes that because they want you to buy a new $2,000 computer or pay stupidly high prices at the time of purchase.

At the time of purchase, the upgrade to a 1 TB SSD on a Mac mini or MacBook Pro will cost $800. They charge $700 on an iMac. Compare that to buying an internal SSD from Amazon, which costs as low as $125-$175 for a base level 1TB internal SSD. You can get a really great high-end drive like a Samsung EVO drive for about $300. Add an enclosure for $20-$50 and you're saving a lot of money.
Can I use an external drive as my main startup drive to run macOS and all my programs? Yes. I did this on a Mac mini for years before I learned how to crack the thing open to upgrade the drive with an internal SSD. The process of using an external SSD worked great.
An external SSD won't run as fast as an internal SSD from Apple. That's not the comparison that matters. Look at the speed of the slow internal traditional spinning hard drives Apple uses and you'll notice a big speed increase by booting from an external SSD connected to the computer's mini-DVI port or a USB-C Thunderbolt port.
What You Need to Add an SSD to a Mac
Here's what you'll need to add an external SSD to your Mac, copy the internal drive over to the external and then tell the computer to boot from the external drive instead of the internal drive.
- An SSD (internal or external)
- A 2.5-inch hard drive enclosure, unless you choose an external solid state drive (more on that below)
- Software to copy the contents of your old internal hard drive to the new external drive
- A way to attach the new external drive to your laptop
Choose Your SSD
You have to decide if you want to save some money by getting an internal SSD and a hard drive enclosure or do you want to get a simpler external solid state drive that usually costs more.
Consider the SanDisk 1TB Extreme Portable External SSD. It connects via USB-C and costs under $200 on Amazon. Or you could get the Crucial MX500 1TB 3D NAND SATA 2.5 Inch Internal SSD for about $135 also on Amazon.

If you go with the second option, you'll need to put it in an enclosure. That's a little box that you install the drive in. It comes with the cable to hook it up to your USB-C port on your Mac. Take a look at the $15 enclosure from Aukey (see above). Some older Macs don't have USB-C so get an enclosure that plugs into a USB 3.0 port, which won't run as fast, but will still run faster than an internal spinning hard drive. You'll find a bunch of them on Amazon.
If you go with the internal SSD and drive enclosure, then install the new drive in the enclosure. Follow the instructions that came with the enclosure.
Copy the Old Drive to the New External Drive
To copy the old internal drive contents to the new external drive, plug the external drive into the USB C or USB 3.0 port. Make sure it's ready and working. You may want to open Disk Utility on your Mac. It's in the Utilities folder of your Applications folder. You can also use the keyboard shortcut COMMAND+Space Bar to open Spotlight Search. Type Disk Utility and make sure it's selected and hit enter or click on it with your mouse or trackpad.
The video above from the folks iFixit at shows exactly how to format the drive and then use the utility below to clone your Mac hard drive to the new SSD.

Select the drive in the list on the right. Be careful to select the external drive and not your internal drive. Then click on Erase on the toolbar.

Give the new drive a title, choose Mac OS Extended (Journaled) in the Format: section and GUID Partition Map in the Scheme: section. Click on the Erase button in the lower right corner of the dialog box that pops up. Let it finish erasing the drive.
Next, head over to the SuperDuper! website and get the file by clicking Download in the upper right corner o the webpage (as of January 2019 - location of the link may change). The downloads a DMG image file.
Install SuperDuper! on your computer. You'll have to give it special permission since a box pops up that says:
macOS will not allow SuperDuper! to copy your drive until you authorize us to do so.
This is done by adding the SuperDuper! application to the "Full Disk Access" section of the Security & Privacy preference pane in System Preferences.
Quit SuperDuper! and we'll open the proper preference pane for you. Once you've added us, re-open SuperDuper! and you should be good to go.

Follow those instructions to make SuperDuper! work. This happens by hitting Quit and it opens the Security Settings screen. Click the little Lock icon in the lower left (see above image) and enter your computer password. Then under the list box click the plus icon and choose SuperDuper! from your list of Applications.
Now you can run SuperDuper! to copy the internal drive to the external drive. The first time you run the utility it will open a comprehensive help file in the Preview program or whatever you use to read PDF files by default.

In the first Copy drop down box (upper left) choose the Macintosh HD. In the second drop down box choose the new drive you just erased. Look for the name you gave it in Disk Utility. I didn't enter one so mine says Untitled. You don't need to change an Options. You can schedule the operation for a later date if you prefer. If not, just hit Copy Now and let it copy. Don't do anything because you might add files while it's copying and that could mess things up.
Boot with New External Drive
It's time to test out the new external drive. Close everything and restart the computer by clicking on the Apple icon in the menu bar's left end. Choose Restart. Let the Mac restart. When it begins to start back up hold down the OPTION key on the keyboard. The computer will show the drives available to boot from. If SuperDuper! worked properly, then you'll see at least two drives. Choose the new drive (the internal will sit on the left and the new drive on the right).

After you select the new drive let the computer start. It should work fine and start up like it did before.
If the new drive makes things faster than the internal spinning hard drive, then everything worked properly. If not, something's wrong. Let everything that runs at startup. Give it a minute and start launching programs.
Run this way for a few days to weeks just to make sure it continues to work. Then if you want you can erase the internal drive and use it as a second drive to store things like media (videos, music, photos) and documents.
Attach the Drive to Your MacBook
You might now want an external drive hanging off your laptop computer. This is the biggest argument against doing what we're suggesting in this how to. However, if you don't mind the external drive the you're done. However, you could attach the drive to your computer so it stays put while carrying the computer around.
Get a case or cover so you're not putting stickers directly on the computer. Find one online that looks the way you prefer. Then find some velcro that you can attach one side to the case and one side to the external drive. Plug in the cables and make sure there's enough cable to let you open the computer's lit while it's plugged in.
People who own a Mac mini or iMac can put the drive on their desk. You don't have to worry about affixing it the computer itself, unless you just want to clear up desk clutter.

Bible Software Choice: Power House or Simple Software

People with simple Bible study needs often pick the simple Bible programs and apps. They are easy to learn and cost less if anything. But will the app or program grow with the user? Can a powerhouse program help people with simple needs study the Bible as well as a the simple apps? We'll take a look and answer those questions.
Three Kinds of Bible Software Users
Bible software or Bible app users fall into one of three categories usually.
- Bible Reader - average believer who plans to read the Bible on their phone or tablet and maybe a computer.
- Pastor or Scholar - these users will need a good app or program that can do advanced searches, study the Bible in Greek or Hebrew and study the word at a deeper level to teach, preach or write scholarly books or articles.
- Growing Student - some people start as a #1 but over time grow into the #2 or they just really like to study the Bible at an interim or advanced level for personal edification or to prepare for a family or small group Bible study.
A program like Accordance, Logos, Wordsearch or even Olive Tree will handle the #2 kind of user easily. Some people will never graduate above the #1 type of Bible student and that’s fine. I often recommend the Bible app from Life.Church, also called the YouVersion Bible app. In the past I've recommended Bible Gateway, Laridian's Pocket Bible, e-Sword and Tecarta's great Bible apps. Those all fall in the simple group even though Laridian also does some of the Power House tasks. So what should you use even if you're not a power user? What do we do with the third group of Bible students? Should these users consider using a more powerful Bible program and the companion mobile app? Since few people who move from the first group into the second group know they will, shouldn’t all believers start out with the more advanced tools knowing it might happen? I’m going to argue for that approach below.
Reasons Both Groups Should Use the Power House Bible Software
A seminary professor or a Sunday school teacher leading the youth class can enjoy a quality Bible app or Bible software. Here’s why the youth class teacher should consider the power house Bible software.
Room to Grow
I know of a young couple that recently built a new house. They put in only one large bathroom. They said that didn't need more. However, what if they have another child or two? A second bathroom will seem like a necessity and not a luxury. Similarly, more powerful Bible software gives Bible students of any level room to grow. They can go from a person who just wants to read and do simple Bible searches to a Greek or Hebrew scholar. You can’t do that if you invest in an app.Many pastors, missionaries and Bible scholars share testimonies of teaching a youth Sunday school class when God called them to vocational ministry. If such a person invested a hundred or two hundred dollars in books to use with their simple Bible study tool, they would later need to buy another program to get the more powerful features these programs include. God doesn’t call everyone to become a pastor or scholar. If this was the only reason our simple users have to buy power house software, then I’d recommend they save their money and go with the Bible app. However, we’ve got a few other reasons.
Powerful Apps Also Do Simple Tasks
 While you wouldn't use a sledge-hammer to pound in a finishing nail sticking out of a chair rail in the dining room, you could. Buying a sledge-hammer and a small hammer won't break most carpenter's bank accounts. However, Bible users won't likely buy a $10 program for simple tasks and a $200-$3,000 program for Bible study. A lot of us use a free app and then buy the more powerful app, but some pay for an app that includes a few Bibles and commentaries to help them understand their daily Bible reading or teach their Sunday school class. Why not buy the books in a more powerful app since it does the complex and simple tasks?Remember that you spend more than just money. It takes time and effort to learn the program and get to a point where you're thinking about the Bible passage or theological topic more than the steps to get your study done. Take it from someone withe experience with a dozen Bible programs and apps over they years. Just knowing how to do what you want without thinking is a huge time saver.Accordance handles deep searching for every instance of a certain Greek verb in one tense or Hebrew word with a particular grammatical form. It will also let you read a Bible passage in multiple translations and share them online. You can use Logos to do create complex diagrams of a Hebrew text or instantly compare a passage in multiple translations with a visual report. Students can also buy the latest popular Christian books and read them on a computer, phone or tablet tracking your reading process. They can highlight every future passage verb and highlight your favorite verses in these programs. The more advanced programs all offer a way to share Bible memes online too, something that characterizes the best simple apps too.
See my round up of Simple Bible apps at ChurchTechToday.
Support for Multiple Devices
McDonald's sells billions of hamburgers even though they're universally criticized for lack of nutrition and taste. (Don't tell anyone, but I really like Quarter Pounders, but I'm in the minority). They sell so many burgers because you can find one in almost every town bigger than 500 people in America. You can also find the same quality at a store in New York City and Bangkok, Thailand. Consistency is key. It's the same with the best Bible software.![]() Some apps work fine on a phone or on a tablet or on a computer. Few of these apps work great on all three and some app makers don't publish apps for all three. Sometimes the simple app makers offer a great desktop program, but a pretty weak iPhone version. Other developers sell great Android apps, but offer an iOS app that's pretty weak in comparison. Throw in the Kindle Fire tablet, and you get fewer options that work on all platforms.While your chosen simple Bible app might work great on your iPhone and iPad, maybe the app developer doesn't create a decent alternative for the Mac. And what if you need to switch to a Windows PC or an Android phone or tablet? That's why the big power house programs make the best choice for some people who need cross-platform support.Get the more powerful apps from companies like Faithlife Logos and Accordance Bible Software.
Some apps work fine on a phone or on a tablet or on a computer. Few of these apps work great on all three and some app makers don't publish apps for all three. Sometimes the simple app makers offer a great desktop program, but a pretty weak iPhone version. Other developers sell great Android apps, but offer an iOS app that's pretty weak in comparison. Throw in the Kindle Fire tablet, and you get fewer options that work on all platforms.While your chosen simple Bible app might work great on your iPhone and iPad, maybe the app developer doesn't create a decent alternative for the Mac. And what if you need to switch to a Windows PC or an Android phone or tablet? That's why the big power house programs make the best choice for some people who need cross-platform support.Get the more powerful apps from companies like Faithlife Logos and Accordance Bible Software.
Contrarian View
I support the above arguments without reservation. However, some people will never become a student of the Bible who needs more advanced features of Logos or Accordance. The simple Bible app, Laridian’s PocketBible or even better Olive Tree Bible Reader does the job. In fact, most Christians should probably use Olive Tree as their simple program that can grow since that app does the basics and offers some advanced features. If such a person ever becomes a seminary professor, he or she will need more. But save money and time learning the intermediate app that works almost the same on all the major platforms.

My Pop - A Tribute
My Pop died on Saturday. This is my tribute to the many who taught me a lot about life, being a father and being a man. We all loved him and he loved us and here’s a few of the reasons why.
On Saturday, December 1 my family lost my father. It was the same day that the 41st President of the United States, George H. W. Bush died. That morning I awoke to the news of the President's passing feeling some nostalgia for the good and decent man I believed he was. A few hours later I saw the caller ID on my phone telling me that my sister was calling from Milwaukee, WI. Earlier this year, my dad fell and due to weakness from an illness. My wife and I travelled to see him in March knowing he might not last much longer. It was a good visit. I told him I loved him and was proud of him. I told him he did a great job raising my sisters and me. He served as a good model to me and much of what I learned about parenting came from my dad and my mom, who died 8 years ago. It felt great to see him and tell him those things.Eight years ago when I last saw my mom alive I knew. As we drove away from the hospital, I told my wife, "I think that's the last time I'll see my mom alive." A few days later she died.I didn't think that in my dad's case. I planned to go to see him again some time in 2019. Living more than 12 hours away meant trips weren't easy and I don't like to fly.
Tribute to My Pop
Jim Purcell was born in Detroit, MI in 1936. His mother was a single mom, but soon the man I knew as Grandpa came into the picture and adopted Sydney Hungerford and gave him the name James Purcell. Dad grew up in the latter years of the Great Depression, but didn't remember a lot about that time. He told me stories about living as a child in Detroit during the war. All the car companies that made Detroit a major city stopped car production and retooled to build the war machine that helped the United States defeat the Germans and Japanese during World War II and go on to be come the mighty world super power. My dad would go to the factories and look at the tanks, Jeeps and planes that the company proudly displayed in their buildings. He also told me about the time that he came home after getting bullied by some kids and my grandpa took him out to find the boys. When they did he pushed my dad to engage the boys and beat them up.
A Bridge Between Two Eras of Fatherhood
That fight was an aberration because my dad was such a kind and wonderful man who loved my mom and his children. He grew up in a time when fathers didn’t say, “I love you” as much as people do today, but his actions said it loudly and with a profound certainty for his children and grandchildren. I see my dad as a kind of bridge between two eras. His dad was the kind of man who worked hard, brought him a gruff exterior and believed a man was someone who took no prisoners and was happy to turn someone else's cheek if he deserved it. My grandpa told me some amazing stories one night when I was a small 8-year-old or 9-year-old boy. At the time I thought they were cool stories and I wished my dad was more like this colorful character.As a kid I didn’t always understand my father. I loved him, respected him most of the time except when I was a terrible brat. And I feared him a little bit.My grandpa and I shared a love of baseball and he bought me a glove that I cherished and still have today. My father hated all sports, probably because people like me and my grandfather would bully him because he wasn't athletic enough to do anything on a field of sport.My father, however, did something that men from that former era would not do and something my grandpa probably never did with my dad. He hugged me. He spent time with me. He was kind to me. He showed me how to love a wonderful woman by the way he treated my mom. He cried. He laughed and let us laugh at him. He was one of the first men in America to live as the modern kind, loving father that was approachable and considerate. That's the kind of example of a husband and father I knew I wanted to father.
Pop Got Smarter the Older I Got
No one ever called my dad "Pop!" For some reason my oldest sister called him "Father." That seemed to fit that father from the older era. But it didn't fit the man that he really was to his children. But we still called him that and I still did as an adult.Dad called himself Pop. He would sign his annual Christmas letter with $100 checks for each of his children that way. I never asked him why, but I think it was because he wanted us to see him as Pop. Someone who was here for his children, someone we could talk to about anything and someone who would love us. Or it could be that it was shorter than the word we used - Father.I said before I didn't understand my Father earlier in life. I loved sports and he hated them. Then I became a believer and chose to commit my life to serve the Lord in a full-time Christian service because I believed Jesus deserved that for what he did for me. My dad was angry at God for not helping him keep a job to take care of his kids. He stayed bitter and angry at the God that I loved and wanted to serve. My best friend as a teenager was my Pastor's son and I always imagined what it was like for them to share with one another about their ministry challenges, failure and successes.But then I got older. The more I experienced but joys and struggles of life the more I understood my Father's feelings. He sacrificed, suffered and struggled with the pain of life. He did it all for us. He did this to provide for us and give us a better life than he had. We went through times of little and times of much. And through it all, he was doing his best.I'm not saying I dealt with the same struggles my dad faced. He had it harder than I did and that's because of his sacrifices that put me into a position to enjoy greater success academically, financially and professionally. My mom and dad made me the person I am so that I could enjoy more success than he did in those areas.
College Teacher Who Never Graduated from College
 He did one thing that I always considered amazing. My dad went into the Navy and served his country. He learned to work on TVs and Radios and eventually became an electronics technician. He fixed equipment for TV and Radio stations because he dreamed of being an on-air broadcaster. He got that chance at a local radio station in Wisconsin Rapids in the late seventies. Later he started to work on medical computer systems at a company in Milwaukee. Eventually he landed as an electronics professor at Milwaukee Area Technical College. That's right he was a college teacher and never earned a degree. He was that smart.He eventually retired, paid off his house and helped my sisters and I on occasion with financially support when we needed it.
The End a Beginning
My sister called Saturday morning and told me that, instead of lasting a day or weeks or longer, he lasted only an hour. The first phone call telling me he was not doing well left me cold and numb. This call hit me hard and I bawled. My wife hugged me and my son got home from work and hugged me. My other son who's in college 3-4 hours away cried with me on the phone. All of them showered me with love, but it didn't really help.My biggest fear was that my dad did not believe in God, at least that was what he said to us. Where is he now?Over the years we've talked for hours about reasons he should trust that God loved him and Jesus died for him offering grace. My dad believed that since he suffered in life God was either not there or didn't care. We could see it and it frustrated my mom and sisters. My wife and boys and I also felt it. Why can't he see it?In this last year the wall started to crumble and he said a few things that led us to believe he was softening in his heart possibly knowing the end was near. I think he was re-evaluating this faith, but he never said the words that gave us the guarantee that he repented of his belief and trusted God. Saturday, I saw the beautiful tribute from the cartoonist who drew a cartoon of President George H. W. Bush flying his plane to heaven and receive the greeting of his wife Barbara and four-year-old daughter. Seeing that touching cartoon surfaced my fears. Was my dad greeted in heaven by a loving gracious savior and my mom or something much worse that I can't even say?As a young man my father sang for the Lord. He went to Moody Bible Institute and studied music. He would travel around and sing with his guitar, tell jokes with a ventriloquist dummy named Jerry and do simple magic tricks with one goal, to spread the Gospel.
 When my sisters and I were small one Sunday night there was something great on TV. We never missed a Sunday night worship service. But we begged my dad to let us stay home and watch TV. He wouldn't let us.Christmas often included my dad singing a solo in church. The song was the spiritual Sweet Little Jesus Boy.What if that list continued for the next 40 years instead of ending in the earlier eighties? Then my sisters and I would not worry about my father's passing. My mom died and we cried and hurt, but we also celebrated and knew we'd see her again one day. With my dad we wonder.As an 8-year-old boy my dad quit going to church. He said he didn't believe that God loved him. That continued for a few more years with a brief reprieve in the earlier eighties. Then it happened again after he lost his third job in less than three years. "He's never answered any of my prayers." That's why we were left wondering.Yesterday, I told my deacons that my dad died and explained that getting through this worship service would be tough. I asked them for their prayers. One of those beloved men told me something. It was the second time he said this. He told me that we believe that once you trust the Lord and seek God's forgiveness, you are saved. If our salvation depended on our goodness, he said, he wouldn't be saved right now. But it's not up to us. He told me as I feared up that, if my dad trusted Jesus as a younger man, then God's grace was amazing enough to keep him safe and we should trust that. He repeated it. We should trust that.For months I prayed, God give me assurance if he's safe. God help me know that he is with you, I prayed Saturday afternoon and Sunday morning early. Then that man said those things.I believe it, I think. I'll never get certain factual understanding until I die or Jesus comes back. But until then I trust in the love and grace of Jesus to save me and my mom who made it clear she believed and my dad who once did, but then lost it.There’s nothing I’ve ever done deserve the love and grace of my Heavenly Father. If he can love me and graciously promise me the chance to see Him one day he can do that for anyone. Please live your life in a way that there’s no doubt in the minds of your loved ones that you will see them again in eternity.If that's all true, then this end is only a beginning!
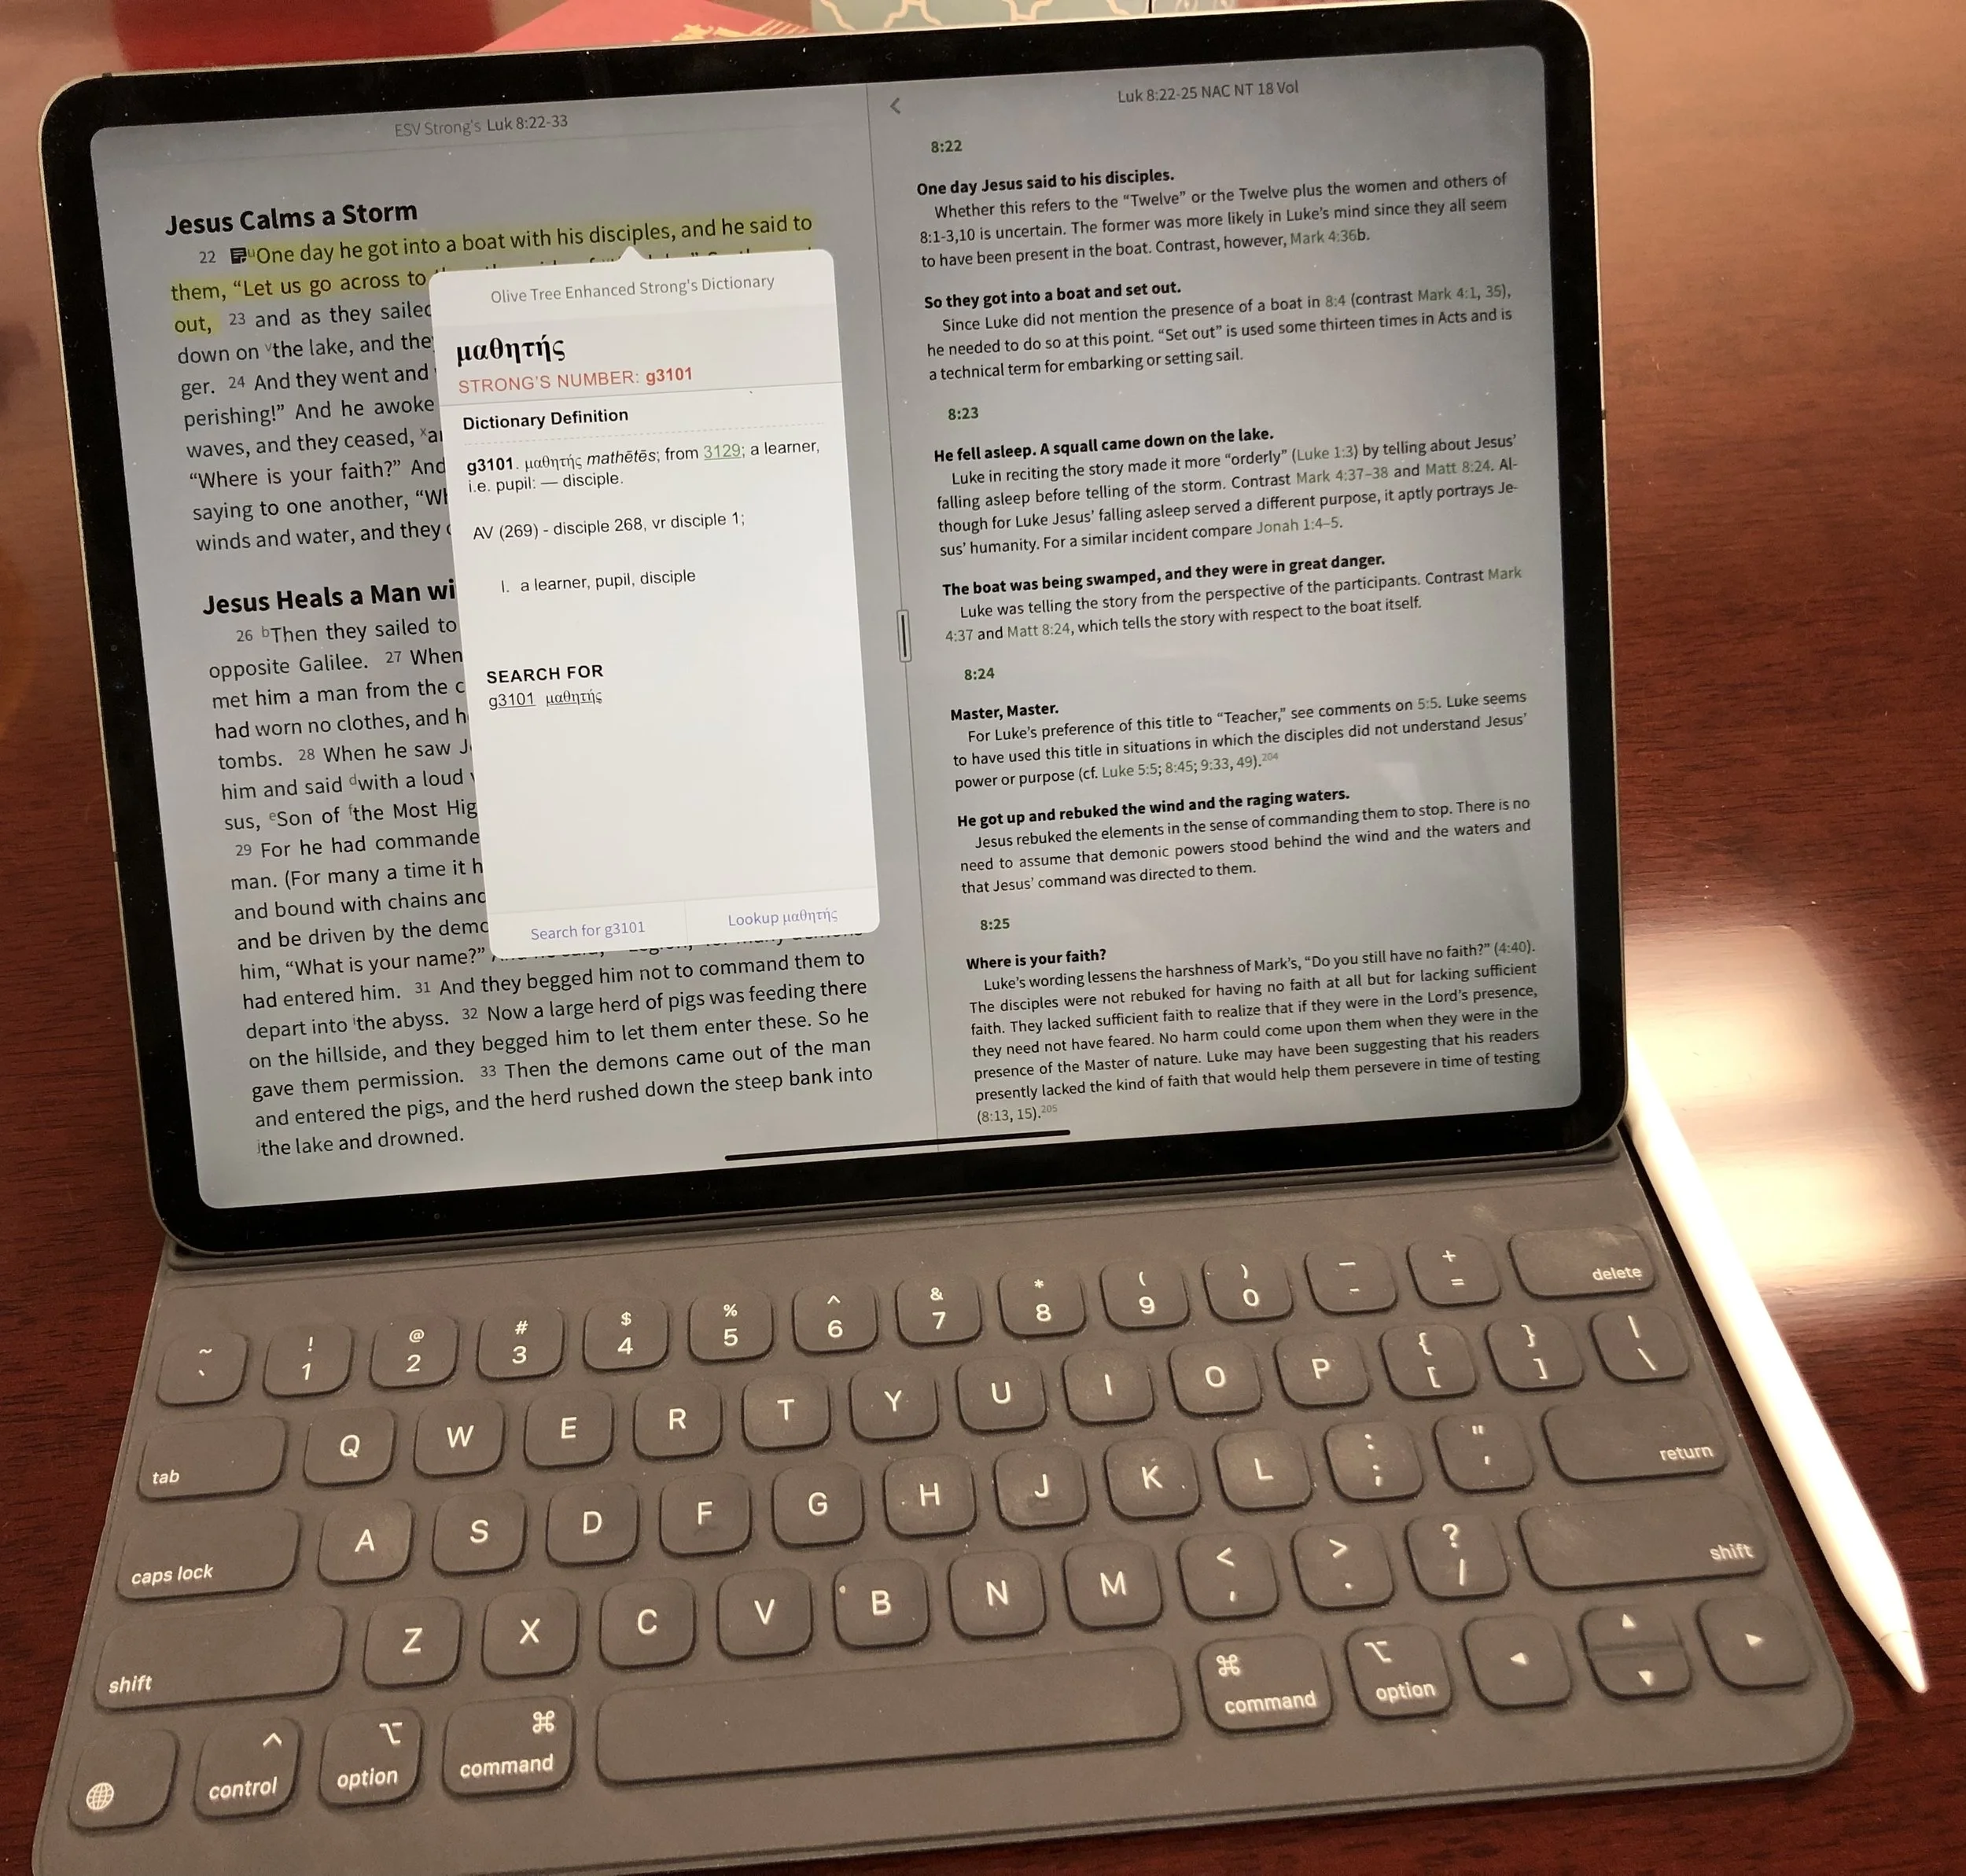
New 2018 Apple iPad Pro for Bible Study
The new 2018 Apple iPad Pro is getting a lot of love from reviewers. How well does it handle Bible study? We’ll look at it from a pastor’s perspective.
The new 2018 Apple iPad Pro is a beautiful piece of hardware and works great for Bible study, sermon prep and general use for pastors and ministers. In fact, I'm really tempted to make it my primary computer for 90% of what I do.
Is the New iPad Pro Better for Bible Study?
Not really! The major difference between the older iPad Pro and the new 2018 Apple iPad Pro comes from the speed and size and the new Pencil. Apple gave it a little facelift to modernize the look.https://youtu.be/HoLs0V8T5AAAn Apple A12X Bionic CPU powers the new 2018 iPad Pro, or as some say it over powers it. That's sounds really cool and gives me memories of Steve Austin, the Bionic Man (see video above) running really slowly as that wonderful music plays behind him. However, there's nothing slow about this chip. I did a review of Olive Tree Bible Study for all the platforms they support. I edited the video on my new 2018 Apple iPad Pro with Luma Fusion, a great video editing app. The video ran about ten minutes and took about a minute to render on the iPad. That's half the time it used to take. It's also faster than Premiere Pro can render a ten minute 1080p video on my 2017 MacBook Pro.In spite of the great speed, the Bible app makers don't exactly require that much power. Few digital Bible students own the new iPad so they can't make their apps to take advantage of the power. However, the faster CPU will help with the initial start-up of apps like Faithlife's Logos Bible app, which does some data crunching in the background after you first start it up.In addition to speed we get a nice looking design with a new keyboard and Apple Pencil. The physical redesign means two things. First, the screen covers more of the front with smaller bezels. That means you'll need to hold it more carefully, however, the accidental touch detection keeps you from accidentally tapping as you hold it and your thumb or fingers accidentally touch the screen. The iPad weighs a little less and takes up less space in your computer bag, if you use one. However, you wont notice that unless you hold them side-by-side. I like that the new Apple Smart Keyboard now covers the back as well as the screen. The screen's beautiful, which makes it a great tool for Bible study. Reading text on a screen for long periods of time requires a high quality screen with great resolution and excellent contrast.
Apple Pencil and Bible Study
 Why won't Bible study creators integrate the Apple Pencil or any stylus in their apps? It would feel so natural to add a handwritten note or highlight with the Pencil. I would love it if the Bible apps would recognize the Apple Pencil and put the app in a special mode where anything the Pencil writes would get saved as a vector drawing attached to the verse or the paragraph with an indicator icon, like they do with text notes now.Developers working at some of the Bible app makers tell me that adding drawing is not a simple thing. Do they spend limited development time on something that a small fraction of the population can take advantage of or on features in great demand that a large percentage of users want? However, I think that the first Bible app maker who figures this out will really stand out and could easily demand a nice premium for this.Until some app maker puts my inking dream into reality, we'll have to use the Pencil as a glorified finger, pointing and selecting. The tip is finer than my man paw fingers. So, I can get more fine pointing with it than I can with my massive digits.
 I love that the Pencil snaps into place on the edge of the iPad Pro when not in use. it also charges wirelessly so that it's always ready to go. The old Pencil would use battery power even while not in use. You had to charge it by plugging into the Lightning port on the bottom/side fo the iPad. This was awkward.I use my iPad for presentations during Bible studies. The Pencil lets me ink on the slides of Bible verses. Sometimes I would plug in my cable to send the video signal over a Lightning to HDMI adapter to our projector. The old Pencil would lose it's connection and if I forgot to plug it in before each Bible study I often had to do without or unplug the video cable, something not ideal while a room of 20-30 people are staring at the screen.The new 2018 iPad Pro and Apple Pencil solves most of these problems. However, carrying it around with the Pencil along the edge makes me nervous. I hit the iPad in just the right way with a hand or my side while carrying it and the iPad goes flying off. Today it landed in a puddle and scared me to death. I can share that a puddle won't destroy the Pencil immediately. We'll see if it has an effects over time.
Writing on the Apple Smart Keyboard
 The new Apple Smart Keyboard is both smaller and heavier at the same time. The old keyboard felt like folding origami at time, especially if you tried to use it as a stand with the keyboard on the back. The new Smart Keyboard's simpler. The special connector sits on the back of the iPad. The new keyboard has two grooves that the long edge of the iPad sit in. This gives the user two angles.
 Since the new 2018 iPad Pro measures less width than the old one, the keyboard does too. However, the keys go edge-to-edge so you still get a comfortably sized keyboard for touch-typing. I can work on it for a long time without problem. The keys give you enough travel to feel nice while typing. I actually type more accurately on my iPad than on my MacBook with its terrible butterfly keyboard.
Conclusion
Using the new 2018 iPad Pro for my work as a pastor is an improvement for a few reasons.
- Smaller size
- Better Apple Pencil
- Nice keyboard
- Excellent display
- Super fast processor
If you own the most recent iPad Pro, then I don't think this thing's enough of an upgrade to make the jump. It is a big change, but can you justify the expense when your "old" iPad will last you for many years to come. I upgraded, but I'm crazy about having the latest greatest.People who own an older iPad or who don't have one now and want and iPad for doing a lot of their work can with this iPad. Here's a few things I enjoy more on my iPad Pro than on another device:
- Editing video
- Typing
- Playing games
- Casual web surfing
- Short stints of reading
- Checking email and social media
However, I'll still prefer my MacBook Pro over my iPad for the following:
- Serious Bible study with desktop class Bible software instead of mobile apps
- Creating slides for my sermons/Bible study presentations
I don't use it for long stints reading. The Kindle Paperwhite works best for reading for extended periods of time. The TV is my choice for watching movies and videos; call me old-fashioned.What would it take to use the iPad Pro 100% of the day? The Bible apps have to get better. Mobile apps do a better job today than they did when I bought my first iPad back in April 2010. I'm not very good at creating my slides on the iPad, but I hope to get there. I could if I was better with using Affinity Photo, which is good enough. But using Adobe Photoshop on my desktop is easy because I have a decade of muscle memory that helps me do things quickly.

iPhone Xs Not Enough to Get My Cash
Apple announced some new phones on September 12 with the Apple iPhone Xs. They also shared their new super iPhone, the iPhone Xs Max and a colorful iPhone Xr. None of these new devices inspired me to open up my wallet or reach for my credit card to pre-order this week. And I will likely skip this round altogether.
iPhone Xs Not Revolutionary Enough for Me
 Last year the iPhone X came out and it looked kind of cool, except for the stupid notch. It still left out the headphone jack, which surprised no one. This time around we get the same design with minor changes. Another notched design without a stereo jack. Rounded corners and no fingerprint reader.
See last year's Apple iPhone launch post and podcast from KevinPurcell.org
I waited to buy one till my youngest son broke his Samsun Galaxy S7 and decided he wanted to jump back on the Apple bandwagon. I didn't plan to buy the X at all, at least not the first generation. But, he needed a phone and we do the tech hand-me-down thing where dad gets the cool new tech and mom or the younguns get last year's tech. So Daniel got my iPhone 7 Plus and I bought a black 256GB iPhone X.https://www.youtube.com/watch?v=9m_K2Yg7wGQHere's what I didn't like and do like about the new design...
- Notches are stupid - why is this a thing? It doesn't really add much screen real estate. One developer I spoke to said the usable space for his app is actually slightly less on the iPhone X. It's a minor thing, but I still don't like it.
- Lightning to stereo dongles - Uggh!! I really hate dongles. I bought five of these so far because I need one for my car, one for my backup ear buds and one for a device I use that plugs into the headphone jack, or used to. Plus I lost two, so that makes 5. That's over $50 of dongles when you add tax. I could use the ear buds that came with the phone, but I hate those too.
- Design - the phone just looks cool! That doesn't matter as much to me as function, but I like how it feels and looks in my hand.
- FaceID v. Fingerprint Reader - I like how fast I can open my phone and don't mind the new gestures, which did take getting used to. However, I miss the fingerprint when I'm in the car waiting for my wife to get out of a store. I tap the screen and have to enter my password because my dock sits at an angle where the camera can't see my face. We get the same problem when it's laying on a table or desk next to my computer.
- It's an iPhone - I love Android, but I also love iOS. I'm a weird one. It's like cheering for the Packers and the Bears. I don't do that, but some people see my Android and iOS fandom as the same way.
- Great camera - the iPhone camera's great. I quit carrying a Sony Nex6 and eventually sold it. I gave my DSLR to my son who's now a photography student in college. Besides my DJI Spark drone, the only camera I own is on my phone.

- AirPods - These are the best thing Apple shipped in the last ten years. They're not the most comfortable, but I got used to them. They generally stay in my ears, unless I'm moving around a lot. They sound very good and last long enough to get through my morning. I plug them back into the battery carrying case and get enough to get through half the afternoon while I'm eating lunch. The case is awesome. They magnetically snap into the case so they won't fall out even if I accidentally open them. The lid snaps into place with magnets too. The case charges with the same lightning connector that charges he iPhone or iPad. Did I say I love my AirPods? At $159 they're expensive, but the design, sound quality and battery makes them worth it.
- Apple Watch - I used to carry a Samsung Galaxy phone and wore a Gear S3 watch. I love that watch, but I equally love the Apple Watch. I wish it showed the time all the time, but I like the way I can tap or draw to respond to text messages. It has pretty accurate movement tracking. Plus it looks better than the Samsung watch.
- Apps - While Android app developers nearly caught up, the same apps in iOS usually run better with more stability. And I beta test a number of Bible apps and the iOS beta testing works better with Testflight, an app you can use to install beta apps instead of always installing the latest beta from the App Store, which you have to do with Android.
 The iPhone Xs or Xs Max comes with some new features. We get a better screen, upgraded camera that's also faster, a new 6.5-inch model on the Max, a cool new gold color that looks amazing, and of course faster stuff. The processor and wireless runs faster and so does the video processor. The dumbed down the iPhone to come with a cheaper iPhone Xr with lower quality screen and colorful options.Unfortunately, none of these new features makes this a compelling upgrade. I'd love the larger display for running Bible study apps, but I can wait till I need a new phone in a year to 18 months when my phone hits the 2 to 2.5 year-old mark.A new Apple Watch looks compelling, but not enough to jump from my Series 3 Apple Watch. I like the idea of a ECG built-in. What if my heart starts acting up? Maybe the watch would save my life some day? But not yet since I'm not going to pay $400-$500 for a new heart monitoring feature plus a new slightly larger display and rounder design. Again, maybe in a year and half I'll jump.They are stills selling the iPhone 8, but who wants to go backwards? I don't hate the notch and lightning only audio that much.
What Apple Could Do to Take My Cash?
Here's what it would take for Apple to take my cash before fall 2019 or later?
- An iPad mini with Apple Pencil Support - I'd love a small 8.9-inch iPad that works like the new iPads. The $329 iPad supports the Apple Pencil. It doesn't come with the same pressure sensitivity. We also don't get the magnetic connector that snaps into the Apple Smart Keyboard cover. That's okay. I'd love for a smaller $329 iPad that has all the same specs as that iPad but smaller.
- iPhone with Apple Pencil Support - Can you tell I like the Apple Pencil. I wish the iPhone Xs Max had support for the Apple Pencil too. If they did that in addition to the new stuff in the Xs and Xs Max, then I'd sell my current phone and buy the new one.
- iPhone with TouchID and headphone jack - It's not going to happen, but if it did...
- Great new revolutionary design that I can't imagine but wish Apple could - I'm not sure what this would be, but I also couldn't imagine they'd come up with the iPad and they did. That design changed tablets forever in a very positive way. So, wow me Johnny Ive!
- Mac mini update - I would love a new Mac mini with a 500+ GB SSD and faster current processor that's smaller and has USB C all for about $700.

Print or Digital Bible App: Which One Is Best?
What kind of Bible should you use? Some believe the traditional print Bible has special value over digital Bibles. While others prefer to use a digital Bible a lot, most or even all the time. I have to admit I fall in the second group and only use my print Bibles on occasion.
Strengths of Print over Digital Bible Apps
Recently Trevin Wax wrote a post for The Gospel Coalition entitled When the Bible Becomes an App. In it he argued for a number of reasons why people should still use a traditional physical print Bible, like the ones Wax’s organization publishes, because of the special value. He says the following strengths means most people should go with this kind of Bible...
- The beautiful format of a high-quality leather Bible shows the value of the words included.
- A small pocket-sized New Testament gives us quick and easy access saying something about the value of the word leading the owner to keep it always on hand.
- A book containing all the books of the Bible tells us that the canon of Scripture and the story’s wholeness in a single book.
- The print edition of the Bible lends itself better to "deep reading" instead of quick, skimming, "surface reading”.
- You lose the “Bible’s geography” meaning the feel for where the books are in the print edition or where the verse is in a book.
- The print edition opens us to the will of God on the page better than the print version.
This is a quick summary of the arguments. You should really read Trevin Wax’s article for your self.
A Rebuttal from a Digital Bible App Maker
Craig Rairdin from Laridian, a Bible app publisher, took exception with Trevin’s articles in a post on the company's blog. He offered a useful point-by-point argument for Digital Bible Apps, like PocketBible from Laridian. Please read it and consider his great points.To summarize, Rairdin says that most of the points above are not strong arguments against digital Bibles, but against certain forms and functions in Bible apps. For example, the argument that the reader can go deaper i print comes from studies saying that using digital print means readers retain less. However, Rairdin points out that other studies say this is so only when the user scrolls the book and not when they use a paginated Bible app. I’m not sure why that would make a difference, but a study said it did.
My Opinion
Both arguments seem convincing. I prefer using a digital Bible app on my phone or sometimes on my tablet for a few reasons.
- Convenience - I always have my phone and it’s small enough to fit in my pocket. Since I can carry my Bible on my phone, I always have access to multiple translations. When one preacher reads from the KJV, I can follow in that version. Another reads from the NIV and I can follow in that translation.
- Weight - Like convenience, I can carry a seminary calibre library in my pocket on my iPhone X. I can’t even conveniently carry two Bibles and a full commentary set plus a Bible dictionary, atlas and Greek or Hebrew lexicons.
- Complexity and Speed - Rairdin pionts out that he can do some advanced Bible study while he’s listening to another speaker teach a lesson or preach a sermon on a passage. I can’t do that on the spot.
The above three arguments are all versions of the same argument. It’s more convenient to follow various translations, do advanced Bible study, and always have my Bible and library with me using a Bible app.I still keep a Bible in the pulpit with me when I teach or preach. It’s a kind of prop, to show the value of the word of God. It also reassures people who do not like the idea of giving up the physical Bible. Plus, if something ever goes wrong, I can always open the Bible to my passage and muddle through my message from memory.What do you prefer? Let me know below and why.
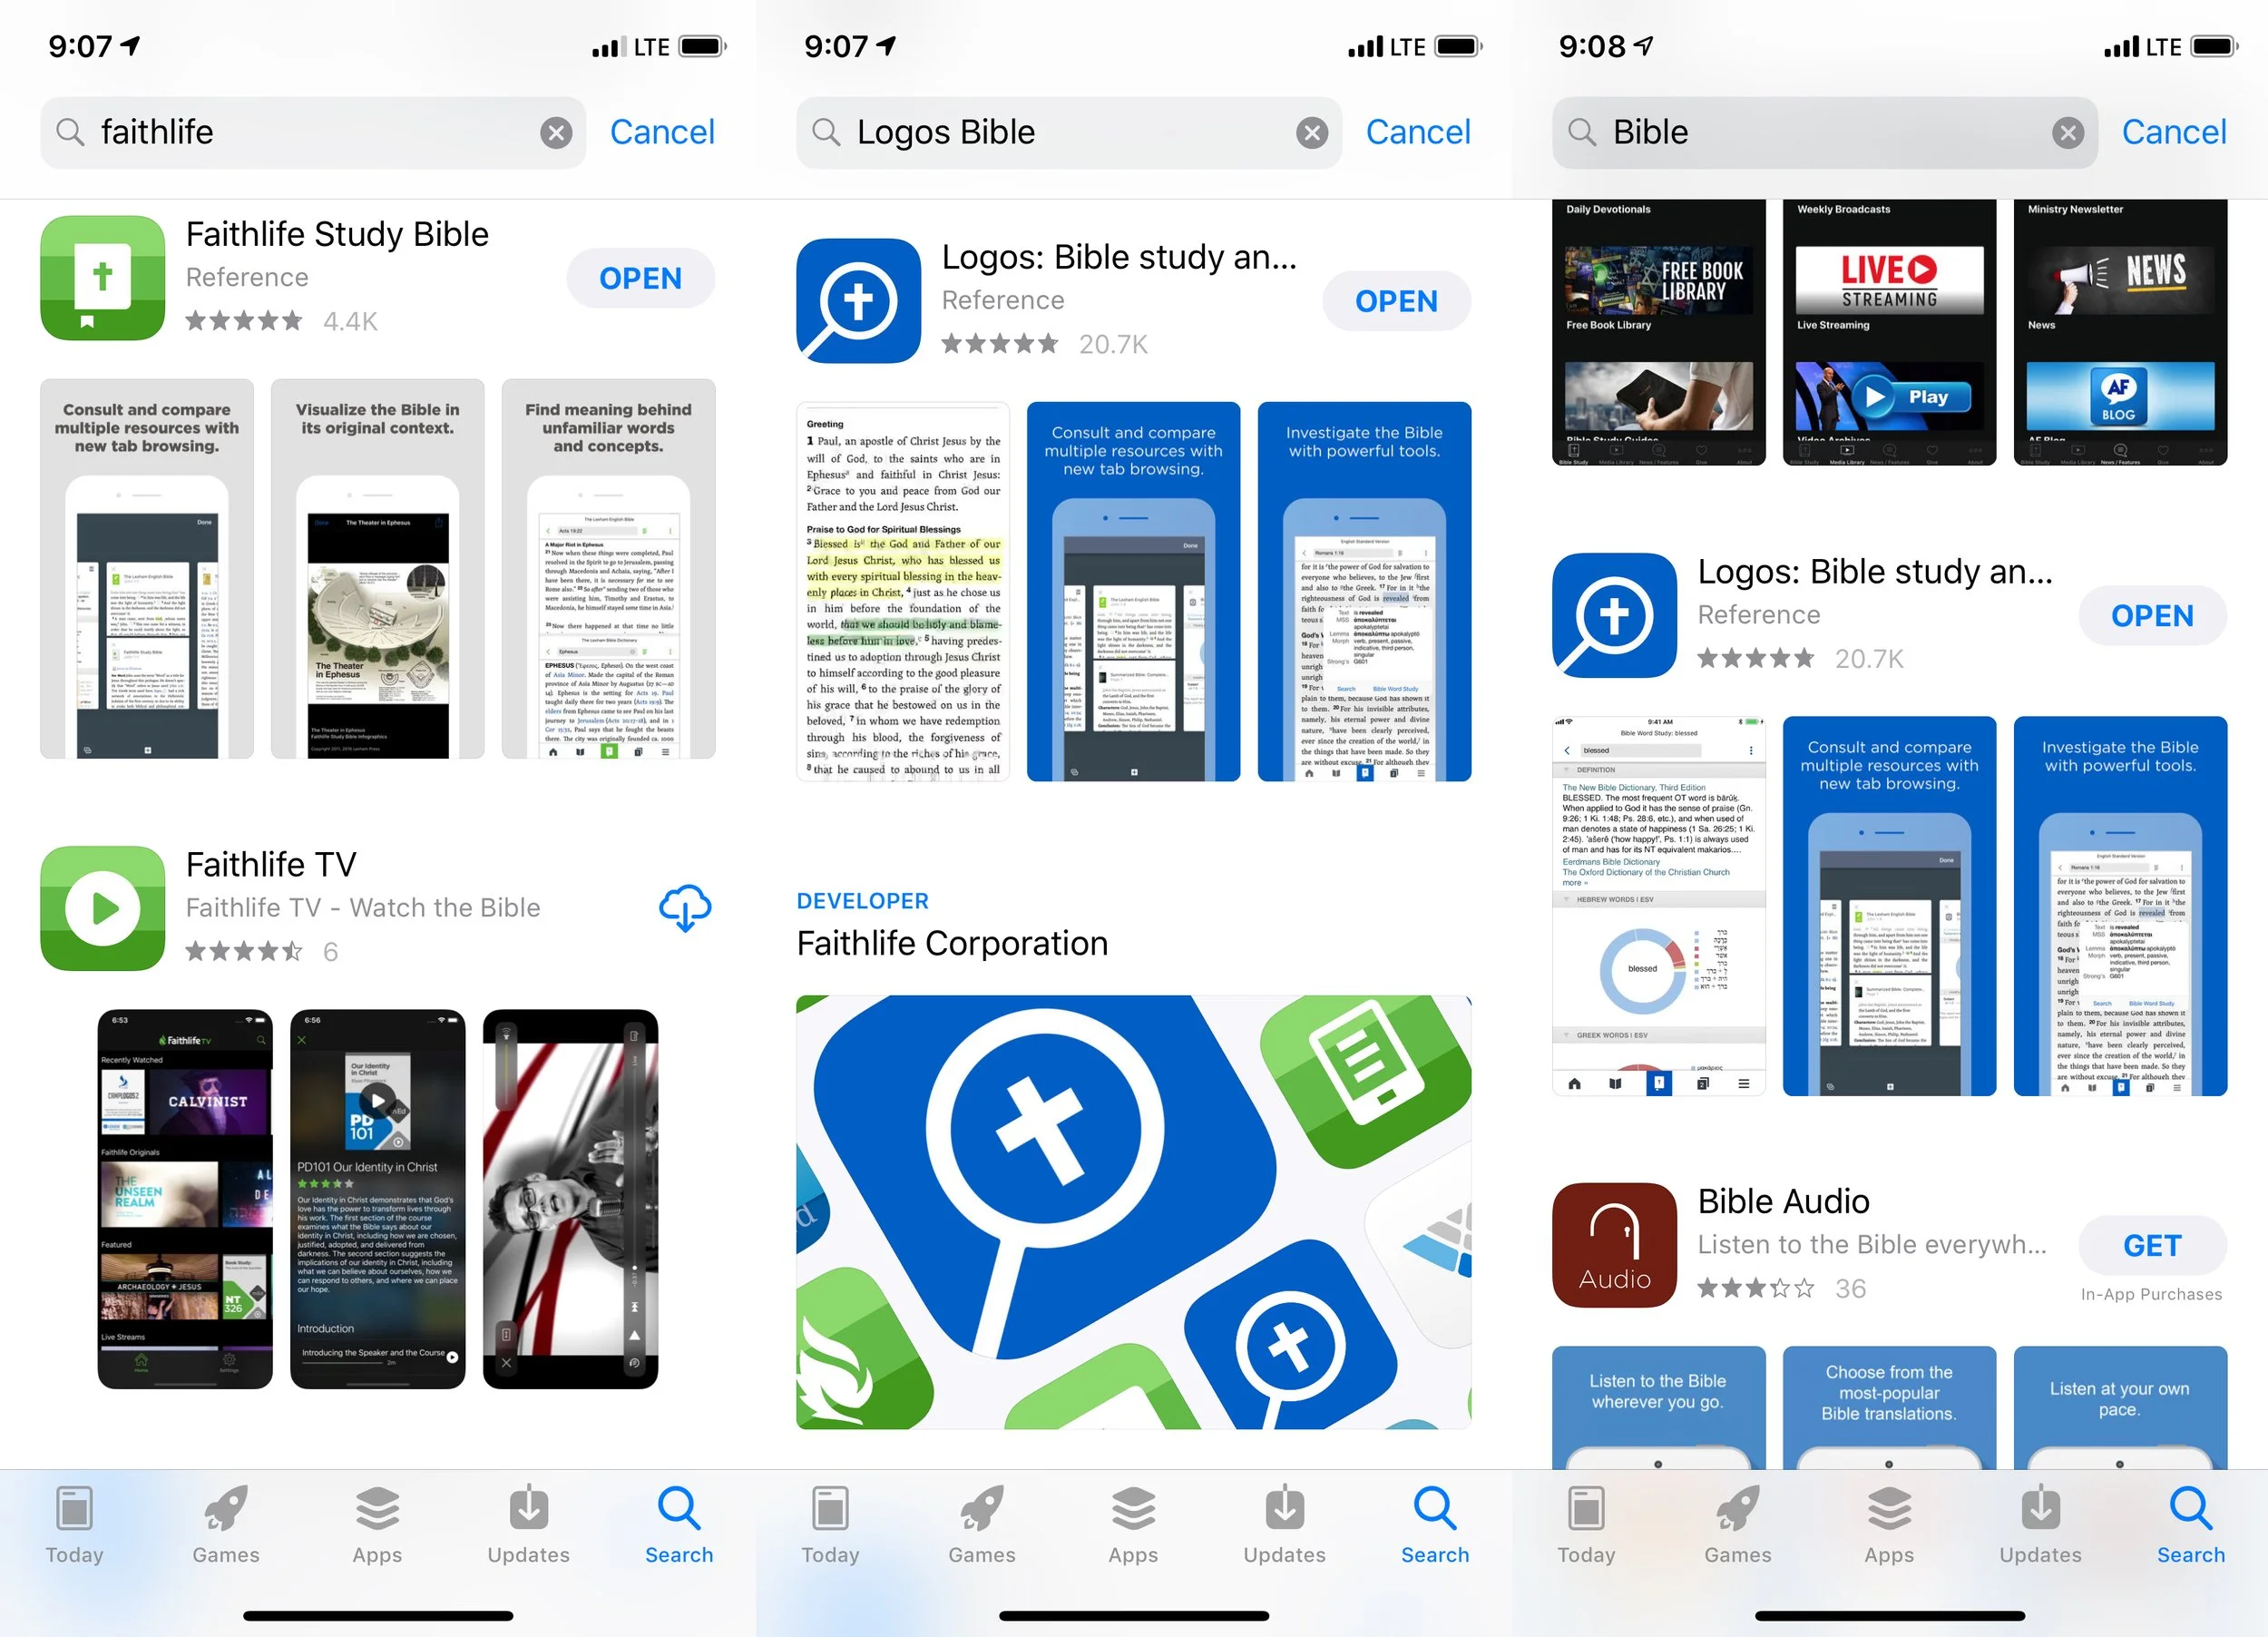
Which Logos Bible App Should I Use on My Phone or Tablet
What Logos Bible App should I install on my device? When a new user enters the Apple App Store on their iPhone or iPad or the Google Play Store on their Android phone, tablet or Chromebook, they might search for Logos or Bible or Faithlife, if they know the name of the company that makes Logos. They will discover a handful of apps. Which one should a new user install?

Let's take a look at the various apps and see what each one does for the user. This will help you decide which one to install on your phone, tablet or Chromebook.
Logos Bible Study Apps
First, let's consider that Logos offers more than just Logos Bible Study apps. They also have an app for their Faithlife TV service, their Faithlife social network, and to control their Proclaim worship software presentation. If you're looking for a Bible study app then you don't need to bother with these.
In the screenshot above the heading, notice in the center screenshot there's a section labelled Faithlife Corporation. You'll find this in the Apple App Store on your iPhone or iPad. Tap on it to see all of the company's apps. You'll see on the next screen the list of all their apps. A section of this next screen reads Apps. You'll see the following listed:
- Proclaim Remote - controls the Proclaim worship software by connecting the phone to your computer running the software.
- Faithlife TV - shows videos that Faithlife distributes including training videos that fit in their Mobile Education tools. Think of Mobile Education as online seminary without the accreditation.
- Faithlife Ebooks - this shows books that a user might own. Faithlife sees this as a kind of Kindle for Christian books. You can see all of your commentaries, Bibles, dictionaries and more if you want. Or you can set it up only to show you Christian Ebooks, like the latest from Max Lucado or Charles Stanley or Christian fiction. It's not a serious Bible study app, but useful for reading books.
- Biblia! - Spanish language Bible study app. Serious Bible study for Spanish speakers.
- Verbum Catholic Bible Study - a scholarly approach to Bible study from the Catholic perspective. If you're Catholic and want to do serious Bible study, then this is your app.
- Note Classics Research App - a scholars app focused on classic works for serious scholarly study in original languages and English.
- Bible Screen - seems like it was made primarily for the Apple TV but works on a phone or tablet tool and shows artwork with inspiring Bible quotes. Save them as Wallpapers or share them to social networks. One nice feature: Fits My Device, which lets you choose your phone's screen size or device model.
- Logos Bible Study - the first and primary app for studying the Bible in preparation for sermons, Bible studies or for scholarly and personal study.
- Faithlife Study Bible - think of a study Bible only on your phone. It's the best app for people who just want a good free app for reading and doing personal study on their phone or tablet.
- Faithlife - social network for the mobile device. Take a look at the Faithlife groups you subscribe to on their Faithlife.com website or create a group for your church.
- Flashcards for Greek and Hebrew - does what it sounds like. Great for students learning one or both of the languages.

You'll find the same list of apps in the Google Play Store.
Which App To Use?
Assuming your looking for a Bible study app and can't figure it out from the list and descriptions above, here's my recommendation. This list doesn't include anything buy apps for studying the Bible or book reading.
- Logos Bible Study - most people will want to use this app. However, there are some exceptions to that.
- Faithlife Ebooks - if you just want to read books and not study the Bible, then get the Faithlife Ebooks app. You might want to get both of these first two apps. Use the first for Bible study and the second for reading fiction or Ebooks.
- Faithlife Study Bible - if you don't need to study the Bible for sermon prep, scholarly papers or your just a hardcore Bible nerd, then get the Faithlife Study Bible app. It's also the best app for people who don't want to buy anything. You just want a study Bible on your phone for church and reading.
- Noet or Verbum - get these if you want to study the classics or you're Catholic.
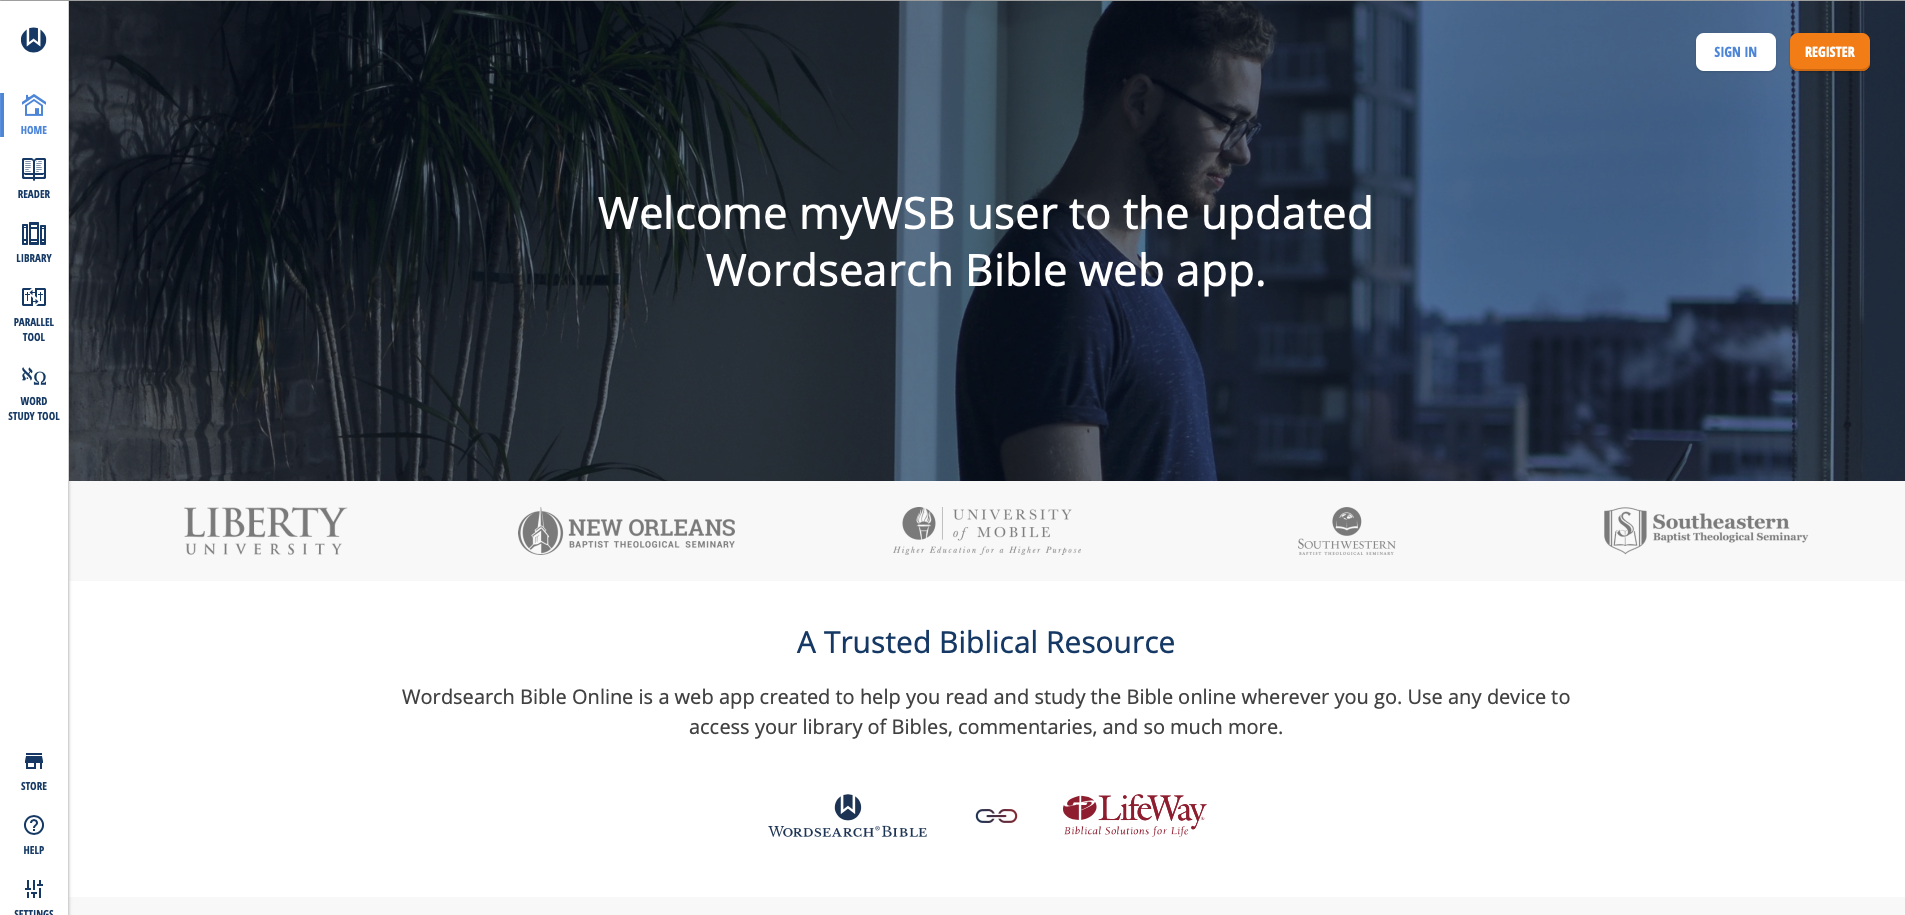
MyWSB Brings Wordsearch Bible Software to the Internet
Wordsearch has a new online Bible study website called MyWSB.com. How good is it and can you use it instead of their mobile apps?
Lifeway updated the MyWSB website for a better online experience for Wordsearch Bible Software customers.
If you use an iPad or another tablet or you own a Chromebook then using Wordsearch Bible Software wasn't possible. They offer a simple book reader for iOS and Android, but it's not enough for most students of the Bible. The MyWSB web app doesn't give us everything found in the Wordsearch 12 program for desktops and laptops. However, it's better than what you get with the iOS or Android mobile apps. They're pretty horrible for anything other than simple book reading.

What's New in MyWSB Wordsearch Online?
What's new in the online app? Most important, Wordsearch updated the user interface. Take a look at the screen shot above and you'll see the modern look. Sign in and see the home page that offers news about the website. Along the left there's a sidebar of links represented by icons. That's where you access your tools for Bible study.
Here's what each icon does...
- Home - shows the main page seen above.
- Reader - the reader lets users open books and read them with window panes (see more below).
- Library - see all the books in your library with categories of books along the left and cover icons in the main section.
- Parallel Tool - opens a window pane with parallel bibles in the Reader.
- Word Study Tool - opens a Word Study Tool pane in the Reader.
- Store - towards the bottom fo the sidebar we see the Store link where you can find new books to add to your library.
- Help - learn how to use MyWSB.
- Settings - change how the app works.
- Profile - manage the Lifeway account profile details.
The MyWSB Reader

The Reader will display your books in window panes with a toolbar. The toolbar has navigation buttons with back and forward buttons represented by large left and right pointing block arrows. These go back and forward one chapter in the Bible or section in a book. They sit at extreme ends of the toolbar. There's also a thin back arrow button that takes you back to the previous passage displayed. There's a table of contents that shows a list view of the contents of the book. Bibles or books tied to passages also have a menu that shows a grid-based book/chapter/verse chooser menu.

There's also a button to search the book or Bible. The small AA button decreases or increases the size of the book's font. And the full screen button sits to the right of that.
On the top you see name of the book open in that window pane. Left of the name is the book's info button. On the right end of the title bar you'll find a bookmark button, which opens the bookmarks toolbar. The next button returns to the regular toolbar described above. Then there's an X that closes the book.
The user can resize the window panes using the handle seen in the center of the screen in the screen shot seen under the section heading.
If you highlight some text in a Bible or book, a new toolbar appears at the bottom. It gives options to highlight the text, bookmark it, add a user note or copy a link to that verse. The link will take the person who clicks it back to this spot on MyWSB.com.

Regular readers of this page will know I am a Bible study notes afianado. The notes tool in MyWSB are pretty basic. You can type in basic text, add tags and that's it.
Word Study Tool

Some Bibles support Strong's Numbers. These books also have a button to show or hide them inline. Also, some books support displaying the Bible in paragraph or one verse per line. Those books have a button which toggles that method of display. See the NASB95 above with the Bible in verse-per-line mode and with Strong's numbers showing.
The Word Study tool is open on the right. It shows the Strong's concordance entry first. Then we see a section named Dictionary Reference. It has the dictionary entry showing a transliteration of the Hebrew or Greek word, a phonetic pronunciation, and the dictionary definition. You can choose which translation with Strong's tagging you want to use. The drop down is in the toolbar at the top of the Window.
The final section shows the Usage Study section. This lists all the entries of that word in your chosen Bible. Expand each book of the Bible to see the references for that book. The Word Study Tool will show the text of the verses in your chosen translation.
Combining Lifeway and Wordsearch Accounts
The other major change in MyWSB comes in the account backend. Ever since Lifeway bought Wordseach, they've wanted to combine accounts so that users have one single sign-on email and password. Finally, they've achieved that with this update.
In the past users had to link their two accounts. Now, after they link them one time, they will use their Lifeway user account to log into MyWSB.
Better Mobile Browser Support
The website works much better on a mobile browser. I use an iPad Pro for sermon prep and the iOS app doesn't work that well. From now on I'll use the MyWSB app. In fact, I created a website app icon on my iPad home screen.

Add a bookmark to the Home Screen on your iPad by tapping the share button on the Safari toolbar. Find the Add to Home Screen (black box with plus icon in center of the second row above). The Home Screen icon's not very attractive. Lifeway needs to fix that with a better site icon.
My Evaluation & Recommendation
I really like MyWSB.com for online Bible study. Logos really stepped up their game and they offer an excellent tool, but Wordsearch users will find a lot to like about this site. They site is simple to use and has enough features to make it useful. You can do nice Word Studies and general reading. Make sure to check it out.
I'd rank MyWSB second on my list of favorite online Bible study tools ahead of Bible Gateway and below Logos. That's only because I have a large Logos library and it has more advanced Bible study tools. It also syncs with their mobile and desktop programs.

7 Great Sources for Sermon Illustrations
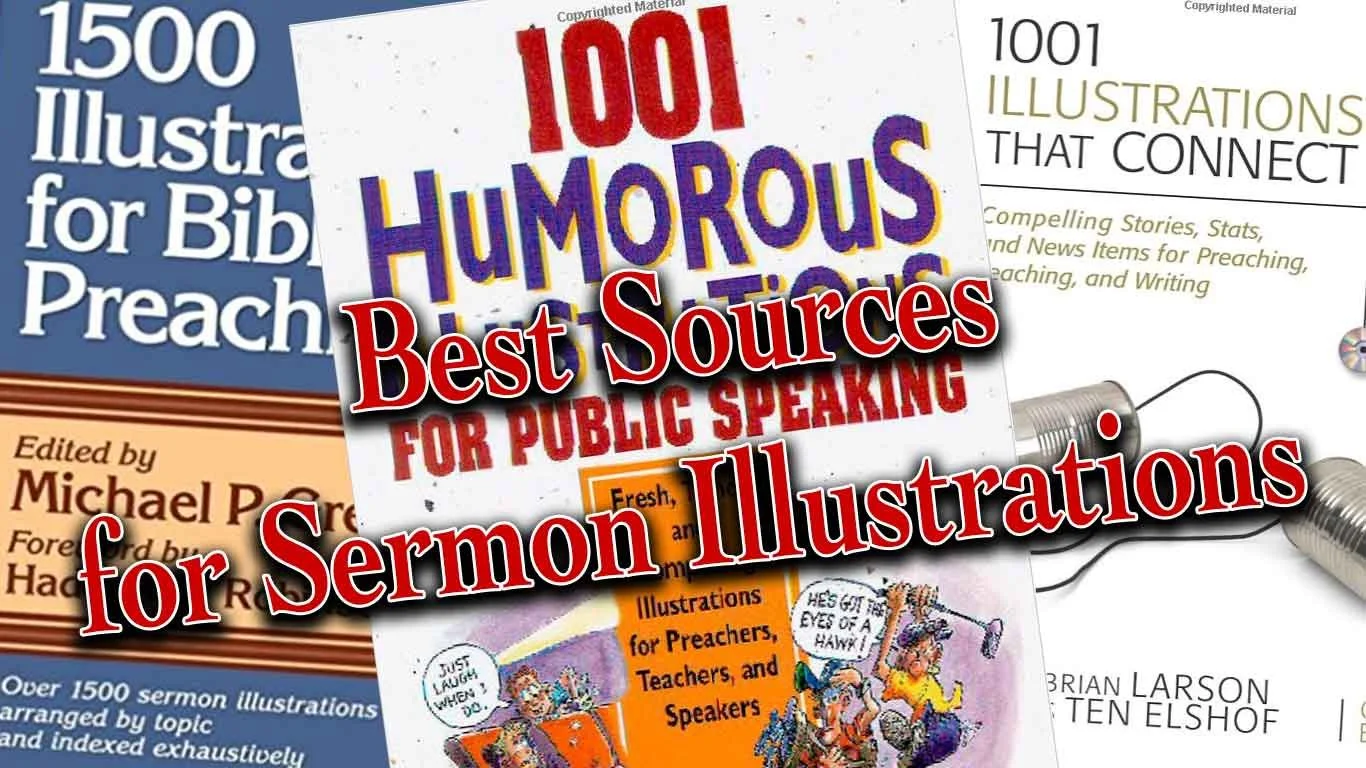
Do you need to find the perfect sermon illustrations to bring life and grab attention for the message for modern-day listeners with limited attention spans? I do and so I seek them from many sources, but a few websites help me find them.In the old days preachers would sometimes find sermon illustrations by consulting books that collected these illustrations by topic and sometimes by scripture reference. These books often suffered from a big problem; they were stale and usually dominated by old missionary stories or quotes of preachers from the 19th century. However, we still bought the books because in Saturday night emergencies we might find something we can use. These illustrations seldom will amaze listens, but they'll get the job done.
Problem with Sermon Illustrations Sites
Today's sermon illustrations databases suffer the same problem as those old illustration books. They can get stale and don't always show us the most interesting or exciting stories or quotes. There's good news because website publishers can update them. Some will also ask users to give their own sites. A few of these offer an incentive, like paying them or giving them access to the site at reduced or free rate.Aside from poor content, users struggle to search the database effectively. Google has billions of dollars to throw at improving their search features, yet they still fail more than succeed in delivering quality results on page one. It's no wonder that even the best funded sermon illustrations websites still struggle to produce useful search results.In spite of the weaknesses of these sites dedicated to sermon illustrations, we'll look at the best sites for finding good sermon illustrations. Not all of them will be these dedicated illustration database sites.
Preaching Today
 My favorite website for finding sermon illustrations comes from Christianity Today. PreachingToday.com gives preachers more than a database of sermon illustrations. It includes...
- Sermon Illustrations - database searchable by keyword, scripture passage and general search. It shows passages that it might fit and topics for preaching. Some even include links to photos that the preacher can display as part of a sermon presentation. If it refers to a movie scene it gives the scene time code (when it occurs in the movie).
- Sermons - database of sermons also searchable the same way the user can search illustrations database with both outlines, sermon series and full text sermons. Search by text, theme, or key word.
- Skill Builders - tips and articles for improving the preaching craft. This can include creative ideas for preaching, tips on how to preach better and more.
- Holidays - section devoted to both holidays and events of the church year like baptism, funerals, etc. that groups all the content available (Illustrations, sermons, videos, and images) by holiday or church event.
- Videos - videos that churches can use in their church if they do presentations.
Preaching Today doesn't come free. Get one year for $69.95 for two for $119.95. You can get some things for free, but not a lot. I pay for a subscription gladly because I have found plenty of fresh and interesting illustrations. Here are the site's strengths:
- Fresh illustrations
- Narrow the search by things like...
- Kind of illustration - the source, audience, type (humor, quote, stats, stories, et. al.)
- Word or Phrase v. Keyword - search the text of the illustrations for the word grace or find all illustrations about keyword grace even if it doesn't include the word grace itself.
- Searching for illustration also searches the other areas (sermons, videos, and more) and shows them in tabs at the top fo the page.
- If you use an illustration you can record this and it will remember that you did so you don't reuse them repeatedly.
Now for the cons:
- Sometimes a search returns illustrations that doesn't really seem to relate to your topic, keyword or passage even though they claim to.
- The cost of the site will keep some from using it.
I often find a true story on Preaching Today and then I'll do a Google search of the story, especially if it's a news story. Then I can fill in details and rewrite the illustration to better fit my preaching idea. I can also find media that fits to display during my sermon. Of course obey all copyright laws.
Google News
As I said above, I'll often find a good news story in a sermon illustrations from Preaching Today, but I need more information. I'll head over to Google and do a search. When. the main page shows few valuable results, then I click on the News tab and often find more pertinent information.Google News will let me find current events to illustrate my preaching idea. This gives the sermon fresh content and they'll come alive in listeners' minds. That's what makes Google News such a valuable tool and it's free. In the example above (see image) I searched for the term "redemption". We get some dictionary definitions and then link to the Internet Movie Database description of the movie titled Redemption. Down the page (not seen above) the results offered very little useful content. I can keep clicking for the next page of results or I can click on the News tab (see the middle tab in image above) and it shows stories about redemption.The second result took me to a NASDAQ news article about redemption of "senior notes". Reading the article helps me think the term redemption as a financial concept, which sparks ideas about relatable sermon illustrations. People might not understand the concept of this article since it covers complex economic issues. However, it serves to spark thoughts about more relatable ideas like covering debt to "redeem" someone's property that might be in foreclosure. I have a friend and family member who went through this. I can relate to it, so many of the people in my audience probably will too.
WingClips
Movies dominate culture, especially very popular blockbusters. They often include interesting scenes that we can use to illustrate our sermon ideas. WingClips partners with the movie studios to let users show these clips without breaking copyright laws. Along the left hand column you'll notice the themes they cover and it shows the number of clips on that theme. You can also search for clips by keyword, movie title, category (meaning film genre like action adventure or animated) and scripture reference. The scripture reference doesn't always work. I'm preaching through Ezekiel so I clicked on Ezekiel 7:25-26 since I'll soon preach that text. WingClips had a link for that passage but showed no results. Stick with the themes. I searched for redemption and came up with a number of useful clips from movies like Les Miserables, The Mummy and Courageous.Most of the clips come in HD and show user ratings (5-star scale) along with written reviews. Preview the clip and see other clips from the same movie on a clip page.WingClips offers some free illustrations and a free subscription. However, to really get the most out of the site, you'll have to either subscribe or pay for clips. They offer subscriptions either monthly or annually. See the image below for costs.
  Monthly subscription prices are as follows:
- $10/month for one clip a month.
- $16/month for 2 clips a month.
- $29/month for 4 clips a month.
If you prefer to save money and will pay annually the cost as follows:
- $89/year for 10 clips a year
- $165/year for 20 clips a year
- $299/year for 40 clips ay ear
If you prefer, you can buy clips one at a time without a subscription. They cost...
- $15 for one clip
- $25 for 2 clips
- $48 for 4 clips
- $219 for 20 clips
Compare paying monthly, annually to buying clips as needed and you'll see that you save some money by subscribing annually. I'd suggest starting out by subscribing to the 10 clips/year and then buy more clips as you need them. If you find you're using more you can upgrade to the 20 or 40 clips per year at any time.
Pixabay
 Frederick R. Barnard once said, "A picture paints a thousand words." Pictures can say quickly what we want to express in our sermons. Here's how I use them in my preaching.
- To illustrate main points - I create a slide with a picture that illustrates the concept of my preaching point. I may never even reference the photo if it obviously says what I want to say (see image above).
- Represent a Sermon Illustration - If I'm sharing a quote, I'll put a photo of the person on the screen with the quote or with a key phrase from the quote. If I'm telling a story about a guy in a fishing boat, then I'll find a photo of a fishing boat to display as I tell the story.
- Comics - these are good ways to share a joke. Just let the people read it. I'm not a great joke teller. Off-the-cuff humor is my thing. So comics are sometimes more powerful than telling a joke. I use this primarily at the beginning of a sermon. I tell the person running my presentation to put the joke up while I'm praying before my sermon. Then I just turn and look at it as I give the audience a chance to read it or look at it. Then I will turn back to the crowd and start preaching, often referring to the joke in the comic.
- Backgrounds to my sermon Bible text - put an image behind a verse that represents what that verse says.
Those are a few ways I use images. I include from 10 to 30 slides in most sermons. I get most of these images from a site called Pixabay, which gives users free images they can download and use under the Creative Commons license agreement. Creative Commons means you can reuse it so long as you give the original creator of the photo credit. Users can search Pixabay's free database of images. Users add to the database and then other users can download the images and use them in their work. The site's free to use. If you're a skilled photographer or artist please consider adding to the site.
 I searched for redemption as I have on the other sites. It showed the above results, including some "adult content" meaning some of the photos show nudes. By default Pixabay blacks out such content and you have to click them to see them. I just ignore them. When the images on the site don't match what I'm looking for, I will either search using a different synonymous term or I'll use the sponsored links to Shutterstock that show up at the top of the page (see below)
 When I find an image I like, then I'll save it and put it in my presentation software. We use MediaShout. I'll usually put something like "Used by permission from Pixabay.com USERNAME - by Creative Commons". If I need to add text for a quote or for my sermon points, then I'll add the attribution on Photoshop or Affinity Photo on my iPad.
freesound
To add some spice to sermon illustrations, my friend Wes Allen who's part of the Theotek Podcast team, uses sound. For example, he said that he was once talking about a criminal investigation and so he used the Law Oder TV show sound. In another instance he was talking about the great cloud of witnesses from Hebrews and used a crowd roar to illustrate it audibly (listen below). I've used sound in this way maybe 2 or 3 times in my life. But it sounds like an interesting tool and church presentation tools like MediaShout can play sound easily.Wes uses freesound as his preferred place to find audio clips. It has a large database of free sound clips. Like Pixabay, it requires attribution since it's a Creative Commons license. Just create an account, sign in and search. Download the audio clip of your choice and play it with an image displayed. On the image show something like this...
Image sed by permission from Pixabay.com USERNAME; Sound used by permission from freesound.org USERNAME - by Creative Commons.
Here's a crowd cheer from freesound user Veridiansunrise; used by permission by Creative Commons. If I used this for a sermon, I'd cut it down since it's pretty long.
Bible Software Illustration Databases
Most of the better Bible software programs include sermon illustrations or let you buy databases of them. For example, Rick Mansfield from Accordance uses his collection in Accordance Bible Software. Rick uses the Research Search function of Accordance. He said:
I run a research search through this group I’ve made according to the subject I’m looking for.
Here's a video where Rick demonstrates how he does this in Accordance.Logos and WORDsearch also offer similar features, so check your Bible software to see if it includes these kinds of tools. If the program doesn't have illustration databases or you don't own any, search your general library for a topic. For example, search redemption in books other than the Bible, commentaries and dictionaries. You will probably find devotional books, Christian Living books and more that cover that topic with stories by the authors.
Personal Experience
You can always access the most important source for sermon illustrations - your personal experience. Wayne McDill offers a great tool for brainstorming sermon illustrations in his book 12 Essential Skills for Great Preaching. Here's how it works.
- Write down your theological idea, such as: Jesus redeemed us by his blood.
- Convert that idea to a non-theological idea: someone acts to free us from our own mistakes through a personal sacrifice.
- Now think of how that might happen in various areas of life, like...
- Family
- Politics
- Sports
- Neighborhoods
- Schools
- Work
- Church
- History
- Current Events
- Now pick two or three that you think you can relate to and your audience can relate to and write out a story to illustrate the idea of personal sacrifice to free someone from their mistakes.
 Here's an example from my personal history.
At Christmas my mom would always make Christmas sugar cookies and my three sisters and I got to help decorate them. One of the favorite decorations were the chocolate Jimmies, little chocolate slivers that to be honest looked like rabbit droppings. However, they tasted great so we often ate them before they made it to the cookies.One year, when I was very young, my mom got home from somewhere and discovered that someone at all the chocolate Jimmies. She was not happy because she made us all promise we would stay away from the sugar cookie decorations while she was out.Nobody admitted their guilt so she sent us all to our rooms. I hated being sent to my room, because like most kids in the seventies, I wanted to play outside. After about an hour I decided that I didn't want to spend another minute in my room, so I worked up some fake tears and then walked down the hall looking as repentant as I could. I found my mom in the kitchen and told her, "I'm sorry. I at the chocolate Jimmies."She was so moved by my performance that she forgave my theft and commuted her intended sentence of grounding the guilty party the rest of the week. I got to go outside.There was one problem. I didn't eat the Chocolate Jimmies. For years, my mom kept telling the story of how sweet I was that day. I never admitted to my deception until I was grown and married. During a Christmas gathering of the family, the story came up. It was then that I admitted to my lie.By then my mom didn't hold that against me. However, none of my three sisters would admit they did it. Either they were liars or more likely forgot. But what I'll never forget is how much my mom chose to forgive me on that day and years earlier. It thought I was really doing something great by admitting to something I didn't do. I thought I was being sacrificial to end this house arrest. But I wasn't the real hero, my mom chose to forgive me not once, but twice.Jesus in his grace will forgive us not just one or twice, but anytime we confess our sins and repent. He's always faithful to forgive us because he also took the blame for something he didn't do. He didn't do it selfishly, l like me. He did it selflessly to redeem me from my prison of sin and hell.
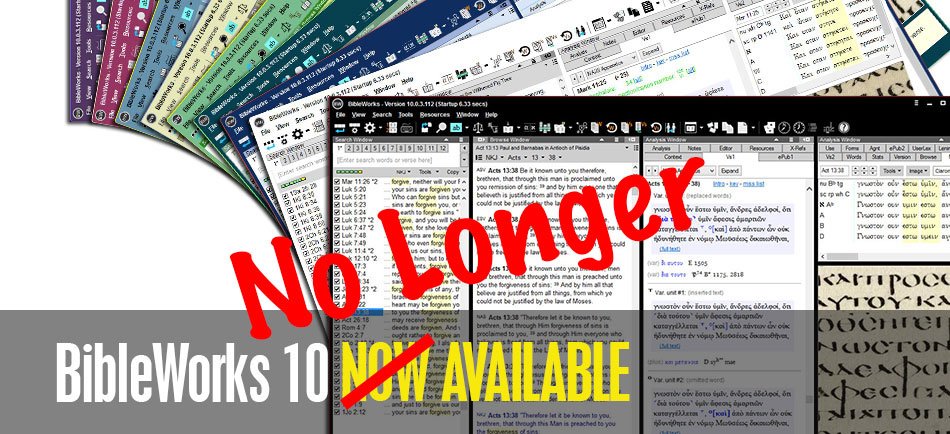
Alternatives to BibleWorks - Shutting Down June 15
Many BibleWorks users got a shocking email on June 1 from the maker of one of the best original language Digital Bible Study tools on the market today. The email, which you can read on the BibleWorks website, included the following statement from owner Michael Bushell:
A special note to our friendsBibleWorks has been serving the church for 26 years by providing a suite of professional tools aimed at enabling students of the Word to "rightly divide the word of truth". But it has become increasingly apparent over the last few years that the need for our services has diminished to the point where we believe the Lord would have us use our gifts in other ways. Accordingly as of June 15, 2018 BibleWorks will cease operation as a provider of Bible software tools. We make this announcement with sadness, but also with gratitude to God and thankfulness to a multitude of faithful users who have stayed with us for a large part of their adult lives. We know that you will have many questions going forward and we will do our best to answer some of them here.
 We covered the release of Bibleworks 10 with a lot of excitement a few years ago. BibleWorks power user Dan Phillips joined us to demo the new features. He tweeted the morning of the announcement:
This is horrible news: https://t.co/2hWKy2Rw3C
Don't ask me what to do. I have no idea. I've written them. This hits hard. I cannot exaggerate, and you can't imagine, the investment of research and work I have in @BibleWorks.— Dan Phillips (@BibChr) June 1, 2018
I'm sure other long time users of the software feel or will feel the same way when they learn the news. It's a painful reminder that your Bible software may feel like yours, but it's really not. You buy permission to use THEIR software, regardless of what they say. QuickVerse and Pradis and other Bible software owners probably felt as shocked when their chosen company's operations ceased or sold out to another company which then shut down development.So what now? Who knows?BibleWorks said that you can continue to use the software. They hope to "continue to provide compatibility fixes for BibleWorks 10 well into the future." Make sure you get a working copy installed now and download all of your content if you don't already have it. After June 15 you can't get any support for the program. Then plan to keep the forums and their Knowledge Base up after that date, but I wouldn't count on this.If you don't own version 10 already, you will not even get compatibility updates. They say you can update to version 10 for $200, but don't. That's like buying the 2018 model of a car after the manufacturer says their closing down the company.
Alternatives to BibleWorks
So what should you do if you want a program that's functional and comes from a company that should support the software for a long time into the future. Here's my list of recommended alternatives to BibleWorks. The first list includes programs that will do most if not all of what you can do with BibleWorks 10.
- Accordance Bible Software - many used to call Accordance the Mac BibleWorks because of it's power. The company makes a great Windows and iOS version and is working to improve their Android app as well. BibleWorks users who don't want digital commentaries or other books can stick with the basics of language study like they had with BibleWorks. However, you'll now have access to a nice library of other digital books. Get the free version to try it out.
- Logos Bible Software - going from BibleWorks to Logos will feel like an Italian learning to speak Spanish. It's similar but also incredibly different. However, Logos has a huge library of content and BibleWorks users will suddenly have access to large collection of resources. They also will have to pay since Logos often costs more than the competition. Logos sells a subscription model called Faithlife Connect with a large library starting at $108/year. See my series on using Logos for Sermon Prep on YouTube or the Theotek Facebook Page.
https://www.youtube.com/watch?list=PL1-Xf_HZquDGvCiJtyisBrEULSH3McCSO&v=GZTrMB0PnuQ
Lower Price Means Fewer Features
The rest of these offer less expensive alternatives even if they don't match BibleWorks in language study prowess.
- Olive Tree Bible - many BibleWorks users who wanted a good mobile Bible app probably already invested in Olive Tree one of the best mobile Bible apps available on all platforms. They have a nice library of books to buy. They also are better at language study than they used to, but BibleWorks users may feel constrained on the desktop with this option.
- Laridian PocketBible - like Olive Tree, PocketBible has a long history of supporting mobile platforms. It predates the iPhone and Android, but has great apps for both. It also runs on Windows and Mac. They have a smaller library, but the programmer is a pioneer in Bible software and does a great job of updating and making the app run smoothly on every platform. Plus it's one of the cheapest options. However, like Olive Tree users might find the program limited in language study.
- e-Sword - if you don't have any money and just want to start getting into an alternative slowly, then grab e-Sword as a good free interim option.
- WORDsearch - the company just updated to version 12 and I'll have more to say about the program over at ChurchTechToday and on the Theotek Podcast. It's a good simple library reader with a better tool for language study in version 12 than it used to have, but like Olive Tree BibleWorks may feel a little constrained in language study with WORDsearch.
Hold Off and Wait
Another option might be to patiently wait. You can still use BibleWorks 10 for the foreseeable future. Get the free versions of the above tools to try them out. Then wait for sales. I know that a few of the companies are thinking about special deals for BibleWorks users to take advantage of the news.
What Happened?
I don't have any inside information, but I have some opinions.
- Mobile - they company didn't embrace iPhone or Android and this failure to embrace mobile meant Bible software users with limited funds didn't want to buy their books twice, once for BibleWorks and once for a mobile app, like OliveTree.
- Shrinking Bible Software Market - like the church in America, I think interest in Bible software is shrinking. Biblical literacy is at an all time low. Pastors who want Bible software is a niche market and fewer of those pastors will buy a program like BibleWorks due to their failure to offer a mobile app and because of the following reasons...
- No Native Mac App - the company's Mac app is a WINE port. That's not acceptable to a lot of Mac users. I see more and more of my colleagues in ministry using Macs instead of Windows.
- No Library to Speak Of - BibleWorks offers some of the best tools for original language study and searching. However, they offer relatively few resources like commentaries and Christian Living titles. So buyers don't want to buy BibleWorks even if it is superior in original language study if they can get something nearly as good like Accordance or Logos that also offers a these other digital resources all in one package.
- Updates Drive Business - as a consumer I don't really like the business model of putting out a big new update every year since it makes me change the way I work to learn new features, it makes me shell out anywhere from $20 to $200 for an update annually, and it turns the program into bloatware, something Logos and others seem to do. However, like it or not, that makes money for Bible programs. What would you rather get? Annual updates that you can buy or skip or an email about a shutdown from your software company after you invested hundreds or thousands of dollars in over the years?
Logos Sermon Prep Part Five: Taking Notes for Observations and Questions

Logos Bible Software helps preachers and teachers prepare their messages thanks to some useful Logos sermon prep tools, but the Notes feature gets more use than any other feature besides offering a library of Bibles, books and reference books. I use Notes extensively for the following:
- Recording my thoughts about a text.
- Keeping rack of ideas for how to preach a passage.
- Record things learned in research of a text.
- Write down questions I need to research.
I use a process called Inductive Bible Study in my Logos sermon prep, where the student reads the text and thinks about the context of the passage before every consulting third-party tools like lexicons, Bible dictionaries, atlases, concordances and commentaries. Those tools help me check my conclusions, find information I couldn't get from my simple observations and learn about things like cultural backgrounds, geography, and language studies.https://www.youtube.com/watch?v=MzyYMcxTIzc&feature=youtu.be
Taking Notes in Logos Sermon Prep
Bible software notes attach text and more to a specific word, phrase, verse or passage. Some programs will also let you record them as topics unattached to anything in a book. In Logos, you can also add notes to other kinds of books and even to tools, like a Passage Guide generated for a passage of Scripture.I attach notes to the passage I'm studying, a range of verses or a single verse. I almost never attach them to a single word in a verse, but you can if you like.Logos lets users create a new Note document for each message or keep on document for all notes attached to a book or the Bible. If I were starting over today, I'd attach one note to each book of the Bible. Instead I have a large notes document called Bible Notes and record all of my notes in that document. I create other documents for other books I read.
Creating and Using the Notes Document in Logos
 To get started, create a new note document, if you don't already have one you want to use. Open Logos and then click on Documents from the toolbar. Then in the window that pops open click on Notes. A new window opens with the new notes document in it. It has the title "Untitled Notes". Click that name in the new document and it turns into an editable text box. Give it a name like Sermon Notes or Ezekiel Notes. I call mine Bible Notes.The ensuing Notes Document will look like a simple word processor. It has the same control box in the upper left corner that all Logos windows show. Click it to see the menu that pops up. Users can sort their notes using different things like name, reference, and date to name a few. This also lets users print their notes or export the note as a passage list or sermon document.
Purpose of Making Observations
After I read and re-read my passage, I take notes on the passage using nothing but the English text at first. I do my language study at a later date. This has a few benefits.
- My first thoughts are not clouded by the views of another researcher.
- This lets me think through the text for myself with the Holy Spirit's inspiration only at first.
- I am going through my passage again, which helps me to internalize the message of the text.
What kinds of observations do I make? I record thoughts and ideas about almost every word in a verse. Let's take John 3:16 as an example.
John 3:16, CSBFor God loved the world in this way: He gave his one and only Son, so that everyone who believes in him will not perish but have eternal life."For" connects this verse with the previous passage. This tells us why Jesus was "lifted up" (John 3:15).God is the one who actively showed us his love in the work he did in giving us his son.The term "loves" shows this is an ongoing, active love. Is this present tense and from agape?God's love is directed not just at his people or Christians, but the entire world. The world refers to all of humanity making his love universal even if salvation isn't universal.How does he show that love? "In this way" denotes the means of his demonstration is presented in the ensuing phrases.
The above observations only cover the first part of the verse. I will go over the entire verse putting a note for nearly every word and definitely every phrase.The underlined part of the observations shows a question that I will need to find an answer by doing a word study of the word "loved". It's a good idea to mark the questions so you can easily find them in your research phase. When I do the research, I will add the answer either replacing the question with the answer or putting the answer right after the question and then removing the marking (underlining in this case).Finish this step by going through every word or phrase in your passage. I also add a note to the entire passage by selecting the range of verses and choosing adding a single note to all the verses using the steps below. In that passage note I will write about the context of the passage showing how it fits in the chapter, the book and the entirety of the Bible. I'll also give a brief outline fo the passage showing the flow of thought. Later I'll come back to this note and record my passage Big Idea.
Working with Notes Documents in Logos
 When you discover something you want to record in a note, create a new note for that verse, word or passage. You can do this by selecting it and right-clicking it. Then choose either the "selection" or the passage in the right-hand column of the pop-up. Use selection (the top item in the list), which shows the text of the words you selected, if you want to add notes to those words or a word and not to a passage. The note will attach to that translation of the Bible only. For example, I've got the Christian Standard Bible open above. If I open the same passage in the KJV, that note won't show up because it's attached the note to the words I selected in the CSB and note the verse reference.To add the note to a verse reference that will show up in any translation that includes that verse, choose the reference. It will attach the note to say John 3:16 instead of that translation of John 3:16. That way when I close CSB or open KJV the note will still show up.After you pick between selection or the passage, click on Add note, Add note to "Bible Notes" or Add community note.
- Add note - this is a new feature that relates to the new Notes features that Faithlife is adding to Logos. These notes will show up in the desktop, the mobile apps and the Logos Web app. Logos is in transition and the new notes feature will become the default soon. Some users might not see this yet in their installation of Logos. You can convert your old notes to the new version when it ships in the final form. For now, I'd avoid this I you don't use the web app.
- Add note to "Bible Notes" - you will add your note to the Notes Document you created above. Its title will show up instead of "Bible Notes". If your preferred Notes Document doesn't show up in the pop-up, then open the Notes Document first from the Document's menu.
- Add community note - Community Notes are public to all people who use them. You can turn these off or on from the Visual Filters toolbar button in the Bible's window. It looks like three dots arranged in a triangular shape (see below).
 I add all my notes to my "Bible Notes" document and will convert them later when the new notes feature gets launched. I'll write a full review and how to article about the new notes feature when it ships, so keep an eye out here.
Other Ways to Record Thoughts and Research
In addition to a Notes Document, users can record research or thoughts using other kinds of documents in Logos. I don't use these features as much, but other users swear by them and use them more than notes. They include...
- Clippings - select text from a commentary, dictionary or other reference tool while studying your passage and shave it to a Clippings Document. Think of this like note cards that you used to use while researching a paper in college or seminary. Clippings helps copy a bunch of snippets of information from other books. At this phase we're focused on the Bible text only, so it's not the best tool for the Observations phase of inductive Bible study.
- Passage List - keep a list of key passages. You might use this to keep cross references from a search performed on a word in your passage.
- Sermon - write your sermon within Logos and then export it or preach from the document in the mobile version of Logos. You can also convert a Notes Document into a Sermon Document.
- Word List - Like a Passage List, but for Greek or Hebrew words instead of passages. Make a list of every theological term in a passage to help you know what word studies you need to do after you've finished taking notes on the English text.

Logos Sermon Prep Part Four: Text Comparison Tool in Inductive Bible Study

The next step on Logos Bible Software Sermon Prep helps us actually learn what the passage we've selected means by reading it repeatedly using the Text Comparison Tool. We're talking about Inductive Bible Study.
What is Inductive Bible Study?
 The phrase Inductive Bible Study refers to studying the Bible hoping to discover the meaning of the text without any prejudices or preconceived notions brought to the task. Seminary students will remember studying the terms eisogesis and exegesis. We call Inductive Bible study exegesis in scholarly circles. It means studying the text and discovering the meaning based on the words, concepts, setting, writer's intent, audience and context. Eisogesis is the opposite. If a student fails to let the word speak for itself, then they might read into the text what's not really there.A lot of heresy comes from eisogesis or reading into the text what's not there. We take verses out of context or don't study them based on the original author's intent, context, setting or the meanings of terms used that we might misunderstand in our time.Inductive Bible Study leads me to discover what God's saying to me and my audience. That's why it's the best approach to Bible study for Logos Bible Software sermon prep.
Theotek Podcast
https://youtu.be/Jx-PYaR_y0o
Steps of Inductive Bible Study in Logos Sermon Prep
You can do Inductive Bible Study using physical books and a notepad or you can use any competent Bible software. Logos Bible Software helps us study the bible inductively thanks to a number of tools. This part focuses on the Text Comparison Tool. The full list of Inductive Bible Study steps include the following:
- Reading the text repeatedly
- Observing what's in the text without any other tools at first
- Ask good interpretive questions
- Diagram the sentence in Greek, Hebrew or English to see the structure of the author's thoughts
- Find answers to questions and check the accuracy of our observations using the tools in Logos Bible Software
- Discover the Big Idea of the text
We started the process with selecting a text covered in three steps (first, second and third steps). Now, it's time to read it repeatedly and we'll show you how using Logos.
Read the Text Repeatedly
We're going to work with Ephesians 1:3-14 as our text. I'm teaching through the passage during my Wednesday night Bible study at church. We already talked about multiple tools and ways to choose the text, so for this step, we'll assume that's a good text to choose, especially since it's one long sentence in Greek.Start by opening your favorite translation and prayerfully read though it in your favorite translation. I say "prayerfully" because you should begin by asking the Holy Spirit to guide your study.You should probably also read the text in context.
- Read the entire chapter.
- Read the whole book if it's not too long - Paul's letters, the Pastoral Epistles, shorter prophetic books.
- Read sections in longer books like the chapters before and after at least.
Use Multiple Translations
 Read the passage itself in a few translations. I always use ...
- Christian Standard Bible - This is my favorite translation. Below I'll explain the value of various translations. I like the CSB because translators targeted a readable translations that's as close to word-for-word without sounding too wooden.
- English Standard Version - A slightly more literal translation that is also very readable.
- King James Version - The standard that most people grew up with in my church and is often the most recognizable translation for popular passages. It's more literal.
- New American Standard Bible - A very literal and highly accurate modern translation. I prefer the 1995 update.
- New International Version - Not a paraphrase, but the translators focused more on readability than literal translation. I prefer the 1984 version.
- New Living Translation - The old Living Bible was a paraphrase, but they updated it in the 1990s and went for more of a translation. However, it is the least literal of these translations with a thought-for-thought approach.
The Range of Translations from Literal to Readable
If you think of translations or paraphrases as sitting on a spectrum, then put the original Greek or Hebrew text to the left of the range. Translation that sit closer to the Greek or Hebrew text show up on the left. We call these "word-for-word" translation. Above, I mentioned that I use the KJV and the NASB in my reading to get this more literal look at the text in English.On the opposite end of the spectrum you find the paraphrases, like the Living Bible, the Good News Bible, The Message or the Amplified Bible. We call these "thought for thought" translations. We use these translations almost like commentaries. They helps us get an idea of what the passage means, even though they don't show us the word-for-word translation of the text.Most modern translations sit closer to the middle of the spectrum between literal and non-literal. Translators like to use the word dynamic or dynamic equivalent. That's a marketing term that makes the ESV, the NIV, and the CSB sound like they're equivalent. They're not as literal as the KJV or NASB, but not as interpretive as a paraphrase like the Living Bible or The Message. See this spectrum for many translations in the image below. The Eccentric Fundamentalist offered this nice graphic, which illustrates where the various translations sit on the spectrum. I don't endorse all that the author says about the translations, but I really like the graphic shown above.
The Text Comparison Tool
How do we read the passage repeatedly using Logos Bible Software tools? You could open the passage in about five or six translations and read them. However, we can do better than that using a tool called the Text Comparison Tool. Before we do, let me suggest setting up a Layout as follows. First, start with a blank layout. Click on the Close all panels button (see above). It looks like a small X inside a circle between the Layouts button and the question mark help button on the right end of the Logos Bible Software toolbar.
 Next, open the Text Comparison Tool from the Tools menu. You now see a screen that shows your top five Bible translations in vertical columns. To change what you see in the columns, click on the hyperlink in that window's toolbar just right of the reference box. A drop down menu appears.
- Type in the text reference in the reference box.
- Click on the hyperlink next to the Text Comparison Tool window. A drop down menu like the one above appears.
- Type in your translation abbreviation.
- Click the box to put a check mark in it when it appears at the bottom of the drop down menu.
- Repeat this until you have all of your chosen translations in the Text Comparison Tool's toolbar above the drop down.
You will see a window with all of your chosen translations in the order you added them. You can now read through each column. However, you might want to see the differences between the various translations. To do that quickly, Logos gives you three options in the Text Comparison Tool.
- Show differences - toggles whether to show or hide differences between the various text compared to the base text (left most translation).
- Show base text - toggles between showing the wording of the base text next to the text of each translation or just show a red circle next to the words that are different from the base text.
- Shows the comparison in either columns or as interlinear. You must certain translations as your base text for this to work. For example, the KJV works fine as seen below, but the Young's Literal doesn't.
 The above shows the Interlinear style Text Comparison Tool. It has the Show differences turned on. Without the Show differences, you'd only see the text without the base text showing up next to the wording that's changed in each row.
 Notice how there's a little red dot next some of the words in the NASB95 column above. This denotes a difference between this translations and the KJV1900 base text.
 In the image above we see the texts in column style. I turned on the Show differences toggle and it puts the words of the base text (KJV1900) next to the words in the NASB95 with a line through them. As an example, in verse 3 we see the word "
hath" with the line through it next to "has" in the NASB95 column.
Save a Layout in Logos
 Now that we have the Text Comparison Tool set up the way we want it, let's add our favorite translations and a Notes document window. Arrange the Text comparison Tool the way you want it. I have it across the bottom half of the screen. Open your favorite Bible. Then open a Notes document. You will use the notes document to record any observations you make you as reread the text repeatedly in your various Bibles.To open a Bible, click the library button and then search for your translation by typing in the abbreviation. Click the title of the translation when it shows up and it will open. If you already have a preferred Notes document, open it from the Documents button on the toolbar. Type the name run the search box. Then click on the title to open it. Now arrange the Bible and the notes document the way you want. You can create a new one for each sermon or for all of your notes in a book of the Bible, the New Testament in general or for the whole Bible. I don't recommend the last one. Your document will get too big.
 We'll save the layout. Click on the Layouts button on the top right of the Logos Bible Software toolbar. In the drop down window, click on Save as named layout. A box opens right there. Type your name and hit Enter.From now on your can open this layout by clicking the Layout button on the toolbar. Then click the Saved Layouts in the column on the left. A list will pop up. Click on the name of the layout you saved in the step above.Now read through the text in each column. If you want, record your thoughts about the differences between the translations by create a note on each verse, for a single word, or for the entire passage. I do this by right-clicking the verse in my favorite Bible. A menu pops up. Select the verse reference in the right column of the pop up menu. Then select Add a note to "your notes document". A new note will show up in the notes document window. Start typing in it.
Next Steps
In our next few parts to this series, we'll look at recording observations in a notes document. You already started this as you reread the text. Then we'll look at questions that the text might present. You'll record those too and start to look for answers in the phase after our inductive study. In the last part of the inductive study, we'll create diagram or outline of the text.

Laridian PocketBible for Mac 1.3 Update Released
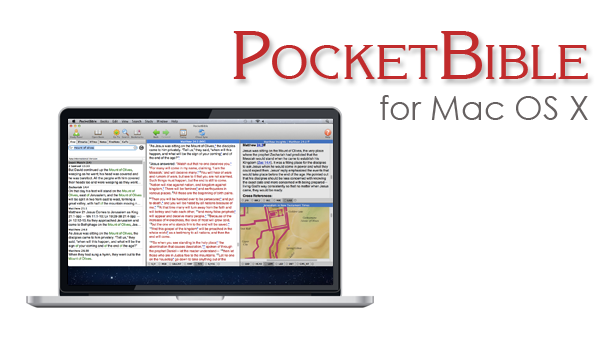
Laridian PocketBible for Mac version 1.3 hit this week with a few new features for users of the deceptively simple yet powerful Bibles study tool. One notable feature includes support for Laridian's latest Bibles that display text in a more useful way. This includes one example, mentioned in an email from Craig Rairdin, Laridian's CEO and chief programmer. The NIV with Goodrick-Kohlenberger Numbers will not support Laridian PocketBible for Mac.
How to Install Laridian PocketBible for Mac 1.3 Update
To get this free update you only need to select Check for Updates in the Laridian PocketBible for Mac menu at the top left of the Mac menu bar (see below). The download will install bringing your copy up to vision 1.3.
 If you own a copy of Laridian PocketBible for Mac but don't already have it installed, then go to the company's website and log in. Click on Download from the top of the website or click on the link labelled Mac OS X along the right side under Download Our FREE PocketBible App! as seen above. This puts a DMG file most likely in your Downloads folder. Double click it and then drag the PocketBible icon into the Applications folder seen in that window that pops up when you download the DMG file.
How to Install Books on Laridian PocketBible for Mac
You will need to register the program after you open it for the first time. MacOS may give you a warning before it opens the newly installed PocketBible for Mac, but it's save to let it open. Then register by typing in your email and password. If you're installing this for the first time not your Mac, then click on the Books (#1 above) menu at the top next to the PocketBible menu on the left side. Then click on Cloud Library or if you prefer use the keyboard combo CMD+L. This opens the screen that lets you install books. You can install all books by clicking the Download All Books (#2 above) button on the lower left of the window. You can help yourself to find only new books by click on Hide books already downloaded (#3 above).Aside from supporting new Laridian Bible formats, they also fixed some minor bugs. There was something they called "wiggling" that happened when you moved to a new verse. Text would "wiggle". I've not seen this, but I'll take Mr. Rairdin's word for it that he fixed it since I don't see it in v. 1.3.
Lairdian PocketBible for Mac Advanced Feature Set Updates
If you own the Advanced Feature Set, then you can hover over a Bible reference and your settings will let you either show or hide the footnotes in a pop up window. You can add the set from the PocketBible menu. The Advanced Feature Set costs $9.99/year on Mac only and $17.99/year for all platforms. Some of the benefits of the Advanced Features Set include (copied from Laridian's website):
- Searching enhancements - search your entire library in one operation (normal search applies only to the active book).
- Note-taking enhancements - create Journal Notes that are not connected to any Bible verse or reference book. Will sync with other versions of PocketBible that have this feature (currently iOS).
- Automatic Study Options
- A Library Navigator shows you everywhere in your library that the current Bible verse is discussed.
- Automatically produce an in-depth study of any verse using all (or selected) books in your library.
- Automatically produce an in-depth study of any word using all (or selected) books in your library.
- Automatically produce a document containing today's (or any day's) Bible readings using one or more devotionals and one or more Bibles from your library.
- Hover over Bible links in books to quickly read the verse from your preferred Bible.
- Highlighting Enhancements
- Rename your highlight colors to be more relevant to the purpose of the color.
- Speech Synthesis Enhancements
- Uses built-in OS X speech synthesis to read a selected passage, read the linked-to Bible verses, or start reading until it is told to stop.
- Choose custom voices and speaking rates for English books, Spanish books, and the Greek New Testament.
- Layout Enhancements
- Create multiple, named screen layouts for different purposes (for example, one for devotional reading, one for lesson preparation, and one for note-taking during sermons).
- Create a special layout for devotional reading that will be activated when the Today button is pressed.
- Maximize a book to use the entire PocketBible Window.
- Maximize a pane to use the entire PocketBible Window.
- Miscellaneous
- Control Special Offer notifications telling you about recent discount offers for which you have been made eligible.
- The Study Panel uses a small toolbar instead of text tabs.
Logos Bible Software Sermon Prep Part Three: Concordance Tool
We've already looked twice at the topic of choosing a text, but let me take a third swing at a tool that you should consider using for Logos Bible Software Sermon Prep. We'll take a look at the Concordance Tool in this third part of the series. I began looking at picking topics and picking passages in parts one and two. Now, how can the Concordance Tool help us in choosing passages to preach or teach.Here's the secret of this powerful tool...
The Concordance Tool Video
My video below shows the basics of the Concordance Tool in Logos 7. https://www.youtube.com/watch?v=asQzvrTeMc4&feature=youtu.be
Benefits of the Concordance Tool in Logos
You may need to put away the old idea of a concordance while still using the principles to figure out what it does. The Concordance Tool, like a traditional Concordance, lists every word in a Bible translation, but here's the cool part of the Logos 7 Concordance Tool. You can change the list based on your own limitations and even use it to create a "concordance" for books other than Bibles. I used to own a hefty NASB Exhaustive Concordance (see above), since that was my favorite translation when I began preaching. I stopped using the huge physical book because Bible software is an exhaustive concordance by itself and its far more convenient than a 5 pound book. So why do we need a tool in Logos or any other program that calls itself a "concordance tool"?First, the Concordance Tool is customizable. I'll show you how to do that below or watch my video demo above.Second, users can create lists of Greek or Hebrew words even in an English Bible if. The tool uses the Strong's tags to do this.Third, you can also index more than just the English words of a Bible translation. It creates lists of other things like lemmas, roots of words, and Biblical entities like people, places and Biblical things. You can even search for references which are tags that link to other books, like a Bible reference in a footnote or in a Concordance or maybe even in a Christian Living book, like something by a popular author.The benefits listed here means the Concordance Tool helps us with picking a passage to preach because we can choose to teach or preach on a particular topic by opening the tool and searching for the most often used words in a book of the Bible. Let's say I want to focus on the idea of redemption, but I don't want to do a topical study of redemption. I want to select a series of passages that focus on the idea or subject of redemption. I could just search for redemption in the Logos search tool. But if I open the Concordance Tool, I can learn one particular author repeatedly discusses redemption.
How to Use the Concordance Tool in Logos
To get started open the Concordance Tool in Logos from the Tools menu. You'll find it in the second column under Reference. Click it to open it. The tool shows the last report generated or runs one if you haven't already used it.
 At the top of the window you'll see the book control drop down that usually shows the cover of the book with a small down arrow to the lower right corner. Click it and you'll see controls like the text size slider, the Find command, print, and the Close command among others.Next to the book control menu you'll see a link that shows the present book or Bible translation (see below). Click that Resource Reference link to change it. The Resource Reference search box shows up with a list of all library resources that you can use to run a Concordance Tool report. You can use a Bible in English or Greek/Hebrew. You can also run a Concordance Tool report on other books like commentaries or books by a single author. This results in an index of all the words in that book, if you do a Word report. More eon that below.
 Let's say you want to work in the NASB 1995 Update. Then, either find the book in the list or type in NASB in the search box and it will show all books with your search string in the title. Click to open the Concordance Tool using the book.
 Next you'll see what to index with the Concordance Tool. Click on the second link over (see above) to create an index. You can create one using one of the following:
- Word - the basic tool that works like a traditional concordance.
- Lemma - finds lemmas instead of words
- Root - finds roots instead of words or lemmas
- Sense - finds senses instead of the above
- Biblical Entity - finds persons, places, things, artifacts or measurements
- Reference - finds reference links
The last link lets the user narrow the search range. For example, in the screen shots here I've run the tool on the NASB 95 Update translation. So, when I click the last link it offers to let me narrow the range from All Passages to just ports of the Bible. You can pick your most recent passage selections or the common ones found in Logos. You can also create a new one by typing in the range at the box below the list labelled New reference range. If you plan to use that range again, give it a name in the Title box below the range box and then click the Save button. It will now show up in the list above the boxes.Along the left there's box that lets the user limit their Concordance Tool index. It's called the REFINE box or section. This changes dynamically based on what you've selected in the three drop down boxes at the top. For example, the index below shows the NASB95 Update with a Word index of All Passages.
 Along the left you can refine the search by omitting things, choosing certain languages only and searching in only parts of the text. So let's do an index of only English by clicking on English. Then only index the Words of Christ and only the Gospels (from the top).
Using Concordance Tool on Commentaries
You can use the Concordance Tool in a commentary on a book to find out what the commentary author seems to think is the most discussed topic. Run an index on a commentary on a particular book of the Bible. Then refine the search using the Refine box on the left. The index Logos creates will show what words the commentary uses most. Look for key theological terms to help you see what that commentary author focused on in that book. This can help you find passage in that book that cover that topic.The index above shows that I ran the tool on a commentary on Matthew. I refined the search to show English only and then limited it also to Heading Text. This shows that there are 6 headings in this commentary that talk about healing. A good sermon or Bible study series might be the healing stories in Matthew. We also see 4 headings with the word Blind in it. Could you do a topical study on Jesus giving sight to the Blind? Those are a couple of ideas.Use this same technique with any book in your library. This will help you find illustrations too. We'll cover that more when we get to the topic of adding illustrations to our sermons and Bible studies.
How This Helps Find Texts to Preach
So why would I use the Concordance Tool for helping find passages to teach or preach?The resulting index (see screen show above) shows the words or word groups (take a look at the second hit, a word group) that show up most in our refined search. If you click on the arrow next to a word, then you'll see a list of the passages that include that word or word group. The image above shows the list under "come comes; coming" which is the fourth most used word/word group in this refined index. So maybe, you'd want to do a sermon series on Jesus is Coming and select passage about why he came, when he might be coming back or what he said about his second coming.Drop down a few and you'll see the word group "go going" which you can also do a similar series but on why we should go or how Jesus wants disciples to go on his behalf.