

iPhone 14: Should You Upgrade?
Apple released the new iPhone 14 with a few new features. Should you upgrade? We advise you from a Christian perspective. So be sure to read to the end.

No!
Okay, that's not entirely accurate for everyone, but for most, it's that simple. Keep your current iPhone or Android phone. However, if you fit one of the following situations, it might be worth an upgrade.
iPhone 14 Replacing a Broken Phone

My wife uses an iPhone 8 Plus, and she's happy with it except for two problems. First, the fingerprint reader doesn't seem to work consistently, and her battery only lasts about 8 hours before she must recharge it.
Because her phone doesn't work great, she will get my iPhone 13 Pro Max, and I'll get the iPhone 14 Pro Max. She's happy with that, so don't complain that I'm giving her the leftovers. We do technology-hand-me-down all the time because I love having the latest and greatest, and she loves having devices that work.
Subscribe to iPhone Upgrade Program

Some of us love owning the latest and greatest technology. Apple caters to us with what they call the iPhone Upgrade Program. I joined this upgrade program this year. Here's what I'm getting...
- Get a new phone every year - 14 this year and the 15 next year and so on
- Apple Care+ is included
- Pay monthly with no interest and trade it in after 12 payments
- Use the phone with your carrier so long as it's one of the big four (AT&T, Sprint/T-Mobile, T-Moble, and Verizon
You don't have to upgrade if you entered the program last year or the previous year, but you might as well since you're getting the new phone for the same basic monthly payment.
How much does the Apple iPhone Upgrade Program cost? Here's the breakdown based on which model of iPhone 14 you buy.
- iPhone 14 - 128GB - $39.50, 256GB - $43.66, 512GB - $52.00
- iPhone 14 Plus - 128GB - $44.91, 256GB - $57.41, 512GB - $52.00
- iPhone 14 Pro - 128GB - $49.91, 256GB - $54.08, 512GB - $62.41, 1TB - $70.75
- iPhone 14 Pro Max - 128GB - $54.08, 256GB - $58.25, 512GB - $66.58, 1TB - $74.91
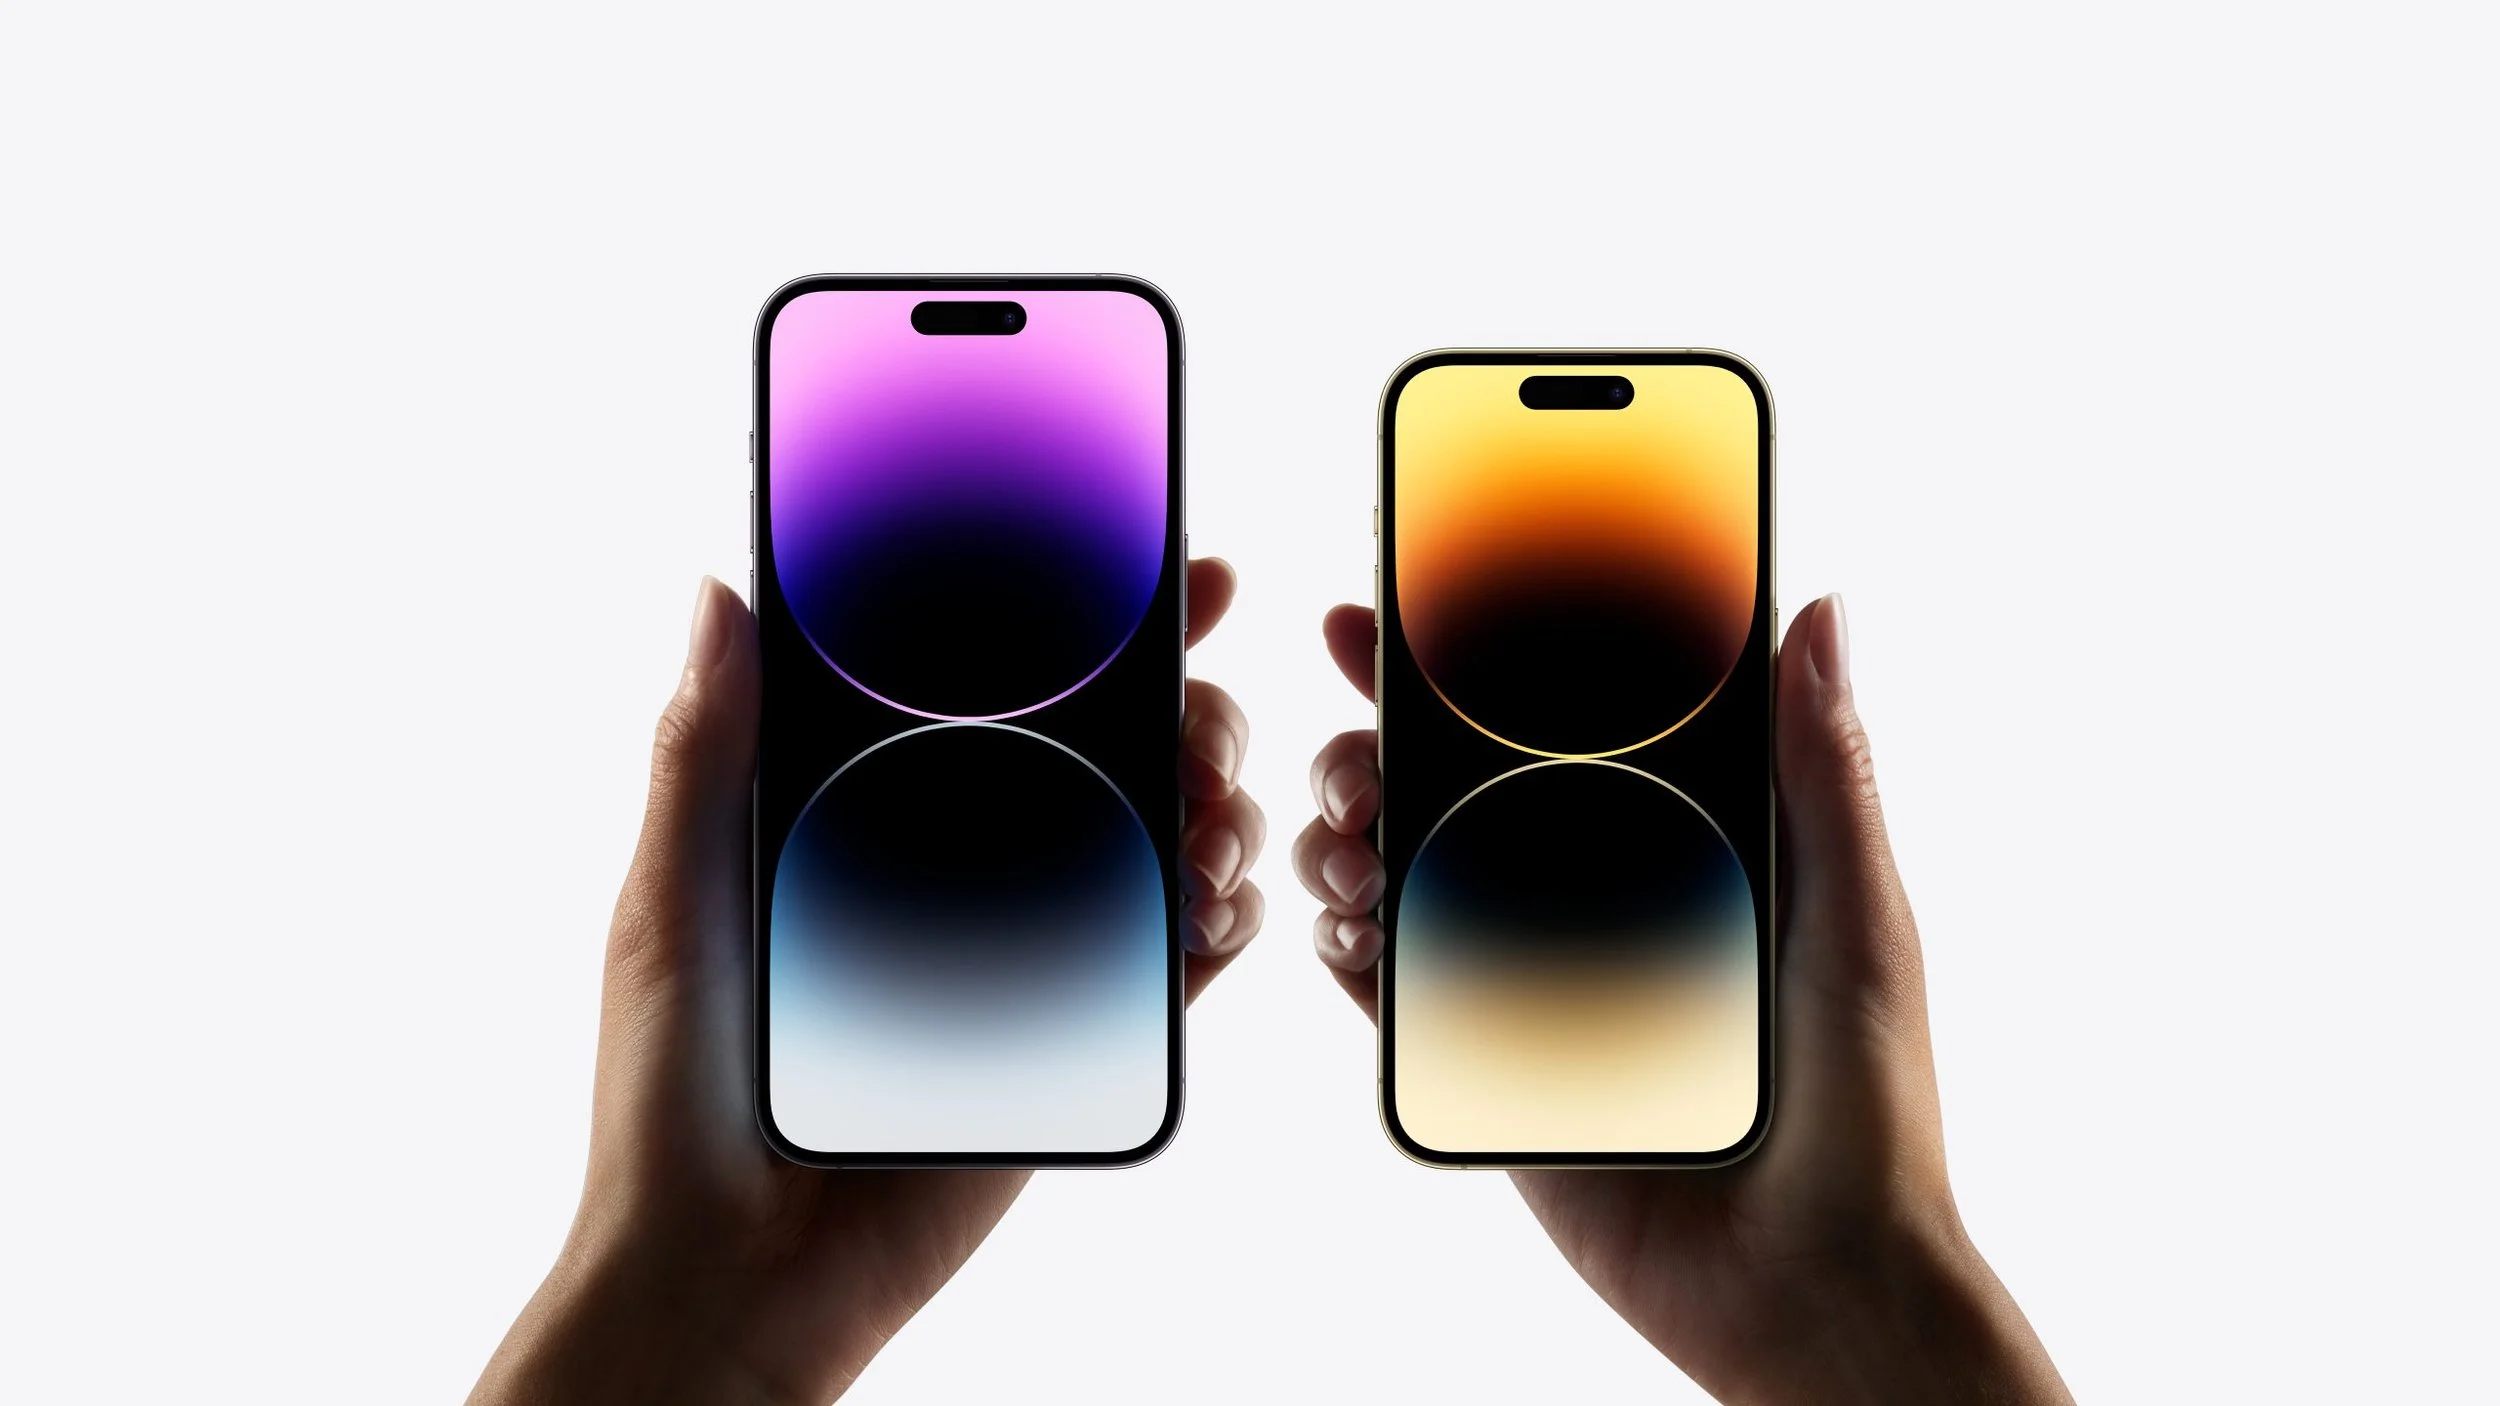
iPhone 14 Features Make Upgrading Worth It
The iPhone 14 doesn't add many new features, but you will get a few. Here's a list of what's new. You might want to upgrade if one of these looks compelling enough.

- Dynamic Island - instead of a notch or a hole where the camera would go, Apple created a wide pill shaped black part that encapsulates the front camera and sensors, but also dynamically changes to show notifications. It looks cool and you have to see it to understand what it really is.
- Longer battery life - Apple promises a little bit longer battery life with iPhone 14.
- Emergency SOS using Satellite Tech - send a brief text message to emergency services when you're out of coverage, and it will connect over Satellite. If you're often outside a cellular coverage area, this might make an upgrade to the iPhone 14 worth it.
- Improved Camera Features - iPhone buyers count on camera improvements each year. You'll get a number of improvements like better low-light images and more colorful pics. A 48-megapixel sensor potentially brings more detail and lets the camera stabilize shots better as it can zoom.
- The front selfie camera now has autofocus - people who take a lot of selfies or just use the front camera will love this.
- Faster processor - this matters most to gamers or people who edit photos and videos on the phone.
- Always on Display - the new iPhone 14 has a display that stays on but still doesn't use up too much battery life since it lowers the refresh rate to almost nothing.
- Widgets on the Lock Screen - you can get widgets on your lock screen, most from built-in Apple apps like their Weather app or activity apps.

You'll get a few more features, but we've touched on the highlights above. That's not a lot, so most people shouldn't bother with an upgrade. However, you might see something on the list that will improve your quality of life or work, making the upgrade worth the expense and effort.
You Give More than Ten Percent to Church and Charity

You won't see church and charity listed on any other tech enthusiast site. However, we need to consider this as Christians or people of faith. If you are a follower of Jesus or even a member of another faith, then you likely have an expectation that you give to help those in need or support your church.
Too many people spend too much money on themselves before giving to others. Traditional Christian churches believe in what's called tithing. I know not all believe this, but we should believe in being generous because of what Paul wrote in 2 Corinthians 9:7-8:
7 So let each one give as he purposes in his heart, not grudgingly or of necessity; for God loves a cheerful giver. 8 And God is able to make all grace abound toward you, that you, always having all sufficiency in all things, may have an abundance for every good work.
2 Corinthians 9:7-8, NKJV
God Wants to Bless You
Give and God will bless you. We're not saying he'll make you rich like the prosperity Gospel crowd who lie to con you out of your money. We're talking about God's promise to help you take care of your needs, shower you with his blessing of pleasure in your good works, and storing up treasures in heaven where moths and rust won't destroy.
I don't know if moths can destroy an iPhone 14, but I do know falls from 6 feet or higher, extreme heat, and general wear and tear can destroy any of Apple's products. Resist the temptation to upgrade if you're not giving generously. Then only upgrade if one of the above reasons applies to you.
It would be interesting to see a study done to find out how many people upgrade every year do so out of any kind of need or just out of want.
7 Best Apps for Writing Sermons Digitally
What are the best apps for writing sermons? We have a bunch of options in 7 categories for sermon writing tools.

What tools do you use to write your sermons digitally? We've got the best apps for writing sermons digitally and we'll explain why each works great and recommend the best single option.
Most of us no longer write out sermons by hand or type them on an old-fashioned typewriter. We write in Bible study software, a word processor, a notepad app, a note program, or some other software.
Microsoft Word or Another Word Processor are Some of the Best Apps for Writing Sermons Digitally
The granddaddy of word processors comes from Microsoft. Most people who use a word processor write with Microsoft Word. Other options include a form of the open-source OpenOffice, like Libre Office Writer. OpenOffice is the foundation for Libre Office. It's a great tool if you use Linus or want a powerful tool that you can get for free.

and then open the notes on an iPad or Android tablet to preach from them.
If you write your sermons with one of these powerful word processors, you will likely come up with your sermon outline, copy and paste text from a Bible program or the Internet, and formate it for preaching.
When I write in Microsoft Word, I format the document with large text for each major sermon division (read points). Each sermon has large green text so I can see it in the pulpit easily as I preach with my sermon notes open. Bible quotes use large bright red text and standard quotes from people or commentaries use large purple text.
The sermon syncs to my iPad using OneDrive and I open it in Word. The iPad sits on my podium so I can look down and check my notes as I preach through the sermon.
This works with an Android tablet or a Windows computer like a Microsoft Surface tablet.

If you're all in using Apple Hardware and software, go with Apple Pages and iCloud sync. It works well even if Pages doesn't come with all the powerful features of Word or one of these open-source word processors.
Android and Chromebook users can take advantage of Google Docs and Drive.
Remember that Microsoft Word costs at least $6.99/month for the basic Microsoft 365 subscription. You can often find deals online on eBay or Amazon, but be careful that you're buying from a reputable buyer.
Bible Study Software Sermon Writing Tools

Open the Sermon Builder to create one sermon.
Logos 9 includes a useful Sermon Manager to create your sermon preaching calendar for weeks to years out in advance. Then, you open a single document with a tool called the Sermon Builder. This was a huge part of the Logos 9 upgrade. They worked to overall the sermon writing and organizing features to make it more usable.
Logos 9 users will love the way the built-in Sermon Builder syncs with their Proclaim worship presentation software. If you use it in your church, then you can create sermons in Logos 9 and it will sync to Presentation for the date the preacher is scheduled to preach that sermon.

Using Logos and Proclaim together lets the preacher publish his sermon online in text mode. Plus the church can record both audio and video to publish podcasts or worship service videos.
Accordance Bible Software also lets users write inside the software. The Papers option works best. The video below shows how to create and edit Papers in Accordance 12 and later.
You could also use things like Notes files and most Bible study apps. But the above two options work best for creating sermons that you can store inside the program and search later to reuse part or all of the sermon.
The cost of Bible software varies wildly depending on which vendor you buy from, what package of tools you purchase, and whether it's on sale.
To get Logos 9 10% off, I'd appreciate you using my affiliate link at www.logos.com/KevinPurcell where you can buy a package and get a few free books too. I get a commission which helps me do my work here on this site and on my YouTube channel.
Tools like Olive Tree and Laridian PocketBible are free to cheap to get the basic app.
Note Apps Built Into Your Operating System are Useful Apps for Writing Sermons Digitally
As I said above, you could just write plant text or simply formatted text in a Note attached to a passage inside your Bible study program. If you use something Like Olive Tree or PocketBible, this might offer the best option.

Writing in a note gives you a simpler option when compared to complex word processors or advanced Bible software with a Sermon Builder or Paper feature like Logos or Accordance mentioned above.
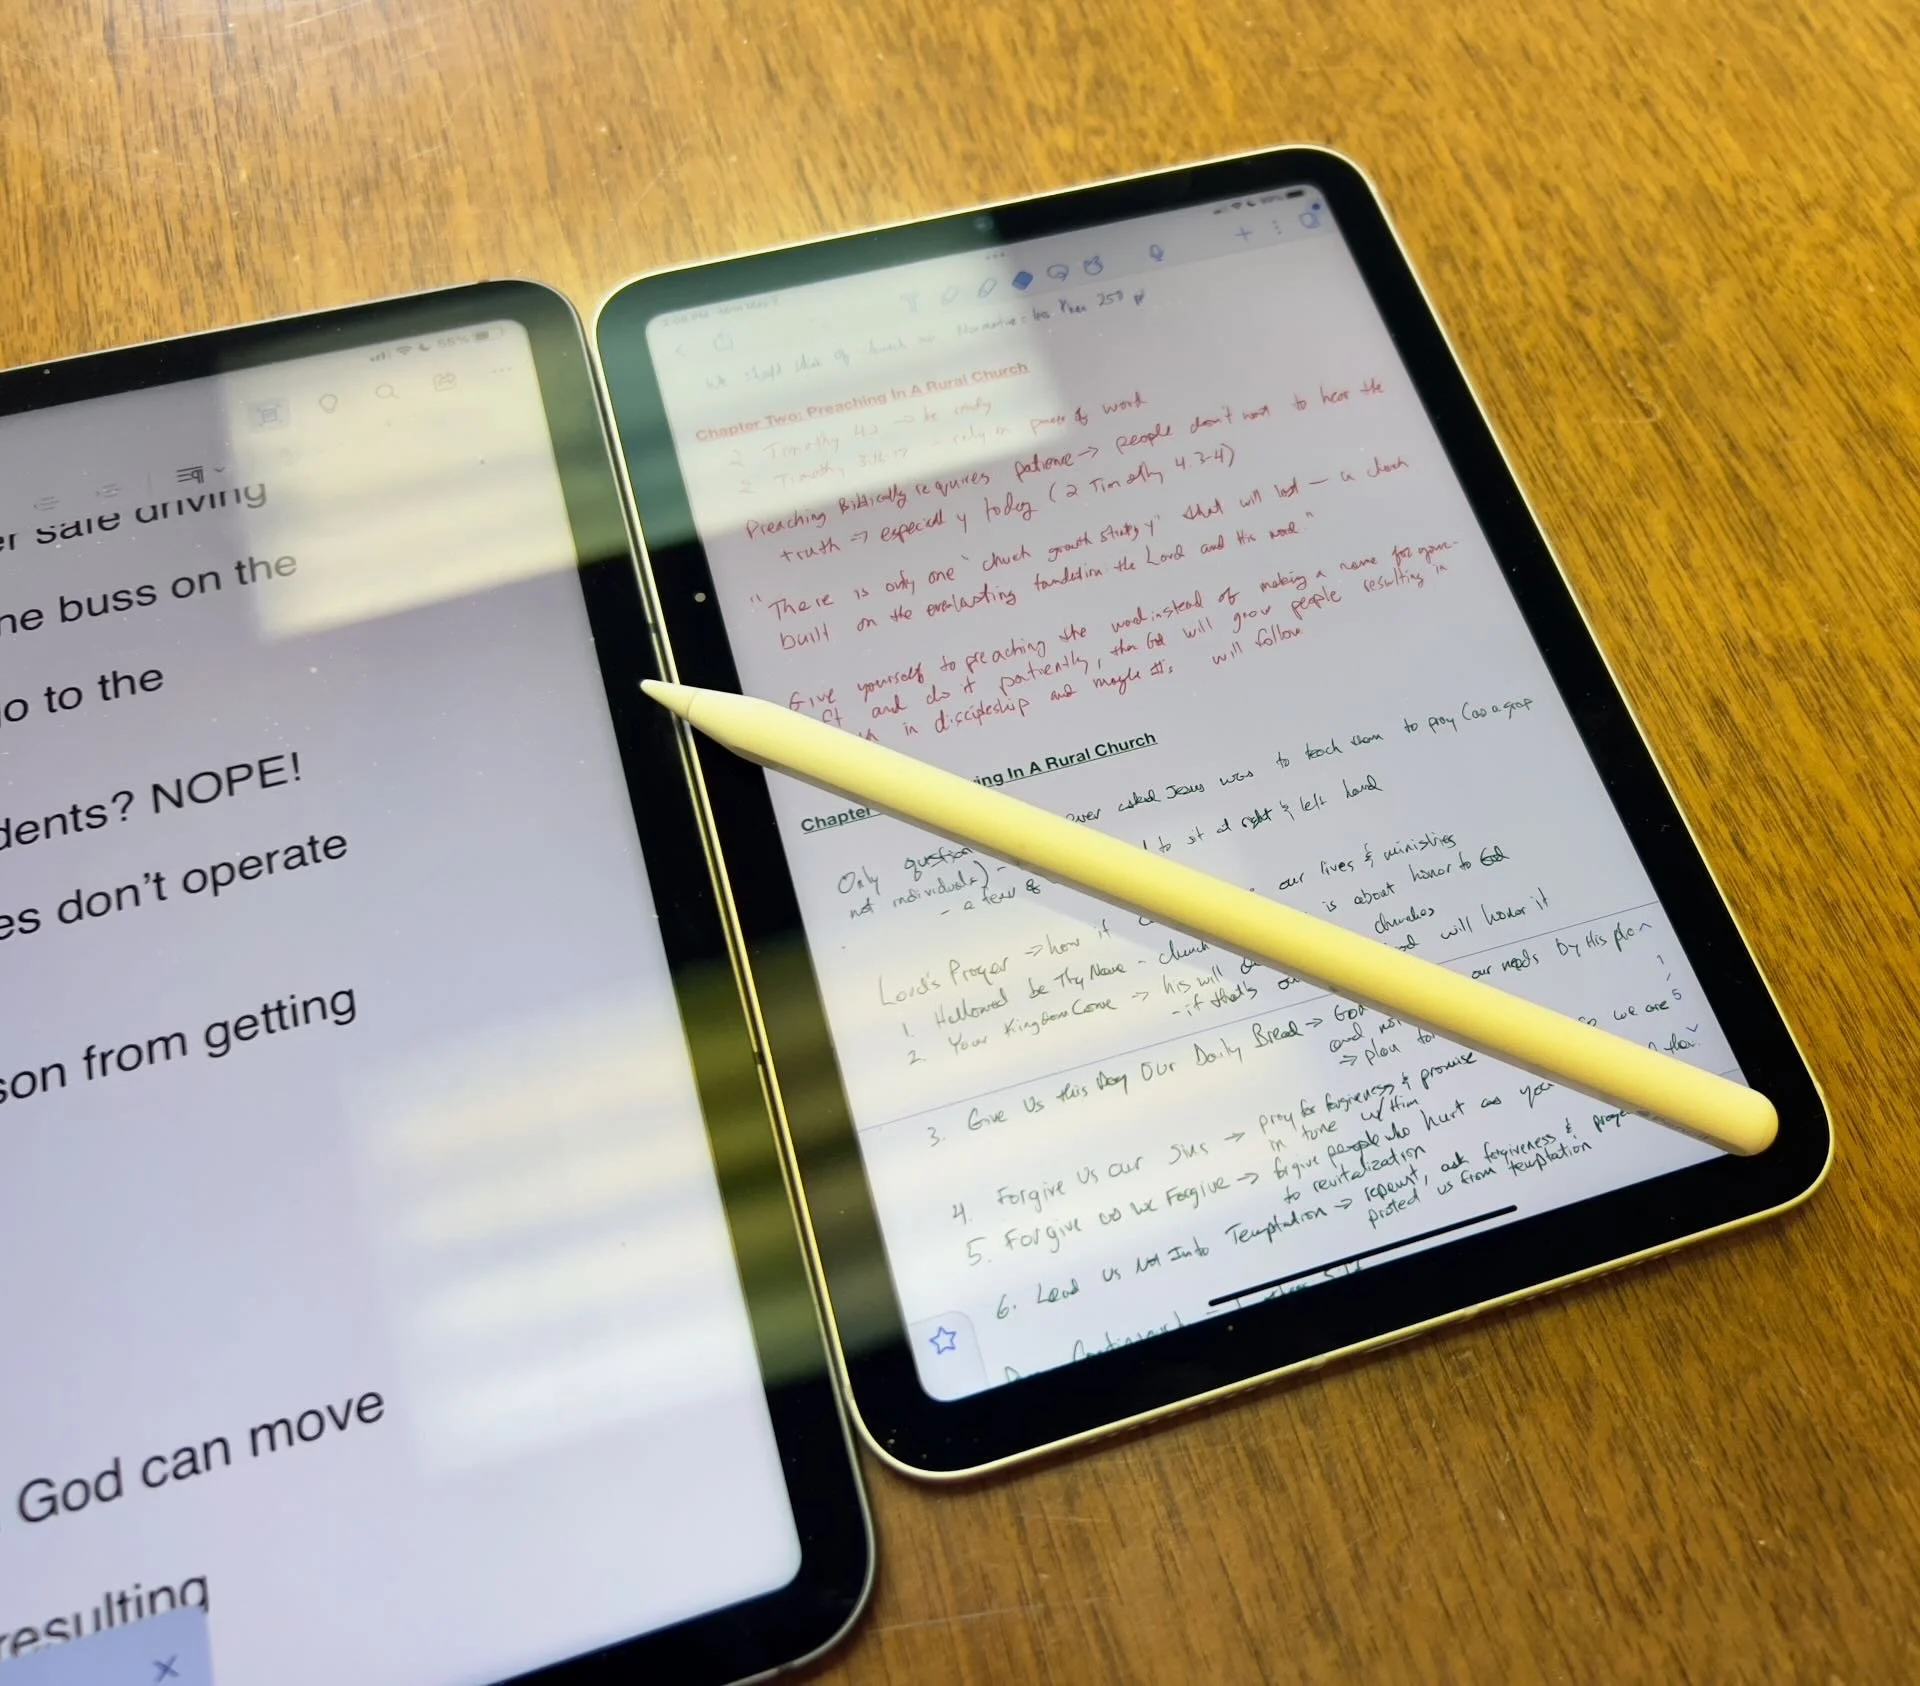
Notability or Other iOS Apps for Writing Sermons by Hand
For users on iOS and Mac, try out the great note-taking apps like Notability on iPad and macOS. You can write using your handwriting, or typing. When you're finished you can export the results as a PDF or image file.
There's a segment of users who enjoy mind mapping their sermons. I'm not one but I've read about them. People like this will organize their sermon notes by putting the major subject in the center of the screen in a circle or box. Then they will draw lines away from the center to another shape for each major sermon division or point. Under each or around each they show their explanation, proof, and application for each main sub idea in the sermon. Add an introduction and conclusion and you've got a visual method of displaying the sermon.

Above you'll see a visual form of those from my friend Antoine Wright who visited my church and did what he called a "Sketch Note" of my sermon that day. You could do something like this for your sermon notes. If you're not artistically inclined like Antoine, then you can use text or print instead of images.
You could use other note-taking apps like Apple Notes, Good Notes, and more.
Samsung Notes or Other Apps for Writing Sermons by Hand on Galaxy Android Devices
Another option for Android and Samsung users is Samsung Notes. It's built into Samsung's version of Android. I like using it because it's simple and easy to learn. However, it has fewer features than Notability. If you could use. Notability on an Android device I would.
Use Samsung Notes to create notes with handwriting or type using a keyboard. The strategy is the same as it is for iOS handwriting apps.
Sermonary for Online Sermon Writing the Best of Online Apps for Writing Sermons Digitally
A final option includes a website that lets you write online called Sermonary. Here's how it works. Create a new sermon and then add your sermon elements. Add sermon divisions or points. Then create subpoints for the explanation, proof, and application.

Sermonary includes Templates for different styles of sermons. You can use...
- 3 Point Sermons
- Andy Stanley's ME-WE-GOD-YOU-ME format
- Running commentary format
- Defender's Outline for an apologetics sermon
- Children's Leader
- Youth Pastor

The service adds resources to help you preach the word including some visuals, sermon series ideas, and more.
Sermonary costs nothing for the basic editor. Add more features and you'll pay $19/month or $69/month for a bundle with Sermonary and Ministry Pass. That adds sermon series ideas, visuals for presentations, holiday sermons, plus sermon illustrations.
In addition to Sermonary, instead, you could use any online writing tools like...
- Google Docs
- Word Online
- Grammarly
Text-based Writing Tools with Markup to Write Sermons in Plain Text

Some people prefer simple text editors. Almost every computer or mobile device includes a text-based writing app like Notepad on Windows, Apple Text Edit on macOS, and Apple Notes on iOS, iPadOS, or macOS.

If you're an Android user, you might find a good text editor, but sometimes you need to download one from the Google Play Store. Consider Writer Plus a great Android text editor available on both iOS and Android. Use it as a basic text editor or add markdown to format your text. The app is free with the option to donate via in-app purchase.
Recommendation for Writing Sermons
If you have access to Microsoft Word, then go with it. It's cross-platform meaning you can move from iOS to Android to Windows to Mac and back. Second, it's not tied to one Bible study program. The death of Bibleworks and Wordsearch recently proves we should move carefully deeper into one platform's ecosystem. I like to keep as much as possible separate from my Bible software.

Which Apple iPad is Best for Bible Study?
The Apple iPad in whatever form factor destroys the Android competition for great Bible study on a tablet. Windows comes in a close second because you can install a desktop-class Bible study program on it if you have the storage.
Even if you assume I’m correct about the iPad, which is a big assumption, what iPad should Bible students choose and why?

To just get the conclusion, jump to the end for my Conclusion at the end of the page.
The 4 Apple iPad Form Factors
All four Apple iPads include a slab of glass housed in a rectangular case. They come with varying qualities of screens, speakers, and speed. However, users will not see a huge difference in running the most popular Bible study apps from Logos, Olive Tree, Accordance, and more on any of the four current-generation Apple iPad. Still, let's take a look at each starting from smallest to largest.

The smallest iPad also gives users the most mobile experience. The iPad mini feels more like reading a book than the other iPads. It comes with an 8.3-inch liquid retina screen when measured diagonally. That's 7.69-inches tall and 5.3-inches wide, about the same size as a small Bible but capable of carrying an entire theological library.

The iPad Air has Touch ID on the power button, a convenient security feature. You will also get some pretty decent speakers on the two shorter edges and USB-C for connecting chargers or accessories.
If you want to carry your whole theological library, then you’ll likely also want one with 256GB of storage. Unfortunately Apple stubbornly only offers two storage options. You can get a meager 64GB or too much for Bible students with the larger 256GB option. Most people need more than 64 and less than 256.

The two storage options cost $499 for the base model iPad mini 6 with Wi-Fi only. With 256GB you add $150. That's ridiculous, but necessary because after you own the mini for a while, you'll want to use it more and more because it's so convenient to carry out. So plan to pay the extra coin.
I personally chose to add Cellular as well making it cost $$800. I like that I can just open the cover and start working no matter where I am, almost since there are some areas without coverage in my semi-rural community.
Throw in an Apple Pencil 2 and a cover and you're over $900. That's a lot of money, but you can get it on a 0% interest payment plan with your wireless carrier or with an Apple Card.
The newer Apple Pencil 2 connects and charges while connected to the side of the iPad. It's a great stylus but costs. More on that below.

Some people call the basic model the iPad 9 or iPad nothing because it doesn't include a descriptive name like the mini, Air, or Pro. It's the cheapest option at only $329 for 64GB of storage and no Cellular.
It includes a larger screen at 10.2-inches diagonally or 9.8-inches by 6.8-inches when measuring the long and wide sizes of the entire device.
The iPad doesn't support Face ID but you can unlock it by touching the Home button, which has Touch ID built-in. It uses older technology than the Air or even the mini. However, it's a great starter iPad for most people. And if you only plan to study the Bible, strongly consider it since it costs less than any other device. Users can use the Smart Keyboard.
The iPad 9 comes with the same problems as the iPad mini with only two storage options - 64 and 256 GB. So you really want the larger storage option which brings the price to $479. If you want Cellular, then add $130 bringing your total to $609. Most looking for this budget model won't want Cellular, but get the 256 because 64 isn't enough.
The other problems with the regular iPad include...
- Lightning connector is slower and makes accessories more expensive since creators have to pay Apple for the right to include Lightning.
- Lower resolution screen that's not as good as the mini and much worse than the Air or Pro models.
- Slower A13 Bionic Chip compared to the A15 in the mini and the M1 Chips in the Air and Pro models
- Uses the older first-generation Apple Pencil that charges by sticking it into the Lightning port making it easier to break off the connector or lose the cap.
Apple offers the iPad as the budget option and that makes it a great tool for people who want a device for basic needs, including Bible study, reading, and Bible app research. You can also pair it with a Bluetooth keyboard for writing. Just don't expect the latest and greatest. Those tech specs aren't included.
Some call this the best deal on an iPad today. You get the most bang for your buck. However, it will cost you more than the iPad and iPad mini. It has a much better screen and a super fast and efficient M1 chip. Plus it records 4K video with the back camera and has a front camera that follows you when you're video conferencing. They call that Center Stage because it centers the camera on the subject.
The Air speakers sound great and the screen looks amazing. You can use the awesome iPad Magic Keyboard case or the awesome Smart Keyboard Folio with the trackpad. I love this keyboard. Also, the newer Apple Pencil 2 connects and charges while connected to the side of the iPad.
However, we still see the annoying storage issue with only 64GB or 256GB. Plus Cellular swells the price by another $150. That brings the total with 256GB and Cellular to $899. For Wi-Fi alone, you pay $749. Why does Cellular cost more on the Air than on the mini or the basic iPad?

The iPad Air is the prettiest coming in one of five colors including Space Gray, Pink, Purple, Blue, and Starlight.
The iPad Pro below comes in two sizes, 12.9 inches, and 11 inches. Don't get the 11-inch iPad Pro. Instead, get the iPad Air.

The most expensive, powerful, and feature-rich iPad seems more like a mobile computer than a tablet. The iPad Pro which you can get in 11-inch or 12.9-inch screen sizes offers the most power of the four sizes. It costs $799 for the 11-inch and $1099 for the 12.9-inch.
Apple offers 128GB for the base price. That's the sweet spot and should be the lowest storage offered on any device made by Apple. It's the perfect storage for most buyers. However, you can get 256, 512, 1TB, or 2TB. You don't need anything more than 128 for Bible study. However, you may want to choose higher storage if you plan to use this iPad for much more than Bible studies, like video and photo editing, gaming, and more complex uses.
Users may want the large 12.9-inch screen because they want more screen real estate for Bible study.
Other specs to excite buyers include:
- Liquid Retina XDR Display
- ProMotion
- M1 Chip with more memory than the others
- Face ID and Center Stage camera
- 5G Cellular optional along with Wi-Fi 6
- LiDar support for things like 3D modeling
- Thunderbolt USB-C port that's fast and will connect to a Thunderbolt monitor or incredible docks with a lot of ports
Recommendation for Bible Study Only

If you only want to study the Bible then you have to ask yourself a few questions. Do you want something small and easy to carry around like a small Bible? Then get the iPad mini. If you need a bigger screen then get the iPad Air. It's the most future-proof and with all the tech inside it will last for a long time. However, budget-conscious buyers should go with yesterday's technology in the basic Apple iPad.
Just remember this. I've never met anyone who actually used a tablet only for Bible study. So, you can see yourself possibly needing a little more power, a good typing experience, or some screen real estate to edit your photos or make video masterpieces, then get the Apple iPad Air.
Recommendation for Bible Study and High-End Multimedia
If you just read the above paragraph, then you know I recommend the Apple iPad Air for people who want to study their Bible with Logos, Accordance, Olive Tree, or some other Bible app and work with multimedia. But which iPad Air should you get?
The 256 is, unfortunately, the best option until Apple gets its head out of the sand and starts offering a 128GB option.
Recommendation for Those Needing a Large Screen

Buy the Apple iPad Pro 12.9-inch model with 128 GB if you only want to study the Bible or 256GB or more if you want to do high-end work like multimedia creation.
I bought the 12.9 Pro because I teach and preach from my iPad and due to my aging eyes the mini's just not big enough. The iPad Pro 12.9 means typing on a keyboard that's wide enough to enjoy. The Air was too narrow for my big hands. I spent more than I needed to. Until Apple offers a larger Air with 128GB, I'll happily keep my Apple iPad Pro 12.9-inch.
Recommendation for Buyers on a Budget
This one's simple. Get the basic Apple iPad for $329 if you don't own a large Bible library or pay more for the 256GB model. You won't get all the power and specs and it may feel old in a shorter time since it's not as fast, but for buyers on a budget, it's the best way to go.
The only other budget option is to buy a used device or get an older one. Look at your budget and something that fits in your budget that also fits your preferred form factor.
You can check out Apple's Refurbished store. For example, they offer the iPad mini 5 for the same price as the newest base model iPad. For slightly more than the base model you can get an Air with Wi-Fi for just $419.
Check out eBay, Facebook Marketplace, and Swappa as other options for used and refurbished products. You can get a great deal.
Must-Have Accessories
When you buy an iPad, you also have to factor in buying accessories. Other tables like the Samsung Galaxy Tabs come with at least a writing device. You can use the tablet alone, but I wouldn't. You'll need the following accessories.

- Cover or Case - you will want to protect your device.
- Keyboard or Keyboard Cover - you can study the Bible on your iPad more efficiently with a keyboard connected.
- Apple Pencil - you may want a Pencil to write or take handwritten notes in apps that you can use alongside your Bible apps.
- Screen Protector - I used to not protect the screens on my tablets, but when you carry it around naked you should.
- Headphones - many Bible apps include audiobooks or videos.

Let me offer my top recommendation for each category above.
- The Apple covers or cases work best, but if you want to save money go with cases from Moko, Spigen, or Moshi.
- Apple's Keyboards or Keyboard Covers are the best options for the Air or Pro. The Magic Keyboard is $300 and the Smart Keyboard Folio costs $180. I love typing on my Magic Keyboard cover connected to my iPad Pro 12.9. However, Logitech makes great keyboards too if you want to use your iPad at a desktop. I have the Logitech MX Keys and MX Keys mini. You can also buy Apple's Magic Keyboards with or without Touch ID.
- Apple Pencil is the best writing device and I wouldn't buy another one. However, the Logitech Crayon is a $70 alternative.

- Screen Protectors are a budget item. They shouldn't cost a lot of money. Just get a glass screen protector. However, here's one alternative that some people really like. Get a Paperlike screen protector, which does two things. It protects the screen and gives users a paper-like experience for drawing and writing.
- Get the Apple Airpods or Beats to use for Headphones. They work best with Apple products and sound really good. However, not everyone wants to pay that much. Be careful which ones you buy, because sub-$100 Bluetooth earbuds usually sound like junk. To save money get Apple's USB-C to stereo adapter and plug-in wired headphones.
Conclusion

To do only Bible study, then get the iPad mini. You'll enjoy using it for hand-held study. If you want to put it on a table and need more screen real estate, then buy the iPad Air with an Apple Magic Keyboard. Add an Apple Pencil to either device if you plan to take notes in your own handwriting or want to write. Add a handwriting keyboard replacement app like Handwriting Keyboard ($3.99). Throw in a great note-taking app like Notability or Good Notes. This way you can have the Bible app on one side and the note-taking app on the other while holding the tablet.
Get Logos Legacy Library for 25% Off
If you need to buy a good Bible software package, consider using my affiliate link to get Logos Bible Software. You can get what they call "Legacy Libraries" for a nice discount of 25% off. A legacy library is a collection of books that they sold when they released previous versions of Logos from versions 5 through 8.

4 Ways Logos Bible Software Can Help You Share God's Word
Logos 9 Bible Software can help you share God's word. Check out these best posts on Logos 9 and a way to save 20%.
Logos Bible Software is one of the top Bible study programs you can buy for both Mac and PC. It's powerful, helps users access a large library of excellent content, and beginners and advanced Bible software users can quickly get used to the program.
I've written a lot about the program so I'm going to share some of my best posts and then show you how you can get a discount on the software.
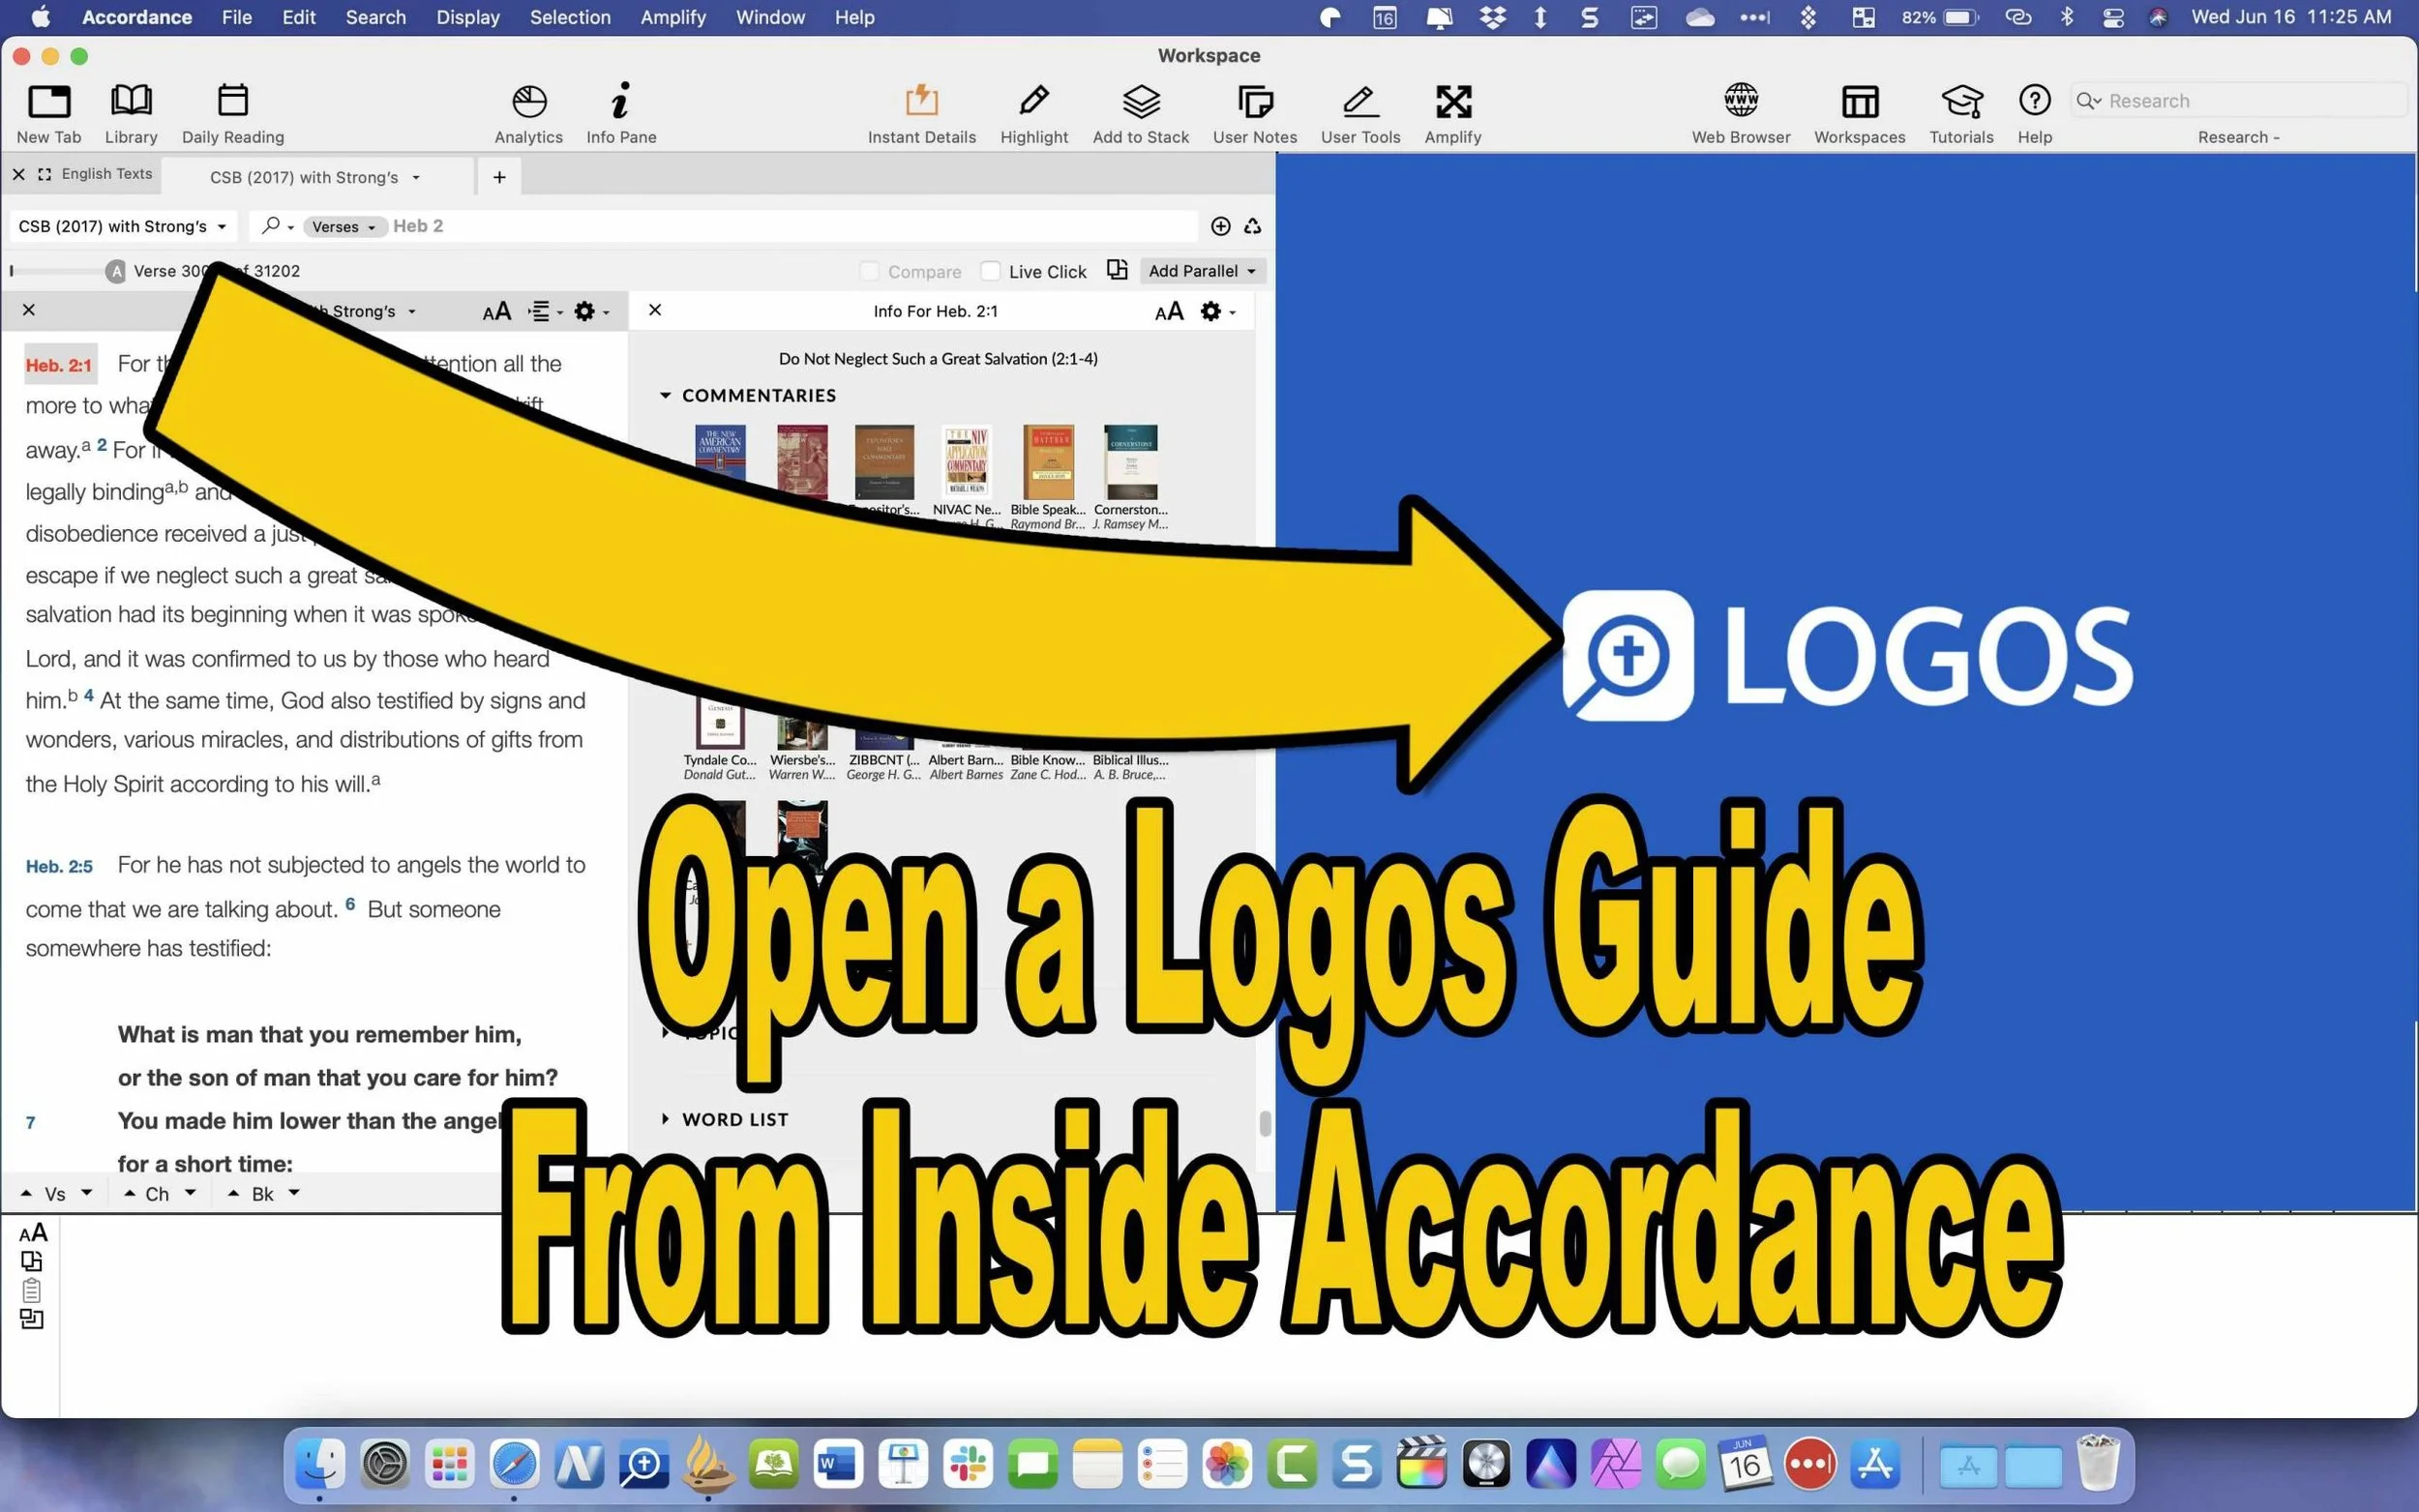
Open the Logos Guides From Inside Accordance

Some of you might be coming over to Logs from Accordance or vice versa. You don't have to uninstall the old one. Just use them together. You can open a Passage Guide or any of the great guides inside Accordance and make use of your Logos library.
Find out how to do this great little hack in my post: How to Use Accordance Amplify to Website to Open Your Logos Library.
The Factbook: What is it and How Do You Use It?

Think of the Factbook as a Bible Encyclopedia on steroids. It's got a lot of facts about the bible. You can learn more about people, places, things, theological ideas, books of the Bible, and a ton more. So read the article about how to use it and watch the video below that demonstrates the Logos 9 Factbook.
Make Logos Work Like Wordsearch
If you loved Wordsearch, then you likely felt abandoned when Lifeway sold the program and all of its assets to Faithlife, the makers of Logos. But, I wrote a post on How to Make Logos Work More Like Wordsearch. So check that article out.
Get 20% Off Base Packages

Maybe you don't already own Logos 9 and would like to. You can get 20% off a base package using my affiliate link. The like will work from April 1 till May 3rd. For full disclosure, I will get 10% of the purchase price from Faithlife as a commission.

iPad Mini 6 Review for Ministers and Everyone Else
One of the best tablets for pastors is the iPad mini 6. Here's why I love it so much for ministry and general use.

The Apple iPad mini 6 came out and I couldn't resist getting one. In fact, I sold my 12.9-inch iPad Pro and my iPad mini 5 so I could get the 256GB model. Here's my iPad mini 6 review for ministers and everyone else.
Let's start with how the iPad mini 6 ($499 for base, $649 as reviewed) fits in my life. I use it as my primary tablet and, for a little while, my only iOS device because a couple of months ago I switched from using an iPhone 12 Pro Max to a Samsung Galaxy S21 Ultra 5G. I moved back to the iPhone after that failed experiment. I shared thoughts on that transition in another post. The iPad mini 6 handles...
- Reading my Bible and others books in Bible apps and the Kindle app.
- A complement to my phone for checking email, Facebook, Twitter, and Instagram.
- Watching videos or listening to podcasts using YouTube, YouTube TV, Pocket Casts, and other streaming video services.
- Playing casual games.
- Quick photo editing for posting online.
- Quick video editing - mostly trimming videos, combining clips, color correcting, adding titles, and music but not complex edits.
- Flying my DJI Mini 2 drone.
- Taking notes in meetings with Notability and the Apple Pencil.
- Preaching from my tablet with Word or using Keynote for presentations.
We'll look at the uses listed above and then the hardware. If you just want to see what I think without the detailed iPad mini 6 Review, then jump to the bottom to get my recommendation.
iPad mini 6 Review: Bible Study and Reading Books
The screen on the iPad mini 6 looks pretty nice while reading books. The iPad mini 6 works well for studying the Bible in several Bible study apps and the Kindle app for reading books. Read magazines using the Apple News app.

I like reading on a screen. My wife prefers the Kindle Paperwhite and won't read books on a tablet, but I love using the iPad mini thanks to the sharp and clear display. If you hate reading on a screen and prefer e-ink or real paper, then don't buy the iPad mini 6 for reading. You won't enjoy it. However, I would recommend trying it out. Borrow a friend’s mini or spend some time at an Apple Store or Best Buy reading to see if you could use it. It’s nice caring only one tablet for reading.

All the Bible apps that run nicely on an iPhone look great on the mini 6. The screen's just big enough to open 2 books at once time or open a book and a note screen. The new window management in the iPad mini 6 or any of Apple's iPad thanks to iPadOS 15 makes it easier than ever to open two apps at once. You can...
- Open one Bible app and take notes in another
- Open your Bible app and a word processor like Word, Pages, or Notes
- Use your inking app, like Notability, and take handwritten notes while also studying the Bible in your favorite Bible app.
- Research topics on the Internet while and studying the Bible in your chosen Bible app.

The Kindle app and Apple News app look great. Reading other text in a browser, email, or social media also looks sharp and crisp.
Margins Notes or Highlighting like a Paper Book
Most of the Bible apps and the Kindle app won't let you take handwritten notes inside the app. iPadOS 15 added a new feature where you can grab your Apple Pencil 2 (sorry, but the first-gen Pencil doesn't work) and swipe from the lower right corner. Apple Notes opens a note and you can take what they call Quick Notes. These Quick Notes are attached to the content on screen. You can type or draw and write in your own penmanship.

While I would not use this for really important Bible study and research notes, it's great for a quick note that you can save and later add to the notes feature. I type faster than I can write with the Pencil, but Quick Notes works great for those instant observations in another app outside your main Bible app, hence the name Apple gave the feature.

If you love to write in the margins of your books, then convert them to PDF and get an app like Notability, Liquid Text, or Good Notes. You can find others, but make sure they support importing PDF files. I use Liquid Text for this. It supports PDFs and Word docs. By the way, the OneNote app also supports handwriting with the Apple Pencil.
You could always highlight the Bible in the best Bible apps. This also works great on the iPad mini 6.
iPad mini 6 Review: Preaching from Digital Notes

When I preach, I always bring my iPad into the pulpit and view my sermon notes in Microsoft Word. It worked great on my 12.9 iPad Pro. Young people or those with great eyesight will love using the iPad mini 6, but it's a little too small to lay down on the pulpit. Word will enlarge the text, but then you don't see enough of the outline at one time. So, going forward I will not use my iPad mini 6. However, if you want to, open the document, put it in reader mode by tapping the icon on the toolbar (see the GIF above), and then pinch to zoom text.
You'll need to decide if your eyes see well enough to use the smaller iPad mini 6 for preaching notes. If you used an older iPad mini, then you'll like the new one. The screen measures slightly larger than the old version with an 8.3-inch display versus the older 7.9-inch on the 5.
Presenting Using the iPad mini 6

Presenting suffers the same problem for my older eyes as reading my preaching notes. However, I can use it and if you've used a small display for presentations before, then the iPad mini 6 will work for you.
If you simply plug in and swipe or tap to advance slides, the iPad mini 6 will work great. If you like to write or draw on the screen as I do (see above GIF), then the size might limit you. It's harder to present on the smaller screen compared to the 12.9-inch Pro display or the 10-11-inch display on the basic iPad, iPad Air, or smaller iPad pro.
With iPadOS 15 and macOS Monterey on a Mac, you can send the display of your iPad to the Mac using screen sharing (see GIF above). This would let you connect to a Mac hooked up to a projector or TV. Then screen share your iPad screen to the Mac.
iPad mini 6 Review: Screen and Input
Pick up the small and light iPad mini 6 and type on the screen with your fingers or write using Scribble, the new Pencil-based input system in iPadOS 15. The mini 6 handles this kind of input. However, I don’t really like Scribble, so I’ve installed a keyboard that lets me draw text and it converts it to printed text on the screen. It’s called Handwriting and handles handwritten text input better than Scribble.
iPad mini 6 Review: Performance
I'm not going to run benchmarks or battery tests. You can find those on more technical reviews elsewhere. Rene Ritchie does a great job of these kinds of reviews on his YouTube channel.
If you plan to use the iPad mini 6 as a tool in ministry, it performs efficiently and offers a nice improvement over the 5. It's snappier, scrolls through websites and books faster, and the inking smoothly displays your handwriting and drawing.
Some people report seeing a strange effect while scrolling. It's the great "Jelly Scrolling" controversy of 2021. See the effect in the video below.
The jelly scrolling issue clearly shows up in the video above. But, I don't see it on mine. It seems like you have to really look for it to see it. And if you do, then you may not see it again. If you get one that looks more noticeable, then get return it and get a replacement.
Since I don't notice the problem, I can't complain about it here.
Other than the Jelly Scroll issue, the iPad mini 6 performs well. I played videos, games, and read on it a lot over the first couple of weeks, and loved the experience. It feels like a good improvement over the 5, which I owned.
iPad mini 6: Video and Photo Samples
Most people will still use their phone or a dedicated camera to take pictures or shoot videos. However, I use my iPad mini to scan documents and the rear-facing camera works great. I import documents into my note-taking apps or scan them for storage in my OneDrive folder. After worship, I scan all the guest cards to contact them. I also scan new member cards to add them to our church role.
More people will use the front-facing camera to stream themselves on social media or for FaceTime, Skype, or Zoom calls. The camera works fine for these situations.
A new feature on the iPad mini 6 enables ultra-wide video so that the camera will follow you around your room even if the iPad remains stationary. The software will zoom in and focus on your face so you can get up and move left or right and then back to the center frame.
In a pinch, the camera does a nice job of taking photos and videos. Here's a sample of photos taken on the iPad mini 6 camera. They are all without edits and exported from Photos to JPG. The one of me in my orange shirt is taken with the front-facing camera. The other four are taken with the rear camera.


The colors look nice. Each photo seems sharp enough for snapshots. I wouldn't try to get high-art photographs with the camera. All of that said, the camera impressed me. Until this model, I wouldn't even consider taking this much time in a review to discuss the quality. But this camera works better than any previous iPad camera.
iPad mini 6 Review: Flying My DJI Mini 2 Drone

Flying a drone usually starts with connecting a phone to the drone controller. However, I never really liked using the small screen of the flown. There's too much on the screen for even a large screen like the one you get with the iPhone 13 Pro Max. So, flying a drone with an iPad mini 6 makes drone pilots happy.


The above set of screenshots shows the interface of the DJI Fly app, used to control the DJI Mini 2 drone. All the controls show up with plenty of room to see the images from the drone's camera.
To fly a DJI drone with the iPad mini 6, you'll need a special attachment like the Drone Valley Gear Tablet Mount ($18.95) that I bought on Amazon. It fits an iPhone, iPad mini 6, or another tablet of similar or even larger size.

If you want to learn more about the mount, see Drone Valley's video below.
iPad mini 6 Accessories
I bought the official Apple Smart Folio in Electric Orange for $59. I also accidentally got the Dark Cherry, but it showed smudges too much, so I stuck with the bright orange Smart Folio and I'm glad I did.
The case covers the back of the iPad mini 6 then wraps around the left side of the device to cover the front. The back snaps into place thanks to magnets that reliably hold it on the iPad.
The front part of the Smart Folio folds up into a triangle to turn into a stand. It will hold the iPad up in an angle best for watching a video and a lower angle for drawing.

The magnets in the front part of the Smart Folio snap onto the front part of the iPad and this turns the screen off until you open the case and it turns the screen back on. It also folds onto the back and snaps into place so you can hold it and read or do other things.
The Apple Smart Folio case feels like it will hold up, but for $59 it seems like it should feel more premium. It has a bit of a cheap feel to it. You can find cheaper cases, but I like Apple’s because they’re designed better even if the raw materials aren’t as premium.
The Folio also comes off easily making the iPad mini 6 lighter and therefore easier to read on it.

The Apple Pencil 2 snaps onto the right side (in portrait orientation) and automatically pairs with the iPad. It also charges while connected. The magnets seem stronger this time than my old 2020 12.9-inch iPad Pro.
The Apple Pencil costs $129, a little steep for a stylus. However, it's one of the best you can get especially for artists.

I don't use the iPad mini for typing very often, but Logitech makes the best keyboard you can pair with the iPad mini 6 or any tablet. The new Logitech Mx Keys Mini costs $99, a lot for an iPad mini keyboard. I use it with other devices so it's worth the price. You get a great keyboard that's small enough to carry in a bag but small enough that it doesn't take up too much space.
Add to the Mx Keys Mini, Logitech's great MX Anywhere 3 mouse, also pricey at $79.99, and you get a mini-computer on the go.
The above image shows a pair of Samsung Galaxy Buds 2, but the best wireless Bluetooth earbuds are the Apple Airpods Pro. They automatically switch to the iPad mini 6 when you put them in your ears and start playing media.
iPad mini 6 Review: Specs
- Screen
- 8.3-inch display with 2266x1488 pixels and 327 pixels per inch
- IPS LCD with 60Hz refresh rate
- 500 nits brightness
- System Hardware
- Apple's A15 Bionic processor
- Hexa-core 64-big
- 64 or 256GB storage
- Battery
- 5078 mAh LI-Polymer battery
- Runs over 10 hours in most tests
- Cameras
- Rear camera - single 12MP with F1.8 aperture
- Video recording at 4K 60fps and 1080P at 240fps
- Front camera - single 12MP with 1080P video
- Connectivity
- 5G, LTE Celular with dual sim support
- Wi-Fi 6
- Bluetooth 5.0
- Physical Size and Details
- 7.69 x 5.31 x .25 inches
- 10.34 ounces
- Volume up/down and power button with integrated fingerprint reader
- USB-C charging port with cable and brink included
- Comes in Space Gray, Pink, Purple, and Startlight
Recommendation
I love my iPad mini 6. It was nearly the perfect update over the 5 with a better camera, USB-C, faster processor, and just an overall better experience. If you own an old iPad mini, then seriously consider upgrading, especially if it’s a 4 or older. If you own an Android tablet or. Kindle, then the iPad mini 6 will cost more, but it’s worth it. Android phones might compete well with the iPhone, but I’ve never used an Android tablet that meets my needs as well as the iPad.
Bible by YouVersion Downloaded 500 Million Times: 5 Reasons Why
The Bible app from YouVersion, and Life.church announced that people downloaded their app 500 million times. Here are 5 reasons why.

500,000.000! That’s half a billion. That’s how many times people like me downloaded the Bible app from the folks at YouVersion by Life.church. I recognize that I downloaded the app probably 20-40 times alone over the years, but even if the 500 Million downloads represent 100 Million actual people, that’s a lot of people reading the Bible.
What makes this simple Bible reading app so popular that such an enormous number of people installed the app on their iPhone, iPad, or Android device? After all, it doesn’t have any commentaries, Greek or Hebrew word studies, or other theological tools. It’s mostly just a Bible reading app with social media features and sharing built-in to name a few features.

Let me share with you the 5 reasons why users downloaded the Bible app 500,000,000 times. Not only will you learn what sets it apart, but how to get the most out of the simple Bible app.
Bible App is Simple
I usually recommend complex Bible study tools like the apps from Logos Bible and Accordance Bible. If that's too complex I drop to the second tier of apps from Olive Tree Bible, Laridian Pocket Bible, or a few other third-tier Bible study apps. Most of my readers want at least basic original language study in Greek or Hebrew, commentaries, Bible dictionaries, and complex searching. The Bible App includes none of these advanced features and that's why so many love the app. They prefer simplicity over power.
Fire up the app and you'll find the Verse of the Day on the Home tab displayed in the text, visual form, and as part of reading plans that include that verse. There's also a video about the verse (see image above).
Tap on the Bible tab at the bottom of the page to read the Bible in your preferred translation. Users can quickly move to a new passage using the button on the top of the screen. The other top center button opens the library of translations and you can read almost any translation you can think of in multiple languages (see image below).

Other options let users open multimedia resources related to the current passage. You can also change the look of the text...

Above you'll see highlighting (left), a selected verse with the menu that shows the list below, and images that you can put behind the verse text and share with social media or other places (right above).
While reading a passage, tap on a verse to…
- Select the verse
- Highlight a version in multiple styles
- Copy a verse
- Create a visual image of that verse
- Share the verse
- Compare the verse in different translation
- Add notes or bookmarks
- Create a prayer list item
- Find related verse
You will also see little note icons that display translation notes.
If you want to select multiple verses, keep tapping on more verses.
There’s a lot here, but compared to more complex research apps, the user interface is quite simple to use and figure out.
Bible App Includes a Large Collection of Simple Reading Plans and Translations

The Plans tap at the center bottom of the app shows you all the reading plans available in the Bible App (see left image above). Users can find a large collection of reading plans based on topics, books of the Bible, or sections of Scripture, like the Sermon on the Mount.
When users select one of the plans, they can do the following:
- Read the Bible
- Share you progress with friends inside the app or on social media
- Get notification reminders to read your daily reading
- Search for plans
Notice in the image above that you can find Reading Plans in the Discover section too (2nd from left button on the bottom - see image above).
Bible App Shares to Social Media and More
The Bible App not only helps people read the Bible but helps them read it as part of a community. Like other social media networks, the Bible App lets users follow friends and see their progress, Bible images, and more.
Go to the Home tab and choose either Today or Community at the top. The Today screen shows your Verse of the Day, reading plans you’re reading, and suggests people follow, among other things.
The Community tab shows things you’ve shared and what your friends share with others, like their reading plan progress or Bible images. You can then comment or like their content. If you like a reading plan that a friend shares, then you can choose to start reading it yourself.
If you choose something in the app, you can use the phone or tablet operating system sharing features to share to places like Facebook, Twitter, Instagram, or directly via a text or some other direct messaging app.
These social media features might do more to spread the Bible App to others than any other feature. As people share things with friends and family, recipients then choose to download the app.
Bible App Syncs Highlights and Notes Across Devices and Platforms

Most people own a computer, a smartphone, and maybe a tablet. Tech enthusiasts like me might own a few of teach. The Bible App works on all of them. You can install it on...
- iPhone
- iPad
- Android phones
- Android tablets
- Kindle tablets
- The Web via a browser
Whatever you do in the app on a device, like an iPhone shows up on the website, your Android tablet, or your Kindle tablet. All your highlights, notes, and reading plan progress show up on each of these platforms. Create an account and log in on each device to sync the various content or progress.
Bible App Adds Multimedia Like Video and Images
As mentioned above, the Bible App doesn't just show you the text of the Bible. You can also view multimedia content like the Verse of the Day superimposed over beautiful images. View the ones made by the app developers, your friends, or create your own.
If you tap on the Discover tab at the bottom of the main screen of the Bible App, you will see Podcasts, Videos, and images.
The Podcasts include simple things like audio book versions of the Bible read by talented readers. You can also hear traditional podcasts that cover things like Bible teaching, help for teachers, and popular content like J. Vernon McGee’s Thru the Bible in podcast form.
The videos come from multiple sources like The Spoken Gospel, which is a video Bible. You can also see scenes from the popular tv series The Chosen. The Bible Project videos also show up here as well as the Lumo Project, another video Bible in multiple languages. You can spend hours watching the videos included in the app.
Summary
I prefer more advanced Bible research and study apps for most of my mobile Bible reading or and study. But for quick and simple Bible reading and for sharing with others, the Bible App does the best job. Since it’s free, everyone should get it and drive that number far past the 500 Million downloads
4 Best Audio Bible Apps for Android for 2021

Do you love to listen to the Bible? Then we've got the best audio Bible apps for Android for 2021. These also work on Amazon Fire Tablets plus your favorite Android smartphone from Google or Samsung Galaxy. I tested them out on a Samsung Galaxy S21 Ultra 5G primarily, but also on a Samsung Galaxy Tab S7. Give this a read and then download them for a good listen to the good book.
If you're looking for the Best Audio Bible Apps for iOS, then keep reading. These also come with iOS versions.
Bible.is - Our Winner: Best Audio Bible Apps for Android

People who want to listen to the Bible and do little else should look at Bible.is and nowhere else. Users agree with a 4.6 rating in the Google Play Store for this free app. You can also find it on iOS. Just a few of the key features that make it great include the following:
- Listen to the Bible in hundreds of languages with more coming all the time
- Create your own listening plans like you can with Bible reading apps - see the first and third screenshot below
- Share plans with other Bible.is users
- Read along with the audio Bible or just read when you can't conveniently listen - see the middle screenshot below
- Search the Bible by keyword, Bible text and phrases, or other words
- Watch Bible-based films like The Jesus Film

The Faith Comes By Hearing folks respond to user support issues and do a great job of pleasing those who have issues with the app. I've never experienced a problem.
YouVersion Bible App - Best Audio Bible Apps for Android with Social Networking
If you only downloaded one Bible app on your phone or tablet, it likely came from Life.church. Life.church brags millions of downloads and often shows up in the list of top apps on iOS and Android.

The church created the Bible app years ago and keeps developing it and improving it. The app excels as a basic Bible reader app with an elegant user interface. It primarily serves as a Bible reading app but adds audio Bible listening and does it well.
I include it here because of its great social networking features. Share Bible verses in a visual way. If your friends post pretty photos with Bible verses imposed over the top of them, the share likely came from the Bible app.
To use the audio Bible features, open in the Bib reader and you'll see a small audio icon in the top toolbar second from the right. Tap it to show the Bible reader pop up as seen in the left screenshot above. You can play from the current location in the Bible shown in the reader window. The fast forward and rewind buttons go forward or back by a chapter.
The settings at the bottom of the pop-up window control the speed and set a timer for how long the app will read the Bible. There's also a button to hide the controls. If you do, then you'll see the screen on the right which shows you smaller rewind, play, and forward buttons. They function the same way as the larger pop-up window.
Olive Tree Bible - Best Audio Bible Apps for Android with Advanced Bible Study Tools
Olive Tree makes the Bible overall Bible study app on Android and iOS. The app includes tools for advanced language study, commentaries, Bible dictionaries, media tools, and more. In addition, they offer a decent library of audiobooks. Check out the Audio Bibles sold on the Olive Tree website.

Open Olive Tree and go to the library to find your audiobooks. The books with audio show a headphone icon. Tap it to open it. You'll then see the audio controls to go back, play, and go forward. Below that, you'll see a toolbar with volume, playback speed, driving mode, and Bluetooth connection.

If you want to use your app while driving tap on the Driving mode icon. The larger play button and skip back button help you play or go back in case you missed something. The icon with the headphone inside a bookmark icon creates a bookmark so you can quickly go back to the spot in the book.
The Olive Tree app plays Bibles and other books too.
Logos - Best Audio Bible Apps for Android Honorable Mention
I've written a lot about Logos over the years including their advanced mobile app. It includes audiobooks too. Open them from the menu button in the lower right corner of the app. Find a book in your library and open it. You might also want to download the book from the library using the tiny download button next to the book title.

Once the audiobook is open you'll see the playback controls as seen above on the right. You can go back and forward by chapter or in 30-second intervals. Play or pause the book. The Contents button lets you jump to any place in the table of contents. There's also a playback speed control.
Recommendation
The playback interface in Logos offers the most options and controls. However, it's also the most complex of the apps and will overwhelm those who don't want to do advanced Bible study.
Bible.IS is the simplest for people who just want to listen to the Bible. If you also want to read and interact with other Bible readers then use the YouVersion Bible app from Life.church. The best overall mobile Bible app comes from Olive Tree. It's not as complex as Logos, but gives you more Bible study tools than the simpler apps.

Wordsearch Support by Logos Ended, Now What?
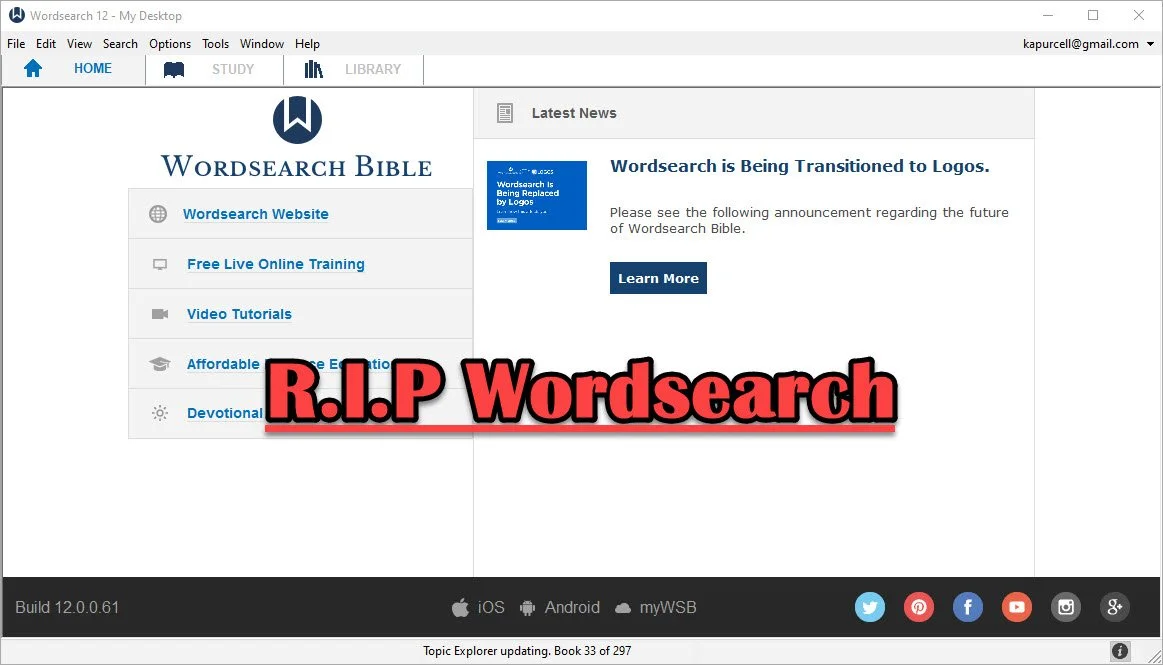
People who used and loved Wordsearch were likely disappointed when Logos and Faithlife bought the company and announced they would eventually shut it down. That time has come so what should a Wordsearch user do now? Here's the best way to continue studying the Bible digitally now that Faithlife and Logos ended support for Wordsearch Bible Software.
Logos Stops Wordsearch Support: What Does It Mean to Me?
Logos announced they planned to stop supporting Wordsearch, but that doesn't mean you can't use the software. You can. Just don't uninstall it or buy a new computer unless you have the installer and your books backed up.
Logos sent out an email to Wordsearch owners that said:
- You will not be able to download the desktop and mobile apps in the future
- You will not be able to download your books to the desktop/laptop or mobile Wordsearch apps.
That's frustrating if you want to keep using Wordsearch after buying a new computer, phone, or tablet. You'll need to find a new different way to get access to the program or start using Logos or some other app or program.
On your desktop or laptop computer, you can do a backup of your computer that includes your installation of Wordsearch and find a way to port it over to your new computer or a computer that you had to reformat or erase. That's more complicated than we have time to discuss in this post. A Google search will likely find dozens of options for Windows or Mac users.
Wordsearch users can also keep using the program on their current computer, phone, or tablet. The company won't cripple Wordsearch apps for software already installed. So keep using it knowing you won't get app or book updates. You also can't add new content, so if that commentary series you love gets a new volume, you'll have to find it in another format to enjoy it digitally.
Start Using Logos Instead of Wordsearch
Logos would love for you to start using their software. That's the whole reason they bought out Wordsearch, to get their users and their library of books.
If you want to start using Logos, then go over to the Logos website and see what version of Logos they gave you when they bought out Wordsearch.
In addition to a version of Logos, you will also get most of your books from your Wordsearch library in Logos. They will download after you install Logos on your computer or mobile device. A small percentage of books won't make the trip over to Logos.
See our post on using Logos and setting it up like Wordsearch.
Switch to Accordance
The best alternative comes from the folks at Accordance Bible Software. They offer a complex and powerful software program that brings you every feature you need to study the Bible at a scholarly level but also works well for pastors, teachers, and lay Bible students.
Switching from Wordsearch will cost more than going to Logos since Logos offers free software and gives you most of the books you own in Wordsearch format. However, you may not want to use Logos. You can get the $200 Crossgrade for Accordance. Crossgrades take the term "upgrade" and marry it with cross-over to form a crossgrade.
In addition to the Wordsearch crossgrade, you can crossgrade many of your books. Just contact Accordance to learn what it will cost. In both cases, you'll need to fill out a form proving you already own either Wordsearch or the books you want to buy via crossgrade.
Other Bible Software Options

Logos and Accordance aren't the only games in town. You can also find great options from the following:
- n Olive Tree Bible - Olive Tree provides a decent desktop or laptop computer program, but also has the best mobile app you can get on iOS or Android. They sell a lot of books too.
- Laridian PocketBible - You won't get as many books with Laridian as you will with Olive Tree, Accordance, or Logos. However, the developer does a nice job of creating a stable platform with some unique features, like showing 4 or more window pains on mobile, something can't get from any other app that I know of. With Book Builder you can make your own books for PocketBible on Android, Windows, iOS and Mac.
- e-Sword - The long time free Bible study program from Rick Meyers will seem simplistic compared to the other programs in this article. However, if a user doesn't like Logos and can't afford the others, then free books from e-Sword will help you with your study needs until you can afford something a little more advanced. Some Wordsearch users will find that it's all they need. If you want some modern Bibles and books you can buy them from eStudySource.

Recommendation
What should you do if you were a Wordsearch user who wished they were still in business?
- Keep using Wordsearch. You can still use it as long as you don't change computers and even then might be able to jump through some technical hoops to get it to work on a new computer.
- Go ahead and get Logos installed, if you have space on your computer's hard drive. You can also install it on your mobile devices. If you used the minimalist Wordsearch mobile apps, you will find that Logos does so much more. This will confuse some users who were Wordsearch's simple book reader app. But most will view it as a huge upgrade on mobile. Spend time about Logos until you feel comfortable using it for your digital Bible study.
- Get free versions of Accordance, Olive Tree, e-Sword, or Laridian's PocketBible. Try them out and see which one you like best. Then start looking into getting the books you need for your study.
Mobile users should look at Logos, Olive Tree, or Laridian first. They are the best mobile apps for serious Bible study. Accordance gets honorable mention if you are using iOS, but Android users should look elsewhere because Accordance on Android is too limited right now. They plan to upgrade making it more useful, but Logos, Olive Tree, and Laridian are so much better on Android.
How to Use Accordance Amplify to Website to Open Your Logos Library
Did you know you can open a Logos Passage Guide inside Accordance using the Accordance Amplify to Website? We'll show you how.

Accordance Bible Software will let you use their Accordance Amplify to Website feature to open other websites while using Accordance to research Bible studies. With these features, people with books in Logos Bible Software who have access to their Web App will let you access your library inside Accordance. First, we'll show you how to set this up and then how to use it.
Use 'Accordance Amplify to Website' to Open Logos Guides
Accordance includes two awesome features that make it possible to open a Logos Passage Guide from inside Accordance. The Accordance Amplify to Website feature will help you. Here's how to add Logos to the menu in Accordance.
To add Logos, you'll have to add a few things to Accordance. I found out about this in the Accordance forums, which are a great option for learning how to use Accordance features and asking for help in using the software.

Open Accordance Preferences from the Accordance menu item in the upper left or by using the keystroke CMD+,. Next, click on the External Websites item on the left side of the Preferences window. Thanks to Accordance user Paul Meiklejohn for these steps.

Then choose the New button to add a new link.
Click on New at the bottom of that box. A new box pops up where you can add your website links so you can use the Accordance Amplify to Website feature to open the Logos Web App.

Now use the links you'll find from the Accordance Forums. Here are a few that I added for Logos.
- Passage Guide: https://app.logos.com/guides/passage?layout=reading&reference=***
- Word Study Guide: https://app.logos.com/guides/word?layout=reading&reference=***
- Exegetical Guide: https://app.logos.com/guides/exegetical?layout=reading&reference=***
- Search Logos: https://app.logos.com/search?layout=reading&q=***&resources=yourBible&tile=right
The above came from Accordance user jarcher who posted them in the forums.
Some other links you'll find there include:
- Blue Letter Bible: https://www.blueletterbible.org/search/preSearch.cfm?criteria=*** (from user dandennison)
- Bible Gateway: https://www.biblegateway.com/quicksearch/?quicksearch=***&qs_version=NET.(from user Drewster; change the last three letters to your chosen translation, like NIV or CSB)
Use Accordance Web Browser to Open Logos Webapp
Now that we've added the sites to Logos and other sites, how do we use these? Open a Bible in Accordance and select the verse along the left. Then right-click the verse, and a large pop-up menu appears. Next, click on the Website in that menu. Choose your new item added in the step above.

For example, in the animate GIF above, I selected Hebrews 2:1 and then opened a Passage Guide in the Logos Web App.
Have you created any Accordance Amplify to Website links that aren't listed above? Then, comment below with your chosen link and let us know how to use it in Accordance.
5 Ways of Using Apple TV in Church
The new Apple TV is a great tool for fun, but you can also use Apple TV in church. We've got 5 uses for Apple TV in church or ministry.

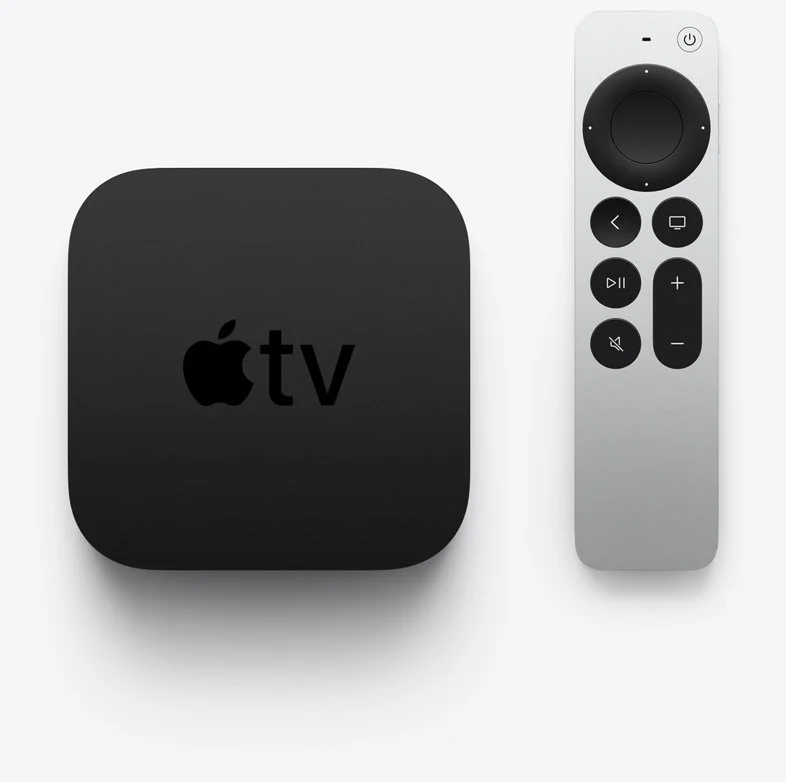
Apple just shipped the new Apple TV and I got one because I love the little black box but hated the old remote. It got me thinking about using Apple TV in church and I came up with 5 ways you can use the new Apple TV in church or in ministry.

What Is the New Apple TV?
Apple first produced a set-top box way back in September 2006, but it didn't really take off till the company updated it 4 years later. Now it's a small black box that looks like an oversized hockey puck. It now comes with a metal remote that's tiny and useful for watching streamed content and even playing some casual games. You can connect a keyboard or a game controller via Bluetooth. You can also connect Bluetooth headphones, Apple AirPods, or a speaker.

Apple added a streaming service called Apple TV+ that includes content made for the service and gathers content from other streaming apps that run on the Apple TV like Netflix, Amazon Prime, Hulu, and more.
Apple added a streaming service called Apple TV+ that includes content made for the service and gathers content from other streaming apps that run on the Apple TV like Netflix, Amazon Prime, Hulu, and more.

This week (May 2021) Apple starting shipping the 6th version of the Apple TV. The following list shows the specs of the latest version, also called the Apple TV 4K 2nd Generation...
- Fast A12 Bionic processor
- High frame rate 60fps HDR
- HDMI 2.1
- Wi-Fi 6
- New color optimization using the iPhone camera
- tvOS 14.5 or higher
- AirPlay
- New and improved remote replacing the horrifically bad touch remote from previous generations

Most people probably think of Apple TV as a way to consume content for entertainment or maybe education. It's also a gaming system for casual gamers. However, you can use it in ministry or the church. So, we've got some tips for using Apple TV in Church.

The new Apple TV costs $179 for a 32GB model and $199 for a 64 GB model. Unless you think you'll install a lot of games or apps, you can get the 32GB model. However, I'd recommend buying the 64GB model since it only costs $20.
Using Apple TV in Church for Presentations
This tip seems obvious. Use an Apple TV in Church for wireless presentations from either your Mac, iPad, or iPhone. If you have an Android device, you can find apps that work with Apple's AirPlay.

Start with traditional presentation apps like Keynote, PowerPoint, or a lesser-known presentation app. Use AirPlay to connect to the Apple TV and fire up the app. It will allow you to mirror the screen or display your slides on the Apple TV and the presenter's view on the iPad, iPhone, or Mac.

If you need the details about how to connect over Airplay, use the tips on Apple's support site. Here's the support page for using a Mac to present.
Set Up a Foyer Information or Announcement Kiosk
You can display photo slideshows on an Apple TV. That's a great use for an Apple TV in Church. Get a TV in the foyer or in any room where you need to display announcements or informational slides. Hook up an Apple TV and set it to play the slideshow.
Put all your photos or slides in an album in the Photos app for the account connected to the Apple TV. Then follow the steps on this Apple Support page for setting up the Photos App to display the slides or photos.
You can use it for...
- Announcements
- Informational slides - for visitors, families, etc.
- Slideshows of events from recent activities in the church - consider putting these in the midst of the announcements or info slides.
- Play a video message - you can also place this in the slideshow of photos or announcements and info slides.
Play Music to Set Tone of a Room or Worship Event
Sometimes I fire up the Apple TV in our church's fellowship room and play some background music. It's great at holiday events or a supper for the church or groups in the church. I also occasionally play music to set the tone for a Bible study or worship event. Then after the event's over, I might fire up the music again with a playlist that sets the tone of how we want to send people on their way.
Stream Video Content
Of course you can stream video content on an Apple TV in church, but why would you?
- Show videos of past events
- Share a video message from a shut-in shot on an iPhone and stored in Photos
- Use one of the many Christian and Bible-centered apps like the Life.Church Bible, Faithlife TV, or RightNow Media Media.
- YouTube videos
- Facebook Watch videos
- Plex to stream your own videos
- Hold a movie party for a small group
That's just a handful of useful ways to use the streaming capabilities of the Apple TV in Church. You can watch any video that you want, so long as you're not breaking copyright laws.
Educate People on Using Software and Websites
If your church just got a new Church app, then use the Apple TV to demonstrate how to use the new app. AirPlay the screen on your iPhone or iPad. You could create a video and stream it.
Use AirPlay to show off your church's new website. Maybe you want your people to use another website. Demo it using Apple TV.

If you have a group of people who want to learn more about studying their Bible with Bible study software or an app, then you can teach them by opening the app or software and then use AirPlay to connect the computer, iPad, or iPhone.
Conclusion
The Apple TV can help save money and make you more successful in communicating with your church. Instead of a long cable run, connect an Apple TV to a projector. Also, it's cheaper a whole computer hooked up to a display.
While the new Apple TV is a great box for using an Apple TV in church, you might want to consider an older 1080P Apple TV. They're cheaper and will still work great. If you're getting one of the new 4K models for home, then maybe you can re-purpose an old 1080P model for the church.

5 Best Bible Apps for Android and Fire Tablets for 2021
What are the 5 best Bible apps for Android for 2021? These run on Android phones, tablets, and the Amazon Fire tablet.

If you own an Android smartphone or tablet or maybe an Amazon Fire Tablet, then we've got the 5 best Bible apps for Android. This list usually stays the same each year. So what has changed for 2021?

I tested these apps on the Samsung Galaxy Tab S6 Lite. I used to own the Tab S7 but handed it down to my son, an Android first guy. Most of the time, I use the iPad, but Android works great too. So, here's my list for 2021!
What's your favorite Bible app on Android or Amazon Fire Tablet. Comment below or head over to the YouTube video above and comment there.
Bible App by Olive Tree
Olive Tree's Bible App sits atop our list because it's still the best mobile Bible app available for reading, study, and sermon prep. Why do I call it the "best"? Olive Tree presents the Bible and Bible study material with the perfect balance of usefulness and simplicity. That's hard to do. Just ask the other more technical Bible study apps listed below.
UPDATE: The Bible App by Olive Tree is no longer supported on Amazon Fire tablets.

Open Olive Tree on a tablet, and you get two areas by default. On the left, you'll see a kind of Windows Explorer or macOS Finder kind of navigation window that takes up the left half of the screen when you tap the menu. To see this menu, you'll need to tap the menu button that looks like three horizontal lines in the upper left corner.

The Bible sits on the left when the menu isn't open. On the right, you'll see the Resource Guide. These two can link up so that when you scroll or swipe from page to page in the Bible, it will move the commentary you have open to the right.

Add word study features by opening a tagged Bible. Tap on a tagged word, and you'll see a popup window that defines the word in its original language. You also get Audiobooks, reading plans, devotionals, maps, highlights, note-taking, and it all syncs up with your computer version of Olive Tree.
There's more to this app, but this hits the highlights and explains why I put it first in my 5 Best Bible Apps for Android list.
Logos Bible App from Faithlife
The Logos Bible App (Amazon Fire App) and its other similar apps from Faithlife come in second in our roundup because of its power and array of useful features. It's a little bloated, but I'd rather have too many features that don't get in the way of the basics than not enough, like the ability to add user notes.

When you look at all that Faithlife packs into Logos, you can only say wow! There's a reason this ends up in our 5 Best Bible Apps for Android, but not at the number one spot.
The app divides into a few main areas.
- Home Screen - layouts for study are here, along with information from Faithlife about sales or books.
- Library - find your books to open and read.
- Book Reader - you can open a bunch of books, and they will show up on screen accessible via the center button, the toolbar at the bottom of the screen.
- Search Screen - use it to search your Bible or books.
- Main Menu - find all the major features of the Logos app here, like the Guides.

You can open multiple books and sync them using the center button on the bottom toolbar. Set up some or all of the books to sync up or don't. I have a few Bible translations and a few study Bible's or commentaries open all the time, all of which I set to sync up, so they move from verse to verse together. I also open books I'm reading too, but they don't sync with a Bible.

On the Bible, you can do word studies, searches, and add notes or highlights. Open the menu, and you can search your library in one of the Guides. A passage guide finds everything about your passage. The Exegetical Guide searches for content related to language study. Other guides work similarly.

You'll find many other features, mainly in the main menu at the far right on the bottom toolbar. And remember, it all syncs nicely with the computer app or their web app.
Faithlife also offers a few other apps for Bible study and reading. You can download...
- Faithlife Study Bible - focused on their study Bible and the Lexham English Bible translation.
- Faithlife eBooks - a simplified version of the app for reading books primarily, but still has some study features.
- Biblia - Spanish language version of the app.
- Verbum Catholic Bible - app focused on Catholic users.
The Bible App from Life.Church

I always fight with myself about adding The Bible App (Amazon Fire App) to my roundup of best Bible apps for any platform, but I always do it for one reason. It's the most popular Bible app available on mobile devices.
I don't like including The Bible App because it's not really a complete Bible study app. You can't do word studies or read commentaries and Bible dictionaries. But that's not what Life.Church intended for its users to do.

Instead of more advanced Bible study, The Bible App excels as a simple Bible reading app that also includes social networking built-in and sharing to social media easily and elegantly. You can...
- Download and read hundreds of versions of the Bible, most of them available offline.
- Listen to audio Bibles.
- Set the app to remind you to read a daily reading and devotion or see a verse of the day in text or visual format.
- See what your friends are reading, highlighting, sharing, or commenting about the Bible.
- Watch videos to help you understand the Bible.
- Bookmark verses.
- Share verses with others via social media, email, or text.

Accordance Bible Software
The Accordance App (Amazon Fire App) on Android has gotten better but still lags behind its iOS cousin and the other apps in our roundup for a couple of glaring weaknesses. First, you can't add your own user notes yet. That's gotta change, and Accordance should feel embarrassed they haven't added the feature in 2021.

Second, the syncing features in the app are weak by comparison. Accordance should add its own syncing tool to keep your user content fresh on Android and a computer.

While Accordance really needs the improvements above, it still deserves a spot in our top 5. Of course, you can read the Bible and other books in your library. Accordance sells a lot of great Bible study tools, thanks to a huge library of quality resources. They are often the first company to release a book when it gets published. For example, they released the new 2020 version of the NASB before the others on the list. Logos doesn't even have it out yet.

Accordance works great as a Bible or book reader. It lets you search, and you can select a word and Amplify it, which means study by searching for related content.
Tecarta Bible
Bible study observers may not know as much about Tecarta Bible (Amazon Fire App $5.99 for NIV) as the others in this roundup. But they should because it's a decent app.

The app includes the most-used translations. You can download the KJV for free and buy others for download. If you don't want to pay for a translation, you can "stream" them, which means use them as long as you have an Internet connection on your phone or tablet. You'll have to buy commentaries, but unlike others, Tecarta lets you try them.

The app displays parallel translations and shows the commentary in a 2nd or 3rd window. Add notes, bookmarks, highlights, or share verses.

If you tap and hold on a word, the app shows a box popup that says "Define," and it will go online to give you a definition from an Internet search.
5 Best Bible Apps for Android and Fire Tablets for 2021 Summary
Which of the 5 apps included in our roundup of the 5 Best Bible Apps for Android should you download? Why not download all of them? Of course, you should start with the app from the company you already use on a computer, if you own one. I'm a Logos Bible Software user on my Macs, so I primarily use Logos, even though I like Olive Tree better on mobile.
UPDATE: If you use an Amazon Fire Tablet, you can't download the Olive Tree app since it's no longer supported. For a fifth Bible app on a Fire Tablet, look at Laridian's Pocket Bible. It's also terrific.
Update: You can also install the Google Play Store on an Amazon Fire Tablet. It's complicated, but if you think you can handle it, fire up the Silk browser on your Fire and head over to the helpful how-to article at Android Police.
If you must make me recommend one over another, then I'm going with Olive Tree first. It's got the cleanest and simplest interface. It has enough features for most users. People who need more advanced tools will likely not work on a tablet or smartphone very long. They're using a computer-level Bible study suite from either Logos or Accordance. However, don't end your search with Olive Tree. You can try out all of them for free and settle on one with the best features for your needs.

Logos 9 Upgrade 6 Months Later - Is It Still Worth the Upgrade Cost?
It's been about six months since Faithlife released Logos 9 upgrade to focus on some key improvements to the computer app and the mobile app. Also, you can save $1,600 on a Logos 9 Base Package plus get 5 free books using the link provided in this article.

It's been about six months since Faithlife released Logos 9 upgrade to focus on some key improvements to the computer app and the mobile app. I published my review over at ChurchTechToday.com on October 30, 2020, and talked about it here as well.
The Logos 9 upgrade brought the following key improvements, like...
- Some user interface tweaks make the software easier to use.
- An update to the Factbook in the Logos 9 Upgrade
- The interesting Sermon Manager and Sermon Builder
- A Counseling Guide
- New sorting features in the Bible commentaries section of the Passage Guide
- Improvements to the Reading Plans and the Reading Queue
In addition to the above improvements in the Logos 9 Upgrade, we also saw some decent changes in the mobile app. They added the Factbook to the menu seen in the toolbar at the bottom right corner of the app. You can also use your iPad or tablet for preaching, thanks to the new preaching mode in the mobile app. I actually love using my iPad to preach.
15% Off Discount on Logos 9 Upgrade to Base Packages and 5 Free Books
From now till June 15, 2021, you can get 15% off a Base Package upgrade. To do that, follow this affiliate link, and you'll get a discount. Full-disclosure, I'll get a little kickback from Faithlife.
Follow that link, and not only will you get the 15% off discount when you use the code PARTNEROFFER9 at Checkout, but you can also get 5 free books. Select from 28 different books, including some great titles.

Here's a list of my recommendations.
- Spurgeon Commentary 1 Peter
- Lexham Research Commentary: Colossians
- St. Paul's Epistles to the Thessalonians by George J. Ellicott
- The Essentials of Prayer by EM Bounds
- The Life of St. Paul by James Stalker

Faithlife offers a myriad of Base Packages. Here's what I recommend depending on what you already own.
- Logos 9 Bronze - Great for people who are just getting started.
- Logos 9 Gold - Jump to this level if you already own a pretty big library.
At the bottom of the page, you see a link to see the other Base Packages. Follow that to find the Logos 9 Upgrade packages for Anglican, Baptist, Lutheran, Messianic Jewish, Methodist & Wesleyan, Orthodox, Pentecostal & Charismatic, Reformed, SDA, or Catholic (Verbum) users.
Logos 9 Upgrade: Best Feature is New User Interface Tweaks
One improvement stands above the rest. I like the features listed above, but the simple tweaks to the user interface on the computer version of Logos 9 made the most difference in my productivity with the Logos 9 upgrade six months after Faithlife released the update.

It sounds crazy, but the new button on the upper right corner of the screen helps users a lot. First, you can quickly jump to your account to see what you have or what pre-orders you might see published soon. You can also jump to Your Faithlife Profile, where you can interact with other users and see answers to your questions.

The other amazing new tweaks include transforming the program toolbar. For example, right-click on a book icon that you placed on the toolbar like I did as seen in the image above.

you now get a drop-down menu holding those books in that folder.
The new tweaks to the toolbar give you a drop-down list of icons from the toolbar that no longer fit on a narrow screen on small screens. See the image below to understand what I mean.
There's a new light mode, dark mode toggle in settings. People love dark mode, and I don't understand why. But if you do, then you now have it.

Other New Features in Logos 9 Upgrade
Logos seems most proud of the other new features in Logos, which include...
- Factbook
- Sermon Builder
- Sermon Manager
- Counseling Guide
- Improved Reading Plans
I like all of those, and you should see my review linked in the top section of this post from ChurchTechToday. The second feature I'm most excited about also doesn't seem big. Faithlife now added a feature to organize my library in a more useful way when I fun a Passage Guide.
Go to the Commentaries section of the Passage Guide and look in the upper right corner. You'll see ways to sort your books including...
- Priority - follows your customization where you rank certain commentaries above the others.
- Series - groups the commentaries by series, like the New American Commentary series or the Word Biblical Commentary series.
- Author - who wrote it?
- Denomination - what is the denomination of the publisher/editor/author depending on the commentary.
- Type - is it a technical or devotional commentary?
- Era - when was it published?
Mobile App Improvements
Logos added the Factbook to the mobile app too. You'll find it in the menu button in the lower right corner.
Faithlife added a preaching mode to the mobile app. That way, you can build and manage your sermons in the computer app. Then you can put your app in preaching mode and preach from the app.

Moment Pro Tripod Mount with MagSafe for iPhone 12 Review
The Moment Pro Tripod Mount with MagSafe for iPhone 12, iPhone 12 Pro, and iPhone 12 Pro Max uses the magnet to quickly snap a tripod onto the iPhone. Does it fulfill the promise?
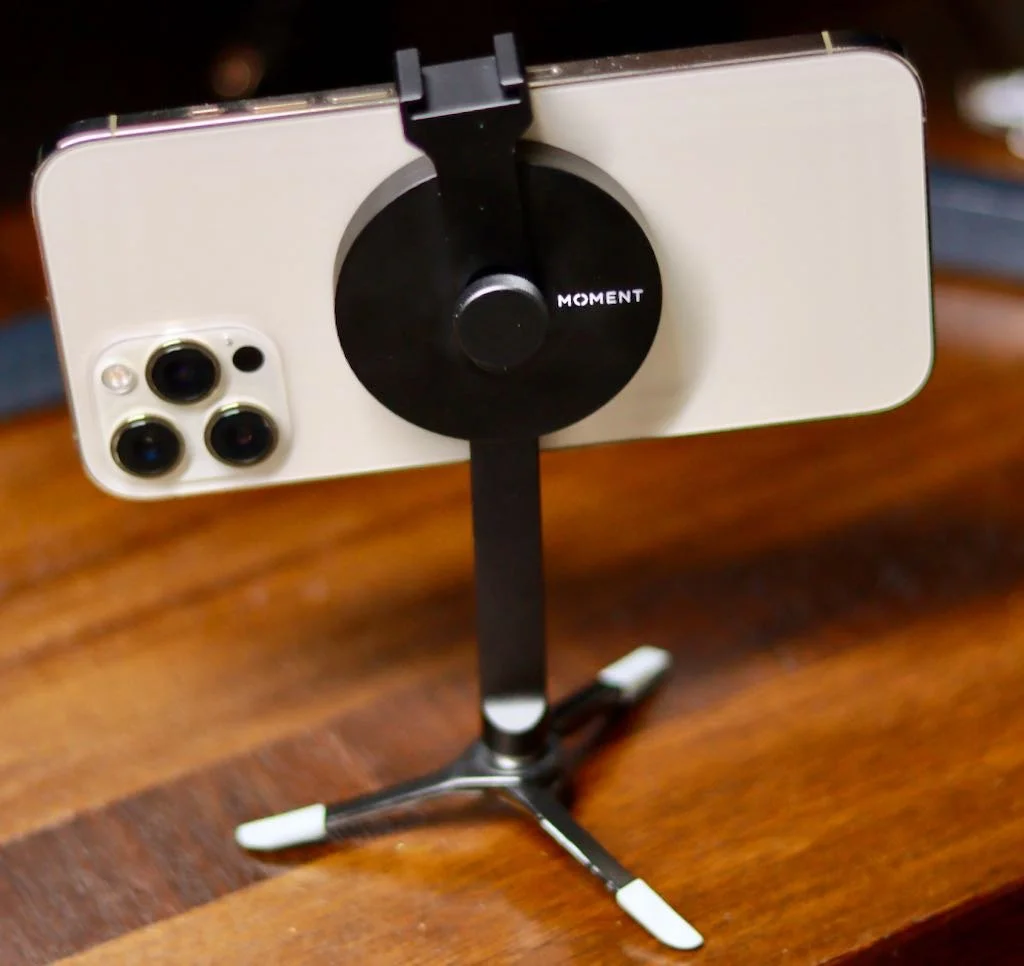
Moment began their business by selling lenses for iPhones and recently added photography gear for a wide variety of cameras. Yet, they still excel at creating great accessories for iPhone photographers. The Moment Pro Tripod Mount with MagSafe continues that line of iPhone photo gear using the MagSafe magnets in the iPhone 12, iPhone 12 Pro, and iPhone 12 Pro Max. The mount promises a quick and easy solution for taking steady photos and videos with the iPhone 12. How well does Moment deliver on that promise? Did they make another great accessory for iPhone photographers?
Moment Pro Tripod Mount with Magsafe for iPhone 12 - Design
The mount comes in two varieties, one for use as a landscape-only device. The other works in both landscape and portrait and has a longer shaft. I bought the one that works in both landscape and portrait modes.

The Moment Pro Tripod Mount with Magsafe connects to the back of your iPhone 12. The magnet in the MagSafe connector snaps onto the mount and holds it firmly. The round disk holds a cold shoe mount screwed onto the back of the mount. There's a short piece coming down out of the disk. There's a 1/4-20 connector so that the photographer can attach it to a tripod, whether it's something like a professional tripod or the small feet that came with my Joby GripTight tripod. The pad on the disk that snaps onto the back of the phone has a softer material. This keeps the metal on the mount from scratching the phone's back.

I also connected it to a clamp mount that I recently bought on Amazon. The Slow Dolphin Tripod Clip Clamp Mount screws into the 1/4-20 connector on the bottom of the MagSafe Tripod Mount. The two hold the iPhone in place for photography or for just viewing videos on Netflix, YouTube, or some other content (see below).

Users can swivel the holder to watch content in the landscape, as seen above. Or you can use it in portrait for those fantastic TikTok videos you shoot.

On top of the mount you'll find a cold shoe mount. Put a light or a mic like the Rode Wireless GO II Microphone.
Moment Pro Tripod Mount with MagSafe for iPhone 12 - Quality
Moment did a great job designing the Moment Pro Tripod Mount with MagSafe for iPhone 12. I've only had it a few days and used it for a few tasks plus every night for streaming Netflix. It works exactly as designed and probably will not fall apart easily. The disk holds the shaft with the 1/4-20 securely and firmly.
The cold shoe mount also serves to secure the phone in place. Press the cold shoe mount down against the phone to keep both in place.

On the back of the mount you there's a screw that holds the cold shoe mount to the MagSafe disk. Unfortunately, it doesn't seem to screw tightly. You have to press it against the phone, or it becomes loose. I'm not sure if that's by design or a design flaw. It doesn't seem to keep the cold shoe mount from working for now, but I'll be keeping an eye on it.

I do not use my iPhone with a case unless I'm taking photos with the set of Moment Lenses I own. I've tested it with my Moment Thin Case, and it does not hold the phone very well at all. That's a huge problem. You can see in the video below that it fall off the mount far too easily with the case on the iPhone 12 Pro Max.
Moment promises that it will work with any MagSafe compatible case. In fact, the magnet in Moment's tripod feels like it snaps to the phone more securely than Apple's own MagSafe products when I don't use a case. However, it's coming off too easily, so you can't confidently mount your iPhone 12 Prom Max with Moment's own case needed to use their lenses.
The mount sits on my nightstand so I can quickly throw it in my bag. The metal design means I need to be careful where I put it because I don't want to scratch my MacBook or iPad.
Recommendation
Moment Pro Tripod Mount with MagSafe for iPhone 12, iPhone 12 Pro, and iPhone 12 Pro Max works as designed on my naked iPhone 12 Pro Max. It's made of quality materials. At $60, it better work well. I love the idea of MagSafe and hope we see some other equally creative accessories. I wish the screw on the back held the cold show mount more securely, but it does work. I also wish it held my phone in a case more securely.

Moment makes several different MagSafe devices including...
- The landscape tripod mount - $59.99
- The landscape and portrait tripod mount - $59.99
- A wall mount that fastens to a magnet stuck to a wall - $19.99
- A car vent mount that holds onto the vents of your car's heater/air conditioner - $39.99*
- A cold shoe mount which is like the one I reviewed, but it doesn't have the shaft with the 1/4-20 connector - $39.99*
- A version of the tripod mount without the cold shoe mount - $49.99*
- A multi-threaded mount with 7 threaded holes on the back and no shaft or cold shoe mount - $39.99*
The items above with the asterisk (*) are either pre-orders or back-ordered. In other words, don't assume you'll get one within the next few weeks. It could take many months like mine did.
I didn't particularly appreciate having to wait for as long as I did to receive the mount. I ordered it soon after they announced that it was available for pre-order. It took many months to show up. Moment always has trouble getting things sent out, and new products often end up back-ordered. They promise that if you order today, you'll get it shipped starting the next day. You should receive it within a week to ten days depending on where you live instead of in 4 months.
Streaming Church Services Live and Cheap
Most churches start streaming church services live during Covid. You probably wish to continue that, but how do you do it without paying thousands of dollars?

Since Covid closed down America's in-person worship services in March 2020, most churches started streaming church services live on Facebook or other services. You can spend thousands of dollars on equipment and service fees, or you can spend far less. In fact, if you follow my recommendations, you can start streaming this week for far less than a thousand hundred dollars.

We'll look at the cameras you can use cheaply. You can buy inexpensive software and use what you already likely have in your church's sound booth to connect it all.
Streaming Church Services - The Camera
Most people start by thinking about a camera. The number one post on my site covers the 4 styles of the camera for streaming church services. Please read that post first for a comprehensive guide to choosing a camera. However, I recommend one kind for budget streaming.
Why not use your phone? Many smartphones come with a great camera. You can, but I don't think it gives you the best option. If you can't afford the cameras below, then use your phone. But you'll need to buy a mic anyway, so spend a little more and get a great dedicated camera that you don't have to worry about charging, getting intrusive notifications, and can't zoom or pan while recording as easily.

Get a decent 1080p camcorder with a clean HDMI out signal (see image and caption above) that will run for at least as long as your worship service, plus about 20 minutes. That could mean you leave it plugged in, or the battery lasts at least that long. What does all of that mean, and which one should you buy? Let's break it down...
- 1080p refers to the resolution. Some people recommend a 4K camera, but that's too much for most churches, and it will cost too much. However, if you already have one, then use it. Just set it for 1080p. 1080p means the resolution of the camera is 1920 pixels horizontally and 1080 pixels vertically. The P stands for pixels.
- Get a camcorder like everyone used to buy before cell phone cameras became so powerful. Make sure it has a 30x optical zoom. Ignore the digital zoom because it makes things look really blurry. Turn off the digital zoom. Only use optical zoom and make sure it does 30x, especially if the camera sits in the back of the auditorium. You want it in the back, so you don't distract attendees.
- Make sure the camera supports a clean HDMI signal (see above image and caption for description). If it doesn't support a clean single, then you'll see things like the battery indicator and the other onscreen display items you see on the small screen on the camcorder. How do you know if the camera supports a clean HDMI signal output? Look at the specs of the camera or ask the person selling it. You can also go to Amazon and ask about the camera.
- The camera needs to run on battery at least 20 minutes longer than your worship service. That way, you can turn it on and test everything before the service. The best camcorders run on AC power plugged into an electric outlet instead of running them off battery power.
We don't have room to go into more detail about camera specs. Adhering to the four things above will give you a great camera. Let me recommend a couple of cameras.
Canon VIXIA HF R800 Camcorder

The Canon VIXIA HF R800 will stream your church service, fulfilling the four requirements above. It supports 1080p and has a clean HDMI signal that would show the distracting icons on the built-in display to your viewers.
The camera supports 32x optical zoom for streaming church services live. Ignore the 57x digital zoom because when you zoom in that far, two things happen. Video quality degrades, and your camera operator will struggle to keep the image stable.
Finally, the camera operator can plug it in a while streaming church services live. The camera will run for about one hour and forty minutes on battery life.
There's one problem with the R800. It costs $300 at B&H Photo and that was cheapest price we could find.
Panasonic HC-V180K Camcorder

Take a look at the Panasonic HC-V180K for a slightly less expensive camera ($229.99 at B&H Photo). It supports a clean 1080p HDMI signal with a nice 50x optical zoom. Again, ignore the 90x "intelligent zoom," which is a misnomer because you'd be stupid to use it.
Consider looking for each of these cameras used. You can often find a camera that is in good condition for less than the retail value.
Streaming Church Services - Software
The cheapest place to stream also invites the largest audience. That's Facebook.
I've tried dedicated streaming services like Dacast and going live to YouTube before settling on Facebook. Google now requires 1,000 subscribers on a channel before they can stream live to their service using the YouTube user interface. Churches can also subscribe to expensive services that put your live stream on your website, or there's for anywhere from hundreds of dollars a year to thousands.
Facebook lets churches stream for free, and they don't need a minimum number of subscribers or followers. Whether you like Facebook or like the way they've limited or allowed certain kinds of accounts and content, it's the cheapest available. That's what my church uses.

How can you get the signal from the camera to Facebook? We'll talk about the connecting accessories below. First, what software should you use? Facebook has its own streaming user interface. Set up a Facebook page and then use their live streaming feature built into the website.
You can add some cool features like lower thirds, text written at the bottom of the video to show what's on your stream. Use it to put the names of people leading worship or the title of the pastor's sermon. To get that you'll need some software.
Take a look at three options below:
- OBS Studio - a free, powerful, open-source program that lets you stream live to Facebook and more. It's complex, but with some time and effort to learn the program, OBS Studio gives users the most powerful solution for no cost to their church.
- Ecamm Live - a great piece of software that makes streaming to Facebook easy, but it's at least a $16/month subscription.
- Restream - a program like Ecamm but offers a free version. I've not used it, but a lot of people prefer it.
- Dacast - a more costly program like Ecamm and Restream. It's more of a service, which offers streaming that you can embed on your church's website.
Of the two above options, I'd recommend OBS Studio if you don't want to use the Facebook page streaming interface. I only mentioned Ecamm Live because I use it at my church. We're grandfathered into the pre-subscription model. You can't get that now, but the software is easy to use. They charge either $16 or $32 per month to use it. They offer a 14-day trial.
Restream is another program that streams videos for you. It's slightly more expensive than Ecamm at the high end. It starts at $16 per month for the subscription version with some of the bells and whistles. The higher tier sells for $41 per month.
OBS Studio is more powerful but more complicated and also free. Ecamm is the easiest tool for churches without someone who can figure out OBS, but it's also expensive due to a monthly subscription. You could say the same for Restream and Dacast.
Other streaming software exists, but it's usually more expensive. If your church already subscribes to software for worship presentation, it might also include streaming features. Proclaim from Faithlife has an option for streaming and Podcasting.
Streaming Church Services - Computer
We put this hardware item last because it's honestly the least important. My church uses a 2014 Mac mini. I upgraded the internal hard drive with a 500GB SSD, and it runs fine. I paid $200 for the computer used and less than $75 for the SSD.

You can also get a recent model Windows computer. Desktops usually cost less than laptops. If you can run Windows 10, you can likely stream from it. Streaming doesn't require a high-end computer. Some people bring their own laptops to church and use them.
If you can afford a brand new system, I'd recommend the new M1-based Mac mini, which costs $800 for a basic version. It's not a "cheap" solution, but it will last a long time in most cases and can handle all that we've talked about for streaming. It's still not incredibly expensive, like a $2000 multimedia PC or MacBook Pro.
Connecting the Camera, Computer, Software, and Sound
Our church sanctuary has a balcony with our soundboard, computer, and camera in the center front of it. We can easily connect our camera, computer, and soundboard because they're within 6 feet of each other. If those three things sit further apart, it will potentially get harder to connect them. If you're set up like we are, then you can follow the first example below.

We put our camera on a sturdy tripod and plug it into a power outlet so that we don't have to worry about the battery running out. We use a mini-HDMI to full-sized HDMI cable coming out of the camera. It plugs into a box made by Blackmagicdesign ($160). It has an HDMI input on one side and a USB-C port on the other. Plug that into your computer.
The computer will "see" this input as a camera, and Facebook or other streaming software will let the operator choose it as the video source.
Connecting Soundboard to Computer
Don't use the sound from the camera for streaming church services live. You probably have a professional sound system with mics meant for soloists and speaking. Use it instead. Connect the soundboard to the computer's sound input using whatever kind of cable you have for sound output.
Our soundboard has a stereo output port with reliable white and red jacks, also called RCA jacks. On the other end of the cable, there's a 3.5mm stereo connector. That goes into the computer using the kind of cable you see below.

You will need this adapter if you have a Mac with a 3.5mm sound jack input. The Mac expects a cable with 3 signals coming in from something like the white Apple earbuds. Your white Apple earbuds or other earbuds or headphones with a mic have three signals going into the computer. One handles the voice coming from the mic in the earbuds or headphones. The other two are the right and left coming from the computer into the headphones. It would help if you had an adapter to change the stereo signal from the soundboard into something the computer jack can handle. For a complete explanation of TRS and TRRS connectors, watch the video below.
Windows PC users may also need the above kind of cable. They might not. There are too many different kinds of Windows PCs to explain how each of them works.

If your church soundboard doesn't have RCA outputs, you may need to use a quarter-inch to 3.5mm TRRS cable. The above video explained that thes "TS Cables" are quarter-inch connectors. But they work the same way. You can find them on Amazon for $10-$20 like this one. Some people will need an XLR cable that converts to 3.5mm TRRS. You can get either a male or female version.
A Better Sound Interface - USB
While the above cables will most likely work, a more expensive solution definitely will work. Get a good USB audio capture device. These devices connect to the computer using USB. Plug your audio cable from the soundboard into the device. It converts it to a digital version that the computer receives over USB.

An expensive high-end version comes from Zoom. The Podtrack P4 works great. I use it for my Wednesday night live streams at church. However, it costs $200 and has more than you need.

If you need a budget option that costs less that $50, take a look at a USB capture device like the Foxnova Game Capture Card. I have to admit, I've not used this one. However, it supports capturing both the HDMI and audio signal so you could potentially ditch the Blackmagjicdesign UltraStudio 3G we looked at above. Take a look at the video below to see an unboxing video.
To Sum It All Up
Let's sum it all up. To start, grab one of the cameras above or see if someone owns a camcorder in your church. They may donate it. Make sure it supports 1080P, clean HDMI output has at least 30x optical zoom. That should cost between $220-$350.
Grab the Blackmagicdesign UltraStudio 3G or the Foxnova Game Capture Card for $50-$160, depending on which one you choose. I'd start with the Foxnova card. It's cheaper. If it doesn't work, return it to Amazon and get the Blackmagicdesign.
Connect the camera to the box with the right mini HDMI cable. Connect the soundboard with the right kind of cable. These should cost less than $50 depending on what you buy.
If you don't already have a computer, try and find a used Mac mini ($200-$400) or get the latest M1 Mac mini ($700).
The software should be free unless you buy something like Ecamm Live.
All of the above hardware adds up to $550 to $1260. That's far less than most churches probably paid for their equipment, cables, and software.

Drone Tricks: 6 Ways to Use a Drone Like the DJI Mini 2 for Church and Ministry

I bought the DJI Mini 2 drone for church ministry and fun. At the same time, I love flying it for fun because it's a simple to use drone that doesn't break your bank and is easy to fly. However, it's also a great tool for church ministry. So, I rounded up 6 Awesome ways to use the DJI Mini 2 for church and ministry. These will work with almost any drone like the DJI Mavic Air 2, the Skydio 2, or any other drone.

DJI Mini 2 Drone Overview
DJI promotes the Mini 2 as a light drone that weighs under the 250kg that the United States FAA sets as the limit for registering a drone. The DJI Mini 2 comes in below that number, so pilots don't need to register the drone with the FAA.
The company also advertises the 4K camera and 31 minutes of flight per battery. It costs less than most drones making it a great option for an entry-level drone buyer. That means it will also fit well in a church or ministry toolbox. It's cheap, doesn't require a lot of training to pass a government test, nor does it mean you have to register the drone.
The DJI Mini 2 serves the budget-minded drone pilot costing $449. Here's the list of what's in the box:
- The DJI Mini 2 drone
- OcuSync 2 Remote Control with Control Sticks
- 1 Battery
- Cables to connect to Android or Apple devices
- Spare propellers and the screws/screwdriver to connect spare propellors
Add $150 to get the Fly More Combo. You'll get...
- 2 extra batteries
- A nice charger to charge three batteries
- A protective cover for your gimbal and camera
- A strap to protect your propellor blades while it's stored away.
The gimbal and propeller strap makes it easier to throw the DJI Mini 2 in the Fly More Combo bag or throw it in a backpack.
Most of the DJI Mini 2 users brag about the excellent OcuSync controller. The wireless technology means pilots can fly their drones further away than older models without the new technology.
Specs hunters can read more about the technical details of the drone at the DJI website. Some of the highlights include...
- 31 minutes of flight time/battery
- 4k video and 12MP images
- 35mm sensor and f2.8 aperture
- Shoots in JPG+RAW
- Video supports 4K, 2.7K, and 1080P video at 24/25/30fps in 4K, 24/25/30/48/50/60fps in 2.7K, and 24/25/30/48/50/60fps in 1080p
- It has 4K 2X Zoom
- micro-SD Cards supported for storage
Inspect Your Church's Building with Your Drone
Recently one of our church's leaders noticed some discoloration on the backside of our steeple. He asked me if I could fly my DJI Mini 2 close enough to see what the discoloration came from in a meeting. I wasn't sure, but I certainly was excited to try it. I actually said, "You don't have to beg me to fly my drone."

The next day, I took off, got as close to the steeple, shot some video, and took photos of everything I could find. We found out that we had some mold and a few places where the paint bubbled up and cracked, revealing some dark spots below the white paint.

The DJI Mini 2 has a 2X zoom feature, as many smartphones have. I used that to get close with the camera while still flying far enough away from the steeple. That way, the wind didn't blow the drone into the steeple. The DJI Mini 2 handles moderate to light wind fine, but I still wanted to fly safely.
Take a Large Group Selfie with Your Drone
Have you ever tried to get a selfie of a large group? Rick Mansfield on the Theotek podcast described a time when he took part in one of these large group shots. The photographer climbed a ladder and yelled at the participants until they were all in place. She took the shot.

The old-fashioned group shot leaves out one person unless she's got a remote or uses the timer. But a drone can easily take off and move up and away far enough to take a shot with everyone in it. Plus, the group shot will look a lot cooler with some elevation. You can also make some videos using the cool automated shots that a lot of drones include.
Video Directions Shot with Your Drone
Your church website should include at the very least your church's address and a photo of the building. Wouldn't it look cooler to offer a video that shows how a person can find your church building?
Guests can drive to our church from four different directions. So, I took off and took a shot of every direction and then created an image with visual indicators of finding their way from those four different directions.
Be careful shooting video or taking photos of traffic patterns. Never fly directly above roads with cars on them. Get the video or photos when there's almost no traffic. You can also fly your drone over a field or large yard next to the road.
Also, don't shoot video while driving a car. Never shoot video or take photos during heavy traffic, even if you're not the one driving the car.
Scenic Video for Worship Service Presentations
Have you ever seen beautiful scenic videos shown during worship as lyric backgrounds in a song or behind a Bible passage? Why not create your own? This works best when you know what the lyrics or Bible text says. Then try to find some video or photos that are thematically connected.
The video below shows how one media person creates motion looping video. He created his video with a drone.
Create Cards, Posters, Instagram Stories, or Any Inspiring Media Using Pictures Taken With Your Drone
We post a lot of images online, so why not make your own. It's fun, and you don't have to pay for images from stock sites or deal with copyright from a public domain or creative commons file stores.

Use your drone shots in the following ways:
- Send photo postcards to people in your church that haven't attended in a while.
- Create a welcome card for guests with a scenic view of the community, church members, or other inspiring photos.
- Put a photo on the cover of your bulletin if you still print one.
- Post images on social media of events taken with your drone.
- Illustrate the Bible passage for this week's sermon, a Sunday school lesson, or a Bible study topic.
- Shoot video of events and create a memories video for participants to share online.
The list above hits on just a handful of cool ways to use your media shot on a drone.
Make Awesome Videos to Put on Social Media Grabbing Attention
Use your creative skills to create fun or attention-grabbing videos to put on social media. A cool video of events at your church will grab some attention with drone shots added to your videos. You're only limited by your creative ability.
How to Subscribe to Podcasts in Your Favorite App
If you want to enjoy the new Theotek podcast, we'll show you how to subscribe to podcasts in various apps or with an RSS link.

You hear a lot about podcasts, but how do you listen to them easily without going to the podcast's website? We'll look at how to subscribe to podcasts in your favorite app, like Apple Podcasts, Google Podcasts, Spotify, or my favorite, Pocket Casts.

Listeners can easily subscribe to podcasts by opening their podcast app of choice and search for it. If you own an iPhone you have an accept podcast app already. Apple Podcasts come installed on your iPhone. If you removed it or it's not there, just search the App Store on your iPhone or iPad and download it.
How to Subscribe to Podcasts in Apple Podcasts

Fire up the app, hit the Search tab in the lower right corner, and type in the Podcast title. If you type in Theotek, it should be the first one on the list, but the jerks at Apple prioritize other shows not named Theotek, so slide right to find it. Tap the cover art as seen above and then hit the three little dots menu button in the upper right. Choose Subscribe.
How to Subscribe to Podcasts in Pocket Casts

My favorite podcast app works so much better than Apple's app. Pocket Casts finds the right Theotek podcast when you search the title. Open it up and tap on Discover instead of Search like you did in Apple Podcasts. Type in the tame Theotek or another podcast title. Tap on the cover art that shows our faces and hit Subscribe.
I don't use Google Podcasts or Spotify, the other most popular apps. Unfortunately, the Google Podcast app doesn't find the right Theotek podcast. It finds the old one that we used to host on our website. So you'll need to use this link to subscribe to Google Podcasts from the web. Here's a link for the podcast on Spotify.
How to Subscribe to Podcasts Using the RSS Feed Link

If you want to subscribe to the Theotek podcast or any other podcast using an RSS feed, then you'll need to find the feed link for the podcasts. For example, here's Theotek's RSS feed link.
https://anchor.fm/s/4739b4e8/podcast/rss
You can also go to the Anchor.fm website to find links to your favorite Podcast service.
Every podcast has a unique URL called an RSS feed. A URL is a website address like www.kevinpurcell.org for this site. However, an RSS feed tells a Podcast app or an RSS reader important information to find a new episode of a podcast and tell your podcast or newsreader to get the new episode.
I use an app called Pocket Casts. The app finds every episode each time the app sends a message to the website asking if there's new content. If there's new content, the RSS feed replies saying, "Yes. We have a great new episode, and you can download it at this address."

Using Pocket Casts, users can add a new RSS feed by going to the Search tab and paste the RSS feed into the search field. Hit the Search button, and it will show you the Podcast. Tap it to go to the page. Tap the Subscribe button in the upper right corner.
Other apps or services have similar methods of subscribing to a podcast. For example, Google Podcasts allows you to add them on the website - podcast.google.com.

In the upper left corner of Google Podcasts website, you will see a link that reads + Add by RSS Feed. Click it to add the podcast RSS feed URL manually.
How to Add a Podcast RSS Feed Link to Apple Podcasts

Using Apple Podcasts, you can subscribe with an RSS feed too. Tap on the Library tab at the bottom of the page. Then find the Edit button in the upper right corner. Tap it and select Add a Show by URL... at the bottom of the list.
Apple Spring Loaded Event with New iMacs, iPads, and iPhones - Who Cares?
Our new episode of Theotek covers the Apple Spring Loaded event where Apple announced iMacs, iPad Pros, and more. Find out what Rick and Kevin thought and hear the opinions of their two guests.

On Tuesday, April 20, 2021, Apple released their Apple Spring Loaded announcement video in which they showed off a lot of new tech toys. We saw a set of new colorful entry-level iMacs with the new M1 chips, an incredibly thin design that makes it look like an oversized 24-inch iPad on a stand. Also, they showed off an updated 2021 iPad Pro in both 11 and 12.9-inch sizes. They boosted the quality of the displays and added a Thunderbolt port for high-speak communication with displays and storage.
Apple Spring Loaded - Theotek Episode #002 with Kevin and Rick
My friend Rick Mansfield and I released our second episode of the new and improved Theotek, a podcast about ministry tech made easy. This show covered all things Apple Spring Loaded.
We invited our friends, including Antoine Wright, who works with government agencies designing websites and user interfaces. LaRosa Smith also joined us. He now works as a contract designer of Bible study books for companies like Olive Tree Bible Software. He just published his second book, Bible Study Tips, which carries the same name as his YouTube show, in which he teaches the Bible and how to study the Bible. Here's one of his videos below:
Theotek Facebook Page

Please consider going over to our Theotek Facebook page. Due to naming rights, we call ourselves Theotek Media over there. Please like the page.
In the future, we plan to do a live feed of us recording our podcasts. You can watch all the fun behind the scenes as well as hear our content live. Use the above link or search for TheotekMedia.

Logos March Matchups Starts Today with Big Savings
Logos March matchups starts today with 40% off New International Commentary on the Old and New Testament. Find out what it is and how you can save money.

I love March Madness. I used to find a set of NCAA basketball brackets and fill them out. Then I'd watch as many NCAA college basketball games as I could find time to watch. The Logos March Matchups comes along at the same time to promote Logos Bible Software.

Logos March Matchups promotes the software to customers with some deals on commentaries during the March Madness season. Logos started the promotion today, and you can start voting on which books you want to be discounted. By the way, the above link is an affiliate link. That means if you use it to buy books, then you'll help me out since Logos gives me a kickback.
How Logos March Matchups Works
You can participate and vote on what books they offer at the best prices. The College Basketball March Madness works like this: they rank teams in four sections from 1 to 16. The best teams are ranked 1 with the weaker teams ranked 16. Take four groups of 16 and you get 64.
Each group of sixteen plays a single-elimination tournament. The winner gets to compete in the Final Four. That's the four winners of the four 16-team tournaments.
Logos does the same, putting 64 commentary sets in a bracket. Instead of playing a game, they let people vote on which commentary sets they want to receive the steepest discount. Since they start with 64 sets, they pair them up in 32 polls in the first round. The sets that voters choose move on to the second round. In that round, Logos pairs 32 sets and 16 can win based on the votes of users. This continues to the third round with 16 teams, the fourth round with 8 teams, the final four, and the final pair. By the end, voters pick one commentary set to get the steepest discount.
Buyers get smaller discounts in the earlier rounds. The final winning commentary set will cost 60% less after March 22, the end of the tournament.
What Can Users Vote On?
Buyers can get the "Hall of Fame" commentary set, the New International Commentary on the Old and New Testament, for 40% off today. You don't have to wait for the end of the Logos March Matchups tournament. Here's how Logos describes this work:
This massive collection combines the available New International Commentary (NIC) volumes covering the books of the Old Testament and the New Testament to provide an exposition of Scripture that is thorough and abreast of modern scholarship, yet at the same time loyal to Scripture as the infallible Word of God. This conviction, shared by all contributors to New International Commentary (NIC), defines the goal of this ambitious series of commentaries.
The brackets for the Logos March Matchups tournament show the following commentary sets...

Here's my list of recommendations from each division of the brackets.
Division 1 - This section includes the New American Commentary series, my favorite set of commentaries. However, a lot of people like Word Biblical Commentary, so I think it may win the division. However, consider the Lexham Geographic Commentaries. Logos says, "The Lexham Geographic Commentaries deliver fresh insight by drawing attention to an often overlooked component of biblical stories—their geographical setting."
Division 2 - I expect that Evangelical Exegetical Commentary will win this division. It's a critical commentary written by and for Evangelicals. They focused on creating a digital tool. The other set that should challenge for the win is the Pillar New Testament Commentary. It's slightly less technical that some commentary sets making it a nice choice for preachers or teachers not doing scholarly work.
Division 3 - The New International Greek Testament Commentary Series should take this division. In fact I'll call it now.
Division 4 - Either the Zondervan Exegetical Commentary Collection or Anchor Yale Bible Commentary will take this part of the bracket. However, I'd prefer The IVP New Testament Commentary Series.
The final round should result in either Word or EEC winning it all. What do you think? Answer below to tell me what your favorite commentary is and which one you think will win it all.
Fans of Mobile Education and Verbum will also enjoy their own bracket.

Setapp Review: Worth the Cost to Get Dozens of Great Apps?
Setapp collects some useful Mac apps & utilities users can install and use so long as they pay for the subscription. Is it worth the price?

What if you could pay one fee and get access to dozens of great apps? That's what the Setapp subscription service offers. You pay monthly or yearly, and while you're paying, you can use any of the included services.

These kinds of bundles pop up on the Mac side, but Setapp is available all the time and keeps adding new apps that you can use all for one monthly fee.
Setapp made a name for itself because it doesn't just provide you with garbage apps no one wants from developers trying to make a name for themselves and can't get people to buy them. They don't offer old versions like those British computer magazines used to offer on a disk with the magazine I used to buy at Barnes and Noble. You actually get some established names too.
I subscribed months ago and used it to download some cool utilities and programs on my Mac and even my iPad. We'll look at the service and the apps and then decide if the price is right. We'll also list some of the best apps available.
See reviews of other tech products here on our site.
Video Review of Setapp
Here is my video review of the Setapp service from the Theotek YouTube Page. Go there and subscribe if you like this video.
How Does Setapp Work?
Install Setapp on your Mac. There's a 7-day free trial offer to test it out. I wish they gave a longer trial, like 30 days.

Run the app, and it puts an icon in your Menu Bar. You can click it, and you'll see a small popup window. This small window shows apps you can install, or you can open the full app. There's also a Settings icon in the lower right corner. Use it to close the app or change preferences.
Take a look at all the apps curated in Setapp and install the ones you might find useful. You can also get them on an iPhone or iPad.

The apps install through the Setapp app, which looks like the Mac App Store. On the left side of the app, there's a list of categories. A slideshow at the top shows the recommended apps. In the main section of the window, users will see Recommended for you, New arrivals, and Recently updated.

To see all the apps installed, click on the On this Mac section on the upper left. The Favorites section shows apps you choose as your favorites by clicking on the heart icon next to an app title (see above). Setapp sets up Collections of apps based on the ways you might use apps.

When you find an app, you might want, click on the app icon to learn more about the app. You can install it from that screen or the previous screen.

Install Apps on iOS
People who want to install apps on their iPhone or iPad can do so by going to the Available on iOS section at the bottom of the list on the left of the Setapp window.

Let's say I want to install the 2Do app on my Mac and iPhone. Install it first on your Mac using the Install button next to the app title. Then you'll see the iOS app button with a checkmark in the button next to the Install button. Click it to install the app.

Setapp shows you a QR code that links to the app in the iOS App Store. Use your phone's camera to scan the QR Code. After installing the app on your phone, click on the Next button on Setapp on your Mac. You'll see another QR Code that unlocks the app on iOS so you now own the app.

Value of the Setapp Service is in the Apps Available
The apps make Setapp worth $10/month or $9/month if you pay annually. I installed only a handful of apps on my Mac, but these apps' total cost if I bought them separately makes it worth the price. The 2Do app costs $50 alone. That's half the price of the subscription for a year. I also use Clean My Mac X, which costs $35/year in the app store or $90 for a one-time fee. Those two apps alone make it worth the cost for a year.

You have to factor in that you must pay every year. So some apps don't have subscriptions. You pay once and own it. If you only use those kinds of apps, then Setapp might not hold value for you.
I like that I can try out all the apps without paying extra. It's all you can eat. That's a good value.
I've discovered apps that I love, like News Explorer. It's an RSS reader, which curates news sites. I can open it and see my favorite blog headlines and open just those I care to read.
Setapp Categories
Setapp contains the following categories:
- All Apps
- Lifestyle
- Creativity
- Developer Tools
- Productivity
- Mac Hacks
- Writing & Blogging
- Education
- Maintenance
- Task Management
- Personal Finance
- Available on iOS
In the lists below, I mention the apps in one category even though some apps show up in multiple categories. For example, Gifox shows up in Lifestyle and Developer Tools. I only list it in the category where it best fits.
Lifestyle Apps Worth Downloading

Here's a list of some of my favorite Setapp Apps in Lifestyle:
- Canary Mail - one of the most popular Mac Email apps.
- Downie - download videos from video hosting sites.
- News Explorer - RSS feed reader mentioned above.
- Photolemur - a nice AI-powered photo editor.
- Swift Publisher - a powerful desktop publishing app.
- Touch Retouch - edit photos and remove distracting background people or objects in photos.
Creativity Apps to Look At

Check out these great Creativity apps on Setapp:
- Cleanshot X - a great screen capture app.
- FotoMagico Pro - powerful slideshow creation tool that puts your photos into beautiful videos of photo slide shows.
- GlueMotion - create time lapse videos using your photos.
Developer Tools
I'm no developer but even I find a few of these useful. Give a look to these Setapp Developer Tools apps:
- Coherence X - turns a website into a Chrome web app, great for Google Chrome browser users who work on a Mac and a Chromebook.
- Gifox - records screen and saves it as an animated Gif.
- Marked - write in markdown code and see what it will look like on your website.
Best Productivity Apps on Setapp
For people trying to get some work done, try some of these Productivity apps.
- 2Do - powerful task manager.
- BusyCal - a great Calendar replacement that runs from the Menu Bar and supports natural language input.
- InstaCal - another great calendar app that runs from the Menu Bar. which I like but not as well as BusyCal, but you may disagree so try both out.
- PDF Search and PDF Pen - two great PDF tools that give you a little more than just using the Preview app for PDF reading, writing, and markup.
Great Mac Hacks Apps
Here's a list of my favorite Mac Hacks apps:
- Bartender - a popular tool to keep your Menu Bar from getting too cluttered.
- Jump Desktop - a great remote computer application, which lets you access another computer over the Internet from your mac and also lets you access the Mac on which you install Jump Desktop.
Writes will Love These Writing & Blogging Apps

Are you a writer or blogger? Then try out these great apps on Setapp:
- MarsEdit - turn your blog into a word processor so you can write offline and then upload after you get your text just right.
- Ulysses - one of the best long document editing tools that helps writers compose their books, screen plays, or other long documents.
Education Apps You'll Love in Setapp
Educators and students will find these apps useful:
- MarginNote - a powerful note taking and annotating tool with automation features that make it incredibly useful for students.
- MindNode - create mind maps to help you organize papers, thoughts, or just study topics.
Cool Maintenance Apps to Make Your Mac Work Better
You can speed up your Mac or make it work more efficiently with these tools:
- BetterTouchTool - lets you program the Touch Bar on your MacBook Pro.
- ClearVPN - a basic VPN client that wouldn't be my first choice, but since it's here for free to Setapp subscribers, I use it and works.
- iStatMenus - get more information about your machine with this little Menu Bar app.
Available on iOS
Install the following apps on your iPhone or iPad:
- 2Do - task manager for Mac and iOS.
- MindNode - great mind mapper for Mac and iOS.
- Ulysses - also runs on an iPad.
Conclusion and Recommendation
The last two categories (Task Management and Personal Finance apps) don't include any apps that weren't already mentioned in the other categories. That's why you don't see them listed above.
Setapp costs $9.99/month. If you buy the one-year subscription, you'll save $12 for the year. You can get a family subscription that lets you install Setapp on up to 4 machines. That might help if you own more than 2 Macs. People with two will pay an extra $2.49/month for the second Mac. Add an iOS device for $2.49/month.
Try Setapp for one month and see what apps you'll use. Then do the math to see if the subscription saves you money over a couple of years. The apps I use would cost me hundreds of dollars, so it's worth paying for 2 Macs and one iPad.
Setapp would be a better deal if the $19.99/month family deal applied to Macs and iOS devices. I'd buy that and install apps on my 2 Macs and my iPhone and iPad.
I like that they add new apps almost every month or two. This increases the value. I'd like to see video demos of the apps inside Setapp. However, the apps include a link to the developer's website. These sites usually show more information that you get inside Setapp.

Does Grammarly Improve Writing Enough to Justify $140/Year Subscription?
Grammarly improves writing by checking your spelling, grammar, and writing style in real-time. You can use it for free to find simple problems in your writing, but is the subscription worth the money? Check out my review ot find out.
I recently discovered the writing service Grammarly. Grammarly runs on various platforms and analyzes writing for grammar, spelling, and style problems. You can use it for free and get spelling and punctuation assistance, or you can get advanced analysis by paying for a subscription. And it's not cheap! Is it worth the price?
Where Can You Use Grammarly?
Writers can run Grammarly wherever they write, so long as they use one of the supported platforms, which include:
- Microsoft Word Plug-in
- Browser Plug-in for Safari, Chrome, Firefox, or Microsoft Edge
- Web Application
- Desktop App for Mac and Windows
- Mobile Keyboard App for iOS and Android

When you install the Word plug-in, you write, and Grammarly offers corrections that you can easily click to change. The quick correction suggestions speed up my writing because I don't worry about going back to fix typos or errors until I finish typing a paragraph or more. Then I click a few times to fix things, thanks to the plug-in.
Open your Safari or Chrome browser, and you can correct as you type anywhere on the Internet. The extension checks your spelling, grammar, and style to help you write better. Grammarly helps when writing inside web forms or other places where there's usually no spell-checking or only rudimentary spell-checking. It's helped me with my writing in WordPress.
Grammarly Web App and Desktop or iPad App

To use Grammarly as a web app, open the site and create a new document. You'll see three columns. The writing area on the left has a toolbar on the bottom for formatting text and paragraphs.
There's a narrow column called the Assistant on the right that shows your document's analysis. It tells you whether your document has any problems and how clear, engaging, and grammatically correct it rates your document.
When there's an error, Grammarly shows the correction in the center column. Users can click to fix things quickly without retyping text.
Grammarly as a Replacement Keyboard


The mobile keyboard on iOS or Android replaces the built-in keyboard. As a user types into a text entry box or a document, the keyboard analyzes the words typed and offers to correct them in real-time. The keyboard includes things like slide to an insertion point by pressing and holding on the space bar, like the built-in iOS keyboard. I can't say if the Android keyboard does this since I've not tried it.
Value and Recommendation
Grammarly is a subscription service with three tiers.
- Free - The free version works in all the various apps and services listed above. Still, it only shows you spelling, grammar, and punctuation errors.
- Premium - Premium enhances the analysis to include writing style for multiple audiences and settings. Imagine an editor helping with more than simple errors to improvise your writing style.
- Business - The Business level subscription adds more features for a team of users.
How much does each level cost? Here's the breakdown:
- Premium Monthly - $29.95
- Premium Quarterly - $19.98 for 3 months = $59.94
- Premium Annually - $11.66 for 12 months = $139.92
The Business Plan changes in price depending on the number of users. If you pay monthly, the company charges $25/month for each member. However, if you pay annually, you get a discount as follows:
- 3 to 9 members — $12.50/member/month
- 10 to 49 members — $12.08/member/month
- 50 to 149 members — $11.67/member/month
The best recommendation I can give you is this: I bought Grammarly for one year. It really helps me with my poor typing skills. I use it as my primary keyboard on my iPad and iPhone. I installed the Word plugin and used it in Safari on my MacBook Pro and Edge on my Windows desktop.
The price seems steep. After telling a friend that I bought the subscription, I learned about something similar called Antidote. He uses it, and it costs half as much. They offer a free version, too, so give it a try before paying for Grammarly. You may get a better deal than I got with Grammarly. If you don't like it, give Grammarly a try. I decided it was worth the price to speed up my typing and protect me from making as many mistakes.